1. Introduzione
Thank you for choosing the HYCHIKA 3.6V Cordless Screwdriver. This manual provides essential information for the safe and efficient operation, maintenance, and troubleshooting of your new tool. Please read these instructions carefully before use and retain them for future reference.
2. Istruzioni di sicurezza
Osservare sempre le precauzioni di sicurezza di base per ridurre il rischio di incendi, scosse elettriche e lesioni personali.
Sicurezza generale dell'utensile elettrico
- Sicurezza dell'area di lavoro: Mantieni la tua area di lavoro pulita e ben illuminata. Le aree disordinate o scure provocano incidenti.
- Sicurezza elettrica: Non esporre gli utensili elettrici alla pioggia o a condizioni di bagnato. L'ingresso di acqua in un utensile elettrico aumenta il rischio di scosse elettriche.
- Sicurezza personale: Always wear appropriate personal protective equipment, such as safety glasses. Dress properly; avoid loose clothing or jewelry that can get caught in moving parts.
- Uso e cura dello strumento: Non forzare l'utensile elettrico. Utilizzare l'utensile elettrico corretto per l'applicazione desiderata. Scollegare la spina dalla fonte di alimentazione e/o rimuovere la batteria dall'utensile elettrico prima di effettuare qualsiasi regolazione, sostituire accessori o riporre l'utensile elettrico.
Sicurezza della batteria
- Only charge the battery with the charger specified by the manufacturer.
- Do not incinerate the battery pack even if it is severely damaged. Batteries can explode in a fire.
- Non cortocircuitare i terminali della batteria.
3. Contenuto della confezione
Verificare che tutti gli articoli siano presenti al momento del disimballaggio:
- 1 x HYCHIKA 3.6V Cordless Screwdriver
- 36 x Accessories (various screwdriver bits, sockets, HSS drill bit, extension bar)
- 1 x adattatore di ricarica
- 1 cavo di ricarica USB
- 1 x Manuale di istruzioni
- 1 x scatola di immagazzinaggio

Figura 3.1: Included accessories, featuring various bit types and sizes, sockets, an HSS drill bit, and an extension bar for diverse applications.
4. Prodotto finitoview
Familiarize yourself with the components of your HYCHIKA Cordless Screwdriver.

Figura 4.1: This diagram identifies key components: Self-locking chuck, Rotating button, Front LED light, Forward/Reverse buttons, On/Off switch, USB port, Charging indicator, Rear flashlight.
Caratteristiche principali:
- Coppia massima 6 Nm: Provides sufficient power for various screwing and light drilling tasks.
- 2.0Ah Lithium-ion Battery: Offers long-lasting power and durability.
- Maniglia rotante: Allows adjustment from a straight to a pistol grip for versatility and access in tight spaces.
- Front LED Light & Rear Flashlight: Illuminates the work area and provides general utility lighting.
- Quick-Release Chuck: Enables fast and easy bit changes.

Figura 4.2: The screwdriver's handle can rotate for different working angles, enhancing usability in various situations.
5. Impostazione
Inserting Screwdriver Bits/Sockets
- Assicurarsi che il cacciavite sia spento e che l'interruttore avanti/indietro sia in posizione neutra (bloccato).
- Tirare in avanti il mandrino a sgancio rapido.
- Insert the desired 6.35mm hex shank bit or socket firmly into the chuck.
- Release the chuck to lock the bit in place. Gently pull on the bit to ensure it is securely fastened.
- For longer reach, attach the extension bar first, then insert the bit into the extension bar.
6. Istruzioni per l'uso
Accensione/spegnimento e controllo della direzione
- To turn the screwdriver ON, press the On/Off switch. The tool will operate as long as the switch is pressed.
- To select the rotation direction (forward for tightening, reverse for loosening), slide the forward/reverse switch. The middle position locks the tool and prevents accidental activation.
Utilizzo delle luci LED
- IL front LED light automatically illuminates when the On/Off switch is pressed, providing visibility to your work area.
- IL rear flashlight can be activated independently by pressing the dedicated flashlight switch located at the base of the handle. This is useful for general illumination in dark spaces.

Figura 6.1: The integrated front LED light illuminates the work area for improved visibility during operation.
Adjusting the Rotating Handle
- To change the handle position, press the 'LOCK' button (rotating button) located near the pivot point of the handle.
- Rotate the handle to the desired position (straight or pistol grip).
- Release the 'LOCK' button to secure the handle in place.
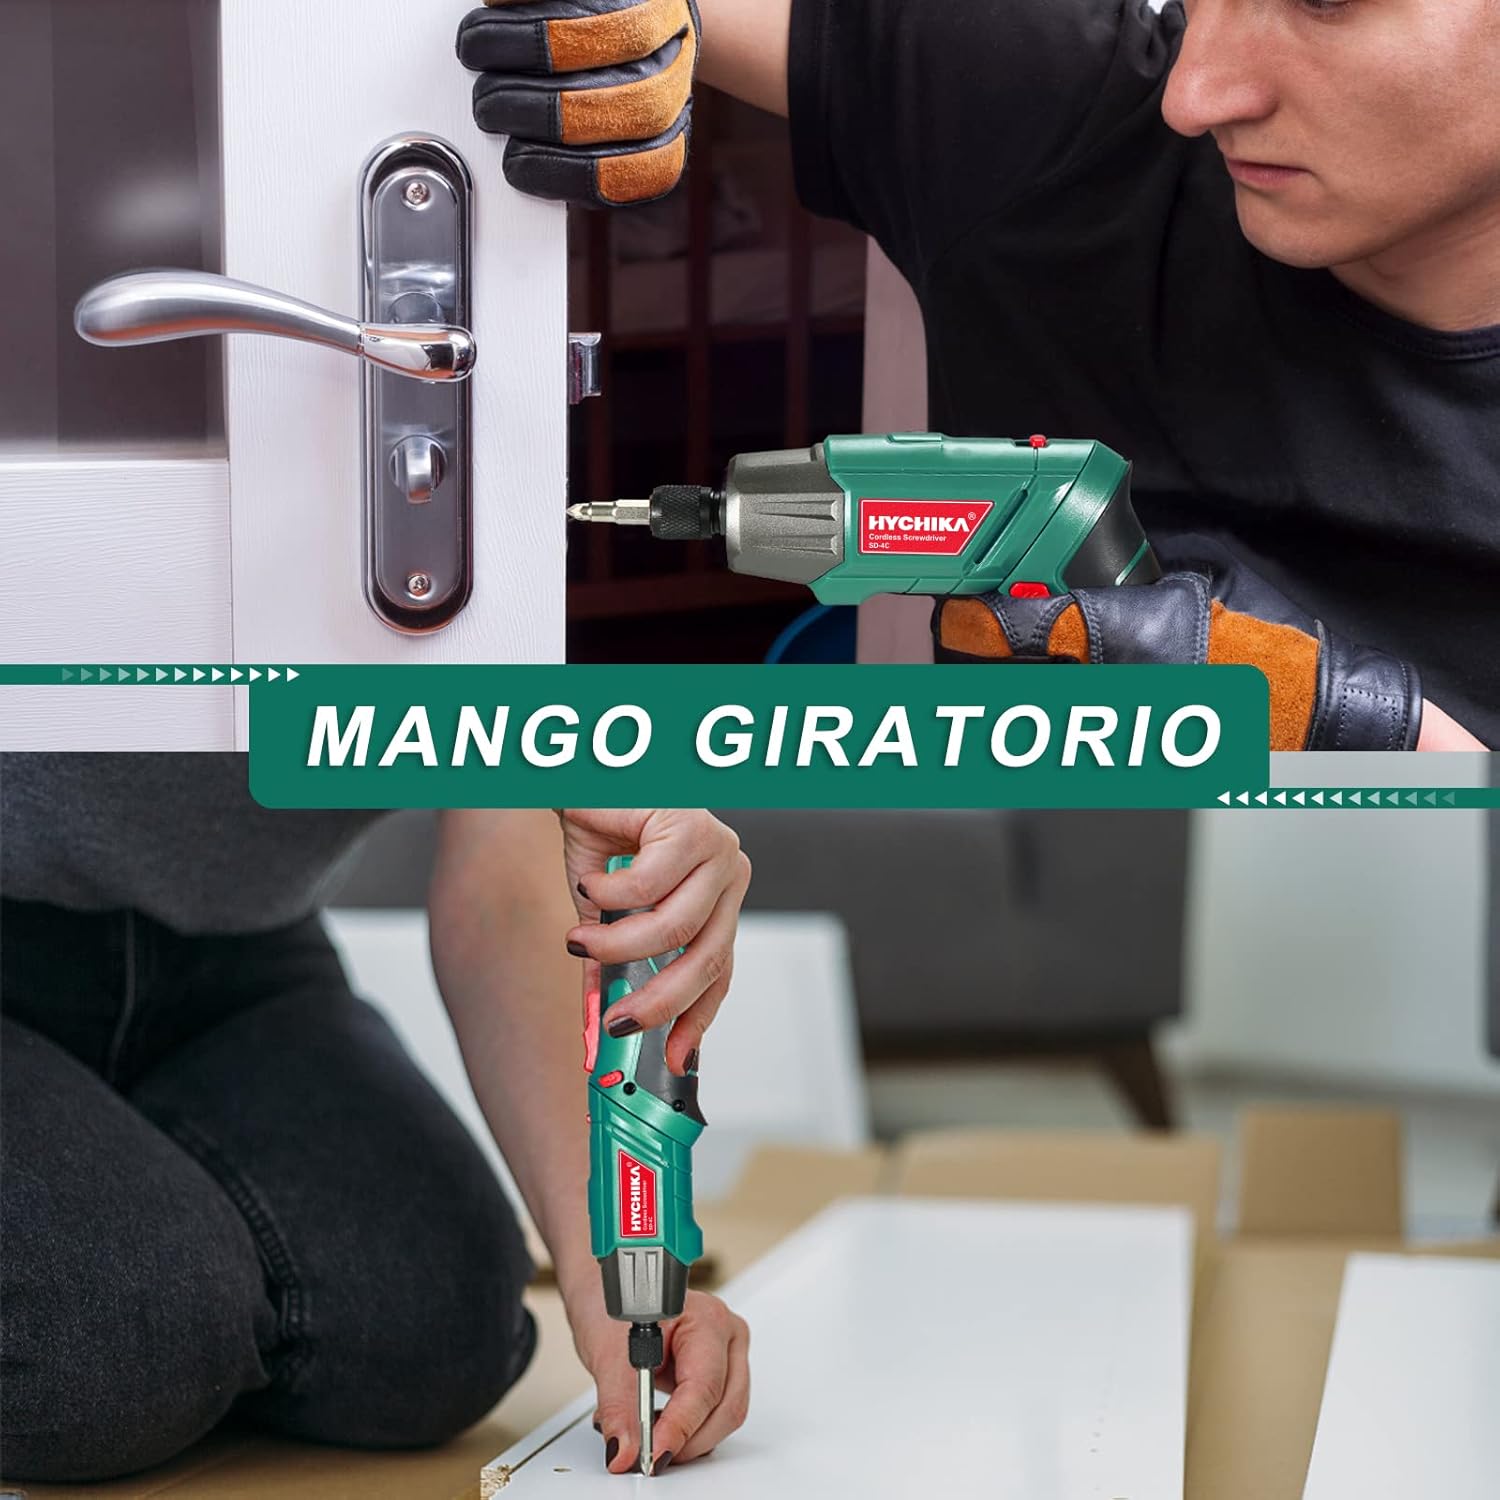
Figura 6.2: The rotating handle allows the screwdriver to be used in a straight or pistol grip configuration, adapting to various working conditions.
Suggerimenti generali per l'uso
- Always select the correct bit for the screw head to prevent stripping.
- Apply firm, steady pressure to the screwdriver to prevent cam-out.
- For delicate materials or small screws, start with a lower torque setting if available (this model has fixed torque, so apply less pressure).

Figura 6.3: The versatile design supports multiple uses, from assembling furniture to minor household repairs.
7. Ricarica
The screwdriver is equipped with a rechargeable 2.0Ah Lithium-ion battery.
- Connect the USB charging cable to the screwdriver's USB port.
- Connect the other end of the USB cable to the provided charging adapter, a computer USB port, or a power bank.
- The charging indicator light will show the charging status. Refer to the product overview diagram for its location.
- Disconnect the charger once the battery is fully charged. Avoid overcharging to prolong battery life.

Figura 7.1: The screwdriver can be charged via USB from various sources like computers, power banks, or wall chargers.
8. Manutenzione
Pulizia
- Keep the tool's ventilation slots clean to prevent overheating.
- Pulisci l'utensile con un panno morbido,amp stoffa. Non utilizzare prodotti chimici aggressivi o detergenti abrasivi.
Magazzinaggio
- Store the screwdriver and accessories in the provided storage box in a dry, cool place, away from direct sunlight and moisture.
- Tenere fuori dalla portata dei bambini.
Cura della batteria
- For optimal battery life, charge the battery fully before storing for extended periods.
- Recharge the battery every 3-6 months if not in regular use.
9. Risoluzione Dei Problemi
If you encounter issues with your screwdriver, refer to the following table:
| Problema | Possibile causa | Soluzione |
|---|---|---|
| Il cacciavite non si accende. | La batteria è scarica. | Caricare completamente la batteria. |
| Forward/reverse switch is in the neutral (locked) position. | Slide the switch to forward or reverse. | |
| Il cacciavite non è potente. | La batteria è scarica. | Ricaricare la batteria. |
| La punta scivola o rovina la testa della vite. | Dimensione o tipo di bit errati. | Utilizzare la punta corretta per la vite. |
| Insufficient pressure or improper angle. | Apply firm, steady pressure and keep the bit straight. | |
| Batteria non in carica. | Il cavo di ricarica o l'adattatore sono difettosi. | Try a different USB cable or adapter. Ensure connections are secure. |
Se il problema persiste dopo aver provato queste soluzioni, contattare l'assistenza clienti.
10. Specifiche
| Caratteristica | Specificazione |
|---|---|
| Numero di modello | SD-4C |
| Voltage | 3.6 Volt |
| Tipo di batteria | Agli ioni di litio |
| Capacità della batteria | 2.0 Ah |
| Coppia massima | 6 Newton-metri (Nm) |
| Velocità a vuoto | 180 giri al minuto |
| Dimensioni del mandrino | 6.35 mm (1/4 inch) Hex |
| Fonte di alimentazione | Alimentato a batteria |
| Dimensioni del prodotto (L x P x A) | Dimensioni: 23.2 x 19.7 x 7.1 cm |
| Peso | 375 grammi |
| Materiale | Metallo |
11. Garanzia e supporto
HYCHIKA products are manufactured to high-quality standards and are warranted against defects in materials and workmanship. For specific warranty details, including duration and coverage, please refer to the warranty card included with your purchase or visit the official HYCHIKA websito.
For technical assistance, troubleshooting beyond this manual, or to inquire about replacement parts, please contact HYCHIKA customer support through the contact information provided on your warranty card or the official HYCHIKA websito.