
Decdeal XGJ3167046817164KD
Decdeal Wi-Fi Smart Programmable Thermostat User Manual
Model: XGJ3167046817164KD
Marca: Decdeal
1. Introduzione
This manual provides detailed instructions for the installation, operation, and maintenance of your Decdeal Wi-Fi Smart Programmable Thermostat. Designed for gas boiler heating systems, this thermostat offers precise temperature control and smart connectivity for enhanced comfort and energy efficiency.
The thermostat features an LCD display with backlight for clear data visibility and touch-sensitive buttons for easy interaction. Its Wi-Fi capabilities allow for remote control via a mobile application, and it is compatible with popular smart home platforms like Amazon Alexa and Google Home.

Immagine 1.1: anteriore view of the Decdeal Wi-Fi Smart Programmable Thermostat.
2. Informazioni sulla sicurezza
Si prega di leggere attentamente tutte le avvertenze e le istruzioni di sicurezza prima di installare o utilizzare questo dispositivo. La mancata osservanza di queste istruzioni può causare scosse elettriche, incendi o altri pericoli.
- L'installazione deve essere eseguita da un elettricista qualificato, nel rispetto delle normative e dei codici elettrici locali.
- Ensure the power supply to the heating system is turned off at the circuit breaker before any installation or wiring work.
- The thermostat is designed for 95~240 VAC, 50~60Hz power supply. Do not connect to other voltage fonti.
- This thermostat model (GC) is specifically designed for gas boiler heating systems. Verify compatibility with your heating system before purchase and installation.
- Non esporre il termostato all'acqua o a umidità eccessiva.
- Tenere fuori dalla portata dei bambini.
3. Contenuto della confezione
Verificare che tutti gli articoli siano presenti nel pacco:
- 1 x Decdeal Wi-Fi Smart Programmable Thermostat
- 2 viti di montaggio
- 1 x Manuale utente (inglese)
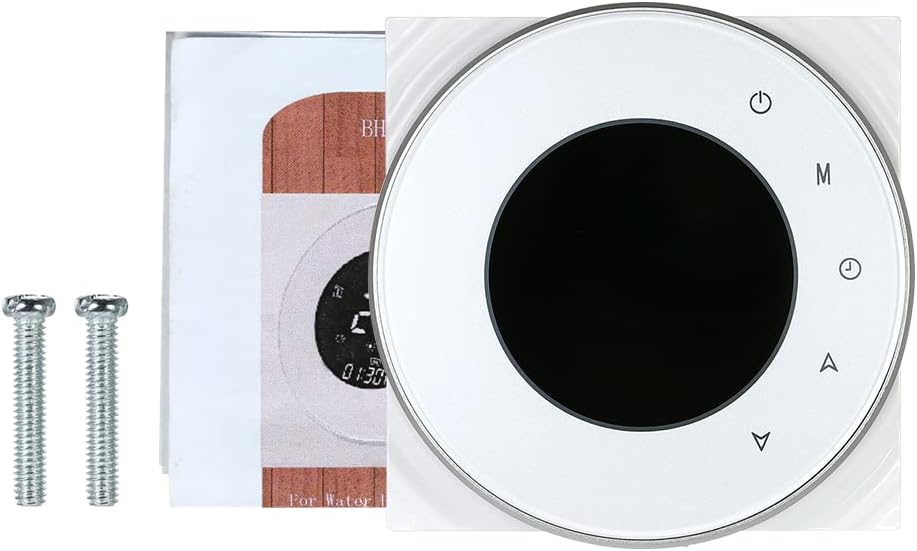
Immagine 3.1: Contenuto della confezione del prodotto.
4. Specifiche
| Caratteristica | Descrizione |
|---|---|
| Modello | XGJ3167046817164KD |
| Colore | Bianco |
| Materiale del guscio | PC + ABS (ignifugo) |
| Display | LCD con retroilluminazione |
| Sensore | NTC 10K 3950 |
| Alimentazione elettrica | 95 ~ 240 V CA, 50 ~ 60 Hz |
| Consumo energetico | <1.5Settembre |
| Precisione | ± 0.5 ° C |
| Errore di temporizzazione | <1% |
| Imposta l'intervallo di temperatura | 5 ~ 35 ° C |
| Visualizzazione dell'intervallo di temperatura | 5 ~ 99 ° C |
| Sistema di supporto | iOS 8.0 e versioni successive o Android 4.1 e versioni successive |
| Temperatura ambiente | 0 ~ 45 ° C |
| Umidità ambientale | 5 ~ 95% UR (senza condensa) |
| Temperatura di conservazione | -5 ~ 45°C |
| Distanza del foro di installazione | 60mm |
| Classe di protezione | Grado di protezione IP20 |
| Dimensioni dell'articolo | 90 x 90 x 38 mm |
| Peso dell'articolo | 135g |
| Compatibilità | Amazon Echo, Alexa, Google Home, IFTTT |

Image 4.1: Dimensions of the thermostat, showing front and side measurements.
5. Installazione
Proper installation is crucial for the thermostat's functionality and safety. It is highly recommended that installation be carried out by a qualified professional.
5.1 Lista di controllo pre-installazione
- Ensure the main power supply to your heating system is turned off.
- Confirm your heating system is a gas boiler type, compatible with this thermostat (GC model).
- Prepare an installation box: either an 86x86mm square box or a 60mm European round box (not included).
- Ensure you have appropriate wiring: 2*1.5mm² or 1*2.5mm² wire terminals are required.
5.2 Cablaggio e montaggio
- Rimuovere con cautela il pannello anteriore del termostato per accedere ai terminali del cablaggio.
- Connect the power and heating system wires to the corresponding terminals on the thermostat's back panel. Refer to the detailed wiring diagram provided in the physical user manual for specific connections.
- Mount the thermostat's back plate securely into the installation box using the provided mounting screws.
- Carefully reattach the front panel to the back plate, ensuring it clicks into place.
- Ripristinare l'alimentazione dell'impianto di riscaldamento tramite l'interruttore automatico.

Immagine 5.1: posteriore view of the thermostat with wiring terminals visible.

Image 5.2: The thermostat seamlessly installed on a wall.
6. Istruzioni per l'uso
The thermostat features an intuitive LCD display and touch buttons for easy operation.

Immagine 6.1: Diagramma etichettato del display e dei pulsanti di controllo del termostato.
6.1 Funzioni dei pulsanti
- Pulsante di accensione (in alto a destra): Accende o spegne il termostato.
- Pulsante Modalità (M): Cycles through different operating modes (e.g., Manual, Program).
- Clock Button (Timer Icon): Used for setting time and programming schedules.
- Up Arrow (Triangle Up): Increases temperature, navigates menus upwards, or adjusts settings.
- Down Arrow (Triangle Down): Decreases temperature, navigates menus downwards, or adjusts settings.
6.2 Elementi di visualizzazione
- Week (Top Left 'i' icon): Indica il giorno corrente della settimana.
- Period (House Icon): Mostra il periodo di programmazione corrente.
- Visualizzazione della temperatura: Mostra la temperatura ambiente attuale o la temperatura impostata.
- Manual (Flame Icon): Indicates manual heating mode is active.
- Tempo: Visualizza l'ora corrente.
6.3 Programmi di programmazione
The thermostat supports weekly programming with 5+2 (weekday/weekend) six programmable periods. This allows you to set different temperatures for various times of the day to maximize comfort and energy savings. Refer to the detailed programming instructions in your physical user manual for step-by-step guidance on setting schedules.
7. Controllo delle app e integrazione con la casa intelligente
Control your thermostat conveniently from anywhere using the dedicated mobile application. The thermostat is compatible with Tuya and Smart Life apps, and integrates with leading smart home platforms.

Image 7.1: Remote control of the thermostat via a mobile application.
7.1 Connessione all'app mobile
- Download the Tuya Smart or Smart Life app from your mobile device's app store (iOS 8.0+ or Android 4.1+).
- Registrati o accedi al tuo account.
- Ensure your thermostat is powered on and in pairing mode (refer to the physical manual for specific pairing instructions, often involving holding a button until a Wi-Fi symbol blinks).
- In the app, select 'Add Device' and choose 'Thermostat' or 'Heater'.
- Follow the on-screen prompts to connect the thermostat to your Wi-Fi network. Note: For dual-band routers, temporarily disable the 5GHz band during the initial connection if you encounter issues.
7.2 Integrazione del controllo vocale
The thermostat is compatible with Amazon Echo (Alexa) and Google Home, allowing for convenient voice control of your heating system.
- Per Amazon Alexa: Enable the 'Smart Life' or 'Tuya Smart' skill in the Alexa app. Discover devices, and your thermostat will appear. You can then use commands like "Alexa, turn on the thermostat" or "Alexa, set the thermostat to 22 degrees."
- Per Google Casa: Link your 'Smart Life' or 'Tuya Smart' account in the Google Home app. Once linked, you can use commands like "Hey Google, turn on the thermostat" or "Hey Google, what's the temperature?"
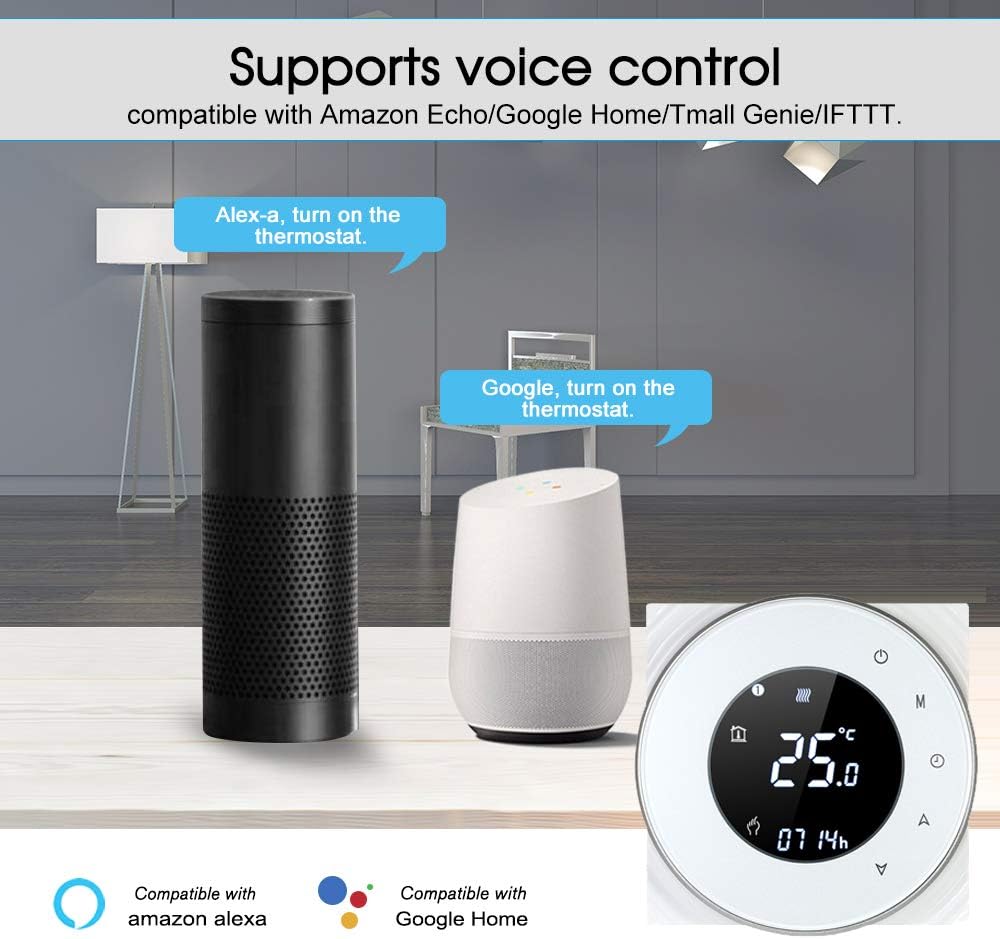
Image 7.2: The thermostat supports voice control via Amazon Alexa and Google Home.
8. Manutenzione
Per garantire prestazioni ottimali e longevità del termostato, seguire queste semplici linee guida per la manutenzione:
- Pulizia: Regularly wipe the thermostat's screen and body with a soft, dry cloth. Avoid using abrasive cleaners, solvents, or chemical sprays, as these can damage the surface or internal components.
- Accumulo di polvere: Ensure the thermostat's vents (if any) are free from dust and debris to allow for proper air circulation and temperature sensing.
- Ciclo di alimentazione: Se il termostato non risponde, provare a spegnere l'interruttore automatico per qualche minuto, quindi ripristinarlo.
No user-serviceable parts are inside. Do not attempt to open or repair the thermostat yourself.
9. Risoluzione Dei Problemi
If you encounter issues with your Decdeal Wi-Fi Smart Programmable Thermostat, refer to the following common problems and solutions:
| Problema | Possibile causa | Soluzione |
|---|---|---|
| Il termostato non si accende | Nessuna alimentazione; cablaggio errato; interruttore automatico scattato. | Check circuit breaker. Verify wiring connections (consult a professional if unsure). Ensure 95-240V AC power is supplied. |
| Impossibile connettersi al Wi-Fi/all'app | Incorrect Wi-Fi password; 5GHz Wi-Fi band interference; thermostat not in pairing mode; weak Wi-Fi signal. | Ensure correct Wi-Fi password. Temporarily disable 5GHz band on your router during setup. Put thermostat into pairing mode (refer to manual). Move router closer or use a Wi-Fi extender. |
| Il termostato non controlla il riscaldamento | Incorrect wiring to boiler; thermostat in wrong mode; temperature setting too low. | Verify wiring to the gas boiler (consult a professional). Ensure thermostat is in heating mode (e.g., Manual or Program). Increase the set temperature above the current room temperature. |
| Lettura della temperatura imprecisa | Termostato posizionato vicino a una fonte di calore/corrente d'aria; sensore ostruito. | Relocate thermostat away from direct sunlight, drafts, or heat-emitting appliances. Ensure no objects are blocking the sensor. |
| Il controllo vocale non funziona | App account not linked; incorrect voice commands; internet connectivity issues. | Ensure your Smart Life/Tuya Smart account is correctly linked in the Alexa/Google Home app. Use precise commands. Check your internet connection. |
Se il problema persiste dopo aver provato queste soluzioni, contattare l'assistenza clienti.
10. Garanzia e supporto
For detailed warranty information, please refer to the warranty card included with your product or visit the official Decdeal websito. La garanzia copre in genere i difetti di fabbricazione per un periodo di tempo specificato a partire dalla data di acquisto.
If you require technical assistance, troubleshooting beyond this manual, or have questions regarding your product, please contact Decdeal customer support through their official websito o le informazioni di contatto fornite nella confezione del prodotto.
Please have your product model number (XGJ3167046817164KD) and purchase details ready when contacting support.
Ask a question about this manual
Ask about setup, troubleshooting, compatibility, parts, safety, or missing instructions. Manuals+ will review the question and use this page’s manual context to help answer it.