
1. Introduzione
Grazie per l'acquistoasing the SMART SENSOR Digital Anemometer AS806. This compact and lightweight device is designed for accurate measurement of wind speed and wind temperature. It features multiple functions including current, maximum, minimum, and average value display, data hold, manual/auto power off, low battery indication, and backlight. Please read this manual thoroughly before use to ensure proper operation and to extend the life of your device.
2. Informazioni sulla sicurezza
- Non tentare di smontare o modificare il dispositivo.
- Tenere il dispositivo lontano dall'acqua e da ambienti ad alta umidità.
- Evitare di esporre il dispositivo a temperature estreme o alla luce solare diretta per periodi prolungati.
- Rimuovere la batteria se il dispositivo non verrà utilizzato per un periodo prolungato per evitare perdite.
- Handle the impeller carefully to prevent damage.
3. Prodotto finitoview
3.1 Componenti
The SMART SENSOR AS806 Digital Anemometer consists of a main body with an LCD display and an integrated impeller for wind speed measurement.
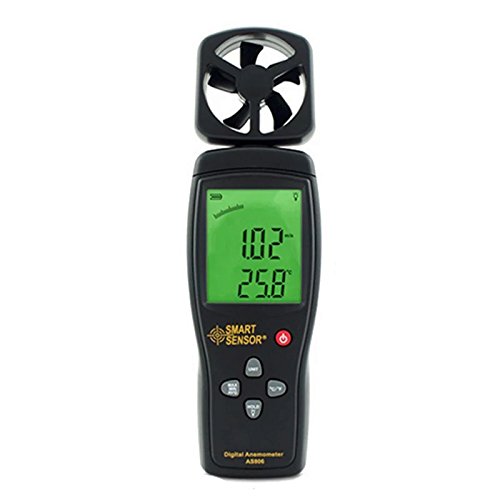
Figura 1: Fronte view of the SMART SENSOR AS806 Digital Anemometer.
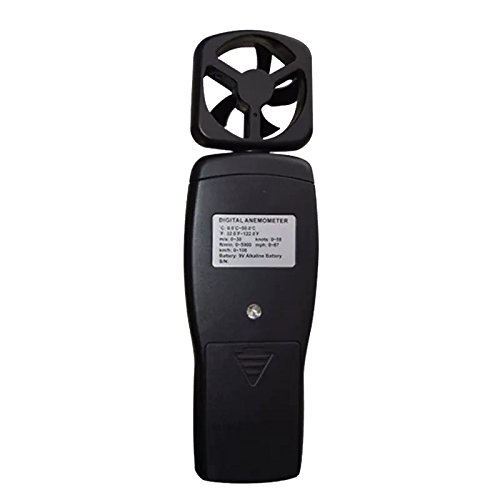
Figura 2: Indietro view of the device, showing the battery compartment.
3.2 Display e pulsanti
The device features an LCD display that shows measurement readings and various indicators. Control buttons allow for mode selection, unit conversion, data hold, and backlight activation.
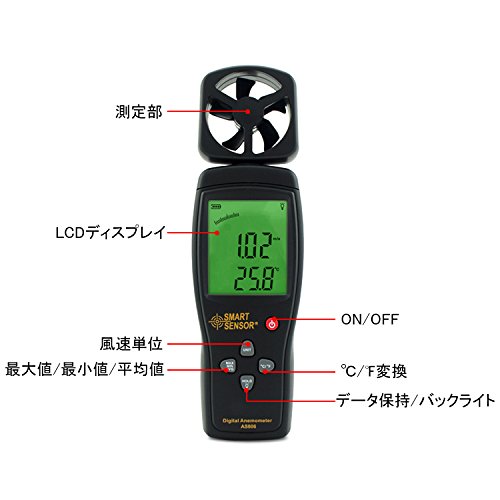
Figura 3: dettagliata view of the LCD display and control buttons. Key elements include the measurement section (impeller), LCD display, ON/OFF button, wind unit selection, Max/Min/Avg function, °C/°F conversion, and Data Hold/Backlight button.
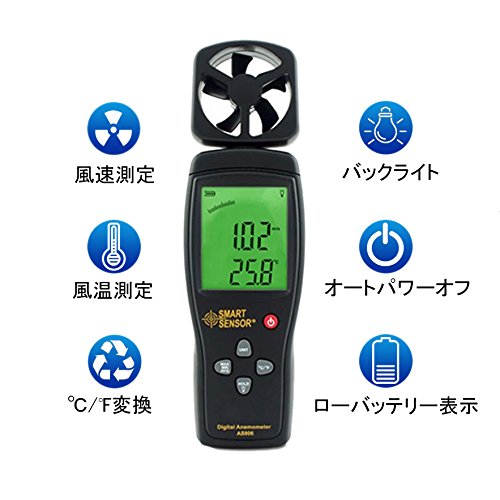
Figura 4: Oltreview of key features: Wind Speed Measurement, Wind Temperature Measurement, °C/°F Conversion, Backlight, Auto Power Off, and Low Battery Indicator.
4. Specifiche
4.1 Parametri tecnici
| Parametro | Valore |
|---|---|
| Gamma di velocità del vento | 0.3 ~ 45 m / s |
| Precisione della velocità del vento | ±3% + 0.1 |
| Unità di velocità del vento | m/s, Ft/min, Knots, km/h, Mph |
| Intervallo di temperatura del vento | Temperatura ambiente: da 0 a 45 °C |
| Precisione della temperatura del vento | ±2 °C |
| Risoluzione | 0.001 metri al secondo |
| Max/Min/Average Value | SÌ |
| Conversione °C/°F | SÌ |
| Retroilluminazione | SÌ |
| Spegnimento manuale/automatico | SÌ |
| Display analogico | SÌ |
| Funzione di conservazione dei dati | SÌ |
4.2 Specifiche generali
- Alimentazione elettrica: Batteria da 9 V
- Peso: 170g
- Dimensioni: Dimensioni: 220 x 65 x 30 mm
- Materiale: Plastic PCB
- Codice UPC: 799789670206
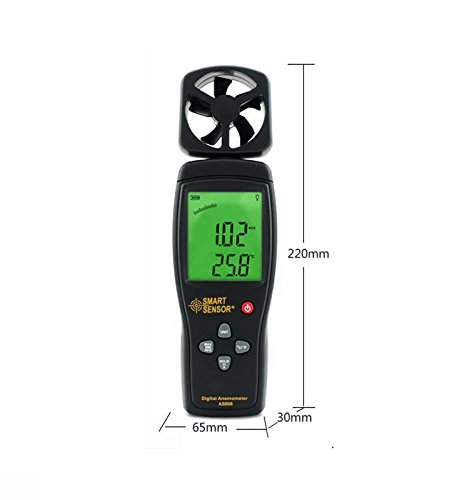
Figure 5: Device dimensions: 220mm (height), 65mm (width), 30mm (depth).
5. Impostazione
5.1 Installazione della batteria
- Individuare il coperchio del vano batteria sul retro del dispositivo (fare riferimento alla Figura 2).
- Per aprire il vano, far scorrere il coperchio verso il basso.
- Insert a 9V battery, ensuring the correct polarity (+/-).
- Chiudere il coperchio del vano batteria facendolo scorrere verso l'alto finché non scatta in posizione.
Nota: Quando è necessario sostituire la batteria, sul display apparirà un indicatore di batteria scarica.
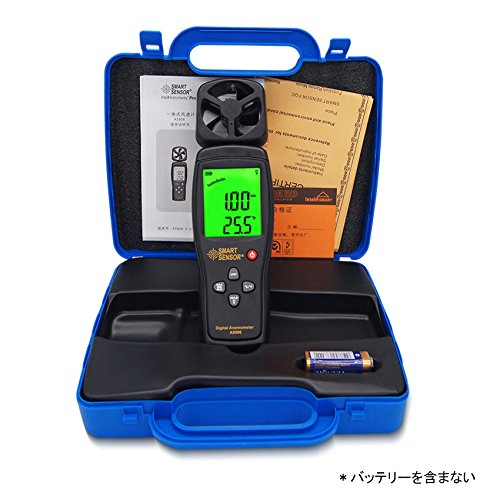
Figure 6: Package contents, including the anemometer and user manual. Note: Battery is not included.
6. Istruzioni per l'uso
6.1 Accensione/spegnimento
- Per accendere il dispositivo, premere il pulsante ACCESO/SPENTO pulsante.
- Per spegnere il dispositivo, tenere premuto il pulsante ACCESO/SPENTO pulsante per alcuni secondi.
- The device also features an auto power-off function to conserve battery life. It will automatically shut down after a period of inactivity.
6.2 Wind Speed and Temperature Measurement
Once powered on, the device will immediately begin measuring wind speed and temperature. Hold the device so that the impeller faces the wind source for accurate readings. The current wind speed and temperature will be displayed on the LCD.
6.3 Conversione unità
- Unità di velocità del vento: Premere il tasto UNITÀ button to cycle through available wind speed units: m/s, Ft/min, Knots, km/h, Mph.
- Unità di temperatura: Premere il tasto ° C / ° F button to switch between Celsius and Fahrenheit for temperature display.
6.4 Funzione di conservazione dei dati
Per congelare le letture correnti sul display, premere il tasto PRESA pulsante. Premerlo nuovamente per rilasciare il blocco e riprendere la misurazione in tempo reale.
6.5 Retroilluminazione
To activate the display backlight for better visibility in low-light conditions, press the LEGGERO button (often combined with HOLD). Press it again to turn off the backlight.
6.6 Max/Min/Average Measurement
The device can display the maximum, minimum, and average wind speed values recorded during a measurement session. Refer to the specific button labeled for these functions (e.g., MAX / MIN / AVG or similar) and press it to cycle through these modes.
7. Manutenzione
- Pulizia: Pulire il dispositivo con un panno morbido e asciutto. Non utilizzare detergenti abrasivi o solventi.
- Magazzinaggio: Store the device in a cool, dry place when not in use. Remove the battery for long-term storage.
- Cura della girante: Per ottenere letture accurate, assicurarsi che la girante sia priva di polvere e detriti. Evitare di toccare direttamente le pale della girante.
8. Risoluzione Dei Problemi
| Problema | Possibile causa | Soluzione |
|---|---|---|
| Il dispositivo non si accende. | Batteria scarica o scarica; installazione errata della batteria. | Sostituire la batteria da 9 V; verificare la corretta polarità. |
| Letture imprecise. | Impeller obstructed; device not positioned correctly. | Clear any obstructions from the impeller; ensure impeller faces the wind directly. |
| Il display è scuro o vuoto. | Batteria scarica; retroilluminazione spenta. | Replace battery; press the backlight button. |
9. Garanzia e supporto
This product comes with a manufacturer's warranty. Please refer to the warranty card included in the package for details regarding coverage and duration. For technical support or warranty claims, please contact your retailer or the manufacturer directly.