1. Introduzione
This manual provides instructions for the Norifon CGA-S002 USB Charger. This compact and lightweight charger is designed for convenient charging of compatible camera batteries via a USB power source. Please read this manual thoroughly before use to ensure proper operation and safety.

Image: Norifon CGA-S002 USB Charger. This image shows the compact design of the charger.
2. Compatibilità
The Norifon CGA-S002 USB Charger is compatible with a range of Panasonic camera batteries. To ensure correct usage, verify that your battery model is listed below. The battery model number is typically found on the battery's label, not the camera itself.
Compatible Battery Models:
- BP-DC5 J, BP-DC5 U
- CGA-S002, CGA-S002A, CGA-S002A/1B, CGA-S002E, CGA-S002E/1B
- CGA-S006, CGA-S006A, CGA-S006E, CGA-S006E/1B
- CGR-S002, CGR-S002E
- CGR-S006, CGR-S006A/1B, CGR-S006E, CGR-S006E/1B, CGR-S006GK
- DMW-BM7, DMW-BMA7
Modelli di fotocamere compatibili:
- Panasonic Lumix DMC-FZ1, DMC-FZ2, DMC-FZ3, DMC-FZ4, DMC-FZ5, DMC-FZ7, DMC-FZ8, DMC-FZ10, DMC-FZ15, DMC-FZ18, DMC-FZ20, DMC-FZ28, DMC-FZ30, DMC-FZ35, DMC-FZ38, DMC-FZ50

Image: Guide on how to identify the battery code on your battery to ensure compatibility with the charger.
Video: This video demonstrates how to select the correct charger for a CGA-S002 battery and provides a visual guide for compatibility.
3. Impostazione
The Norifon USB Charger is designed for versatile power input, allowing you to charge your batteries from various USB sources.
Collegamento del caricabatterie:
- Ensure the battery and charger contacts are aligned correctly (+ to + and - to -).
- Insert the battery into the charger slot.
- Connect the charger to a USB power source using a compatible USB cable. The charger features a Type-C USB port for input.

Immagine: Primo piano view of the USB Type-C port on the charger, indicating the connection point.

Image: Illustration showing the charger being powered by a PC, AC charger, car charger, or power bank.
4. Funzionamento
Once the battery is correctly inserted and the charger is connected to a power source, the charging process will begin automatically. The charger features an LED indicator to display the charging status.
Indicatore di stato di carica:
- Luce rossa: Indica che la batteria è attualmente in carica.
- Luce blu: Indicates that the battery is fully charged or no battery is inserted (no load).

Image: The charger's LED indicator showing a red light when charging and a blue light when charging is complete or no battery is present.
Video: This video demonstrates the process of inserting a battery into the charger and observing the LED indicator change from red (charging) to blue (fully charged).
5. Manutenzione
To ensure the longevity and optimal performance of your Norifon USB Charger, follow these simple maintenance guidelines:
- Mantenere il caricabatterie pulito e privo di polvere e detriti. Utilizzare un panno morbido e asciutto per la pulizia.
- Quando non lo si utilizza, conservare il caricabatterie in un luogo asciutto.
- Evitare di esporre il caricabatterie a temperature estreme o alla luce solare diretta.
- Non immergere il caricabatterie in acqua o altri liquidi.
6. Risoluzione Dei Problemi
Se riscontri problemi con il caricabatterie, prendi in considerazione i seguenti passaggi comuni per la risoluzione dei problemi:
- Charger not lighting up: Ensure the USB cable is securely connected to both the charger and the power source. Try a different USB cable or power source.
- Battery not charging (blue light immediately): Verify that the battery is correctly inserted and its contacts are clean. Confirm that the battery model is compatible with the charger.
- Ricarica lenta: Ensure your USB power source provides sufficient current (e.g., a wall adapter rather than a low-power USB port on an older computer).
If problems persist, please refer to the support information provided with your purchase.
7. Specifiche
Technical details for the Norifon CGA-S002 USB Charger:
| Marca | Norifon |
| Modello | CGA-S002 |
| Ingresso volumetage | CC 5V |
| Volume di uscitatage | DC 4.2V / 8.4V (500mA) |
| Tipo di connettore | USB di tipo C |
| Numero di porte | 1 |
| Peso del prodotto | 20 grammi |
| Conformità | Conforme UL |

Image: The back label of the Norifon USB Charger, displaying input and output specifications.
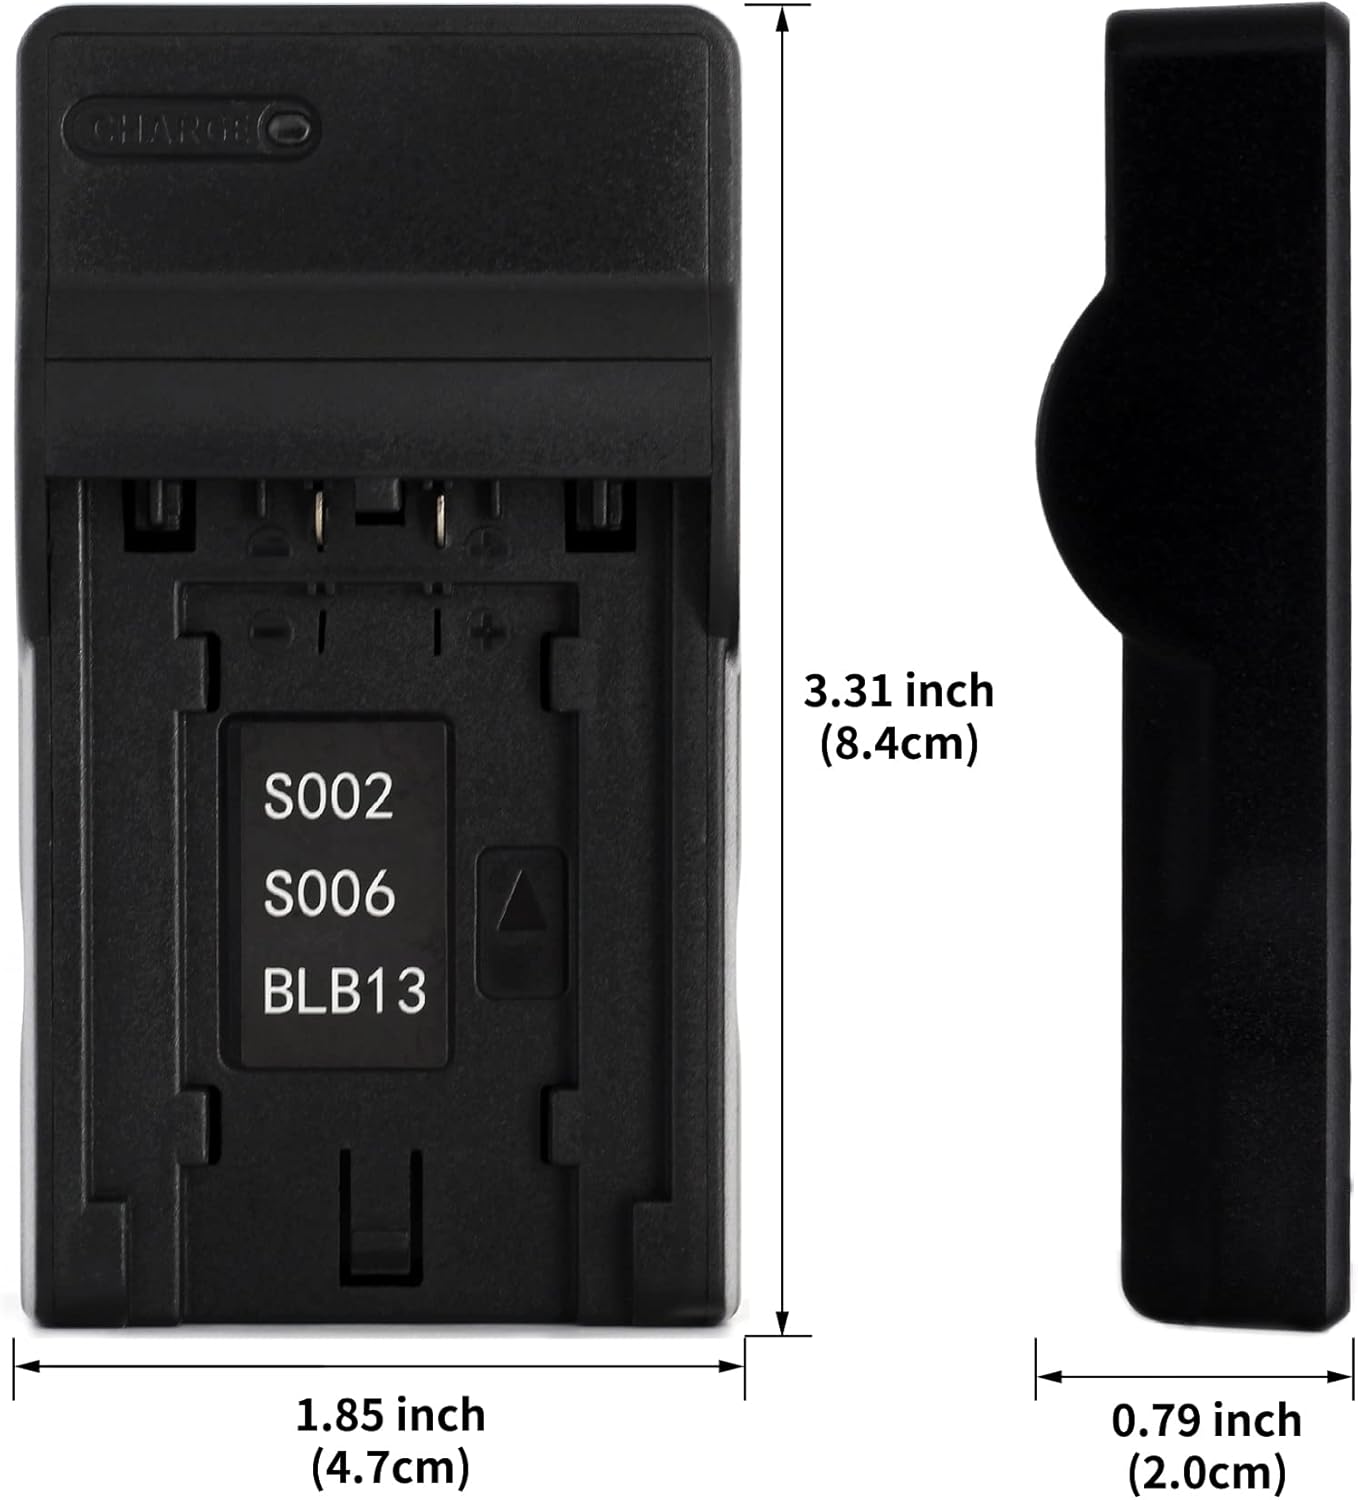
Image: Dimensions of the Norifon USB Charger, showing its compact size (3.31 inches height, 1.85 inches width, 0.79 inches thickness).
8. Informazioni sulla sicurezza
Please observe the following safety precautions to prevent damage to the charger, battery, or personal injury:
- Non aprire o modificare il caricabatterie.
- Do not immerse the charger in water or expose it to rain or moisture.
- Use the charger only in dry locations.
- Use only compatible batteries with this charger.
- Tenere fuori dalla portata dei bambini.
- Scollegare il caricabatterie dalla fonte di alimentazione quando non in uso.
9. Garanzia e supporto
Norifon products are designed for reliability and performance. For warranty information or technical support, please refer to the documentation included with your purchase or contact Norifon customer service through the retailer where the product was purchased.