1. Introduzione
This manual provides essential instructions for the proper setup, operation, and maintenance of your SentrySafe Executive Security Safe, Model PLX510487. This safe is designed to protect your valuables with an electronic lock and pry-resistant steel construction. Please read this manual thoroughly before using your safe to ensure optimal performance and security.
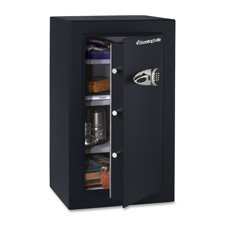
Figure 1: SentrySafe Executive Security Safe (Model PLX510487)
2. Informazioni sulla sicurezza
- Do not store safe keys inside the safe. Always keep override keys in a secure location away from the safe.
- Assicurarsi che la cassaforte sia montata saldamente per impedirne la rimozione non autorizzata.
- Keep the electronic keypad dry and clean.
- This safe is not water resistant. Do not expose it to water or high humidity.
- Keep children away from the safe and do not allow them to operate the electronic lock.
3. Contenuto della confezione
Verificare che tutti i componenti siano presenti nella confezione:
- SentrySafe Executive Security Safe (PLX510487)
- Tasti di esclusione (2)
- Mounting Bolts (for wall mounting)
- Manuale dell'utente (questo documento)
4. Impostazione
4.1 Disimballaggio
- Estrarre con cautela la cassaforte dall'imballaggio.
- Inspect the safe for any signs of damage. If damaged, contact customer support.
- Conservare i materiali di imballaggio per eventuali trasporti futuri.
4.2 Installazione della batteria
The electronic lock requires four (4) AA alkaline batteries (not included).
- Individuare il vano batterie all'interno dello sportello della cassaforte.
- Aprire il coperchio del vano batterie.
- Inserire quattro nuove batterie alcaline AA, assicurandosi della corretta polarità (+/-).
- Chiudere saldamente il coperchio del vano batterie.
4.3 Montaggio della cassaforte
For enhanced security, it is recommended to wall mount the safe.
- Scegliere una posizione adatta per il montaggio, assicurandosi che si tratti di una superficie solida in grado di sostenere il peso della cassaforte.
- Open the safe door and locate the pre-drilled mounting holes on the back panel.
- Position the safe against the wall and mark the drilling points through the mounting holes.
- Drill pilot holes into the wall at the marked locations.
- Align the safe with the drilled holes and secure it using the provided mounting bolts. Tighten all bolts firmly.
4.4 Initial Code Setup
Upon first use, you will need to set your personal electronic access code.
- With the safe door open, press the red reset button located on the inside of the door, near the hinge. The yellow indicator light on the keypad will illuminate.
- Entro 5 secondi, inserisci il codice desiderato di 3-8 cifre sulla tastiera.
- Press the 'A' or 'B' button to confirm your new code. The yellow light will turn off, and a beep will confirm the code is set.
- Prova il nuovo codice con la porta aperta prima di chiuderla.
5. Utilizzo della cassaforte
5.1 Opening the Safe with Electronic Code
- Inserisci il tuo codice personale da 3 a 8 cifre sulla tastiera.
- Press the 'A' or 'B' button. The green indicator light will illuminate, and you will hear a beep.
- Entro 5 secondi, ruotare la maniglia in senso orario per aprire lo sportello della cassaforte.
5.2 Apertura della cassaforte con chiave di override
In case of forgotten code or battery failure, use the override key.
- Individuare il copriserratura sul pannello della tastiera.
- Togliere il coperchio.
- Insert the override key and turn it counter-clockwise.
- While holding the key turned, turn the handle clockwise to open the safe door.
- Dopo l'uso, rimuovere la chiave e riposizionare il coperchio della serratura.
5.3 Chiusura e blocco della cassaforte
- Chiudere bene la porta della cassaforte.
- Turn the handle counter-clockwise until it is fully engaged and the door is secured.
- La cassaforte si bloccherà automaticamente.
5.4 Modifica del codice utente
- Open the safe door using your current code or override key.
- Press the red reset button on the inside of the door. The yellow indicator light will illuminate.
- Entro 5 secondi, inserisci il tuo nuovo codice da 3 a 8 cifre.
- Press the 'A' or 'B' button to confirm. The yellow light will turn off, and a beep will confirm the new code.
- Prova il nuovo codice con la porta aperta prima di chiuderla.
6. Manutenzione
6.1 Sostituzione della batteria
When the batteries are low, the red indicator light will flash when you enter your code. Replace batteries promptly to avoid lock-out.
- Apri la porta della cassaforte.
- Replace all four AA alkaline batteries as described in Section 4.2.
- Your electronic code will be retained during battery replacement.
6.2 Pulizia
Pulisci l'esterno della cassaforte con un panno morbido eamp panno. Non utilizzare detergenti abrasivi o solventi, poiché potrebbero danneggiare la finitura o i componenti elettronici.
7. Risoluzione Dei Problemi
- La cassaforte non si apre con il codice:
- Ensure batteries are fresh and installed correctly. Replace if necessary.
- Re-enter the code carefully. Ensure no buttons are stuck.
- Try using the override key to open the safe. - Keypad does not respond:
- Check battery installation and replace batteries.
- Ensure no debris is obstructing the buttons. - Codice dimenticato:
- Use the override key to open the safe.
- Once open, follow the steps in Section 5.4 to set a new user code. - Door does not close/lock properly:
- Ensure no items are obstructing the door or locking bolts.
- Check that the handle is fully turned counter-clockwise to engage the locking mechanism.
8. Specifiche
| Marca | Sicurezza della sentinella |
| Numero di modello | PLX510487 |
| Tipo di blocco | Chiave elettronica |
| Capacità | 6 piedi cubi |
| Materiale | Acciaio legato |
| Tipo di montaggio | Montaggio a parete |
| Componenti inclusi | Bolts, Keys |
| Peso dell'articolo | 241 libbre |
| Livello di resistenza all'acqua | Non resistente all'acqua |
| Dimensioni del prodotto | 23.8 x 21.5 x 38.3 pollici |
| Codice UPC | 635665104871 |
9. Garanzia e supporto
SentrySafe products are manufactured to high-quality standards. For specific warranty information, please refer to the warranty card included with your purchase or visit the official SentrySafe website. For technical support, replacement parts, or further assistance, please contact SentrySafe customer service directly.
SentrySafe Official Websito: www.sentrysafe.com