
Introduzione
This manual provides detailed instructions for the QIACHIP WL101 Superheterodyne Receiver and WL102 Transmitter 433MHz RF Wireless Module Kit. This kit is designed for various DIY projects, including remote control applications with platforms like Arduino UNO. It operates on the 433MHz frequency band and supports ASK/OOK modulation.
Contenuto della confezione:
- 1 x WL101 Superheterodyne Receiver Module
- 1 x WL102 Transmitter Module
- 2 x Antennas (for receiver and transmitter)
Informazioni sulla sicurezza
Handle batteries with care. Avoid extreme temperatures. Do not interfere with other wireless devices.
Caratteristiche del prodotto
- Frequenza: 433 MHz RF
- Modalità di modulazione: Supports ASK/OOK modulation
- Potenza di trasmissione: Greater than 11dBm (for WL102 Transmitter)
- Tipo di ricevitore: Superheterodyne (for WL101 Receiver)
- Applicazione: Suitable for motorcycles, automobile anti-theft products, home security systems, electric doors, remote control sockets, LED lighting, garage door openers, and various remote control applications.
Specifiche
WL101 Receiver Module
- Modello: WL101
- Volume di eserciziotage: Typically 3.3V - 5V (refer to specific datasheet for exact range)
- Corrente di esercizio: Basso consumo energetico
- Frequenza: 433 MHz
- Dimensioni: Approximately 1.18 inches x 0.35 inches (30mm x 9mm)
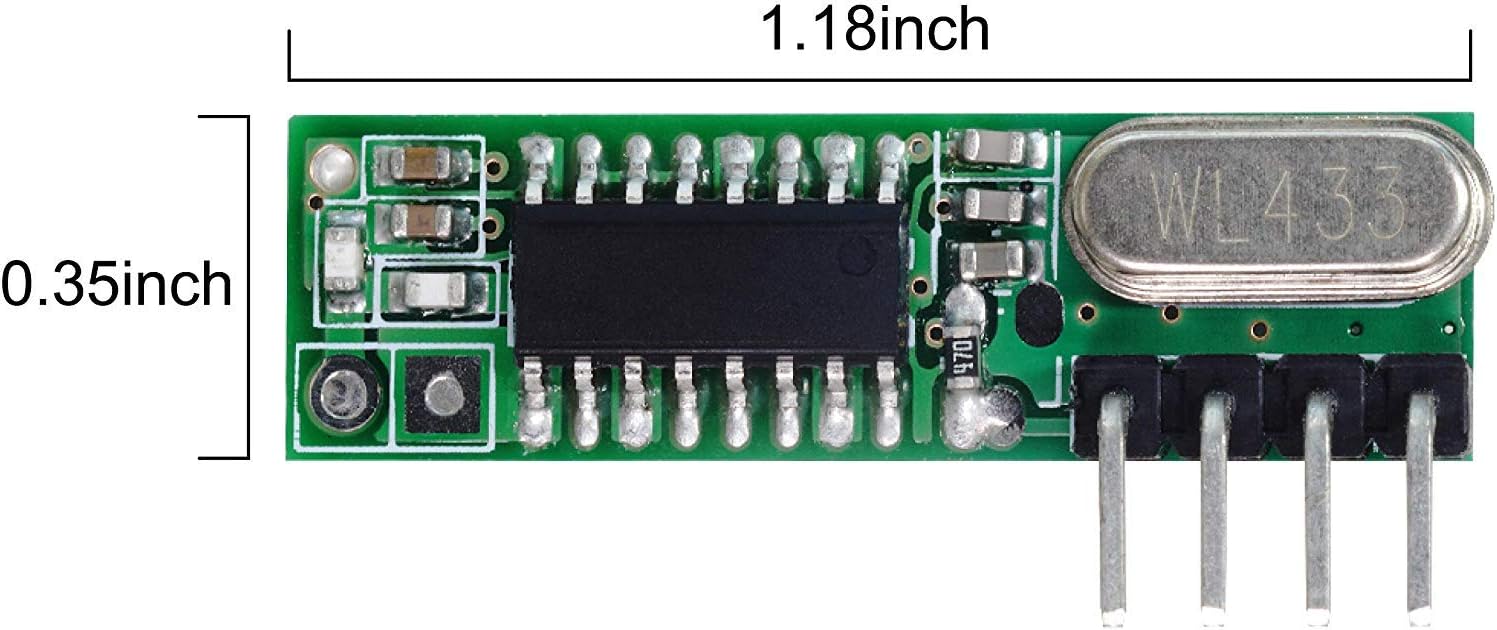
Descrizione dell'immagine: A green circuit board showing the WL101 receiver module with dimensions indicated. The length is approximately 1.18 inches and the width is 0.35 inches.
WL102 Transmitter Module
- Modello: WL102
- Volume di eserciziotage: Typically 3.3V - 12V (refer to specific datasheet for exact range)
- Corrente di esercizio: Varies with transmit power
- Frequenza: 433 MHz
- Potenza di trasmissione: >11dBm
- Dimensioni: Circa 13 mm x 13 mm

Descrizione dell'immagine: A small blue circuit board showing the WL102 transmitter module with a ruler indicating its size, approximately 13 mm.
Pinout and Connections
WL101 Superheterodyne Receiver Pinout
The WL101 receiver module features six pins for power, ground, data output, and antenna connection. Refer to the diagram below for pin identification.
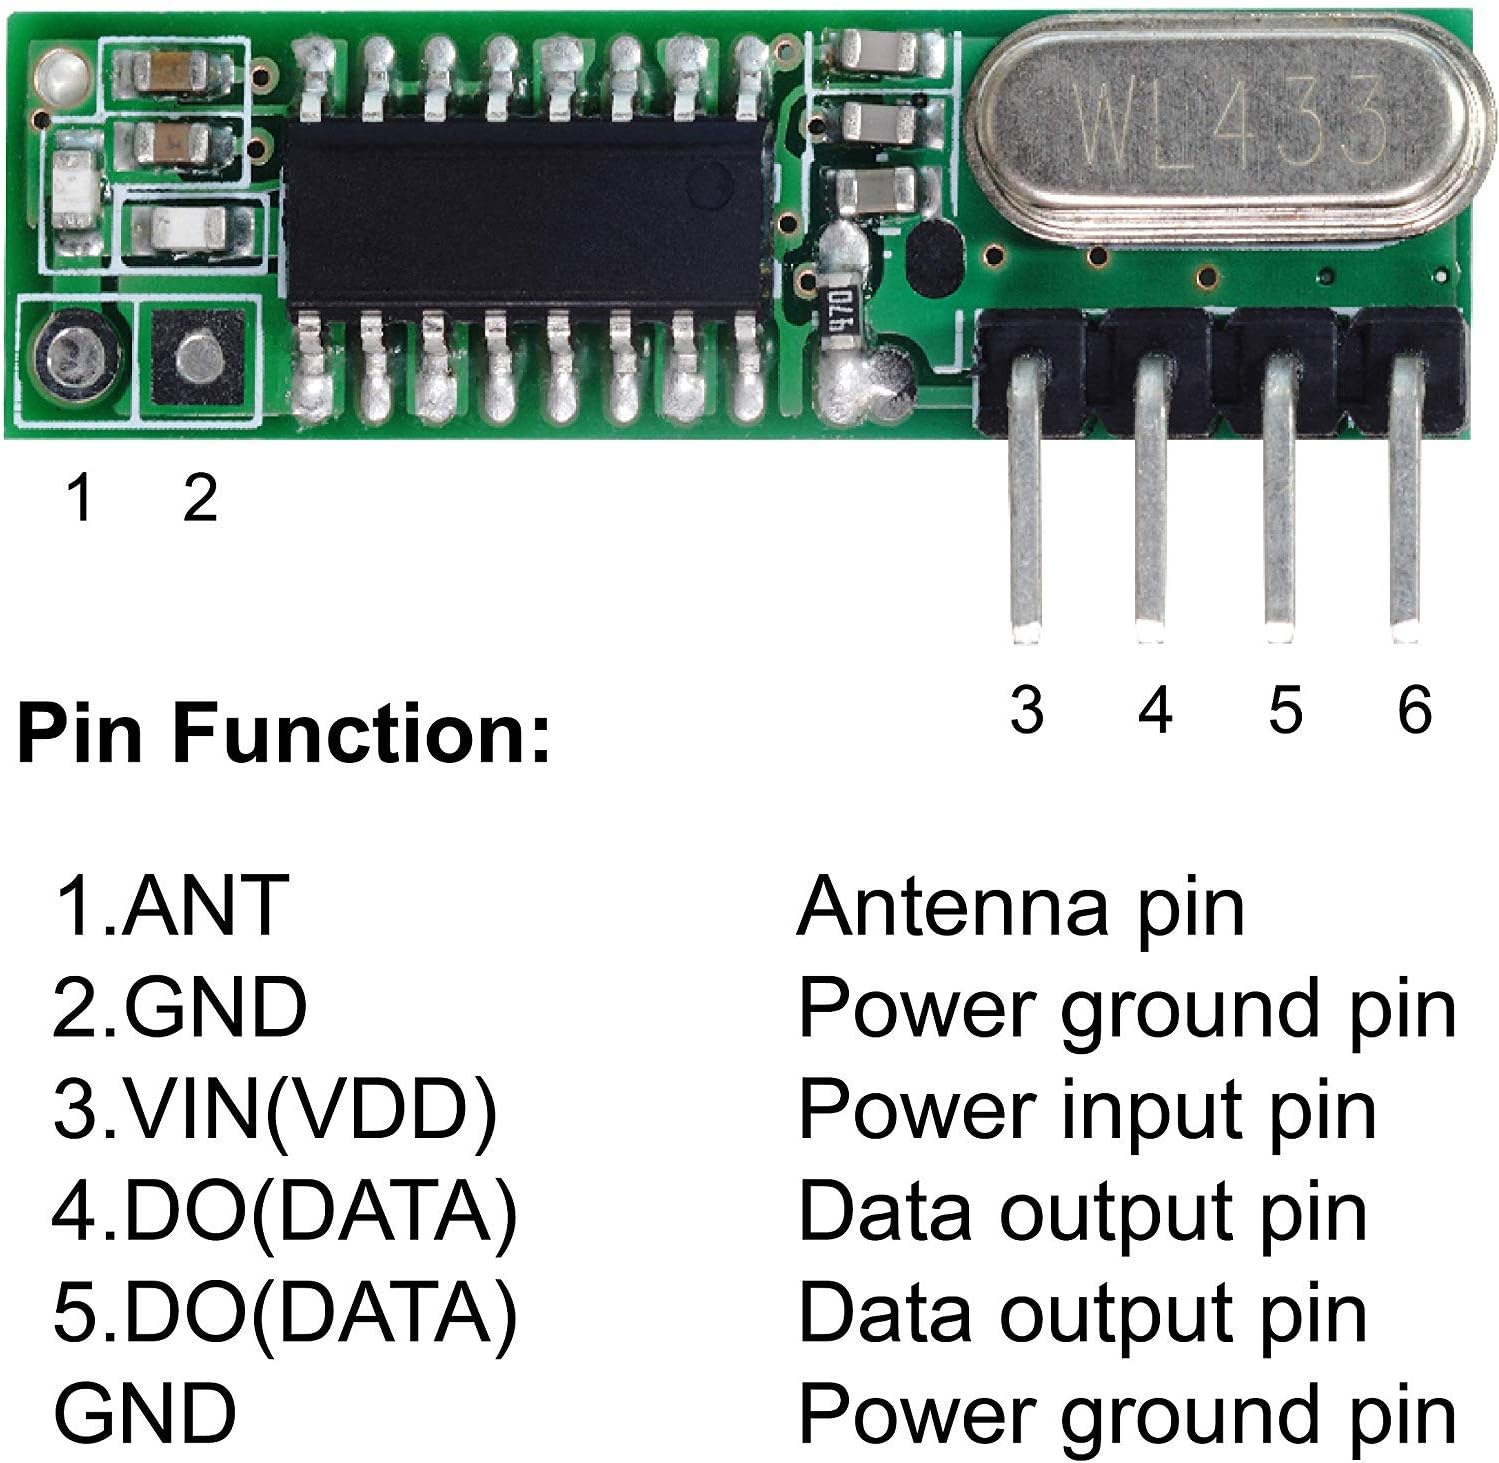
Descrizione dell'immagine: A green circuit board showing the WL101 receiver module. Six pins are labeled 1 through 6. Pin 1 is ANT (Antenna), Pin 2 is GND (Power ground), Pin 3 is VIN(VDD) (Power input), Pin 4 is DO(DATA) (Data output), Pin 5 is DO(DATA) (Data output), and Pin 6 is GND (Power ground).
| Pin No. | Etichetta | Funzione |
|---|---|---|
| 1 | FORMICA | Perno dell'antenna |
| 2 | Terra | Pin di messa a terra dell'alimentazione |
| 3 | VIN(VDD) | Pin di ingresso alimentazione |
| 4 | DO(DATA) | Pin di uscita dati |
| 5 | DO(DATA) | Pin di uscita dati |
| 6 | Terra | Pin di messa a terra dell'alimentazione |
WL102 Transmitter Pinout
The WL102 transmitter module has pins for power, ground, data input, and antenna. Note that the EN (Enable) pin is internally connected to the power supply and has no external function.

Descrizione dell'immagine: A small green circuit board showing the WL102 transmitter module. It has four pins at the bottom. The text indicates 'DAT - Wave signal input', 'OUT - Antenna pin', 'EN - Enable Pin (connected to power supply, no function)', '-' Power ground Pin, '+' Power supply pin.
| Etichetta | Funzione |
|---|---|
| DATO | Wave signal input |
| FUORI | Antenna pin (RF signal output) |
| EN | Enable Pin (internally connected to power, no external function) |
| - (GND) | Pin di messa a terra dell'alimentazione |
| + (VCC) | Spina di alimentazione |
Example Connection to Arduino UNO (WL101 Receiver)
This diagram illustrates a typical connection of the WL101 receiver module to an Arduino UNO board. Ensure correct voltage and data pin connections.

Descrizione dell'immagine: A circuit diagram showing a QIACHIP WL101-341 Superheterodyne 433MHz Receiver connected to an Arduino UNO board. The receiver's VDD pin is connected to Arduino's 5V, GND to GND, and one of the DO(DATA) pins to a digital input pin (e.g., D2) on the Arduino. The antenna is shown connected to the ANT pin.
Impostare
Collegamento dell'antenna
For optimal performance, connect the supplied helical antenna to the ANT pin of the WL101 receiver and the OUT pin of the WL102 transmitter. The length of the antenna is critical for 433MHz operation; a quarter-wavelength antenna (approximately 17.3 cm or 6.8 inches for 433MHz) is recommended for best range, though the provided coiled antennas are suitable for shorter distances.
Alimentazione elettrica
- WL101 Receiver: Connect the VIN(VDD) pin to a stable power source (e.g., 5V from Arduino) and GND to ground.
- WL102 Transmitter: Connect the '+' pin to a stable power source (e.g., 3.3V to 12V, depending on desired range and power) and '-' to ground.
Connessione dati
- WL101 Receiver: Connect one of the DO(DATA) pins to a digital input pin on your microcontroller (e.g., Arduino).
- WL102 Transmitter: Connect the DAT pin to a digital output pin on your microcontroller.
Istruzioni per l'uso
Principio di funzionamento di base
The WL102 transmitter sends data using Amplitude Shift Keying (ASK) or On-Off Keying (OOK) modulation at 433MHz. The WL101 superheterodyne receiver is designed to efficiently detect and demodulate these signals.
Microcontroller Programming (e.g., Arduino)
- Transmitter (WL102): Program your microcontroller to send digital data (e.g., ON/OFF pulses) to the DAT pin of the WL102. Libraries like "RCSwitch" or "VirtualWire" are commonly used for encoding and transmitting data.
- Receiver (WL101): Program your microcontroller to read digital data from the DO(DATA) pin of the WL101. The same libraries (e.g., "RCSwitch", "VirtualWire") can be used to decode the received signals.
- Protocollo dati: Ensure that the data encoding and decoding protocols used by the transmitter and receiver microcontrollers are compatible.
Considerazioni sulla portata
The effective range of the modules depends on several factors, including antenna quality, power supply voltage (for transmitter), environmental interference, and line of sight. Optimal antenna tuning and clear line of sight will maximize range.
Manutenzione
- Mantenere asciutto: Protect the modules from moisture and humidity to prevent corrosion and damage.
- Connessioni pulite: Ensure all pin connections are clean and secure.
- Evitare lo stress fisico: Handle the modules carefully to prevent bending pins or damaging components.
- Cura dell'antenna: Ensure antennas are not bent or damaged, as this can significantly impact performance.
Risoluzione dei problemi
- Nessuna ricezione del segnale:
- Verify power connections to both modules.
- Check antenna connections and ensure they are properly sized for 433MHz.
- Confirm that the transmitter and receiver are operating on the same frequency (433MHz).
- Ensure the data encoding/decoding libraries and protocols are correctly implemented.
- Reduce distance between modules and check for obstructions or sources of interference.
- A corto raggio:
- Improve antenna quality (e.g., use a proper quarter-wavelength wire antenna).
- Increase transmitter power supply voltage (within specified limits).
- Minimize environmental interference (e.g., other 433MHz devices, Wi-Fi routers).
- Assicurare una linea di vista libera tra trasmettitore e ricevitore.
- Funzionamento intermittente:
- Controllare che non vi siano collegamenti allentati o saldature fredde.
- Ensure stable power supply to both modules.
- Consider adding decoupling capacitors near power pins if experiencing noise issues.
- Module Appears Damaged:
- Inspect for visible signs of corrosion or physical damage. If found, replacement may be necessary.
Garanzia e supporto
QIACHIP products are designed for reliability. For technical support or inquiries regarding your WL101/WL102 module kit, please refer to the seller's support channels or the QIACHIP official websito. I dettagli specifici della garanzia possono variare in base alla regione e al rivenditore.