1. Introduzione
Thank you for choosing the HMF 1608-02 Portable Document Safe. This safe is designed to provide secure storage for your valuable documents, cash, and other small items. It features a robust steel sheet body, an electronic lock with a customizable code, and an emergency key override. For added security, an anti-theft metal cable is included. Please read this manual carefully before initial use to ensure proper setup and operation.
2. Istruzioni di sicurezza
- Keep Emergency Keys Secure: Store the emergency keys in a safe location, separate from the safe itself, and not inside the safe.
- Gestione della batteria: Use only the specified battery type. Do not mix old and new batteries or different types of batteries. Remove batteries if the safe will not be used for an extended period.
- Evitare l'umidità: Do not expose the safe to water or high humidity.
- Posizionamento corretto: Ensure the safe is placed on a stable, flat surface.
- Bambini: Keep the safe and its keys out of reach of children.
3. Contenuto della confezione
Si prega di verificare che tutti gli articoli siano presenti nel pacco:
- HMF 1608-02 Portable Document Safe
- Chiavi di emergenza (2 pezzi)
- Anti-theft Metal Cable
- Manuale di istruzioni (questo documento)
4. Prodotto finitoview
Familiarize yourself with the components of your HMF 1608-02 safe.

Figura 4.1: Esterno view of the HMF 1608-02 safe, highlighting the electronic keypad for code entry, the central rotary knob for locking/unlocking, and the emergency keyhole.

Figura 4.2: Interno view of the HMF 1608-02 safe when open. The bottom is lined with foam for protection, and the battery compartment for the electronic lock is visible on the inside of the lid.

Figura 4.3: The safe's interior, showcasing its capacity to hold various items such as a smartphone, camera lens, and banknotes, with a protective foam base.
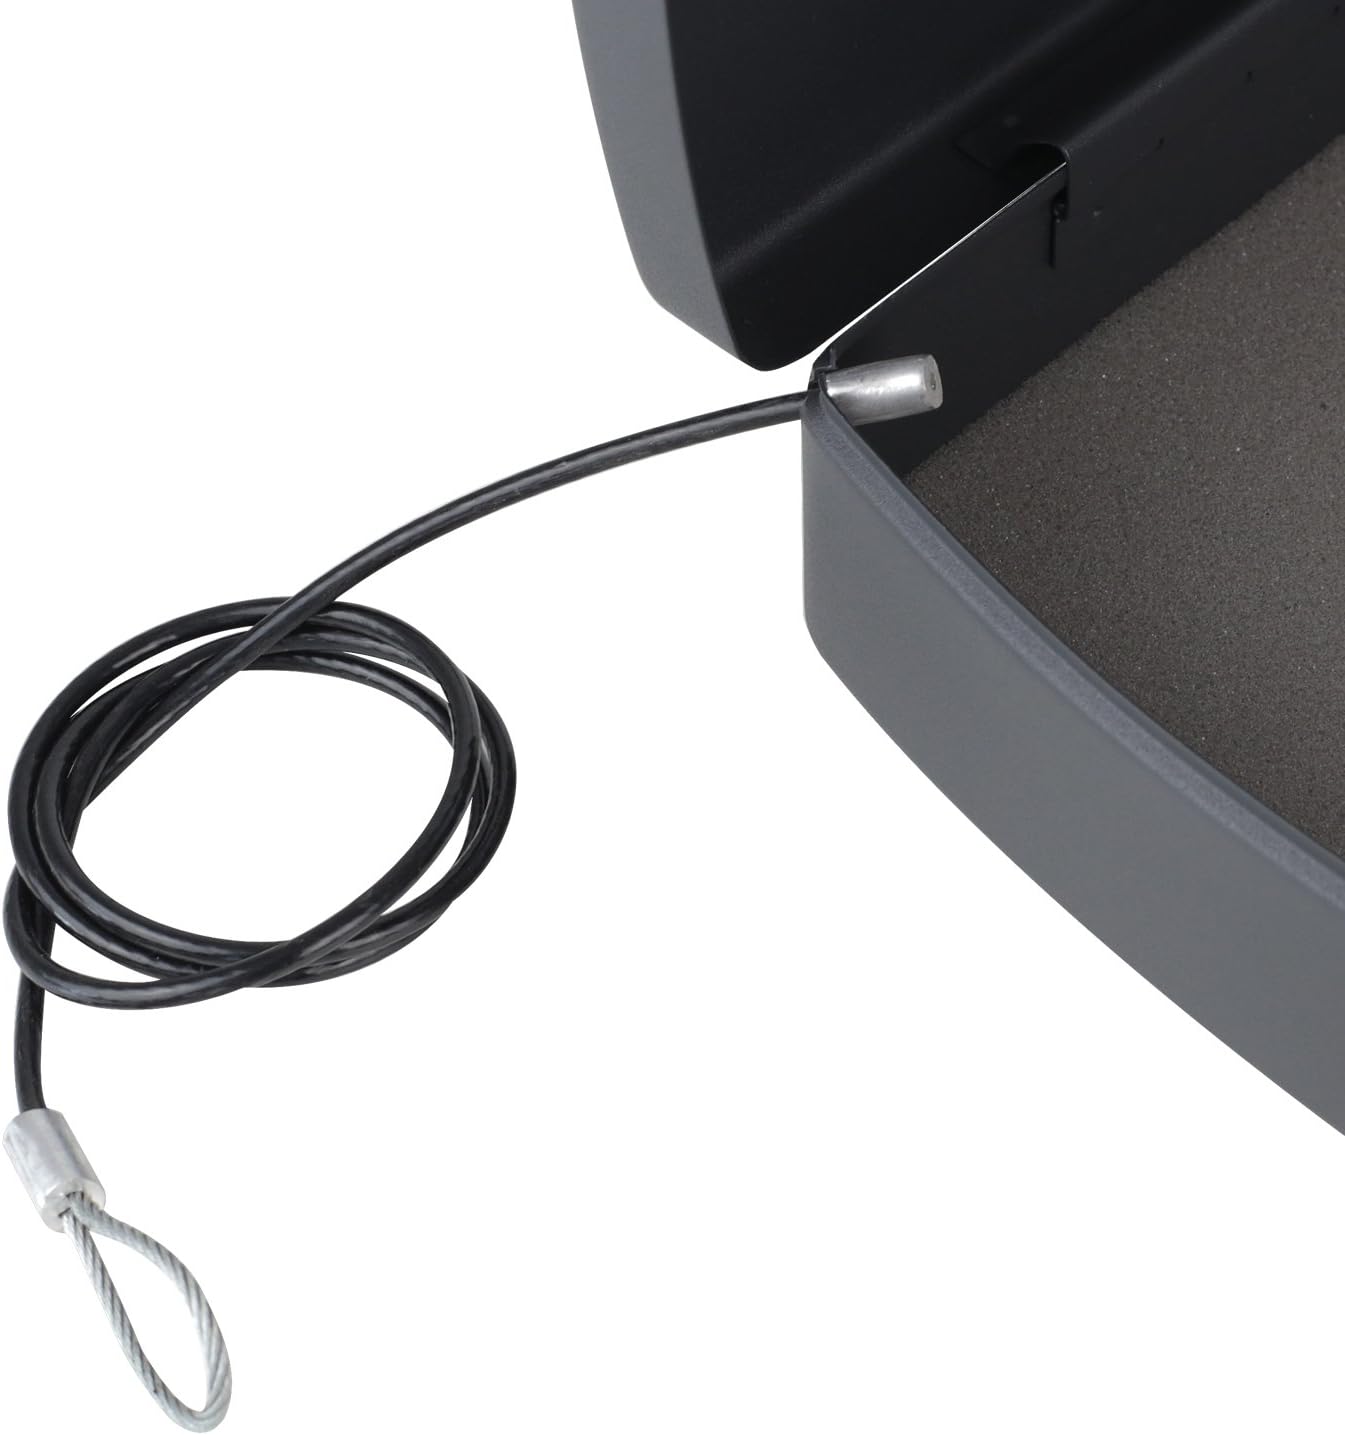
Figura 4.4: Detail of the anti-theft metal cable, designed to secure the safe to a fixed object, providing an additional layer of protection.

Figura 4.5: The integrated carrying handle on the front of the safe, demonstrating its portability and ease of transport.
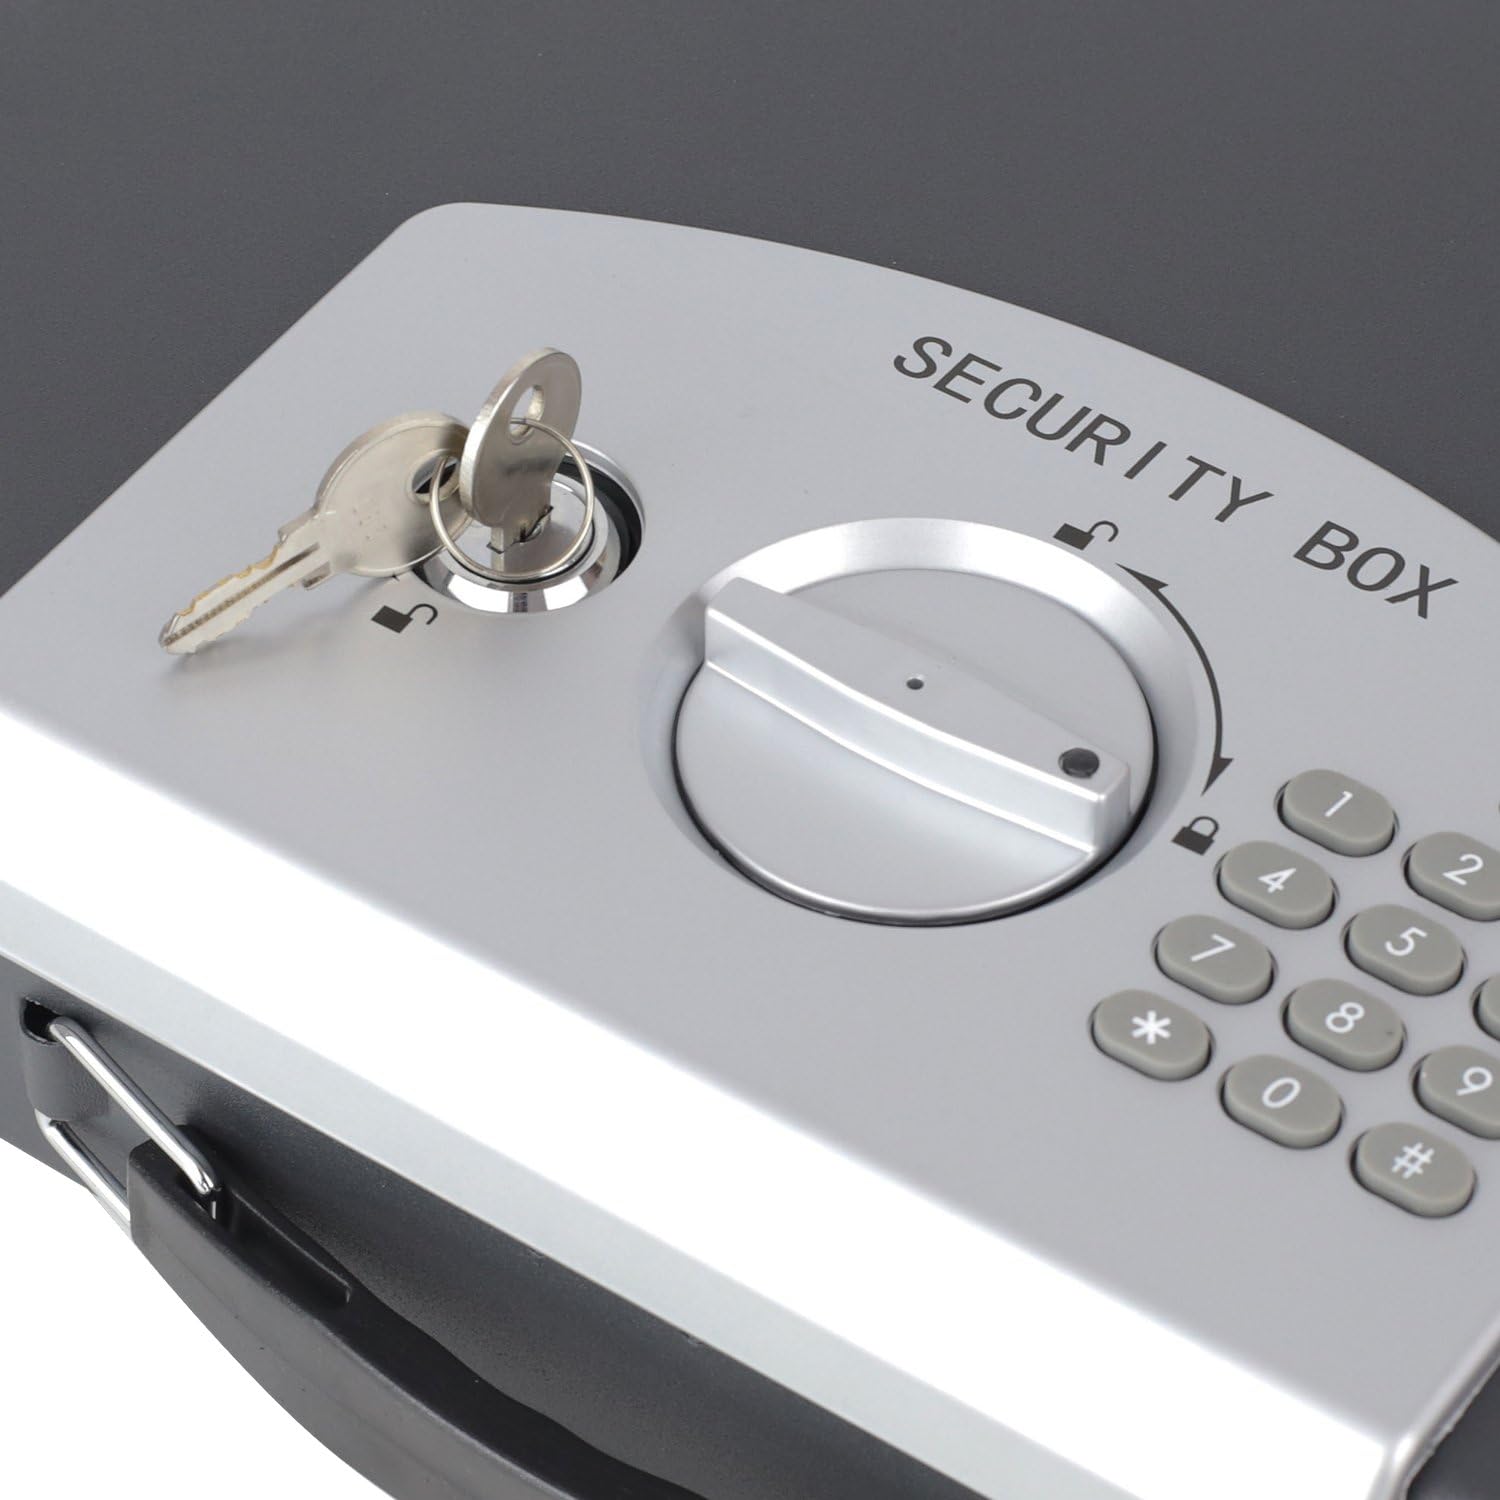
Figura 4.6: Un dettagliato view of the emergency keyhole, located on the control panel, which allows manual access to the safe.
5. Impostazione
5.1 Installazione della batteria
- Open the safe using the emergency key (refer to section 5.3 if needed).
- Locate the battery compartment on the inside of the safe's lid (refer to Figure 4.2).
- Aprire il coperchio del vano batterie.
- Insert the required batteries (typically 4x AA, not included) according to the polarity indicators (+/-).
- Chiudere saldamente il coperchio del vano batterie.
5.2 Setting the Electronic Code
After installing batteries, you can set your personal electronic code.
- With the safe door open, locate the small red or green reset button on the inside of the door, near the battery compartment.
- Premere il pulsante di reset. Si dovrebbe udire un segnale acustico e una spia luminosa sulla tastiera si accenderà.
- Within 5 seconds, enter your desired personal code (3-8 digits) on the keypad.
- Confirm your code by pressing the '#' button.
- The indicator light will flash, and you will hear a confirmation beep, indicating the new code is set.
- Prova il nuovo codice: With the door still open, enter your new code and press '#'. The safe should indicate it's unlocked. If it doesn't, repeat the steps.
5.3 Using the Emergency Key
The emergency key provides manual access to the safe in case of battery failure or forgotten code.
- Locate the emergency keyhole on the control panel (refer to Figure 4.6).
- Inserire una delle chiavi di emergenza fornite nella serratura.
- Turn the key clockwise (or counter-clockwise, depending on the lock) while simultaneously turning the rotary knob on the control panel to the unlock position.
- The safe door will open.
- Remove the key after opening.
6. Operativo
6.1 Opening with Electronic Code
- Enter your personal electronic code (3-8 digits) on the keypad.
- Premere il tasto '#'.
- If the code is correct, a green indicator light will illuminate, and you will hear a beep.
- Within 5 seconds, turn the rotary knob clockwise (or counter-clockwise) to the unlock position and open the safe door.
6.2 Chiusura della cassaforte
- Chiudere bene la porta della cassaforte.
- Turn the rotary knob counter-clockwise (or clockwise) to the lock position. The safe is now secured.
6.3 Using the Anti-Theft Cable
The included metal cable can be used to secure the safe to a fixed object, deterring opportunistic theft.
- Locate the cable attachment point on the safe (refer to Figure 4.4).
- Thread the loop end of the metal cable through a secure, fixed object (e.g., a desk leg, a heavy piece of furniture).
- Attach the other end of the cable to the designated slot on the safe.
- Ensure the cable is taut and the safe cannot be easily moved.
7. Manutenzione
7.1 Sostituzione della batteria
When the batteries are low, the indicator light may flash red or the keypad may not respond. Replace batteries promptly to avoid being locked out.
- Open the safe using either the electronic code or the emergency key.
- Open the battery compartment on the inside of the lid.
- Rimuovere le vecchie batterie e smaltirle in modo responsabile.
- Inserire nuove batterie, assicurandosi della corretta polarità.
- Chiudere il vano batterie.
7.2 Pulizia
Pulisci l'esterno della cassaforte con un panno morbido eamp panno. Non utilizzare detergenti abrasivi o solventi, poiché potrebbero danneggiare la finitura o i componenti elettronici.
8. Risoluzione Dei Problemi
- Safe does not open with electronic code:
- Assicurarsi che le batterie siano installate correttamente e non siano scariche. Sostituirle se necessario.
- Verifica di aver inserito il codice corretto.
- Ensure you press '#' after entering the code and turn the knob within 5 seconds.
- Keypad is unresponsive or indicator light is dim:
- Batteries are likely low. Replace them immediately.
- Safe locks after multiple incorrect attempts:
- The safe may enter a lockout mode after 5 incorrect code entries. Wait for the lockout period to expire (typically a few minutes) or use the emergency key to open.
- La chiave di emergenza non funziona:
- Ensure the key is fully inserted and turned correctly while simultaneously operating the rotary knob.
9. Specifiche
- Modello: 1608-02 Anno di costruzione: XNUMX
- Materiale: Acciaio legato
- Colore: Nero
- Tipo di blocco: Chiave elettronica
- Dimensioni esterne (L x P x A): 33 cm x 29.5 cm x 7.5 cm (13.0 pollici x 11.6 pollici x 3.0 pollici)
- Dimensioni interne (L x P x A): 30 cm x 22.5 cm x 5.5 cm (11.8 pollici x 8.9 pollici x 2.2 pollici)
- Peso: 1.9 kg (4.19 libbre)
- Compatibilità dei documenti: A4 format
- Caratteristiche speciali: Portable, Anti-theft protection (via cable), Carrying handle
10. Garanzia e supporto
HMF products are manufactured to high-quality standards. For warranty information or technical support, please refer to the contact details provided at the point of purchase or visit the official HMF websito. Conservare la prova d'acquisto per eventuali reclami in garanzia.