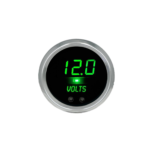
Intellitronix M8009B LED Digital Clock Installation Guide
Always disconnect the battery before attempting any electrical work on your vehicle.*
WIRING INSTRUCTIONS
Note: Automotive circuit connectors are the preferred method of connecting wires. However, you may solder if you prefer.
Ground – Black Connect directly to the engine block.
Power – Red Connect to a switched +12V source, such as the ignition.
Memory – Pink Connect directly to the battery to retain the time when the ignition is shut off.
Dimmer – Purple Connect to the parking lights to dim the LEDs 50% when the headlights are on. However, do not connect to the headlight rheostat control wire; the dimming feature will not work properly.
Once the gauge is wired in, program the time with the two separate push buttons for hours and minutes
Documents / Resources
 | Intellitronix M8009B LED Digital Clock [pdf] Installation Guide M8009B LED Digital Clock, M8009B, LED Digital Clock, Digital Clock, Clock |