1. Okwu mmalite
Thank you for choosing the DazzlingStage 60W 9LED RGBW Stage Wall Wash Bar Light. This manual provides essential information for the safe and effective operation of your lighting fixture. Please read it thoroughly before installation and use, and retain it for future reference.
Nke a stage light bar features 9 high-power RGBW LEDs, offering a wide spectrum of colors and dynamic lighting effects suitable for various events and venues.

Foto 1.1: Ofeview of the DazzlingStage 60W 9LED RGBW Stage Wall Wash Bar Lights in various colors.
2. Ntuziaka nchekwa
- Nchekwa Eletriki: Gbaa mbọ hụ na ọkọnọ ọkụ voltage matches the specifications of the fixture. Always disconnect power before cleaning, servicing, or moving the unit.
- Nwụnye: Install the fixture in a well-ventilated area, away from heat sources. Ensure secure mounting to prevent accidental falls.
- Ọrụ: Do not look directly into the light source when the fixture is operating, as it can cause eye damage. Avoid operating the unit in wet or damp ọnọdụ.
- Nlekọta: Refer all servicing to qualified personnel. Do not attempt to repair the unit yourself.
- Ụmụaka: Debe ngwaọrụ ahụ ka ụmụaka ghara iru ya.
3. Ihe ngwugwu
Mgbe ị na-ewepụ ihe ndị a, biko hụ na ihe niile edepụtara n'okpuru dị ma dịkwa mma:
- DazzlingStage 60W 9LED RGBW Stage Wall Wash Bar Light (x1 per pack)
- Power Cord (x1 per pack)
- Remote Control (x1 per pack)
- Mounting Bracket (x1 per pack)
- Knobs (x2 per pack)
- Black Gaskets (x2 per pack)
- Instruction Manual (x1 per pack)

Foto 3.1: Ọdịnaya etinyere na ngwugwu ngwaahịa.
4. Ngwa ngwaahịa
Familiarize yourself with the main components of the light bar:
- Ụdị LED: 9 RGBW LEDs for color mixing.
- Ogwe njikwa: Features a 4-digit LED display and control buttons (MENU, UP, DOWN, ENTER) for mode selection and parameter adjustment.
- DMX IN/OUT Ports: For connecting to a DMX controller or linking multiple units.
- Ike banye/Ọpụpụ: For power connection and daisy-chaining power to other units.
- Arịọnụ mgbodo: Adjustable bracket for floor standing or truss mounting.
- Ngwa mbelata okpomọkụ: Integrated cooling system to maintain optimal operating temperature.

Image 4.1: Key components and dimensions of the light bar.
5. Ntọala na nwụnye
The DazzlingStage Wall Wash Bar Light offers flexible installation options:
5.1 Ịtinye bracket
Attach the included mounting bracket to the light bar using the provided knobs and gaskets. Ensure the bracket is securely fastened.
5.2 Nhọrọ ntinye
- Iguzo n'ala: The bracket allows the light bar to stand upright on a flat surface. Adjust the angle as needed.
- Truss Mounting: Jiri cl kwesịrị ekwesịamps (not included) to attach the bracket to a lighting truss. Ensure the truss and clamps can support the weight of the fixture.
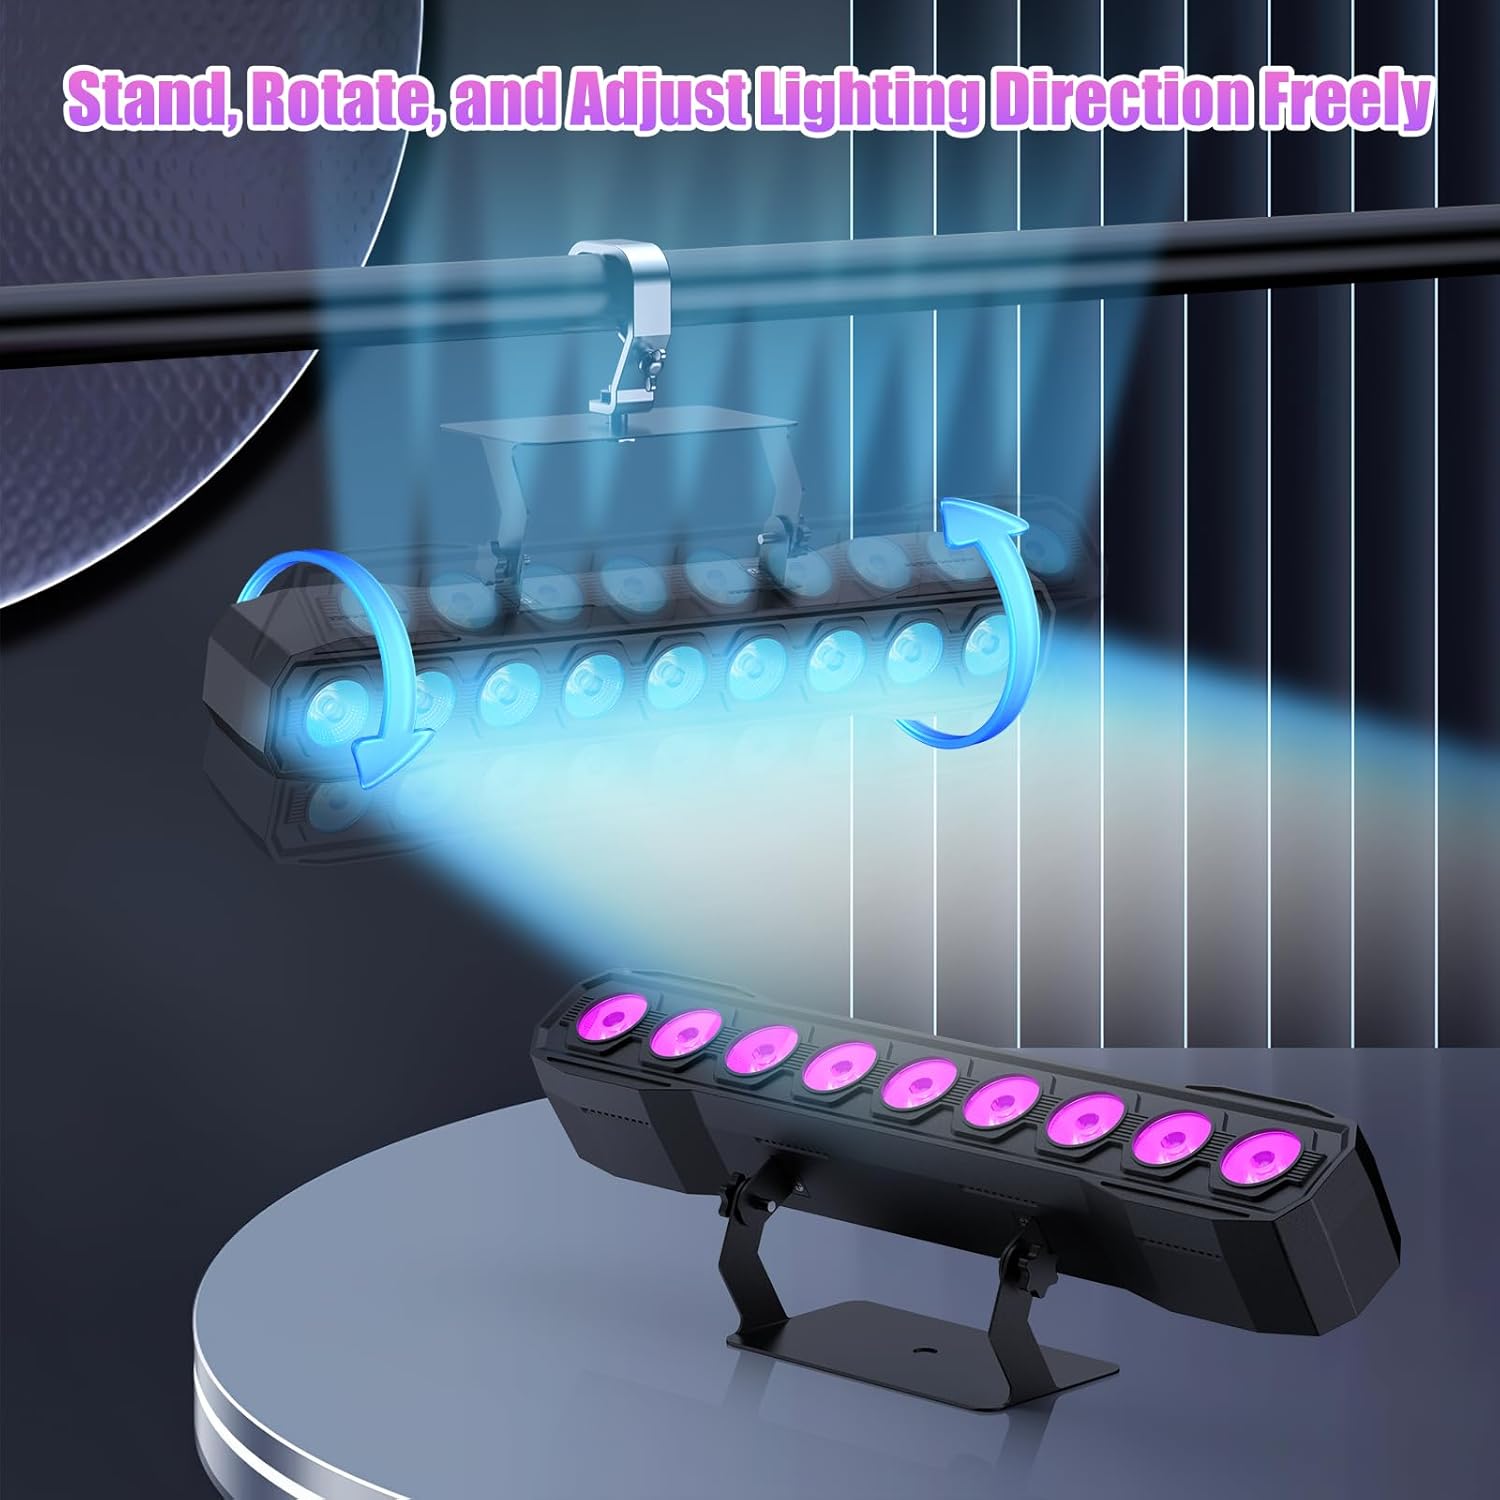
Image 5.1: Illustration of mounting and angle adjustment options.
5.3 Njikọ ike
Connect the power cord to the Power IN port on the back of the fixture and then to a suitable power outlet. Multiple units can be daisy-chained using the Power OUT port to simplify wiring for larger setups.
6. Ụdị arụ ọrụ
The DazzlingStage Wall Wash Bar Light supports several control modes:
- Njikwa DMX512: For professional control via a DMX console.
- Nchekwa onwe na ọnọdụ: Usoro ọkụ e mere tupu oge eruo.
- Sound-Activated Control: Lights react to ambient sound.
- Njikwa anya: Convenient wireless control using the included remote.
- Ụkpụrụ Nna-ukwu: Link multiple units where one acts as a master and others as slaves, synchronizing effects.
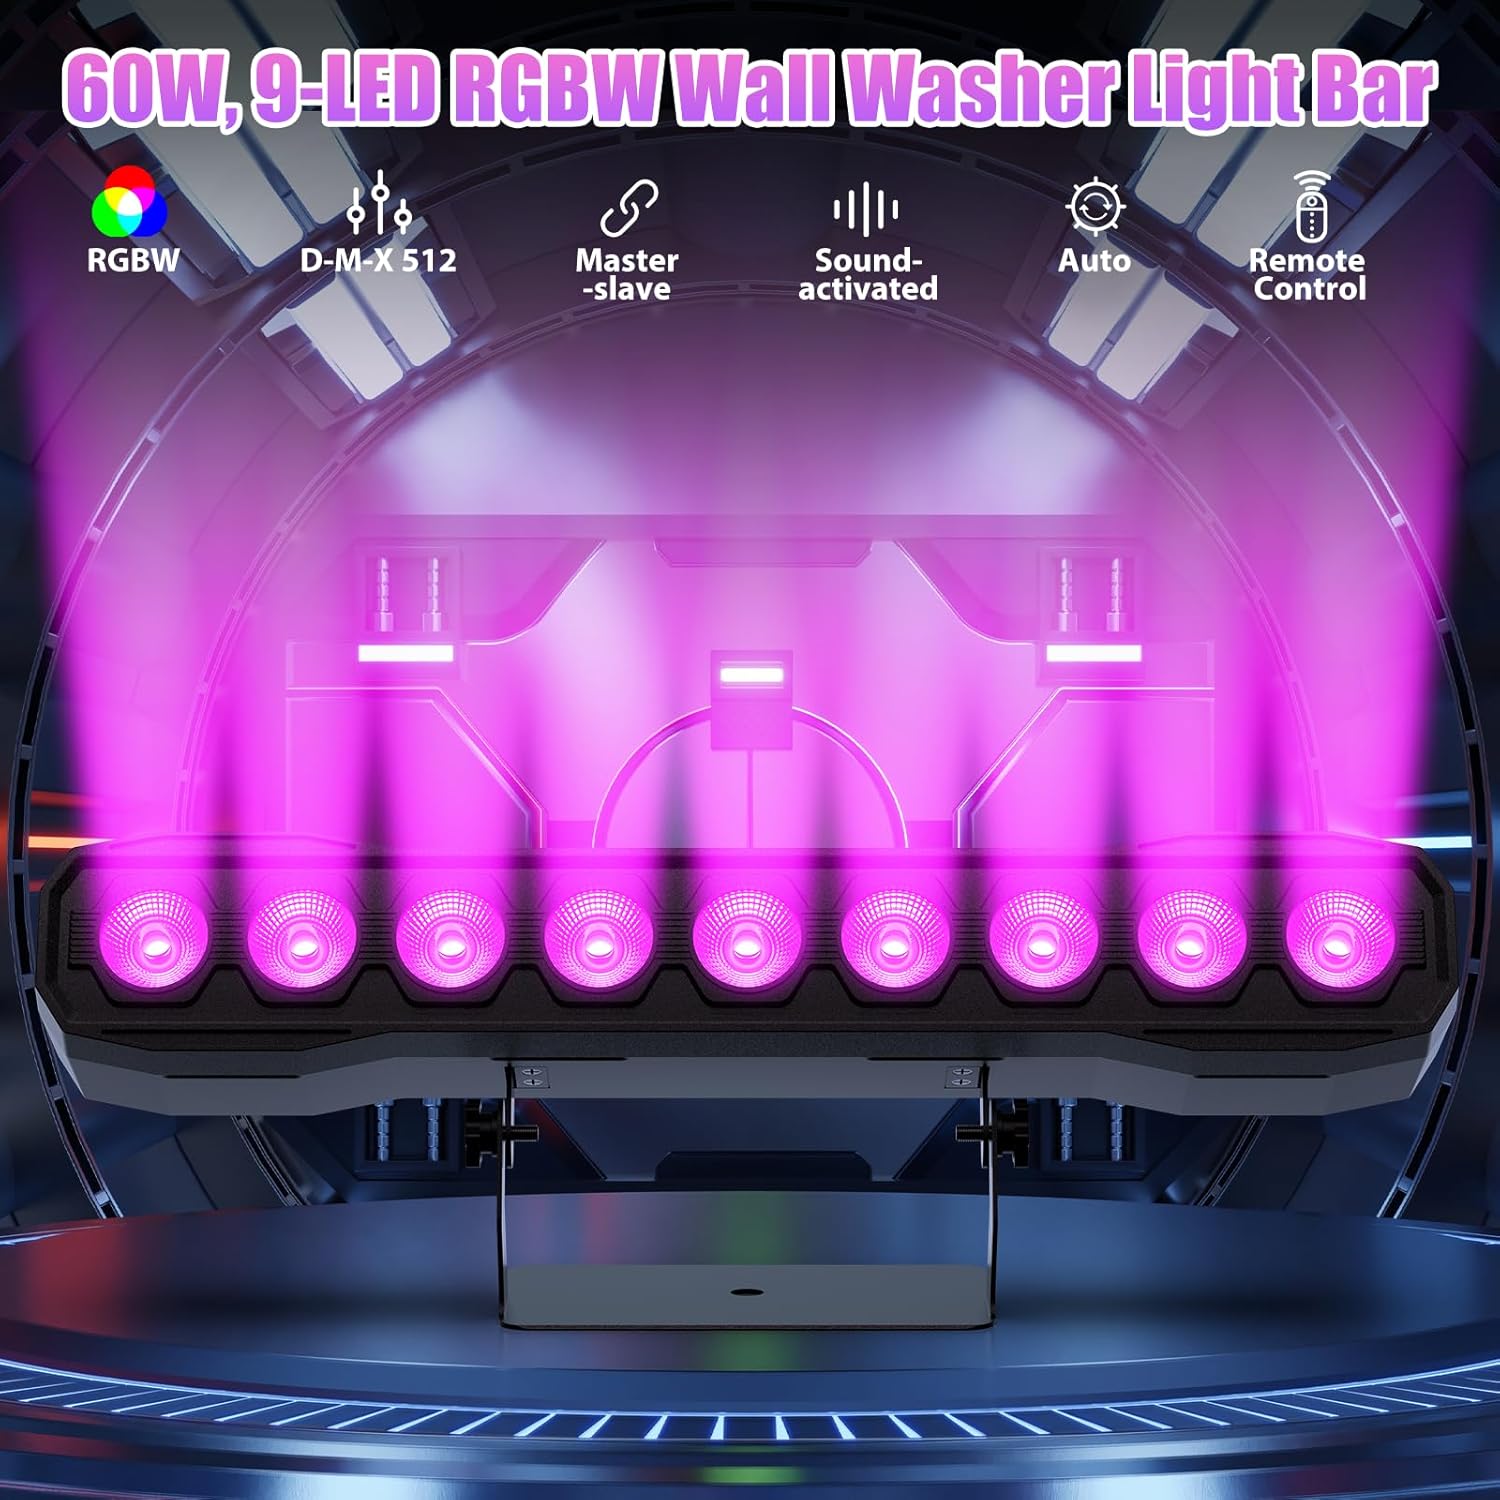
Foto 6.1: Ofeview of available control modes.
6.1 Display Panel Operation
Use the buttons on the back of the fixture to navigate the menu and select modes:
- NchNhr: Na-eme okirikiri site na nhọrọ menu isi.
- Elu/ala: Adjusts values or navigates sub-menus.
- Tinye: Na-akwado nhọrọ.
6.2 Mmetụta ọkụ
The fixture supports various dynamic effects:
- Ngwakọta agba: Over 16.7 million color combinations with 0-100% linear dimming.
- Okpokoro: Flashing effect.
- wuo: Instant color changes.
- gbadaa: Smooth transitions between colors.
- Pulse: Gradual changing effects.
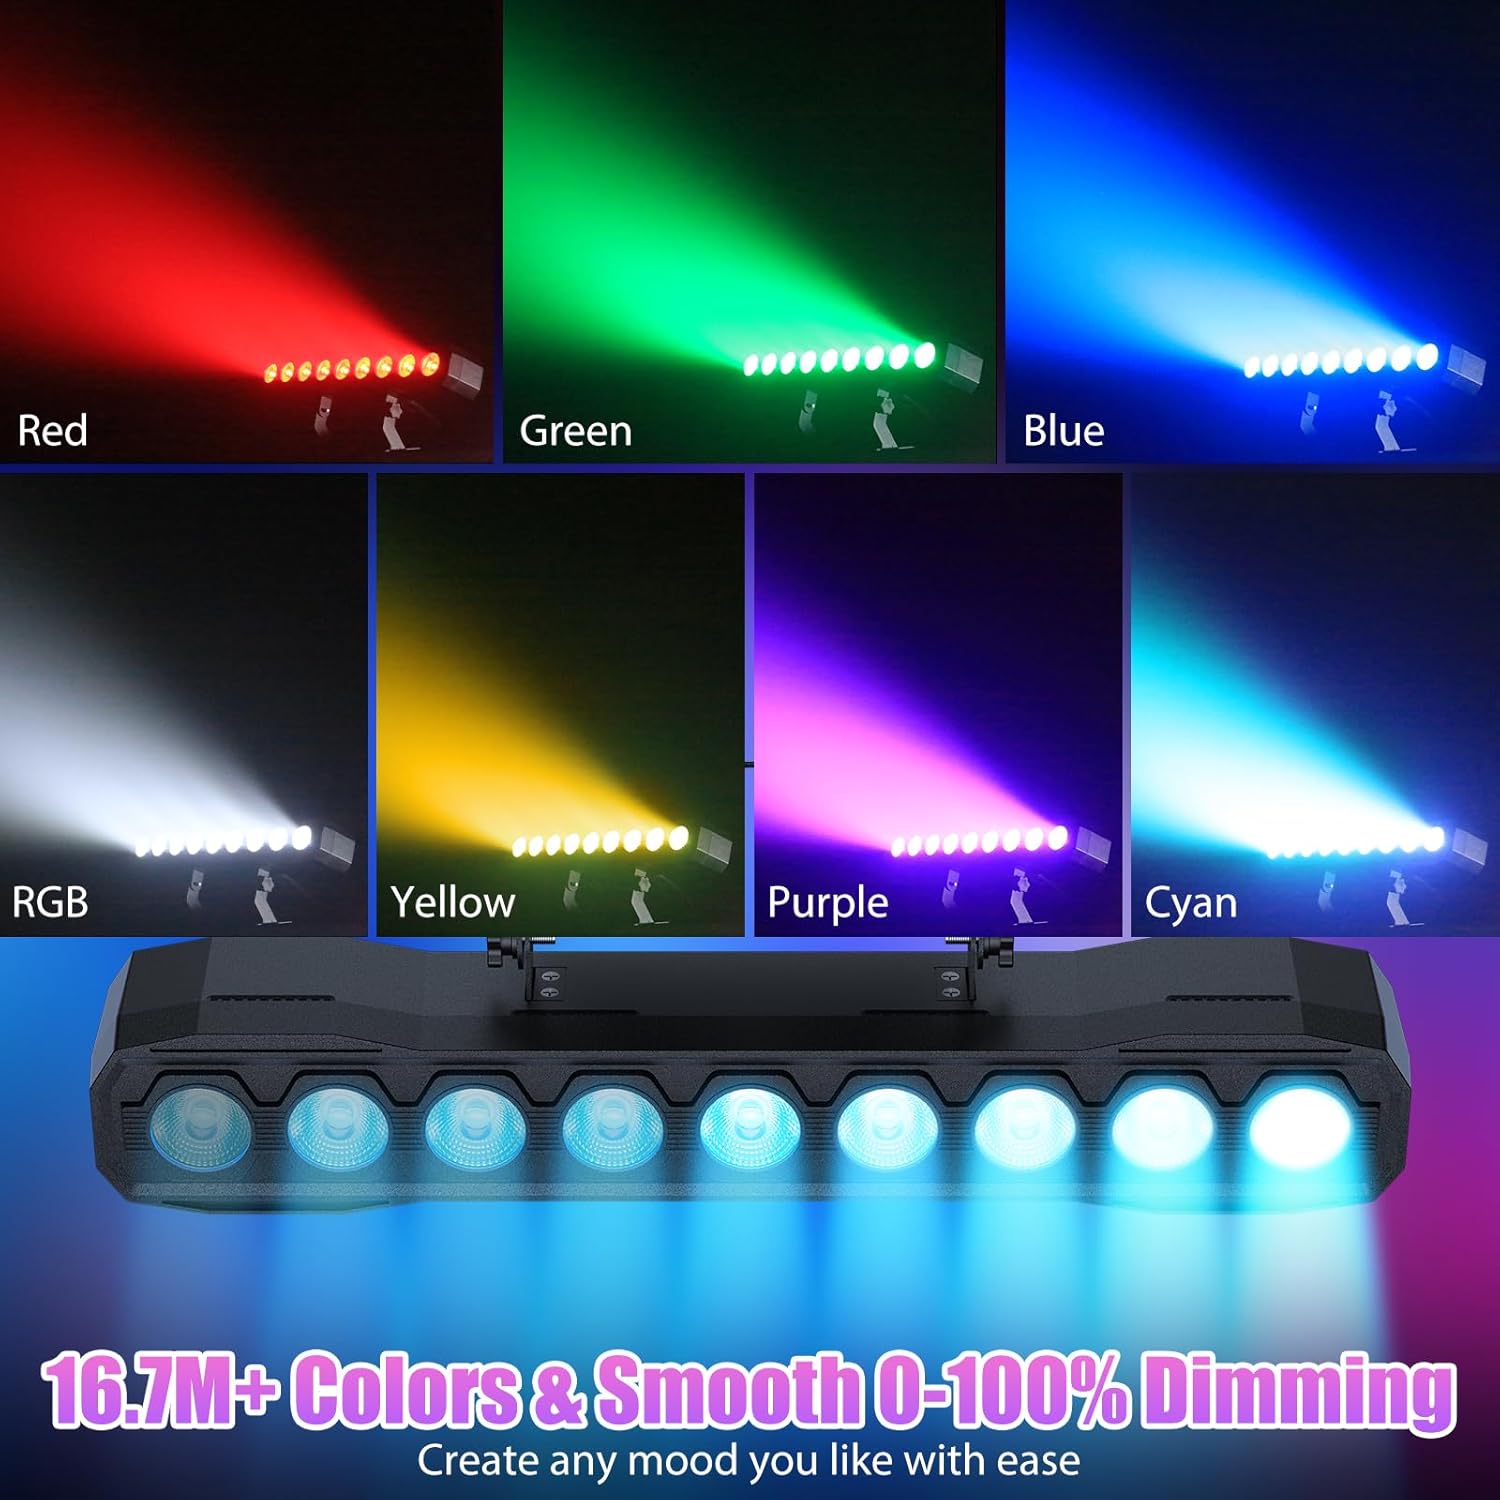
Foto 6.2: Ọpụamples of color mixing and dimming capabilities.

Image 6.3: Visual representation of Strobe, Jump, Fade, and Pulse effects.
7. Ọrụ njikwa anya
The included remote control provides convenient access to various functions:
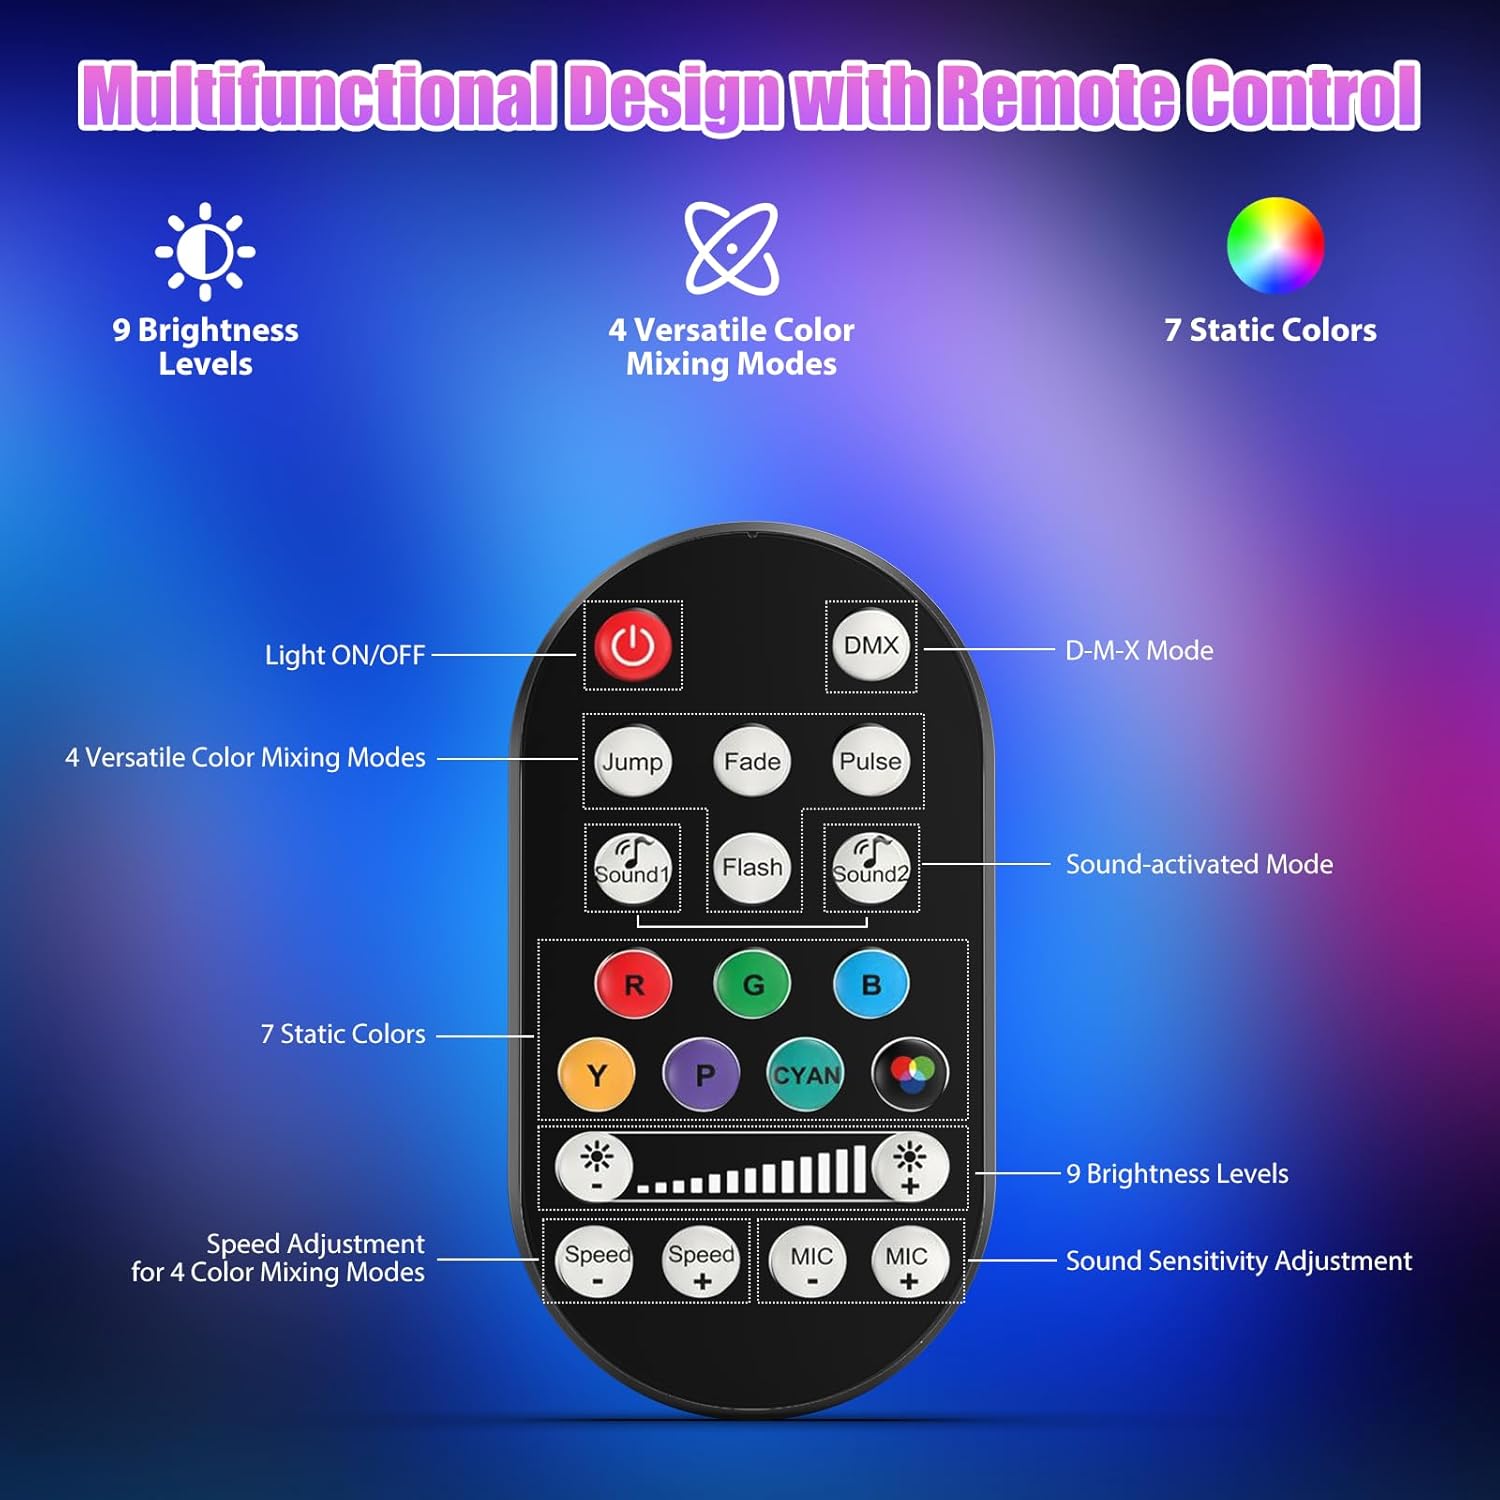
Image 7.1: Remote control layout and functions.
- Gbanyụọ/ Gbanyụọ: Na-agbanye unit ahụ ma ọ bụ gbanyụọ.
- DMX: Activates DMX control mode.
- Jump, Fade, Pulse, Flash: Selects different color mixing modes.
- Sound1, Sound2: Activates sound-activated modes with different sensitivities.
- R, G, B, Y, P, Cyan, White: Selects static colors.
- Ọkwa ihie: Adjusts the overall intensity of the light (9 levels).
- Ọsọ +/-: Adjusts the speed of dynamic effects.
- MIC +/-: Adjusts the sound sensitivity for sound-activated modes (15 levels).
8. Njikwa DMX512
For advanced control, connect the fixture to a DMX512 controller. The light bar typically uses 4 or 8 DMX channels. Refer to the display panel for DMX address setting and channel assignments.
8.1 DMX Ntọala adreesị
Use the MENU, UP, DOWN, and ENTER buttons on the fixture's display panel to set the DMX starting address. The display will show 'AXXX' where XXX is the address (e.g., A001).
8.2 DMX Channel Functions (Example - 8 Channel Mode)
| Ọwa | Ọrụ | Oke ọnụ ahịa | Nkọwa |
|---|---|---|---|
| CH1 | Nna-ukwu Dimmer | 0-255 | Nchapụta zuru oke (0% ruo 100%) |
| CH2 | Uhie Uhie | 0-255 | Red LED brightness (0% to 100%) |
| CH3 | Green ike | 0-255 | Green LED brightness (0% to 100%) |
| CH4 | Acha anụnụ anụnụ | 0-255 | Blue LED brightness (0% to 100%) |
| CH5 | Ike ọcha | 0-255 | White LED brightness (0% to 100%) |
| CH6 | Strobe/Effect | 0-255 | 0-10: No function; 11-255: Strobe speed (slow to fast) |
| CH7 | Nchekwa onwe Mmemme | 0-255 | Selects and controls speed of built-in auto programs |
| CH8 | Na-ada ụda | 0-255 | Activates sound mode and adjusts sensitivity |
Tebụl 8.1: Ọpụample DMX Channel Functions (may vary slightly by firmware version).
9. Nlekọta
Regular maintenance ensures optimal performance and extends the lifespan of your fixture.
- Nhicha: Periodically clean the lens and housing with a soft, lint-free cloth. Do not use abrasive cleaners or solvents. Ensure the fixture is powered off and cool before cleaning.
- Nyocha: Regularly check power cables, DMX cables, and mounting hardware for any signs of wear or damage. Replace damaged components immediately.
- Nchekwa: When not in use for extended periods, store the fixture in a dry, dust-free environment.
10. Nchọpụta nsogbu
Ọ bụrụ na ị na-enwe nsogbu, rụtụ aka na nsogbu ndị a na-ahụkarị na ngwọta ndị a:
| Nsogbu | Ihe nwere ike ime | Ngwọta |
|---|---|---|
| Enweghị ike | Power cable disconnected; No power from outlet; Blown fuse | Check power cable connection; Test outlet with another device; Replace fuse if necessary |
| Enweghị mmepụta ọkụ | Dimmer channel at 0%; Incorrect mode selected; DMX signal issue | Increase dimmer level; Select desired operating mode; Check DMX cable and address settings |
| Incorrect colors/effects | Incorrect DMX channel values; Remote control interference | Verify DMX channel settings; Ensure remote is pointed directly at the sensor; Check for other IR interference |
| Ụdị agbanyere ụda anaghị arụ ọrụ | Microphone sensitivity too low; No sound input | Increase MIC sensitivity via remote or display; Ensure sufficient sound is present near the fixture |
| Fixture ikpo oke ọkụ | Poor ventilation; Blocked heat sink | Ensure adequate airflow around the unit; Clean any dust or debris from the heat sink fins |
11. Nkọwapụta
| Njirimara | Nkọwa |
|---|---|
| Ụdị | DazzlingStage |
| Nọmba nlereanya | ZQ06190 |
| Isi Iyi Ìhè | 9 x 60W RGBW LEDs |
| Ịgwakọta agba | RGBW 4-in-1, 16.7 million colors |
| Na-ebelata | 0-100% eletrọnịkị ahịrị n'ahịrị |
| Angle Beam | Ogologo akụkụ 35° |
| Ụdị njikwa | DMX512, Auto, Sound-Activated, Remote Control, Master-Slave |
| Ọwa DMX | 4 or 8 Channels (selectable) |
| Ngosipụta | Ngosipụta 4-nọmba LED |
| Ihe onwunwe | Acrylonitrile Butadiene Styrene (ABS) |
| Akụkụ ngwaahịa | 18.1 x 5.5 x 5.1 sentimita (46 x 14 x 13 cm) |
| Ibu Ibu | Ihe ruru. 1.98 lbs (0.9 n'arọ) |
| Ntinye ike | AC 100-240V, 50/60Hz |
| Onye nrụpụta | Shenzhen Zhuoqiong Technology Co., Ltd. |
12. Akwụkwọ ikike na nkwado
DazzlingStage products are designed for reliability and performance. For warranty information, please refer to the terms and conditions provided at the time of purchase or contact your retailer.
If you require technical assistance or have questions not covered in this manual, please contact DazzlingStage customer support through the retailer's platform or the official brand website. Please have your model number (ZQ06190) and purchase details ready when contacting support.