
1. Okwu mmalite
This manual provides detailed instructions for the installation, operation, and maintenance of your Fuers 8-Channel 5MP H.265+ Hybrid Security DVR Recorder. This DVR system is designed to support various camera types, including TVI, AHD, CVBS, CVI, XVI, and IP cameras, offering a versatile surveillance solution. It features advanced H.265+ video compression, AI human detection, and remote access capabilities.
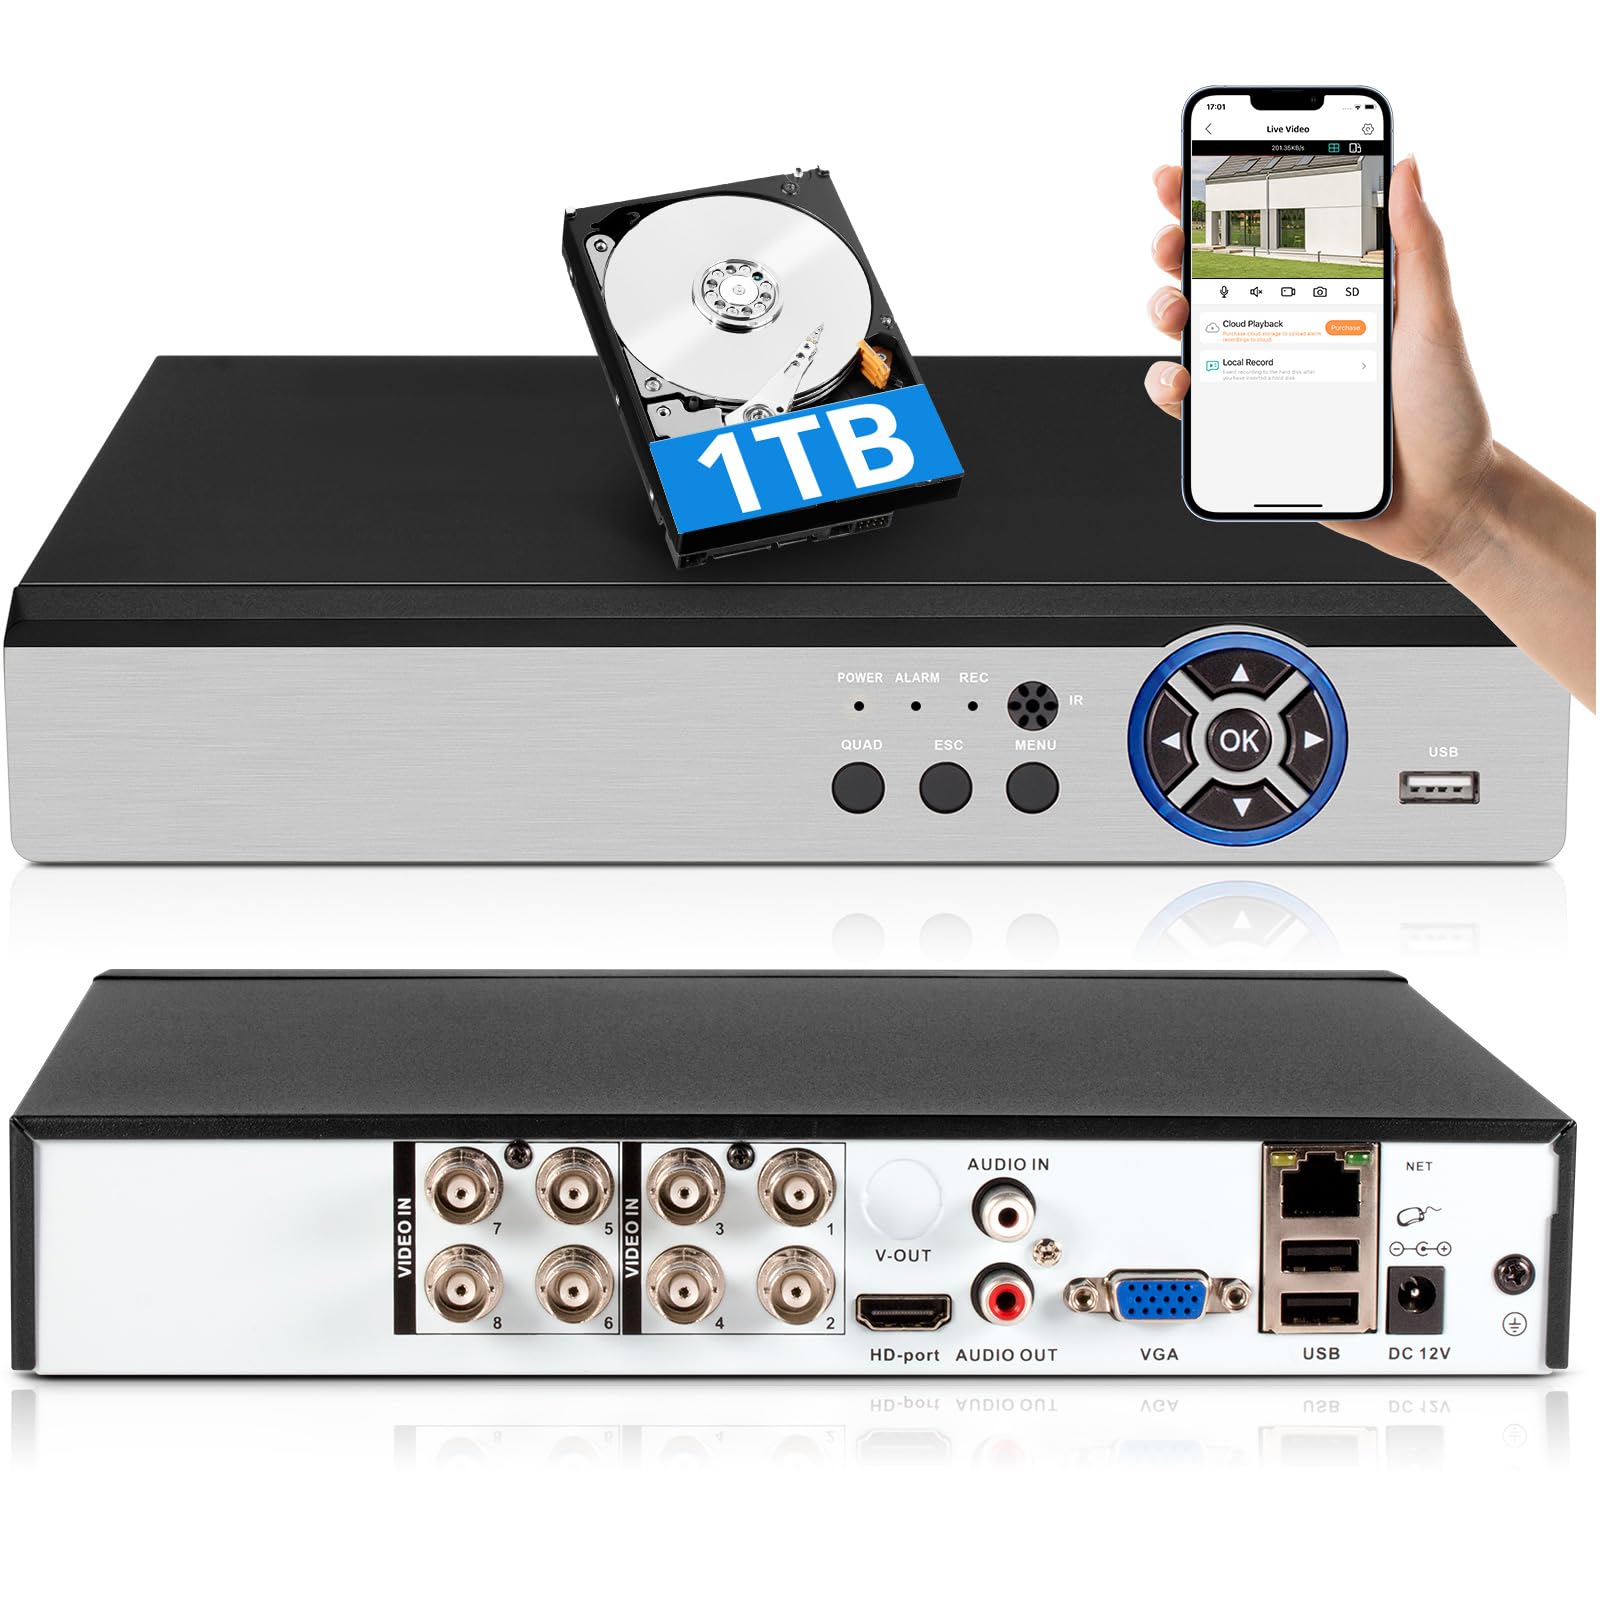
Image: The Fuers 8-Channel 5MP H.265+ Hybrid Security DVR Recorder unit.
2. Kedu ihe dị na Igbe ahụ
Biko chọpụta na agụnyere ihe niile edepụtara n'okpuru na ngwugwu gị:
- 1x 5MP 8CH DVR
- 1x 1TB Hard Drive (Pre-installed on DVR)
- 1x DVR Power Supply
- 1 x eriri USB
- 1x Akwụkwọ ntuziaka onye ọrụ

Image: The DVR unit and its included accessories: 1TB HDD, power supply, USB mouse, and user manual.
3. Akụrụngwa Ngwaahịa
- 5MP 6-in-1 Hybrid DVR: Supports up to 8 TVI, AHD, CVBS, CVI, XVI, Analog cameras and IP cameras.
- Advanced H.265+ Video Format: Offers longer recording times and up to 50% storage space savings compared to H.264 systems.
- Nchọpụta mmadụ AI: Advanced algorithms detect human presence, reducing false alarms.
- Nnweta dị anya: Njikwa na view footage remotely via the iCSee App on smartphones, tablets, and PCs (Google Chrome, Microsoft Edge, Internet Explorer).
- Ọrụ na-anọghị n'ịntanetị: The DVR can function without an internet connection for local recording and viewing. Internet is only required for remote access features.
- Pre-installed 1TB Hard Drive: Ready for immediate recording, expandable up to 14TB via SATA.
- Simultaneous VGA/HDMI Output: Connects to PC monitors and TVs concurrently.

Foto: Ofeview of the DVR's key features including AI Human Detection and remote access.
4. Ntuziaka Nhazi
4.1 Njikọ anụ ahụ
- Jikọọ Nyochaa: Plug the HDMI or VGA cable from your monitor into the corresponding port on the DVR.
- Jikọọ òké USB: Insert the USB mouse into one of the USB ports on the DVR.
- Jikọọ Igwefoto: Connect your analog cameras (TVI, AHD, CVBS, CVI, XVI) to the BNC 'VIDEO IN' ports. For IP cameras, connect them to your network and ensure the DVR is also connected to the same network.
- Connect Network (Optional for Remote Access): Connect an Ethernet cable from the DVR's 'NET' port to your router for remote viewing ike.
- Njikọ Ike: Plug the DVR power supply into the DC 12V input port on the DVR, then plug the adapter into a power outlet.

Foto: Zuru ezu view of the DVR's rear panel showing video input, audio input/output, VGA, HDMI, USB, and network ports.
4.2 Mobile App Setup (iCSee)
To access your DVR remotely, download and configure the iCSee mobile application:
- Budata ngwa: Scan the QR code displayed on your monitor or search for "iCSee" in your device's app store.
- Android: Ụlọ ahịa Google Play
- iOS: Ụlọ ahịa Apple App
- Debanye aha/Nbanye: Open the iCSee app and create a new account or log in if you already have one.
- Tinye ngwaọrụ: In the app, select the option to add a new device. You can typically scan the QR code found in the DVR's menu (Main Menu > Info > Version) to bind the device.
- View Nri dị ndụ: Once the device is added, you can view your camera feeds live from anywhere with an internet connection.

Image: Visual guide for connecting the DVR to a network and setting up the iCSee mobile application for remote viewing.
5. Ntuziaka ọrụ
5.1 Nkpọghachi vidiyo
Maka review edekọ footage:
- Pịa aka nri na ndụ view screen to open the main menu.
- Select "Record" then "Playback".
- Choose the desired channel(s) and date from the calendar.
- Click "Start Playback" to view ihe ndekọ.
Video: Demonstration of DVR video playback settings and navigation.
5.2 Nleba anya anya
After completing the mobile app setup (Section 4.2), you can monitor your surveillance system from any location with internet access. The iCSee app allows for live viewing, playback of recorded footage, and receiving alerts.
Vidiyo: Ofeview of the H.265+ 5MP 8 Channel CCTV DVR Recorder with 1TB HDD, demonstrating its features and remote access capabilities.
5.3 Nchọpụta na Ịdọ Aka Ná Ntị
The DVR supports customizable motion detection zones and AI human detection to minimize false alarms. When motion is detected, the system can send real-time app notifications and email alerts with snapshots.

Image: Illustration of AI human detection and the alert notification system.
6. Nlekọta
- Nhicha mgbe niile: Keep the DVR unit free from dust and debris to ensure proper ventilation. Use a soft, dry cloth for cleaning.
- Mmelite femụwe: Lelee nke onye nrụpụta oge ụfọdụ websaịtị maka mmelite firmware iji hụ na arụmọrụ na nchekwa kacha mma.
- Hard Drive Management: The DVR features automatic overwrite functionality, ensuring continuous recording by replacing older footage with new. Regularly back up important footage to external storage if needed.
- Nchekwa okwuntughe: Use strong, unique passwords for your DVR and mobile app accounts. Change passwords regularly.
7. Nchọpụta nsogbu
| Nsogbu | Ihe nwere ike ime | Ngwọta |
|---|---|---|
| Enweghị ngosipụta vidiyo na ihe nlele | Njikọ eriri dị larịị, isi mmalite ntinye ezighi ezi na ihe nlele, DVR anaghị agba ọkụ. | Check HDMI/VGA cable connections. Ensure monitor input source matches. Verify DVR power. |
| Enweghị ike ịnweta DVR site na anya | No internet connection, incorrect app settings, firewall issues. | Ensure DVR is connected to the internet. Verify app login details and device binding. Check router/firewall settings. |
| Enweghị ndekọ | Hard drive full, recording schedule not set, hard drive malfunction. | Check hard drive status and capacity. Configure recording schedule. If HDD is faulty, replace it. |
| Frequent false motion alerts | Sensitive motion detection settings, environmental factors (e.g., moving branches). | Adjust motion detection sensitivity. Configure AI human detection. Define specific detection zones to exclude irrelevant areas. |
If you encounter issues not covered here, please refer to the comprehensive user manual included in your package or contact Fuers customer support.
8. Nkọwapụta
- Nọmba nlereanya: A6908-1TB
- Akụkụ ngwaahịa: 9.84 x 8.26 x 1.57 sentimita asatọ
- Ibu ihe: 3.72 pound
- Teknụzụ Njikọta: HDMI, USB, VGA, Ethernet
- Ngwa dakọtara: Analog Cameras (TVI, AHD, CVBS, CVI, XVI), IP Cameras, Smartphone, Tablet, Computer
- Ike Nchekwa ebe nchekwa: 1 TB (pre-installed), expandable up to 14 TB
- Mkpakọ vidiyo: H.265+
- Ọwa: 8-Channel Analog, expandable with IP channels
- Onye nrụpụta: Ọkụ
9. Akwụkwọ ikike na nkwado
For warranty information and technical support, please refer to the warranty card included in your product packaging or visit the official Fuers website. You may also contact the seller, MBANGDE-COM, for assistance with your purchase.