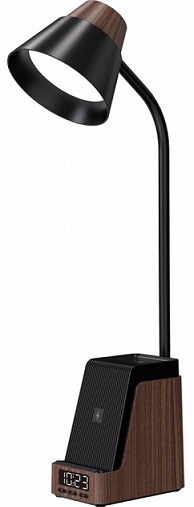
Immax 08999L IDEAL LED Table Lamp
Product Information
The Immax IDEAL LED table lamp is a versatile lighting solution that also features a multifunctional QI charging capability. It is designed in the Czech Republic and manufactured in China by IMMAX. The lamp provides efficient LED lighting and serves as a convenient charging station for Qi-enabled devices.
Product Usage Instructions
Set up
- Place the Immax IDEAL LED table lamp on a stable surface near a power outlet.
- Connect the lamp to the power source using the provided power adapter.
Lighting
To turn on the LED desk light, locate the power button, usually on the base or neck of the lamp. Press the button to toggle the light on or off. Adjust the brightness level if applicable using the corresponding controls.
Charging
The QI charging feature allows you to charge compatible devices wirelessly. Simply place your QI-enabled device on the designated charging area of the lamp to initiate charging. Ensure proper alignment for efficient charging.
- Before using this product, please read and follow the instructions and recommendations provided carefully. Keep them for future reference.
- For safety reasons and to avoid invalidating the warranty, do not use the product inconsistently with these instructions or for purposes other than those specified.
- Please note that the images in the installation manual are for reference only. The product image may differ from the actual product. For an accurate representation of the luminaire and its technical parameters, please refer to the label on the packaging or the
- product catalogue number on the Immax website: www.immax.cz.
- By purchasing the Immax IDEAL table lamp, you have acquired the best in natural lighting technology.
NOTE: THIS DEVICE IS COMPLETELY ASSEMBLED.
- Remove the lamp from the packaging and place the lamp base (A) on a flat surface.
- Connect the power adapter input (J) to the connector (K) at the bottom rear of the lamp.
- Plug the power adapter (L) into a standard 120 V socket. Note: when you first plug in the lamp and turn on the power, the green indicator lights (S and V) will flash briefly and a beep will sound, indicating that the lamp is properly connected to the power supply.
- The touch switch (B) controls the lamp’s on/off function, LED brightness and colour mode.
- To turn on the main light, lightly touch switch B and follow these steps:
- To turn on the lamp at the first brightness level, press the switch once.
- To turn on the lamp at the second brightness level, press the switch twice.
- To activate the third brightness setting, press the switch three times.
- To turn off the lamp, press the switch four times.
- This lamp offers three colour modes. Press and hold switch (B) for three seconds to cycle through the colour temperature modes: 5000 K, 2700 K and 4000 K.
- The maximum adjustment range of the lamp is shown in diagrams 1 and 2. LIGHTING ANGLE ADJUSTMENT
Adjust the lamp arm to any vertical angle from 0° to 90°, as required for the area to be illuminated. When adjusting the lamp arm, hold the base with one hand to set the correct lighting angle.
Warning: Excessive adjustment or adjustment outside the specified angle range may damage the movable arm.
See the following icon legend for instructions on the various setting functions.
- C – ‘SETTING BUTTON’ – used to set the time, date and alarm.
- D – ‘UP BUTTON’ – Press to increase in setting mode.
- E – ‘DOWN BUTTON’ – Press to decrease in setting mode.
SETTING THE CLOCK
- In normal mode, when the time is displayed, press and hold the ‘Setting Button’ to enter setting mode. Press the ‘Setting Button’ again to make further settings. The setting sequence is: 12-hour or 24-hour mode, hour, minutes.
- Press the C – ‘SETTING BUTTON’ to exit setting mode; the device will automatically return to normal mode after no operation. CALENDAR SETTING:
- Press the ‘SETTING BUTTON’ to display the date. When the date is displayed (e.g. 05 01 for 1 May), press and hold the C button/‘SETTING BUTTON’ to set the date. The setting sequence is: YEAR – MONTH – DAY.
- In normal mode, you can also display the date by pressing the D button (the ‘UP’ button). If the device is not in use, the date will automatically revert to normal mode.
- Press the C button (SETTING BUTTON) to exit the settings, or the device will return to normal mode automatically if it is not in operation.
ALARM SETTING
- Press the C button twice to display A1. When the alarm is displayed, press and hold the C button to set the alarm time.
- The setting order is: HOUR – MINUTES.
- Press the C button (SETTING BUTTON) to exit setting mode. The device will automatically return to normal mode if no action is taken.
- TURNING THE ALARM ON AND OFF:
- To turn the alarm on, press the ‘SETTING BUTTON’ (C) twice to display A1. Press the D button (UP BUTTON) to turn the alarm on or off. When the alarm is on, the two leftmost characters on the display change from ‘–‘ to ‘On’ and the ‘alarm’ icon appears.
- Press the C button to exit setting mode; the alarm will automatically return to normal mode after no activity. When the alarm sounds, press any button to turn it off. The alarm will automatically turn off after 10 minutes if no button is pressed.
- The snooze function is not available.
SETTING THE CLOCK DISPLAY BRIGHTNESS
To adjust the brightness of the clock display, press the ‘DOWN’ button. There are four settings available: OFF, L1, L2 and L3.
Wireless charging instructions:
Wireless charging requires a Qi-certified device. Visit the Wireless Power Consortium website to find out if your device is Qi-certified. The wireless charging area (M) is intended for mobile phones. Wireless charging (N) can be used for headphones.
To charge your device wirelessly, follow these steps:
Place the device face up in the centre of the wireless charging area (M) or (N).
Once the device is centred, the red indicator light (S or V) will light up continuously to show that charging is in progress. The device should also display a message to indicate that charging is in progress.
Check the charge level regularly to determine when the device is fully charged.
NOTE: The product does not display any indication when the device is fully charged.
WARNING! The device may become warm during charging. This is normal and part of the process. Charging times vary depending on the device.
INSTRUCTIONS FOR THE WATCH CHARGING STAND
A wireless watch charger (not included) is required to charge the watch.
Remove the cover (T) and insert the charger cable into the hole on the watch stand (P). Thread the cable so that it fits into the compartment. If the watch charger does not fit securely into the stand, place one of the two included silicone covers over the charger before inserting it into the stand.
Connect the wireless watch charger to the appropriate port (Q or R) using the USB-A or USB-C connector, then replace the cover (T).
Note: check regularly to ensure that the device is fully charged, as the indicator light does not indicate when this has been achieved.
The USB ports (Q) and (R) have a rated voltage of 5 V, 1 A and can be used to charge devices such as smartwatches, tablets and mobile phones. Only one USB port can be used at a time, with priority given to the port that was connected first.
SAFETY WARNING
To reduce the risk of fire, electric shock or personal injury:
- Before handling, turn off the lamp and wait for the lamp head (F) to cool down.
- The LED panel (G) may become hot after several hours of continuous use. Do not touch the LED panel directly.
- Only use the original power cord. Do not use an extension cord or splitter, as this may cause the product to malfunction. If the light starts flashing or making a noise, replace the power supply promptly. Do not connect the adapter contacts to any other metal conductors, as this could damage the product or cause other hazards. Do not use the power cord if it is visibly damaged.
- The light cannot be used at angles greater than 6 degrees. When in use, ensure that the product is placed on a stable surface to prevent it from falling and causing damage.
- Do not modify the plug.
- The LED light cannot be replaced.
- FOR INDOOR USE ONLY.
- Do not expose the product to high temperatures or humidity.
- If you are not using this product for a long time, disconnect the power adapter from the power source.
Note: The important safety instructions in this user manual do not cover all possible conditions and situations that may arise. Remember that all electrical products should be used with caution, care and attention.
BATTERY REPLACEMENT
This lamp uses a CR2032 battery. Refer to the diagram for instructions on how to replace the battery. The battery compartment is located at the base of the lamp (A), inside the battery compartment cover (U).
Removing/inserting the button battery: Use a screwdriver to remove the battery compartment cover (U). Insert the button battery with the ‘+’ side or flat side facing up.
BATTERY SAFETY WARNING:
This product contains a button battery. If swallowed, it can cause serious injury or death in as little as two hours. Seek medical attention.
- Safety instructions for products containing batteries.
- Only use the type of battery specified in the product’s user manual. This lamp uses a CR2032 battery.
- Do not attempt to recharge batteries unless they are specifically marked as rechargeable.
- Do not throw batteries into a fire, disassemble them, or expose them to excessive heat.
- Keep out of reach of children. Risk of swallowing.
- If the battery leaks, replace it immediately and clean the contacts thoroughly.
- If the product stops working, check the batteries and replace them if necessary.
Maintenance and storage
- Remove the batteries if the product is not going to be used for a long time, to prevent electrolyte leakage.
- Store the batteries in a dry place, away from direct sunlight.
- Regularly check that the batteries are not leaking or worn out.
- Disposal of used batteries: Used batteries must not be disposed of with normal household waste. Dispose of them at designated collection points, such as recycling centres or special containers in shops. The crossed-out wheelie bin symbol
- This symbol on batteries or packaging indicates that they are subject to special recycling. By following these instructions, you are helping to protect the environment.
- Disposal of the product: The product must not be disposed of with municipal waste. To dispose of it properly, take it to a designated collection point. ASEKOL: AK-016010, WEEE Reg. No. DE 88927148.
- Cleaning and care:
- The luminaire’s surface does not require any special maintenance. Wipe the surface with a soft cloth or duster.
- Do not expose the product to excessive cleaning and avoid using abrasive or other chemical agents.
IMMAX, Teslova 1179/2, 702 00 Ostrava, EU | www.immax.cz Designed in the Czech Republic, manufactured in China
Product Overview
Read instructions prior to use.

LED Desk Light with Multi Charging Station
Technical parameters
- Material: ABS
- Luminous flux: 800 lm
- Light output: 8 W
- Number of LEDs: 33
- Dimmable – 3 levels
- Wireless charging: 5 W
- USB output: USB: 5 V/1 A
- Color temperature: CCT
- Cool: 5000 ± 280 K
- Warm: 2700±280K
- Cool and warm: 4000±280K
- Color rendering index: >85Ra
- Battery: CR2032 (3V)
- Input power: 12V/2.5 adapter
- Input voltage: AC 220-230 V, 50/60 Hz
FAQ
- Q: How do I know if my device is Qi-enabled?
A: Most modern smartphones and devices that support wireless charging are Qi-enabled. You can also refer to your device’s specifications or manual to confirm its compatibility with QI charging. - Q: Can I use the lamp without connecting it to a power source?
A: No, the Immax IDEAL LED table lamp requires connection to a power source for both lighting functionality and QI charging capabilities.
Documents / Resources
 |
Immax 08999L IDEAL LED Table Lamp [pdf] Instruction Manual 08999L, 08999L IDEAL LED Table Lamp, IDEAL LED Table Lamp, LED Table Lamp, Table Lamp, Lamp |