Perkenalan
Thank you for choosing the OLEVS XBC-G1106GH-HH Men's Chronograph Analog-Digital Watch. This timepiece combines a classic analog display with modern digital functions, including chronograph, alarm, day, and date. This manual provides detailed instructions for setting up and operating your watch to ensure optimal performance and longevity.

Image: The OLEVS XBC-G1106GH-HH watch featuring a black band and black dial, showcasing desainnya yang kokoh.
Produk Selesaiview
Familiarize yourself with the main components and controls of your OLEVS watch.
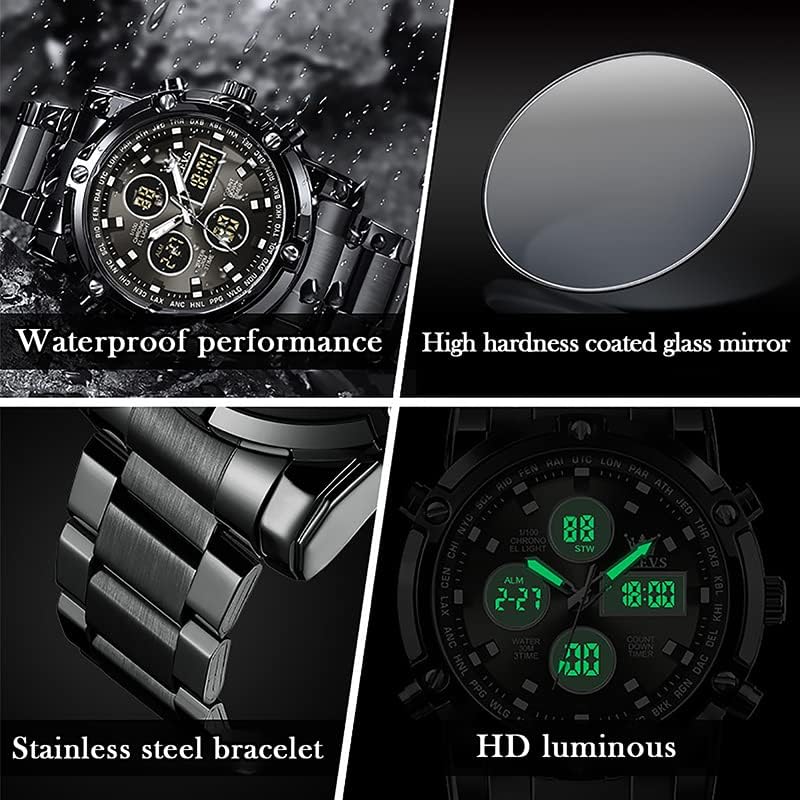
Image: Detailed diagram illustrating the various buttons and digital display functions of the OLEVS watch, including time, date, alarm, and chronograph indicators.
Komponen dan Fungsi Jam Tangan:
- Mahkota: Used for setting analog time (pull out to adjust).
- Buttons (Pushers): Control digital functions such as mode selection, setting adjustments, and chronograph operations.
- Tampilan Analog: Jarum jam, menit, dan detik tradisional.
- Tampilan Digital: Multiple digital screens showing time, date, day, alarm, stopwatch, and countdown timer.
- Lampu latar: Menerangi tampilan digital agar mudah terlihat dalam kondisi cahaya redup.
- Tampilan Minggu: Indicates the current day of the week (MON, TUE, WED, THU, FRI, SAT, SUN).
- Indikator Mode: AL (Alarm mode), ST (Stopwatch mode), TR (Countdown mode).
Pengaturan
1. Pengaturan Waktu Analog
- Tarik kenop yang terletak di sisi kanan jam tangan.
- Putar mahkota untuk menggerakkan jarum jam dan menit ke waktu yang diinginkan.
- Dorong kembali kenop untuk mengamankan pengaturan waktu.
2. Pengaturan Waktu dan Tanggal Digital
The digital display allows for precise time, date, and day settings. Refer to the product overview Gambar untuk lokasi tombol.
- Masuk ke Mode Pengaturan: Press and hold the button labeled "Long press to enter settings" (typically bottom-right) until the digital display starts flashing.
- Pilih Item yang Ingin Disesuaikan: Press the button labeled "Convert hours, minutes when setting week, month, day, etc." (typically top-left) to cycle through the settings: seconds, hours, minutes, year, month, day, and week.
- Sesuaikan Nilai: Use the button labeled "Increment value when setting" (typically top-right) to increase the selected value.
- Konfirmasi dan Keluar: Once all settings are correct, press the button labeled "Long press to enter settings" again to exit the setting mode.
3. Mengatur Alarm
- Masuk ke Mode Alarm: Press the mode button (typically bottom-left, labeled "Convert seconds, timing Functions such as normal time" or similar) until "AL" (Alarm mode) is displayed on the digital screen.
- Masukkan Pengaturan Alarm: Press and hold the button labeled "Long press to enter settings" until the alarm time starts flashing.
- Adjust Alarm Time: Use the button labeled "Convert hours, minutes when setting week, month, day, etc." to select hours or minutes, and the button labeled "Increment value when setting" to adjust the values.
- Aktifkan/Nonaktifkan Alarm: While in Alarm mode (AL), press the button labeled "Alarm on" (typically bottom-right) to toggle the alarm on or off. An alarm icon will appear when activated.
- Pengaturan Alarm Keluar: Press the button labeled "Long press to enter settings" to save and exit.
Fungsi Operasi
1. Menggunakan Kronograf (Stopwatch)
Fungsi kronograf memungkinkan Anda untuk mengukur waktu yang telah berlalu.
- Masuk ke Mode Stopwatch: Press the mode button (typically bottom-left) until "ST" (Stopwatch mode) is displayed.
- Mulai/Berhenti: Press the button labeled "Convert seconds, timing functions such as normal time" (typically bottom-left) to start the stopwatch. Press it again to stop.
- Atur ulang: While the stopwatch is stopped, press the button labeled "Increment value when setting" (typically top-right) to reset the stopwatch to zero.
2. Menggunakan Penghitung Waktu Mundur
The countdown timer allows you to set a specific duration and will alert you when it reaches zero.
- Masuk ke Mode Hitung Mundur: Press the mode button (typically bottom-left) until "TR" (Countdown mode) is displayed.
- Atur Waktu Hitung Mundur: Press and hold the button labeled "Long press to enter settings" until the countdown time flashes. Use the button labeled "Convert hours, minutes when setting week, month, day, etc." to select hours or minutes, and the button labeled "Increment value when setting" to adjust the values. Press the button labeled "Long press to enter settings" again to save.
- Mulai/Berhenti: Press the button labeled "Convert seconds, timing functions such as normal time" to start the countdown. Press it again to pause/resume.
- Atur ulang: While the countdown is paused, press the button labeled "Increment value when setting" to reset to the preset time.
3. Fungsi Lampu Latar
To illuminate the digital display in dark conditions, press the button labeled "Backlit keys" (typically top-left). The backlight will typically stay on for a few seconds.
Pedoman Ketahanan Air
Your OLEVS XBC-G1106GH-HH watch is rated for 30 meters (3ATM) water resistance. This means it is suitable for daily use and can withstand splashes, rain, and brief immersion in water. However, it is bukan suitable for swimming, diving, or showering with hot water, as steam and temperature changes can compromise the seals.
- Tidak operate any buttons or pull out the crown while the watch is wet or submerged.
- Hindari memaparkan jam tangan pada perubahan suhu yang ekstrem.
- If the watch comes into contact with saltwater, rinse it with fresh water and dry thoroughly.

Image: The OLEVS watch demonstrating its water-resistant capabilities, suitable for splashes and rain.
Pemeliharaan
Proper care will extend the life and maintain the appearance of your watch.
- Pembersihan: Bersihkan casing dan tali jam tangan secara teratur dengan kain lembut dan kering. Untuk bahan stainless steel, gunakan kain yang sedikit kering.amp Kain dapat digunakan, diikuti dengan pengeringan segera.
- Hindari Bahan Kimia: Jangan biarkan jam tangan terkena pelarut, deterjen, parfum, atau semprotan kosmetik, karena dapat merusak casing, tali, atau segel.
- Suhu: Hindari memaparkan jam tangan pada suhu ekstrem (di atas 60°C / 140°F atau di bawah 0°C / 32°F) atau perubahan suhu yang tiba-tiba.
- Medan Magnet: Jauhkan jam tangan dari medan magnet yang kuat, karena dapat memengaruhi keakuratan pergerakan kuarsa.
- Penggantian Baterai: When the watch battery runs low, the digital display may dim or the watch may stop. Have the battery replaced by a qualified watch technician to ensure water resistance is maintained.
Penyelesaian Masalah
| Masalah | Kemungkinan Penyebab | Larutan |
|---|---|---|
| Jarum analog tidak bergerak | Baterai habis; Kenop putar terlepas; Masalah mekanis. | Check if crown is pushed in. Replace battery. Contact service if issue persists. |
| Layar digital kosong atau redup. | Baterai habis. | Ganti baterai. |
| Incorrect time/date displayed | Time/date not set correctly; Watch exposed to strong magnetic fields. | Reset time and date according to instructions. Keep watch away from magnets. |
| Tombol tidak merespons | Jamnya basah; Kerusakan internal. | Ensure watch is dry before operating buttons. If issue persists, contact service. |
Spesifikasi
- Merek: OLEVS
- Nomor Model: XBC-G1106GH-HH
- Tipe Tampilan: Analog-Digital
- Pergerakan: Kuarsa
- Sumber Daya: Bertenaga Baterai
- Bahan Kasus: Baja tahan karat
- Bahan Pita: Baja tahan karat
- Kristal: Kayu keras
- Diameter Kasus: 48 Milimeter
- Ketebalan casing: 16 Milimeter
- Lebar Pita: 23 Milimeter
- Kedalaman Tahan Air: 30 Metres (3ATM)
- Tipe Jepitan: Gesper Lipat Tombol Dorong Dengan Pengaman
- Fungsi: Chronograph, LED Backlight, Day, Date, Alarm, Stopwatch, Countdown Timer
Garansi dan Dukungan
For warranty information and customer support, please refer to the documentation provided with your purchase or contact the retailer where you purchased the OLEVS XBC-G1106GH-HH watch. Keep your proof of purchase for any warranty claims.
For further assistance, you may also visit the official OLEVS websitus atau menghubungi departemen layanan pelanggan mereka secara langsung.