Gingko GK08W13
Panduan Pengguna Jam Klik LED Kubus Ginkgo
Model: GK08W13 | Brand: Gingko
1. Pendahuluan
Terima kasih sudah membeliasing the Gingko Cube LED Click Clock. This innovative alarm clock combines elegant design with smart functionality, displaying time, date, and temperature. Its unique sound-activated display ensures a dark room at night, illuminating only when needed. Please read this manual carefully to ensure proper setup and operation of your device.
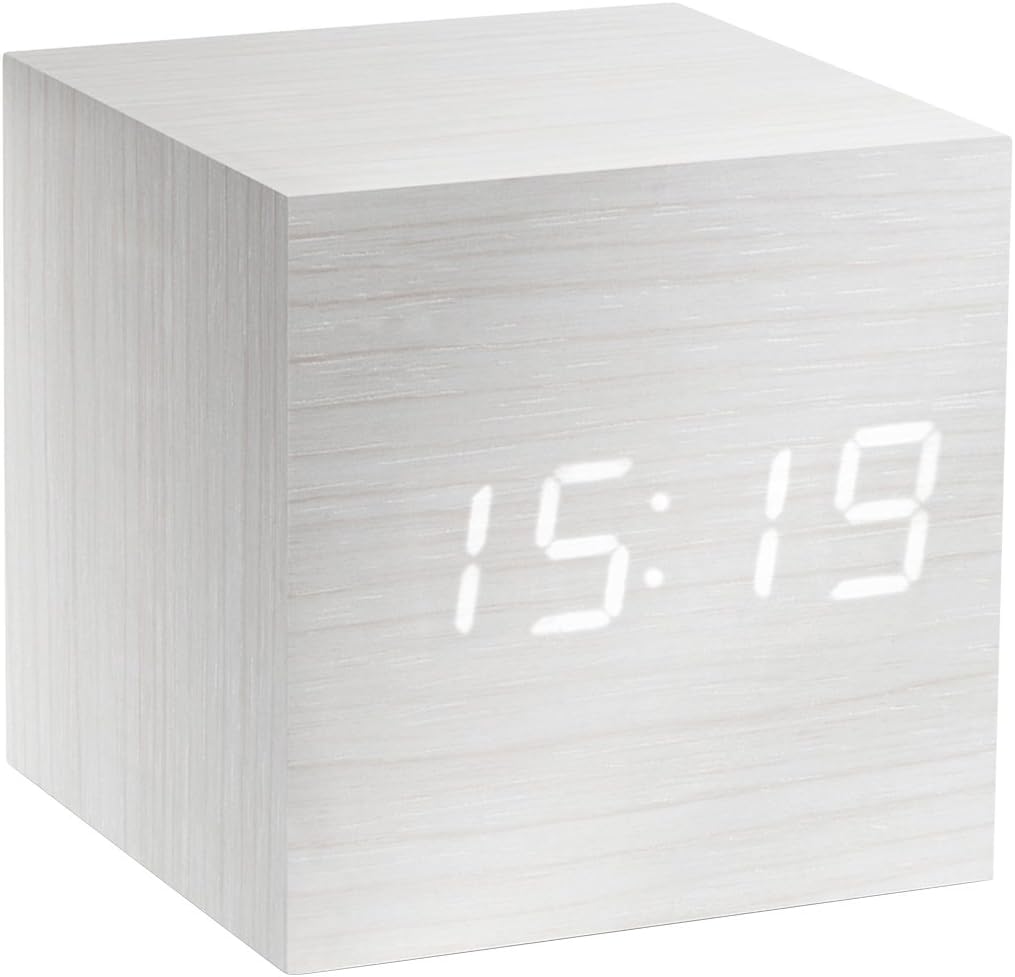
Figure 1: The Gingko Cube LED Click Clock displaying the time 15:19. The clock features a minimalist cube design with a white wood-grain finish and bright white LED digits.
2. Informasi Keselamatan
- Jangan biarkan perangkat terkena air atau kelembapan berlebihan.
- Avoid extreme temperatures, direct sunlight, or heat sources.
- Jangan mencoba membongkar atau memodifikasi perangkat. Ini akan membatalkan garansi.
- Use only the provided USB adapter or compatible power sources.
- Jauhkan dari jangkauan anak-anak.
- Buang baterai secara bertanggung jawab sesuai dengan peraturan setempat.
3. Isi Paket
Harap centang kotak untuk item berikut:
- Gingko Cube LED Click Clock (Model GK08W13)
- USB Power Adapter
- Kabel USB
- Instruksi Manual (dokumen ini)
4. Produk Lebihview
The Gingko Cube LED Click Clock is designed for simplicity and functionality. Its main features include a hidden LED display that appears through the wood-grain finish, and control buttons located on the back panel.

Gambar 2: Belakang view of the Gingko Cube LED Click Clock. This image shows the battery compartment cover removed, revealing slots for three AAA batteries. Above the battery compartment, five small control buttons are visible: SET, UP, DOWN, V/S, and RESET.
4.1 Tombol Kontrol
- MENGATUR: Enters setting mode for time, date, and alarms. Confirms selections.
- UP: Meningkatkan nilai selama pengaturan.
- TURUN: Menurunkan nilai selama pengaturan.
- V/S (Suara/Bunyi): Toggles between sound-activated display mode and permanent display mode.
- SETEL ULANG: Mengatur ulang jam ke pengaturan pabrik.
4.2 Masukan Daya
The clock can be powered via the included USB cable and adapter, or by 3 x AAA batteries (not included). An internal battery is included to retain settings during power outagyaitu.
5. Pengaturan
5.1 Menghidupkan
- Using USB Power: Connect the small end of the USB cable to the DC5V port on the back of the clock. Plug the larger end into the USB power adapter, then plug the adapter into a wall outlet.
- Menggunakan Baterai: Open the battery compartment cover on the back of the clock. Insert 3 x AAA batteries, ensuring correct polarity (+/-). Close the battery compartment cover securely.
Layar akan menyala, menandakan jam tersebut telah dihidupkan.
5.2 Initial Settings (Time, Date, Temperature Format)
Tekan dan tahan tombol MENGATUR button for 3 seconds to enter setting mode. The display will flash, indicating the current setting is ready for adjustment. Use the UP Dan TURUN buttons to change values. Press MENGATUR untuk mengkonfirmasi dan pindah ke pengaturan berikutnya.
- Pengaturan Tahun: Adjust the year (e.g., 2024). Press MENGATUR.
- Pengaturan Bulan: Adjust the month. Press MENGATUR.
- Pengaturan Tanggal: Adjust the day. Press MENGATUR.
- Format 12/24 Jam: Select "12H" or "24H". Press MENGATUR.
- Pengaturan Jam: Adjust the hour. Press MENGATUR.
- Pengaturan Menit: Adjust the minute. Press MENGATUR.
- Satuan suhu: Select "°C" (Celsius) or "°F" (Fahrenheit). Press MENGATUR.
The clock will exit setting mode automatically after a few seconds of inactivity or after the last setting is confirmed.
6. Petunjuk Pengoperasian
6.1 Mode Tampilan (Waktu, Tanggal, Suhu)
The clock can cycle through displaying time, date, and temperature. By default, it will alternate between these displays.

Figure 3: The clock displaying the time 11:43, positioned on a dark desk next to a laptop. This illustrates the clock's compact size and clear LED display in a typical environment.
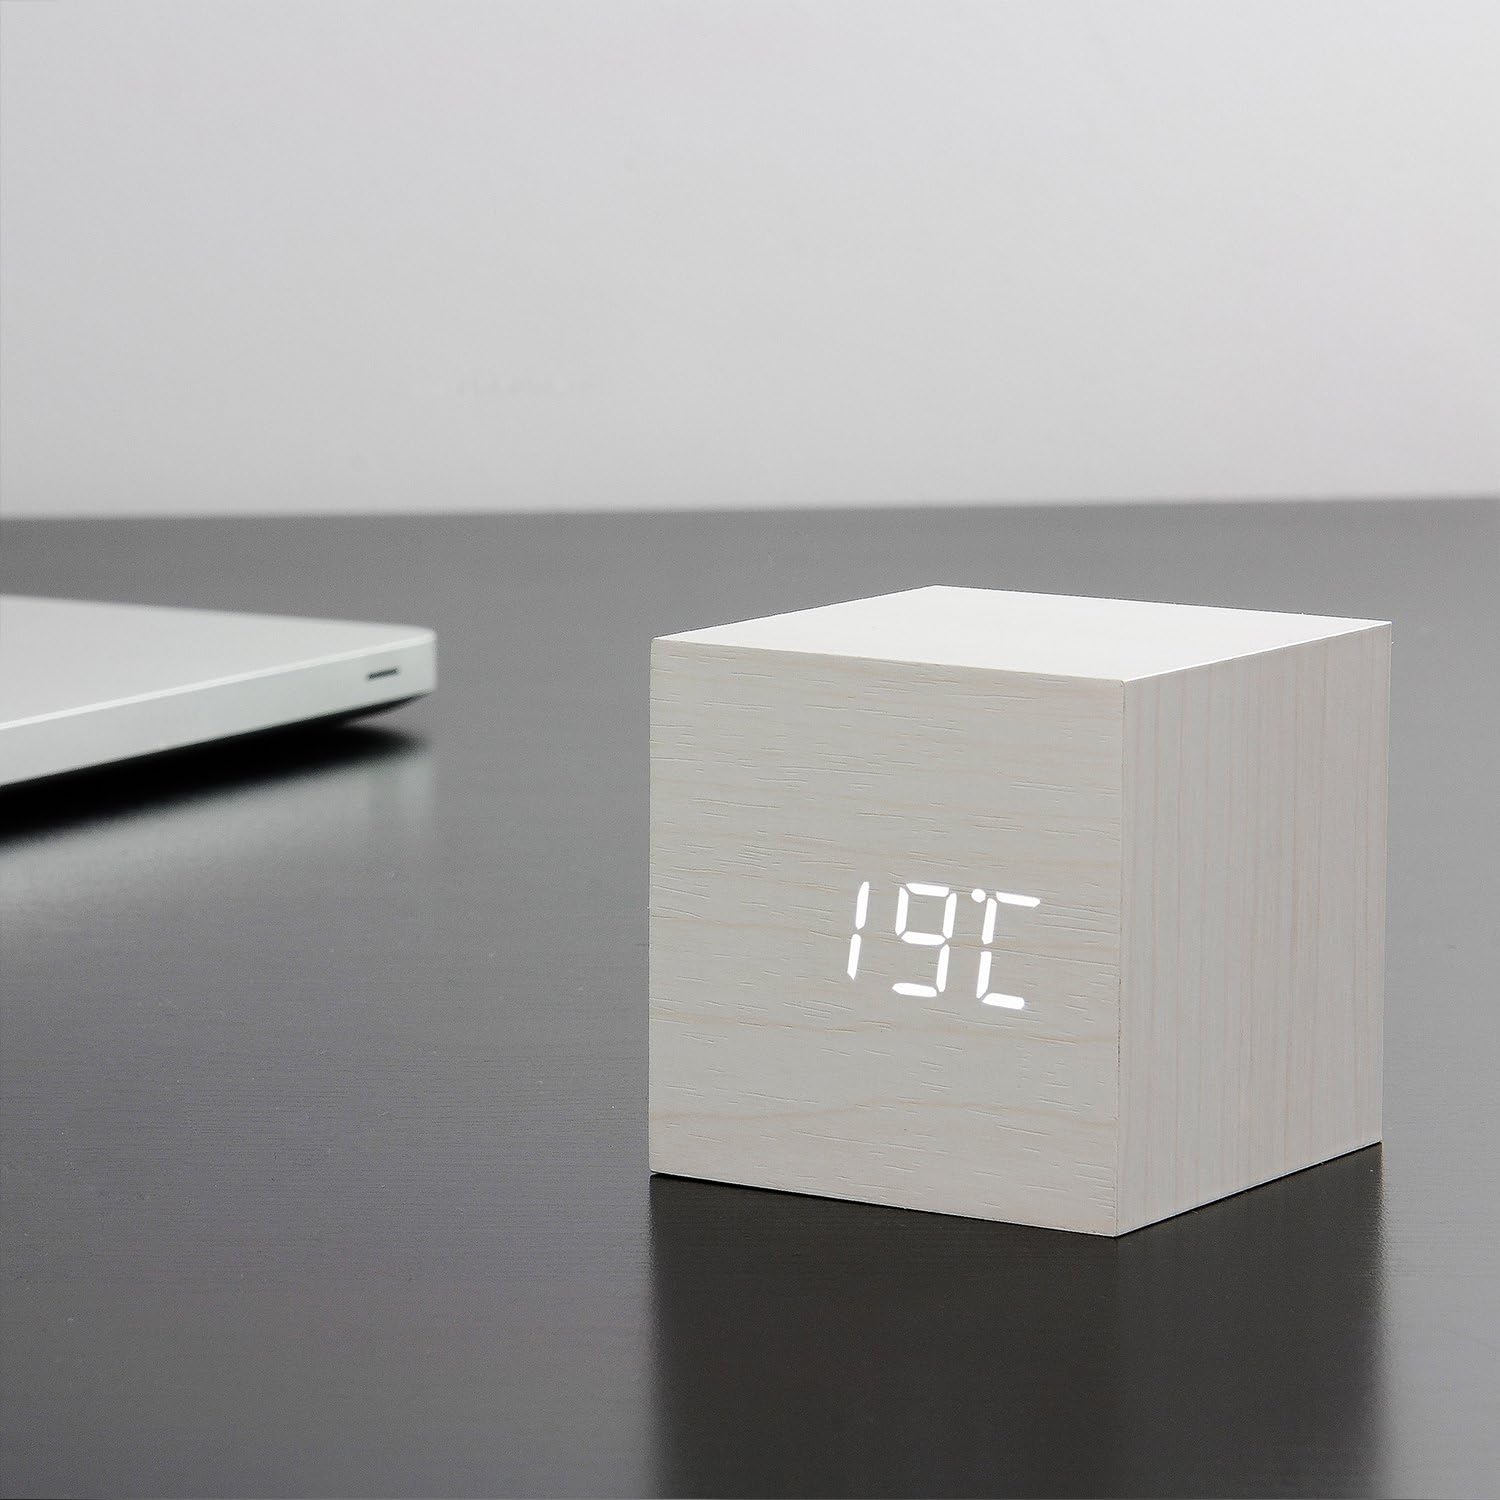
Figure 4: The clock displaying the temperature 19°C, also on a dark desk next to a laptop. This shows the clock's ability to display environmental temperature in addition to time and date.
6.2 Sound Activation (V/S Mode)
The clock features a sound-activated display mode, which conserves power and keeps your room dark. In this mode, the display turns off when the room is quiet and illuminates when a sound (like a clap or tap) is detected.
- Tekan tombol V/S button to toggle between sound-activated display (display turns off after a few seconds of silence) and permanent display (display remains on).
- When in sound-activated mode, a sound above 60dB (e.g., a clap, finger snap, or gentle tap on the clock/surface) will activate the display for approximately 10 seconds.
6.3 Pengaturan Alarm
The clock supports up to three different alarm settings (AL1, AL2, AL3).
- From the normal display mode, short press the MENGATUR button repeatedly until "AL1", "AL2", or "AL3" appears.
- Untuk mengatur alarm, tekan dan tahan tombol MENGATUR button for 3 seconds when the desired alarm (e.g., "AL1") is displayed. The hour digits will flash.
- Menggunakan UP Dan TURUN to set the alarm hour. Press MENGATUR.
- Menggunakan UP Dan TURUN to set the alarm minute. Press MENGATUR.
- The display will show "ON:AL" or "OFF:AL". Use UP or TURUN to toggle the alarm ON or OFF. Press MENGATUR untuk mengonfirmasi.
- Repeat for AL2 and AL3 if desired.
When an alarm sounds, it will last for 1 minute. To stop the alarm, press any button. The alarm will automatically turn off after 1 minute if no button is pressed.
6.4 Fungsi Peredup
The clock features an automatic dimmer function. The display brightness will automatically adjust between brighter (7:00 AM - 6:59 PM) and dimmer (7:00 PM - 6:59 AM) modes to suit ambient light conditions.
7. Pemeliharaan
- Bersihkan permukaan jam dengan kain lembut dan kering. Jangan gunakan pembersih abrasif atau pelarut.
- If using batteries, replace them when the display becomes dim or erratic. Remove batteries if the clock will not be used for an extended period.
8. Penyelesaian masalah
| Masalah | Kemungkinan Penyebab | Larutan |
|---|---|---|
| Layar mati atau redup. | Sound-activated mode is on; low batteries; no power. | Tap the clock or make a sound to activate. Press V/S to switch to permanent display. Replace batteries or ensure USB power is connected. |
| Clock not responding to buttons. | Gangguan perangkat lunak sementara. | Press the RESET button on the back of the clock. Re-enter settings if necessary. |
| Alarm tidak berbunyi. | Alarm is set to OFF; incorrect alarm time. | Check alarm settings (AL1/AL2/AL3) to ensure it is set to ON and the time is correct. |
| Incorrect time/date/temperature. | Settings not correctly configured. | Re-enter setting mode (Section 5.2) and adjust values. |
9. Spesifikasi
| Fitur | Detil |
|---|---|
| Nomor Model | GK08W13 |
| Dimensi (P x L x T) | 68 x 68 x 68 mm (2.68 x 2.68 x 2.68 inci) |
| Berat | 120 gram (0.26 pon) |
| Bahan | Plastik |
| Warna | White / White LED |
| Jenis Tampilan | Lampu LED digital |
| Sumber Daya | USB Cable (DC5V) or 3 x AAA Batteries |
| Fitur | Time, Date, Temperature Display, Sound Activation, 3 Alarm Settings, Dimmer Function, Internal Battery for Settings Retention |
10. Garansi dan Dukungan
Gingko products are designed and manufactured to the highest standards. For warranty information or technical support, please refer to the official Gingko website or contact your retailer. Please have your model number (GK08W13) and purchase details ready when seeking support.
Untuk informasi lebih lanjut, kunjungi: www.gingkodesign.com
Ask a question about this manual
Ask about setup, troubleshooting, compatibility, parts, safety, or missing instructions. Manuals+ will review the question and use this page’s manual context to help answer it.