1. Introdución
This manual provides detailed instructions for the installation, operation, and maintenance of the xTool Intelligent Conveyor Feeder, designed to enhance the capabilities of your xTool P3 80W CO2 Laser Cutter. This accessory enables automatic material feeding, significantly expanding the work area and streamlining large-scale or batch engraving and cutting projects.
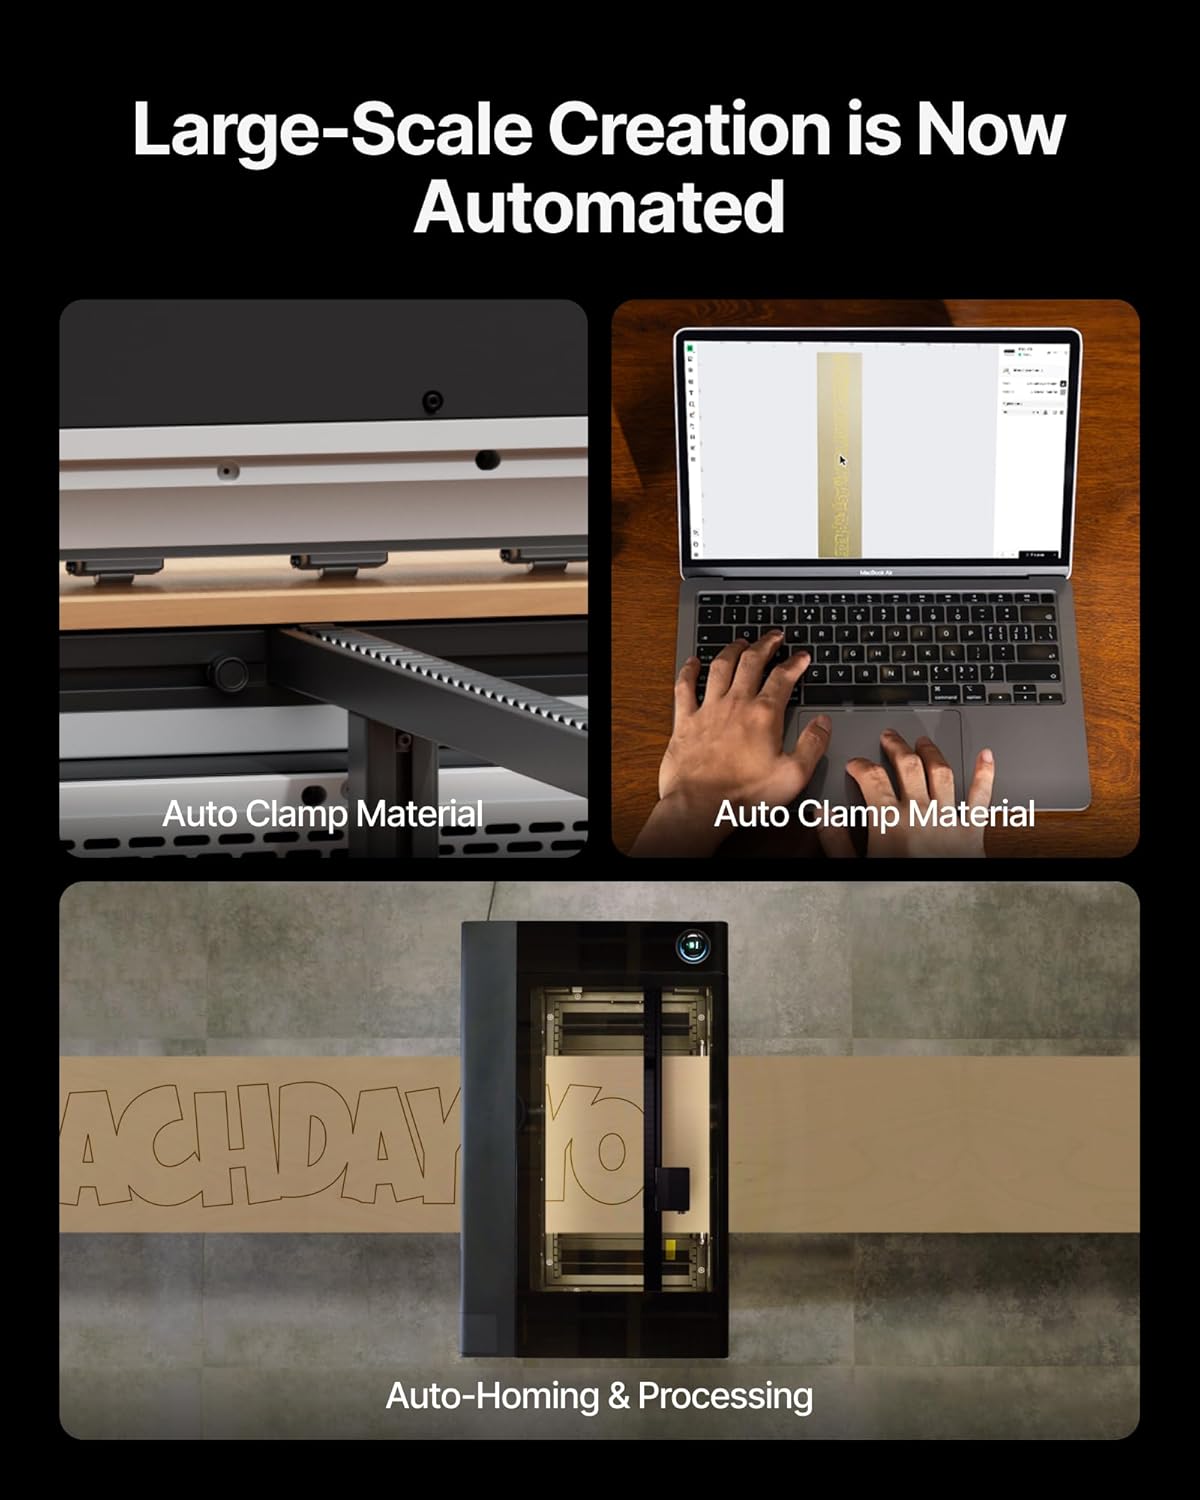
Figure 1.1: xTool Intelligent Conveyor Feeder connected to the xTool P3 laser cutter.
2. Produto rematadoview e Características clave
The xTool Intelligent Conveyor Feeder is engineered to provide an extended and automated workspace for your xTool P3 laser cutter. Its innovative design focuses on efficiency and precision for continuous processing.
Características principais:
- Full-Size Conveyor Preview: Utilizes AI Seamless Tiling Preview to eliminate blind spots and ensure accurate design placement across the entire work area.
- Configuración automatizada: Features automatic material clamping, homing, and preview functions to reduce manual intervention and save time.
- Expanded Work Area: Supports a work area of 24.01" x 51.18" (standard kit) with 3-axis (X+Y+U) motion control, significantly larger than the standard P3 work area.
- Increased Material Thickness: Accommodates materials up to 26mm thick.
- High Processing Speed: Achieves speeds up of to 200mm/s for efficient operation.
- Deseño integrado: Features a one-time installation base and detachable suspended rails, removing the need for additional support tables for standard rail configurations.

Figure 2.1: Automated material handling with auto clamping and auto homing for continuous processing.

Figure 2.2: Key performance metrics including material thickness, processing speed, and work area.
3. Configuración e instalación
The Conveyor Feeder is designed for straightforward integration with your xTool P3. Follow these steps for proper installation.
3.1 Desembalaxe e comprobación de compoñentes
Carefully unpack all components. Verify that all parts listed in the packing list are present and undamaged. Keep packaging materials for future transport or storage.
3.2 Attaching the Conveyor Feeder to xTool P3
- Ensure your xTool P3 laser cutter is powered off and disconnected from the power source.
- Position the Conveyor Feeder base unit securely next to the xTool P3. The integrated design allows for a one-time installation.
- Attach the detachable suspended rails to the main unit. These rails are designed to extend the work area without requiring additional support tables for standard configurations.
- Connect the necessary cables from the Conveyor Feeder to the xTool P3 as indicated in the quick start guide (refer to the specific port labels).

Figure 3.1: Integrated design for convenient and safe operation, showing auto clamping.
3.3 Initial Power-On and Calibration
- Reconnect the xTool P3 to power and turn it on.
- Launch the xTool software. The software should detect the connected Conveyor Feeder.
- Perform initial calibration steps as prompted by the software to ensure proper alignment and functionality of the feeder. This includes automatic homing.
4. Instrucións de funcionamento
The xTool Intelligent Conveyor Feeder simplifies large-scale projects through its automated features.
4.1 Material Loading and Automatic Clamping
- Place your material onto the Conveyor Feeder's input area. Ensure the material is flat and properly aligned with the feeder's guides.
- Initiate the automatic material clamping function through the xTool software. The feeder will automatically secure the material for stable processing.

Figure 4.1: Detail of the automatic clamping mechanism ensuring a smooth and stable material feed.
4.2 AI Seamless Tiling Preview
The Conveyor Feeder integrates with the xTool P3's AI Seamless Tiling Preview feature. This allows you to see a full, accurate preview of your design across the entire extended work area before starting the engraving or cutting process. This eliminates guesswork and ensures precise placement, even for designs larger than the P3's standard bed.

Figure 4.2: Visual representation of the expanded work area provided by the Conveyor Feeder for the xTool P3.

Figura 4.3: Examples of large-scale and batch items that can be processed with the Conveyor Feeder.
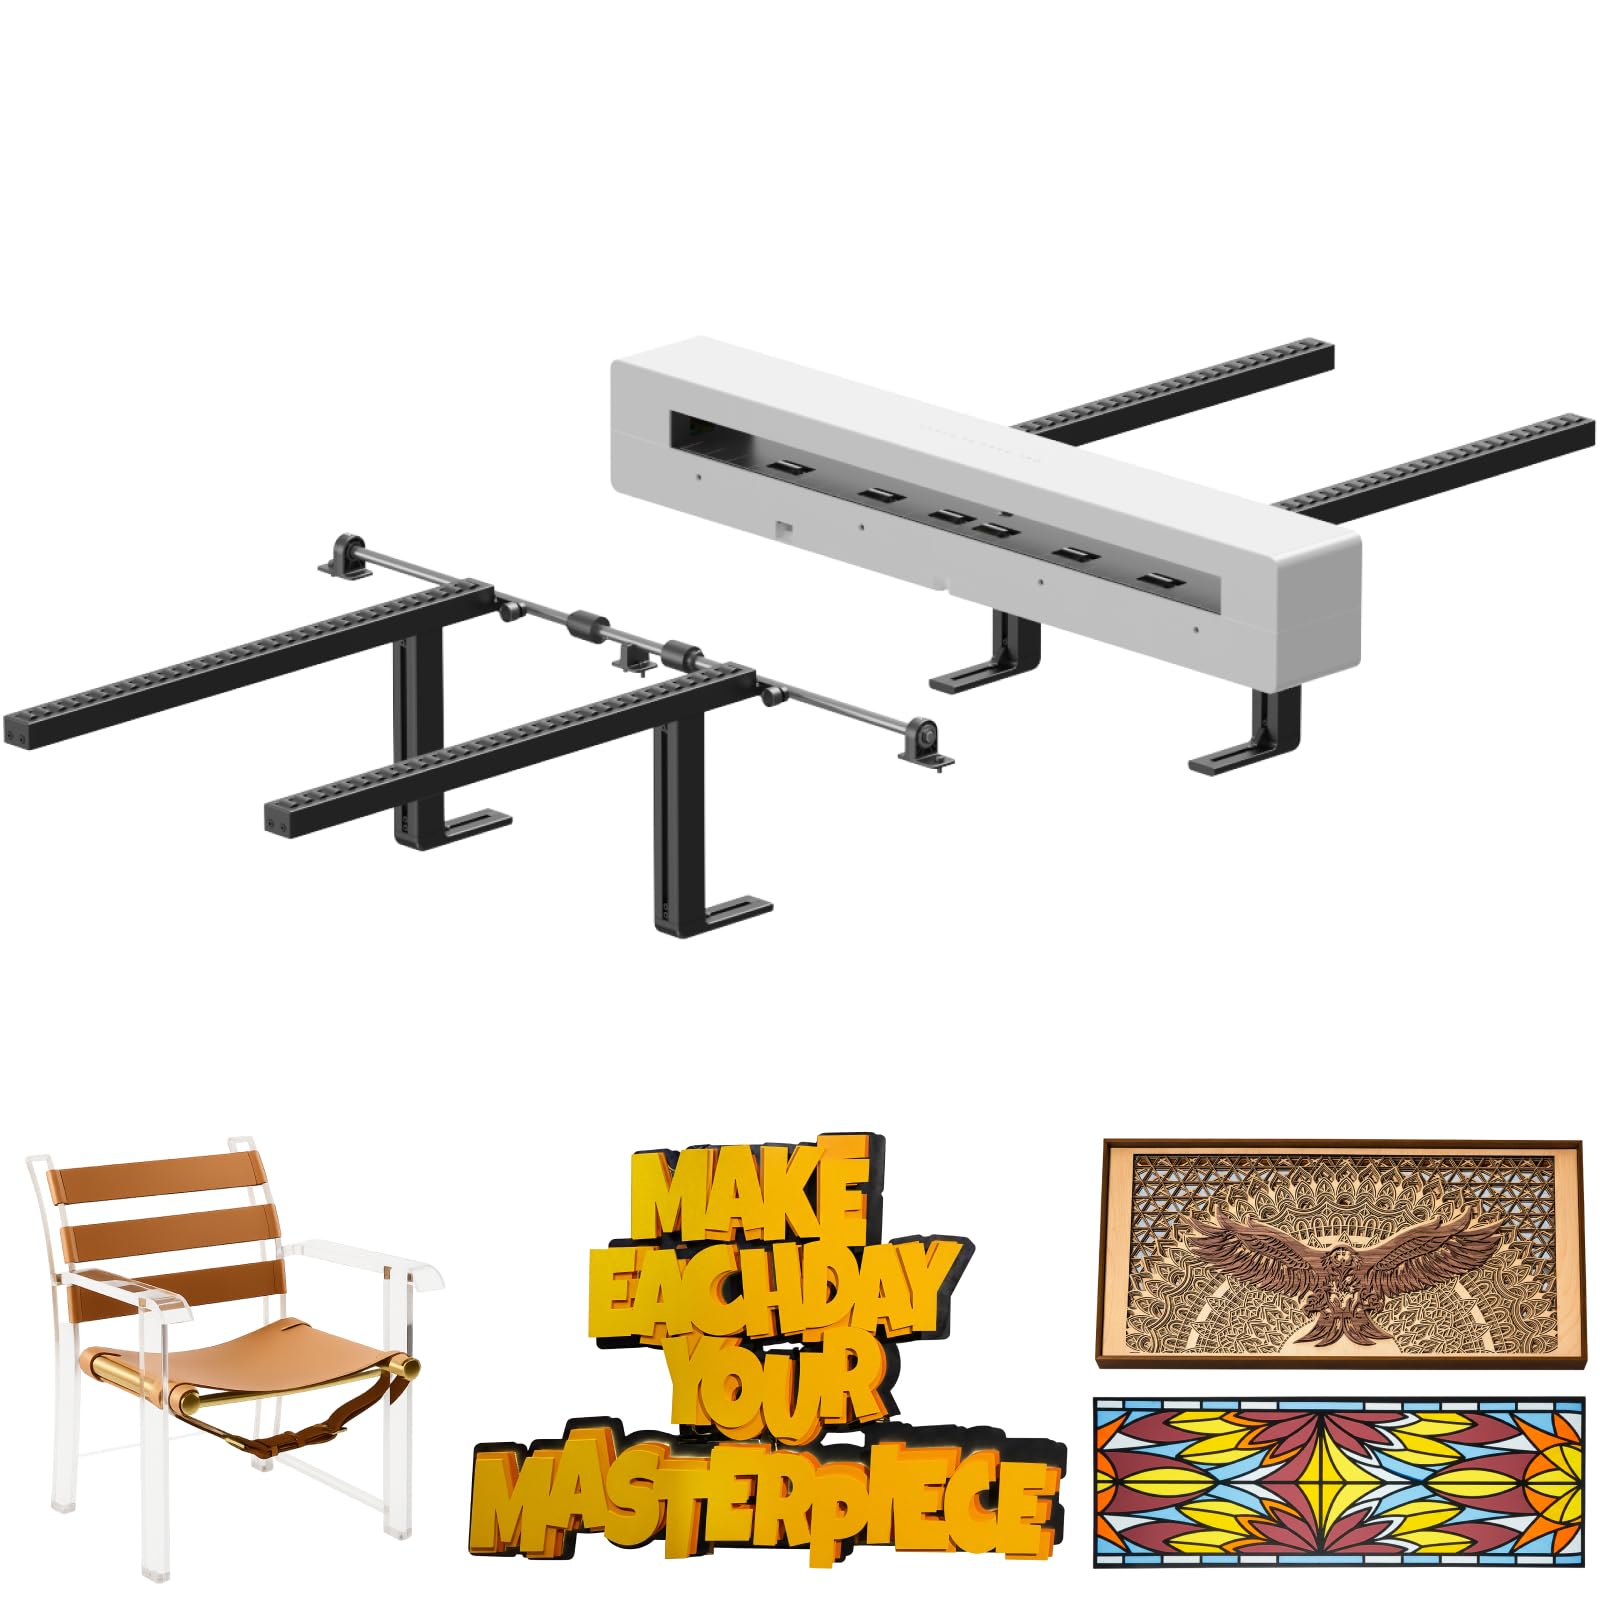
Figure 4.4: The P3's full AI preview ensures precise design placement before processing.
4.3 Tramitación
Unha vez que o material estea clamped and the preview is confirmed, initiate the engraving or cutting process through the xTool software. The Conveyor Feeder will automatically feed the material through the laser cutter, allowing for continuous operation on long materials or multiple batch items.
5. Mantemento
Regular maintenance ensures the longevity and optimal performance of your xTool Intelligent Conveyor Feeder.
5.1 Limpeza
- Periodically clean the conveyor belt and rollers to prevent dust and debris buildup, which can affect material feeding accuracy. Use a soft, dry cloth or a vacuum cleaner.
- Asegúrese de que o clamping mechanisms are free from obstructions.
5.2 Inspección
- Regularly inspect the conveyor belt for signs of wear or damage.
- Comprobe todas as conexións dos cables para asegurarse de que estean seguras.
5.3 Lubricación
Refer to the xTool P3 main manual for specific lubrication requirements for moving parts, if applicable. The Conveyor Feeder generally requires minimal lubrication.
6 Solución de problemas
This section addresses common issues you might encounter with the xTool Intelligent Conveyor Feeder.
| Problema | Causa posible | Solución |
|---|---|---|
| O material non se alimenta sen problemas. | Debris on conveyor belt or rollers; material not properly aligned; clamping mechanism issue. | Clean the conveyor path. Realign the material. Check clamping mechanism for obstructions. |
| Conveyor Feeder not detected by software. | Loose cable connection; software not updated; feeder not powered on. | Ensure all cables are securely connected. Update xTool software to the latest version. Verify the feeder is powered on. |
| Inaccurate preview or design placement. | Calibration required; material shifted after preview. | Perform software calibration. Ensure material is firmly clamped and does not move after preview. |
If you encounter issues not listed here, please refer to the xTool P3 main user manual or contact xTool customer support.
7. Especificacións
| Característica | Detalle |
|---|---|
| Número de modelo | MXP-P012-A01 |
| Dimensións do produto | 32.8 x 11.42 x 9.25 polgadas |
| Peso do elemento | 21.5 libras |
| Max Material Thickness | 26 mm |
| Max Processing Speed | 200 mm/s |
| Work Area (Standard Kit) | 24.01" x 51.18" |
| Control de movemento | 3-axis (X+Y+U) |
| Data de primeira dispoñibilidade | 29 de outubro de 2025 |
| Fabricante | Makeblock Co., Ltd. |
8. Garantía e soporte
8.1 Información da garantía
The xTool Intelligent Conveyor Feeder comes with a standard manufacturer's warranty. Please refer to the warranty card included with your product or visit the official xTool websitio web para obter termos e condicións detallados da garantía. Garda o comprobante de compra para reclamacións de garantía.
8.2 Atención ao cliente
For technical assistance, troubleshooting, or spare parts, please contact xTool customer support. You can find contact information on the official xTool websitio web ou a través da túa plataforma de compra.
- Soporte en liña: Visita o xTool Official Store or the xTool official websitio.
- Soporte por correo electrónico: Refer to your product documentation for the support email address.