
1. Instrucións de seguridade importantes
Read and understand all safety warnings and instructions before operating this electric hoist. Failure to follow these instructions may result in electric shock, fire, serious injury, or property damage. Keep this manual for future reference.
1.1 Seguridade xeral
- Use sempre o equipo de protección individual (EPI) axeitado, incluíndo lentes de seguridade, luvas e calzado resistente.
- Ensure the work area is clear of obstructions, well-lit, and free from unauthorized personnel.
- Non opere o polipasto baixo os efectos de drogas, alcol ou medicamentos.
- Inspect the hoist for damage before each use. Do not operate if damaged.
- Keep hands and body clear of moving parts and the load during operation.
1.2 Seguridade eléctrica
- Connect the hoist only to a properly grounded power outlet with the specified voltage (220 V).
- Do not expose the hoist to rain or wet conditions.
- Nunca empregue o cable de alimentación para transportar, tirar ou desconectar o polipasto.
- Asegúrese de que todas as conexións eléctricas estean seguras e libres de danos.
1.3 Seguridade na elevación
- Never exceed the rated load capacity of the hoist (125 kg for single cable, 250 kg for double cable).
- Ensure the load is properly balanced and securely attached to the hook.
- Do not lift people or objects over people.
- Evite arranques ou paradas bruscas ao levantar ou baixar unha carga.
- Use the emergency stop switch immediately if an unsafe condition occurs.
2. Produto rematadoview
The VEVOR Electric Wire Rope Hoist PAYX250-2 is designed for lifting heavy objects in various environments such as garages, warehouses, and factories. It features a robust pure copper motor, a durable steel wire rope, and a wired remote control for safe operation.
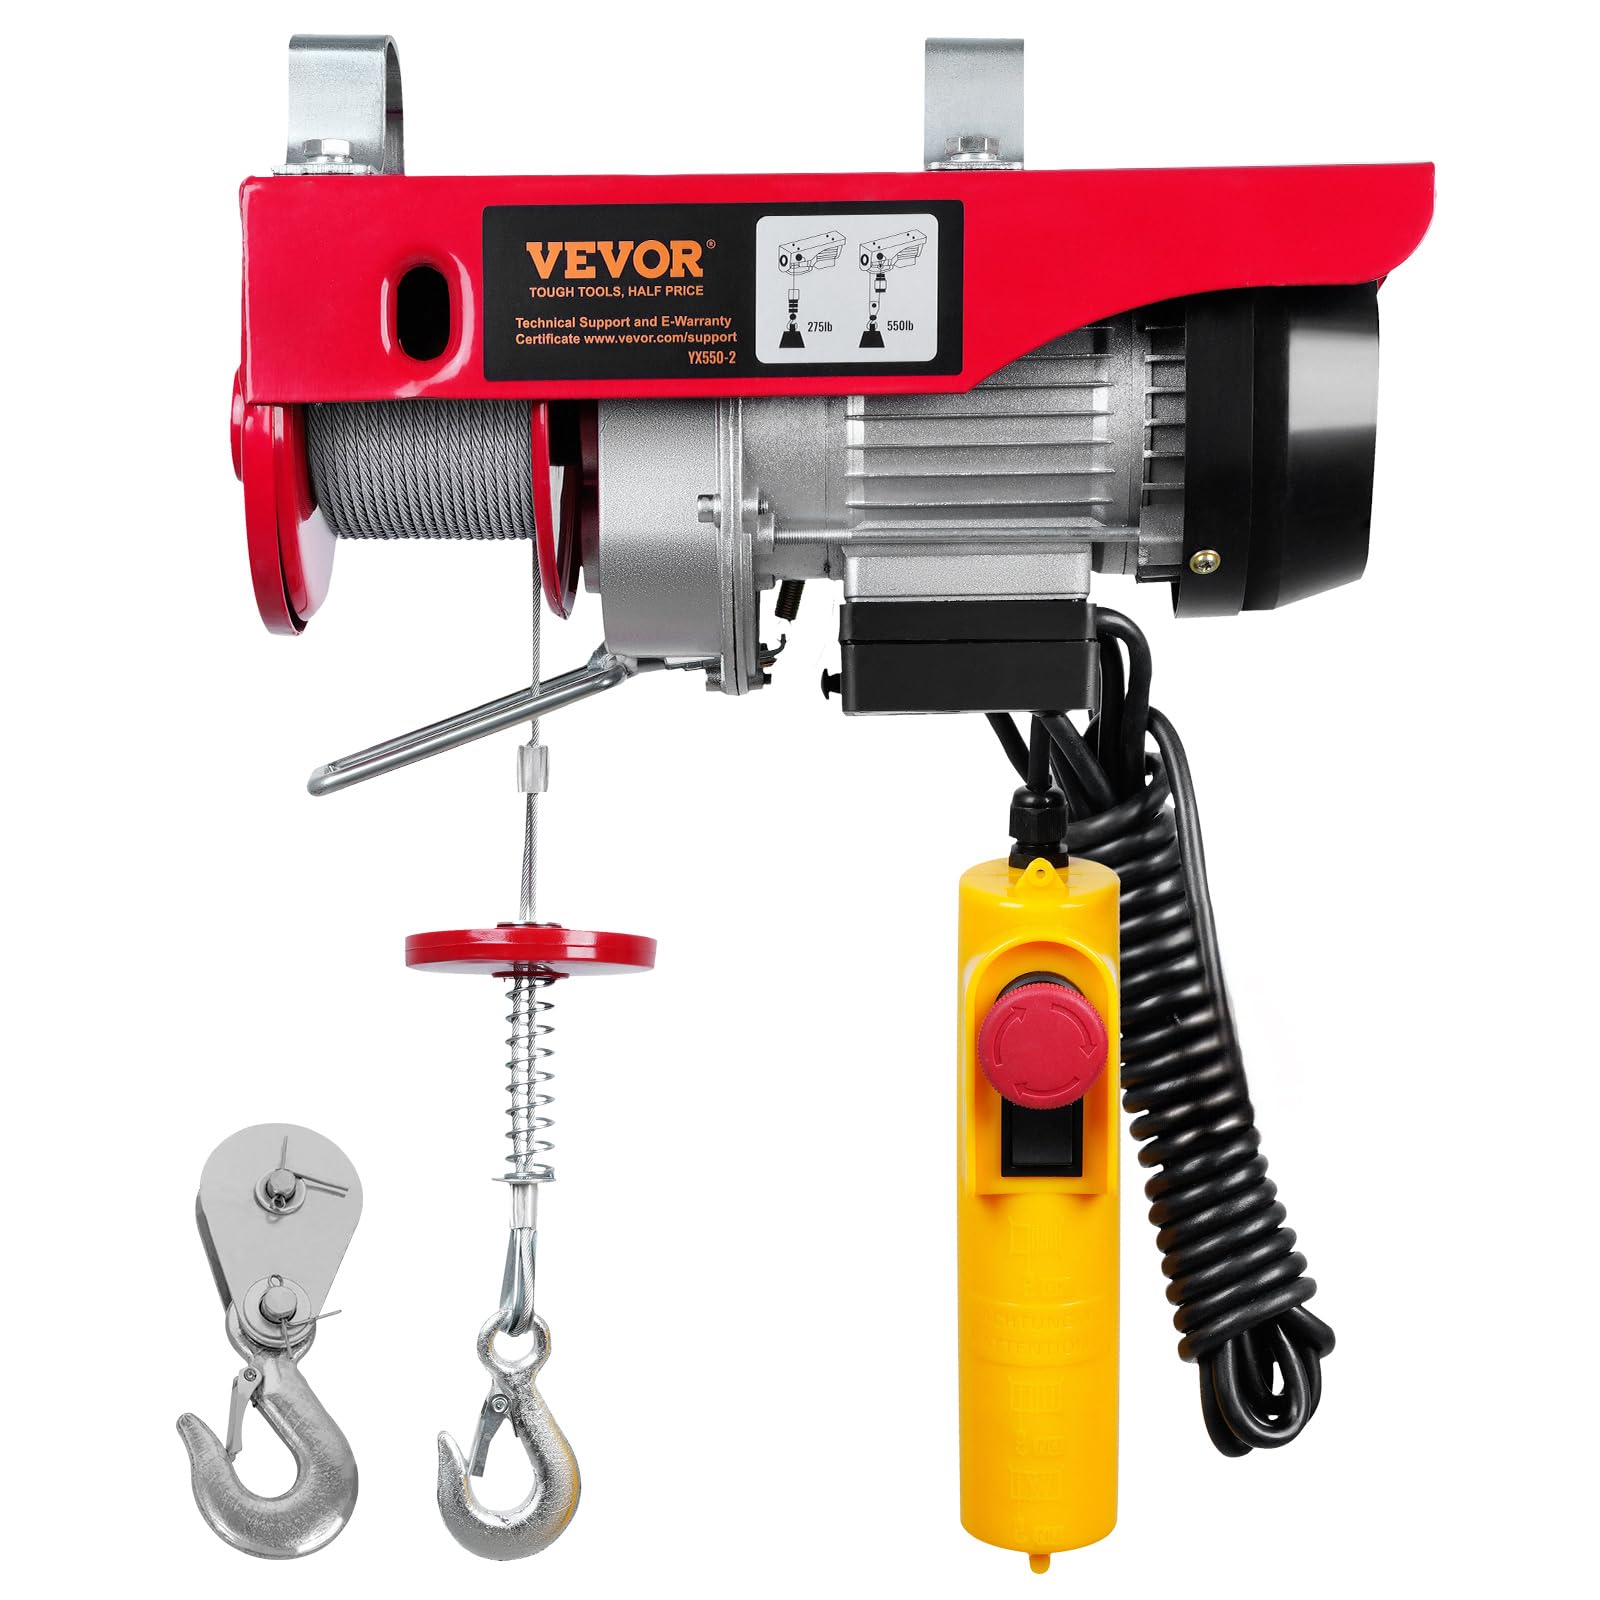
Figura 2.1: Principal view of the VEVOR Electric Wire Rope Hoist, highlighting its compact design and robust construction.

Figure 2.2: The electric hoist installed in a typical garage environment, demonstrating its application for lifting tasks.
2.1 Compoñentes clave
- Motor: Pure copper motor with a cooling fan for efficient and prolonged operation.
- Fío de arame: Durable braided steel cable (Φ 3 mm * L 12 m, 19 strands).
- Gancho: Alloy steel hook for secure load attachment. Includes a double hook for increased capacity.
- Control remoto: Wired remote with a 4m cable for safe operation from a distance, featuring an emergency stop button.
- Soportes de montaxe: Two channel mounting brackets for easy installation.
- Características de seguridade: Emergency stop switch and electromagnetic braking system to prevent accidental slippage and overturning.
3. Configuración
Proper installation is crucial for safe and effective operation of the hoist.
3.1 Montaxe do polipasto
- Select a sturdy overhead beam or crossbar capable of supporting the hoist's weight and the maximum intended load.
- Attach the two provided channel mounting brackets to the hoist.
- Securely mount the hoist to the chosen overhead structure using appropriate fasteners. Ensure the brackets are tightly fastened to prevent movement during operation.
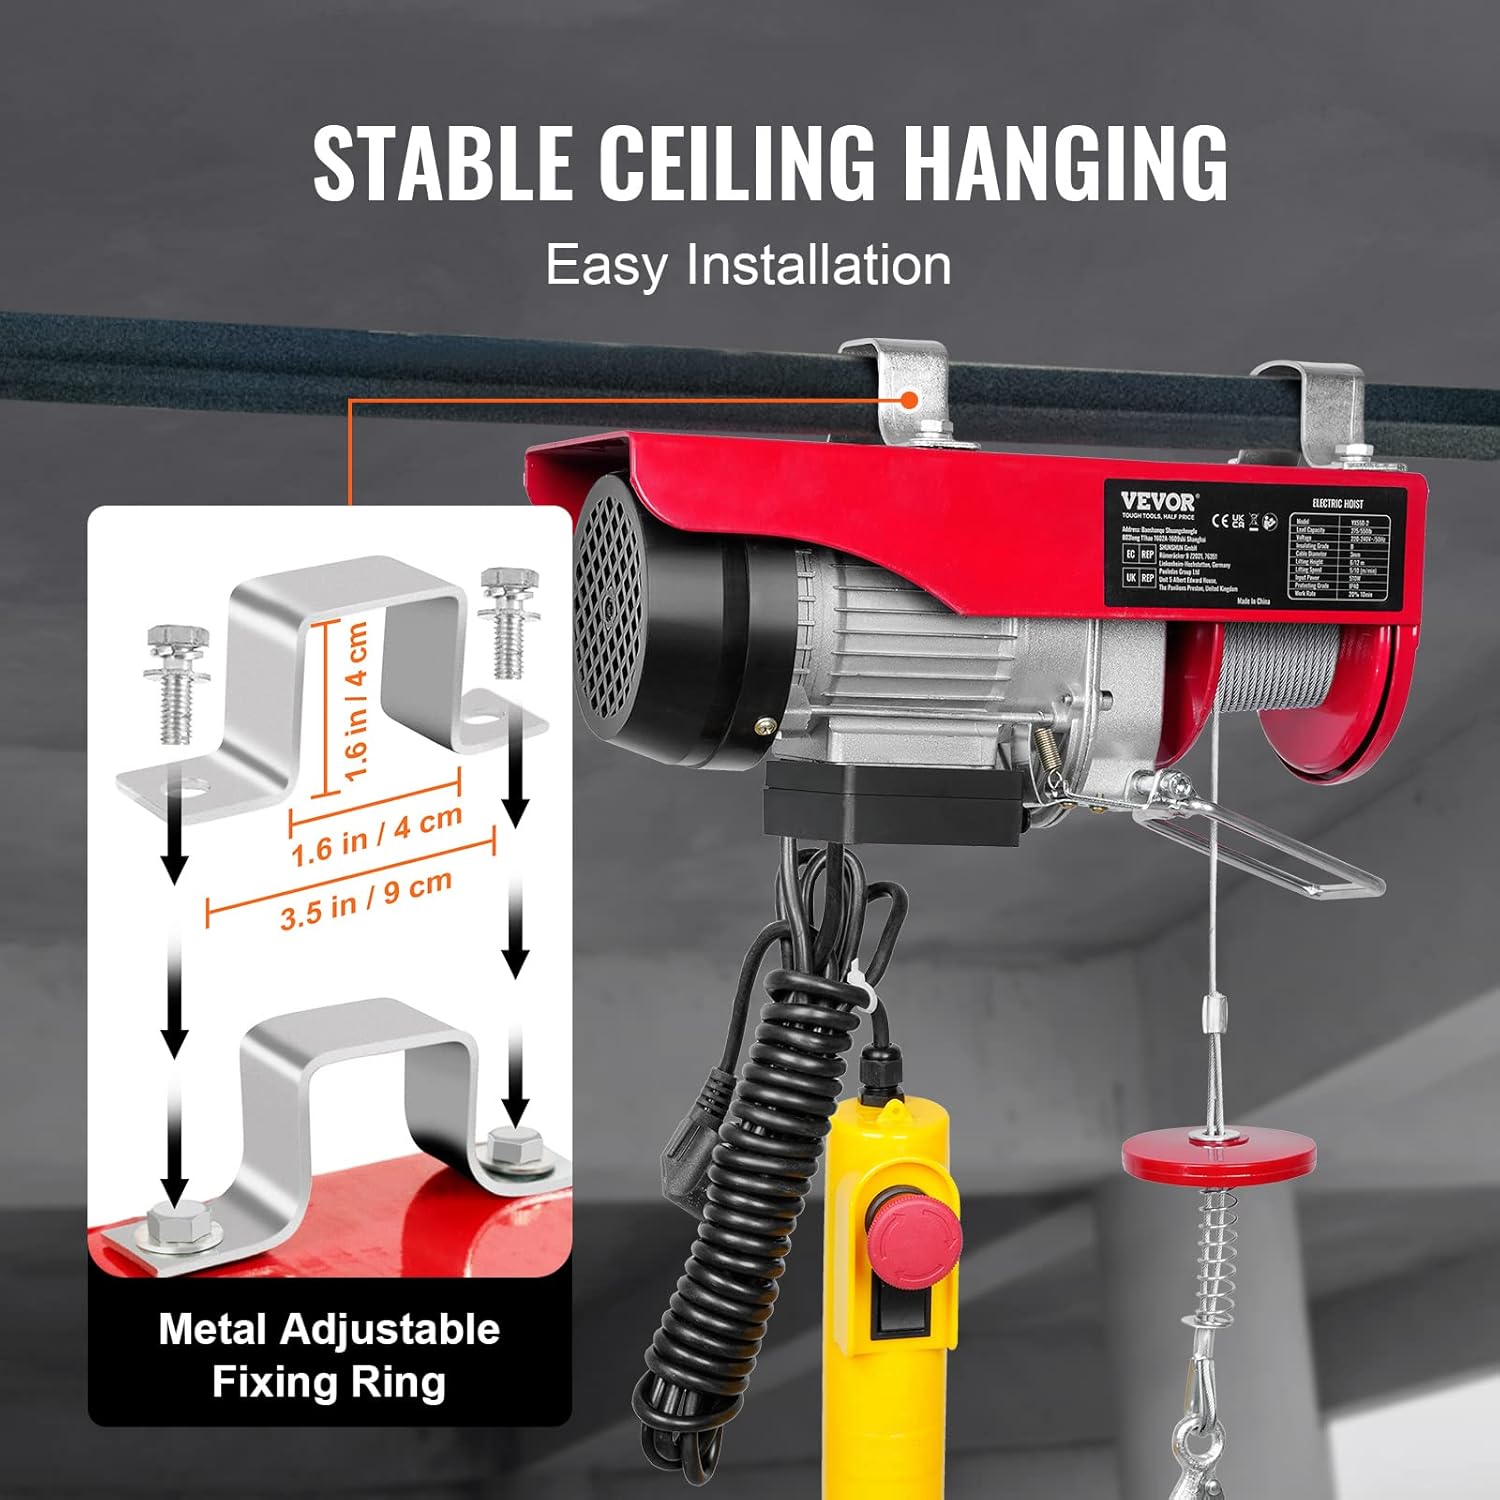
Figure 3.1: Illustration of the metal adjustable fixing rings (mounting brackets) and their dimensions for secure installation.
3.2 Conexión eléctrica
- Ensure the power supply matches the hoist's voltage requirement (220V).
- Plug the hoist into a grounded electrical outlet. Avoid using extension cords if possible; if necessary, use a heavy-duty, grounded extension cord rated for the hoist's power requirements.
3.3 Cable Configuration (Single vs. Double Line)
The hoist can be configured for single or double line lifting, affecting its capacity and lifting speed.
- Single Cable: Provides higher lifting height and speed (40 ft/12 m, 33 ft/min) with a capacity of 125 kg.
- Double Cable: Achieved by using the provided pulley hook, which doubles the lifting capacity to 250 kg but halves the lifting height and speed (19.7 ft/6 m, 16 ft/min).

Figure 3.2: Comparison of single cable setup (left) for higher speed and height, and double cable setup (right) using a pulley hook for increased lifting capacity.
4. Instrucións de funcionamento
Follow these steps for safe and effective operation of your electric hoist.
4.1 Uso do mando a distancia
The hoist is operated via a wired remote control, allowing you to maintain a safe distance from the load.
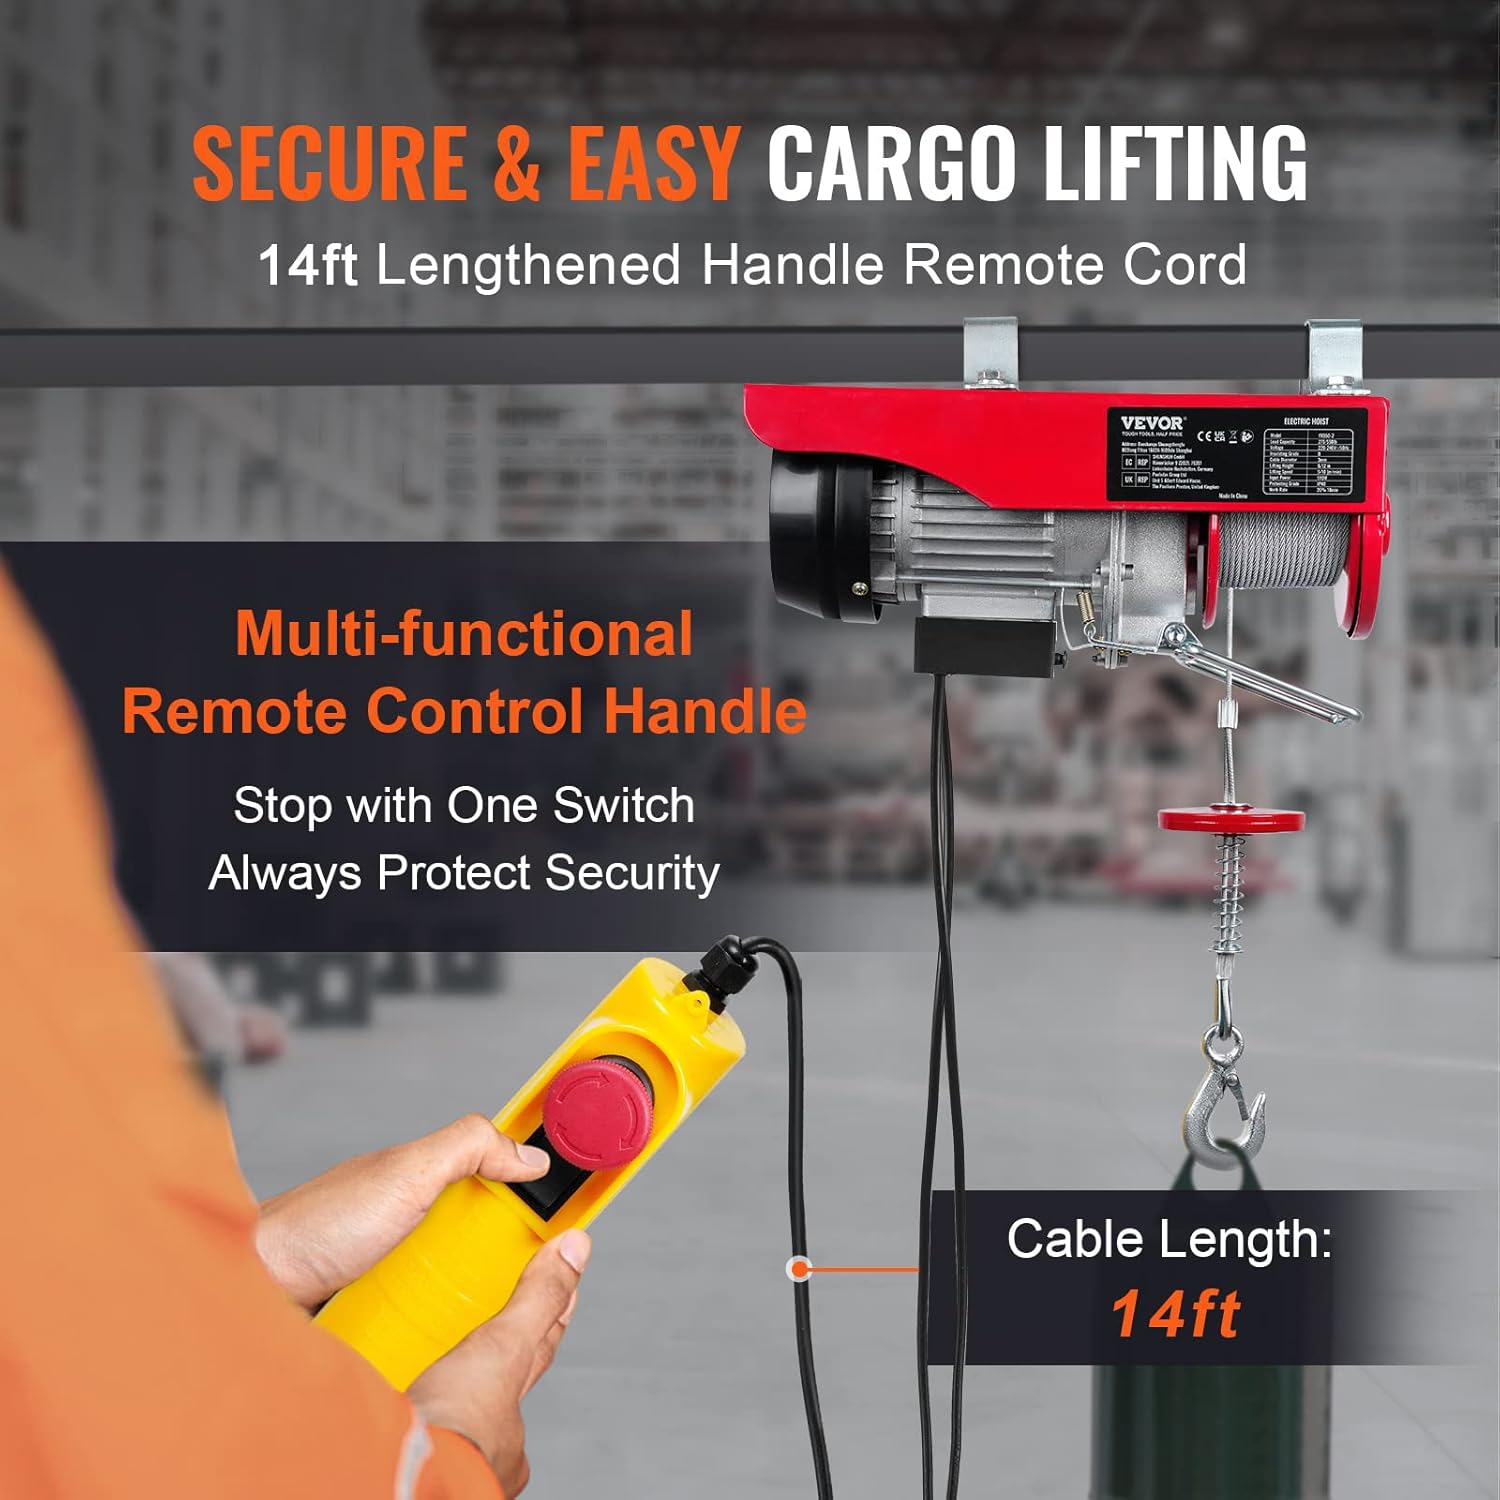
Figure 4.1: The multi-functional remote control handle with its 14ft (approx. 4m) cable, featuring an emergency stop button.
- Botón Arriba: Press and hold to lift the load.
- Botón de abaixo: Press and hold to lower the load.
- Botón de parada de emerxencia: Press the large red button to immediately stop all hoist operations in an emergency. Twist to reset.
- Always operate the hoist from a position where you have a clear view of the load and the surrounding area.
4.2 Procedementos de elevación
- Before lifting, ensure the load is within the hoist's capacity and is securely attached to the hook.
- Slowly lift the load a few inches off the ground to check for balance and stability.
- If the load is stable, proceed to lift it to the desired height. Avoid swinging the load.
- When lowering, do so slowly and steadily. Guide the load if necessary, keeping hands clear.
- Nunca deixe unha carga suspendida desatendida.
5. Mantemento
Regular maintenance ensures the longevity and safe operation of your hoist.
5.1 Inspección periódica
- Fío de arame: Inspect the wire rope for kinks, fraying, corrosion, or broken strands before each use. Replace if any damage is observed.
- Gancho: Check the hook for deformation, cracks, or excessive wear. Ensure the safety latch operates correctly.
- Motor e carcasa: Inspect for any visible damage, loose fasteners, or unusual noises during operation.
- Electrical Cable and Remote: Check for cuts, abrasions, or damage to the power cord and remote control cable.
5.2 Limpeza e almacenamento
- Keep the hoist clean and free from dirt, dust, and debris. Use a dry cloth to wipe down surfaces.
- Store the hoist in a dry, clean, and secure location away from moisture and extreme temperatures.
6 Solución de problemas
Consulta esta sección para coñecer os problemas comúns e as súas posibles solucións.
| Problema | Causa posible | Solución |
|---|---|---|
| O elevador non funciona | Sen fonte de alimentación Parada de emerxencia activada Protección de sobrecarga do motor activada | Comprobe a conexión e a toma de corrente Soltar o botón de parada de emerxencia Deixar arrefriar o motor, reducir a carga |
| Ruído inusual durante o funcionamento | Compoñentes soltos Falta de lubricación Danos internos | Inspect for loose parts and tighten Consulte a un técnico cualificado Discontinue use and seek professional service |
| Load slips or drops | Mal funcionamento do freo Sobrecarga | Discontinue use immediately and contact service Ensure load is within capacity |
If you encounter problems not listed here or if the suggested solutions do not resolve the issue, contact VEVOR customer support.
7. Especificacións
Technical data for the VEVOR Electric Wire Rope Hoist PAYX250-2.

Figure 7.1: Detailed product dimensions and a summary of key specifications.
| Parámetro | Valor |
|---|---|
| Número de modelo | PAYX250-2 |
| Lifting Load Capacity (Single Cable) | 125 kg (275 lb) |
| Lifting Load Capacity (Double Cable) | 250 kg (550 lb) |
| Lifting Height (Single Cable) | 12 m (40 pés) |
| Lifting Height (Double Cable) | 6 m (19.7 pés) |
| Lifting Speed (Single Cable) | 10 m/min (33 pés/min) |
| Lifting Speed (Double Cable) | 5 m/min (16 pés/min) |
| Potencia do motor | 510 W |
| Voltage | 220 V |
| Tamaño do cable | Φ 3 mm * L 12 m (19 strands) |
| Dimensións do produto (L x W x H) | 350 x 135 x 160 mm (13.8 x 5.3 x 6.3 polgadas) |
| Peso do produto | 10.35 kg (22.82 lb) |
| Modo de control | Control remoto con cable |
| Velocidade de rotación nominal | 2800 rpm |
| Par nominal | 1.1 Nm |
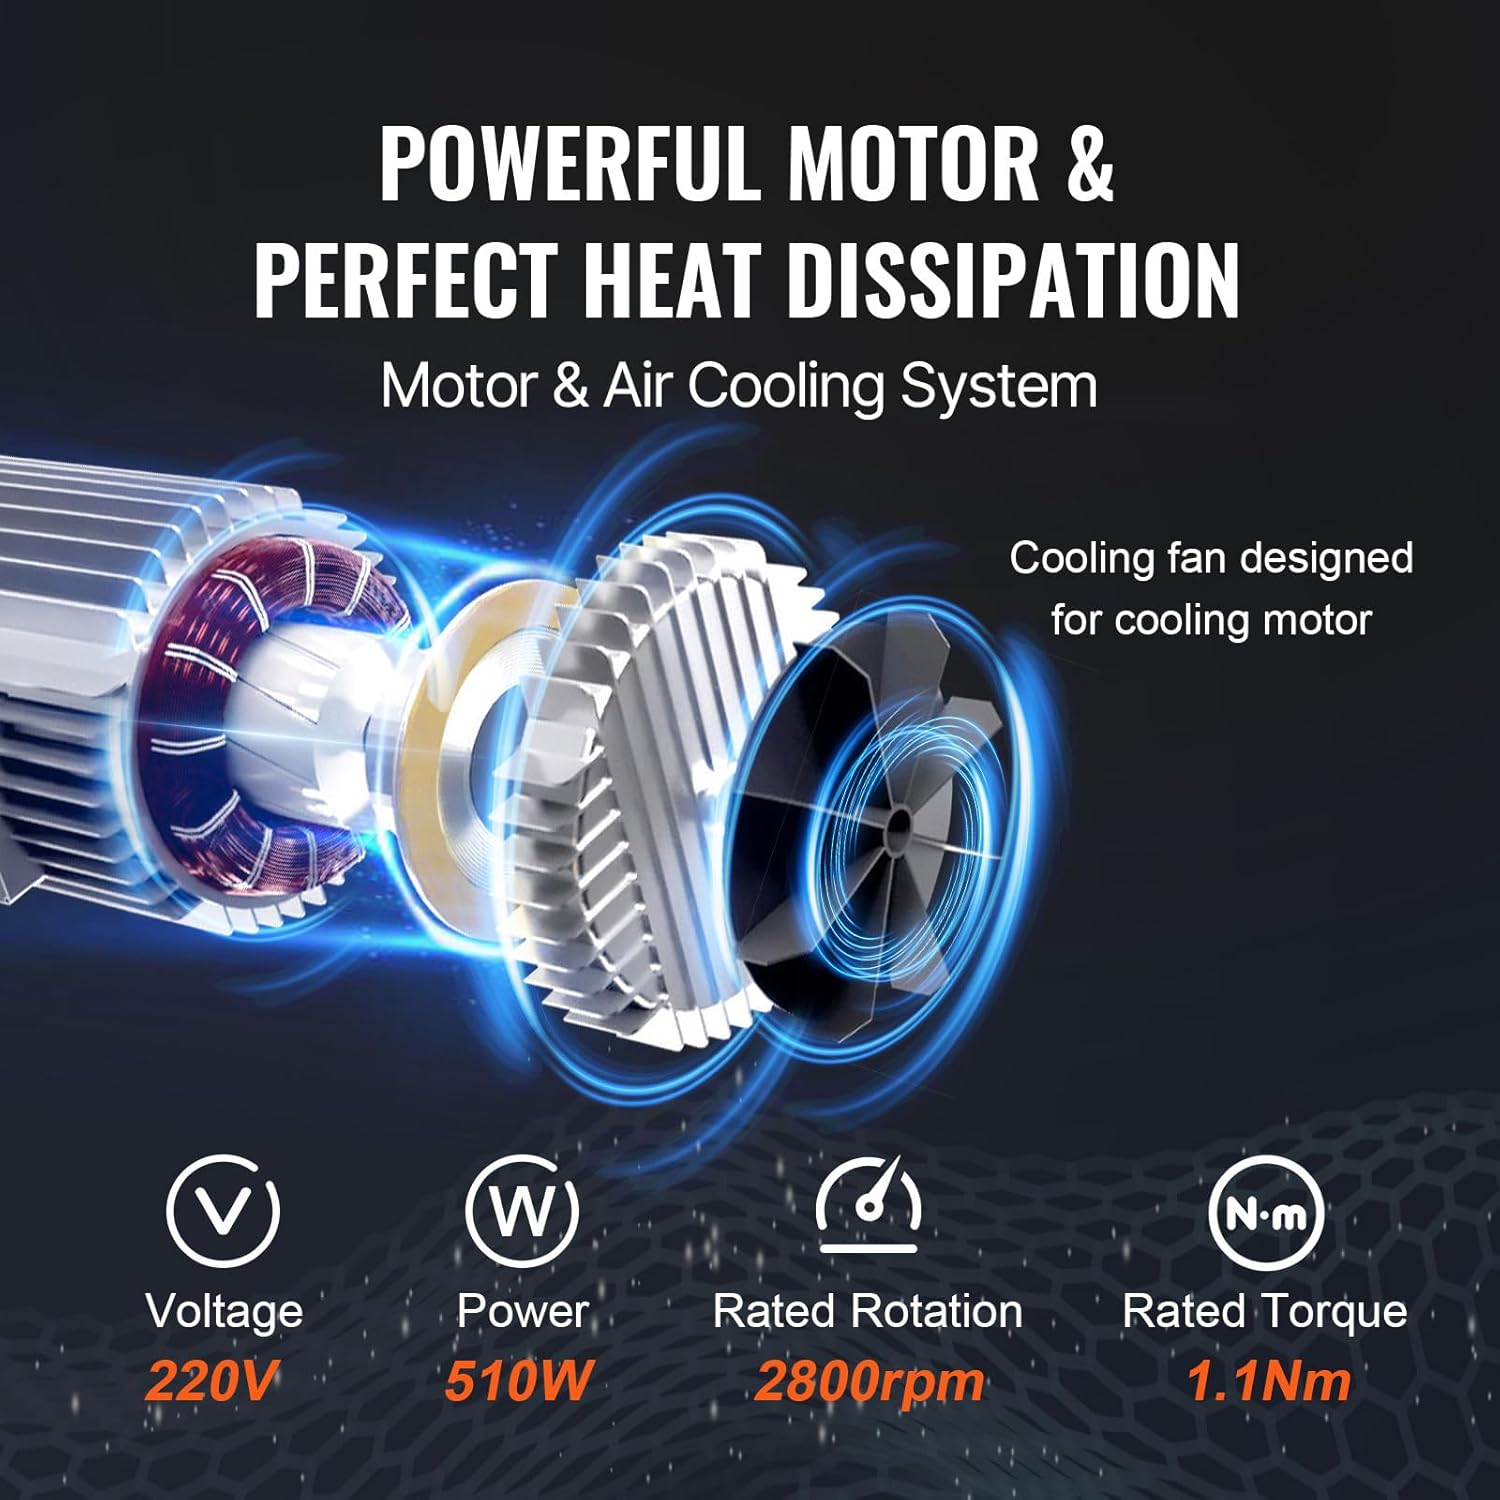
Figure 7.2: Diagram illustrating the internal motor components and the cooling fan designed for heat dissipation.
8. Garantía e soporte
Os produtos VEVOR están deseñados para ser duradeiros e ter un bo rendemento. Para obter información sobre a garantía, asistencia técnica ou consultas sobre o servizo, consulte a tarxeta de garantía incluída co produto ou visite o sitio web oficial de VEVOR. websitio. Garde o recibo da compra como xustificante da mesma.


