
Introduction
This manual provides instructions for the proper setup, operation, and maintenance of your SMALLRIG Push-Button Rotating Side Handle with NATO Clamp. This accessory is designed to enhance handheld camera operation by providing a comfortable and versatile grip solution for camera cages and mounting plates equipped with NATO rails.
Qu'y a-t-il dans la boîte
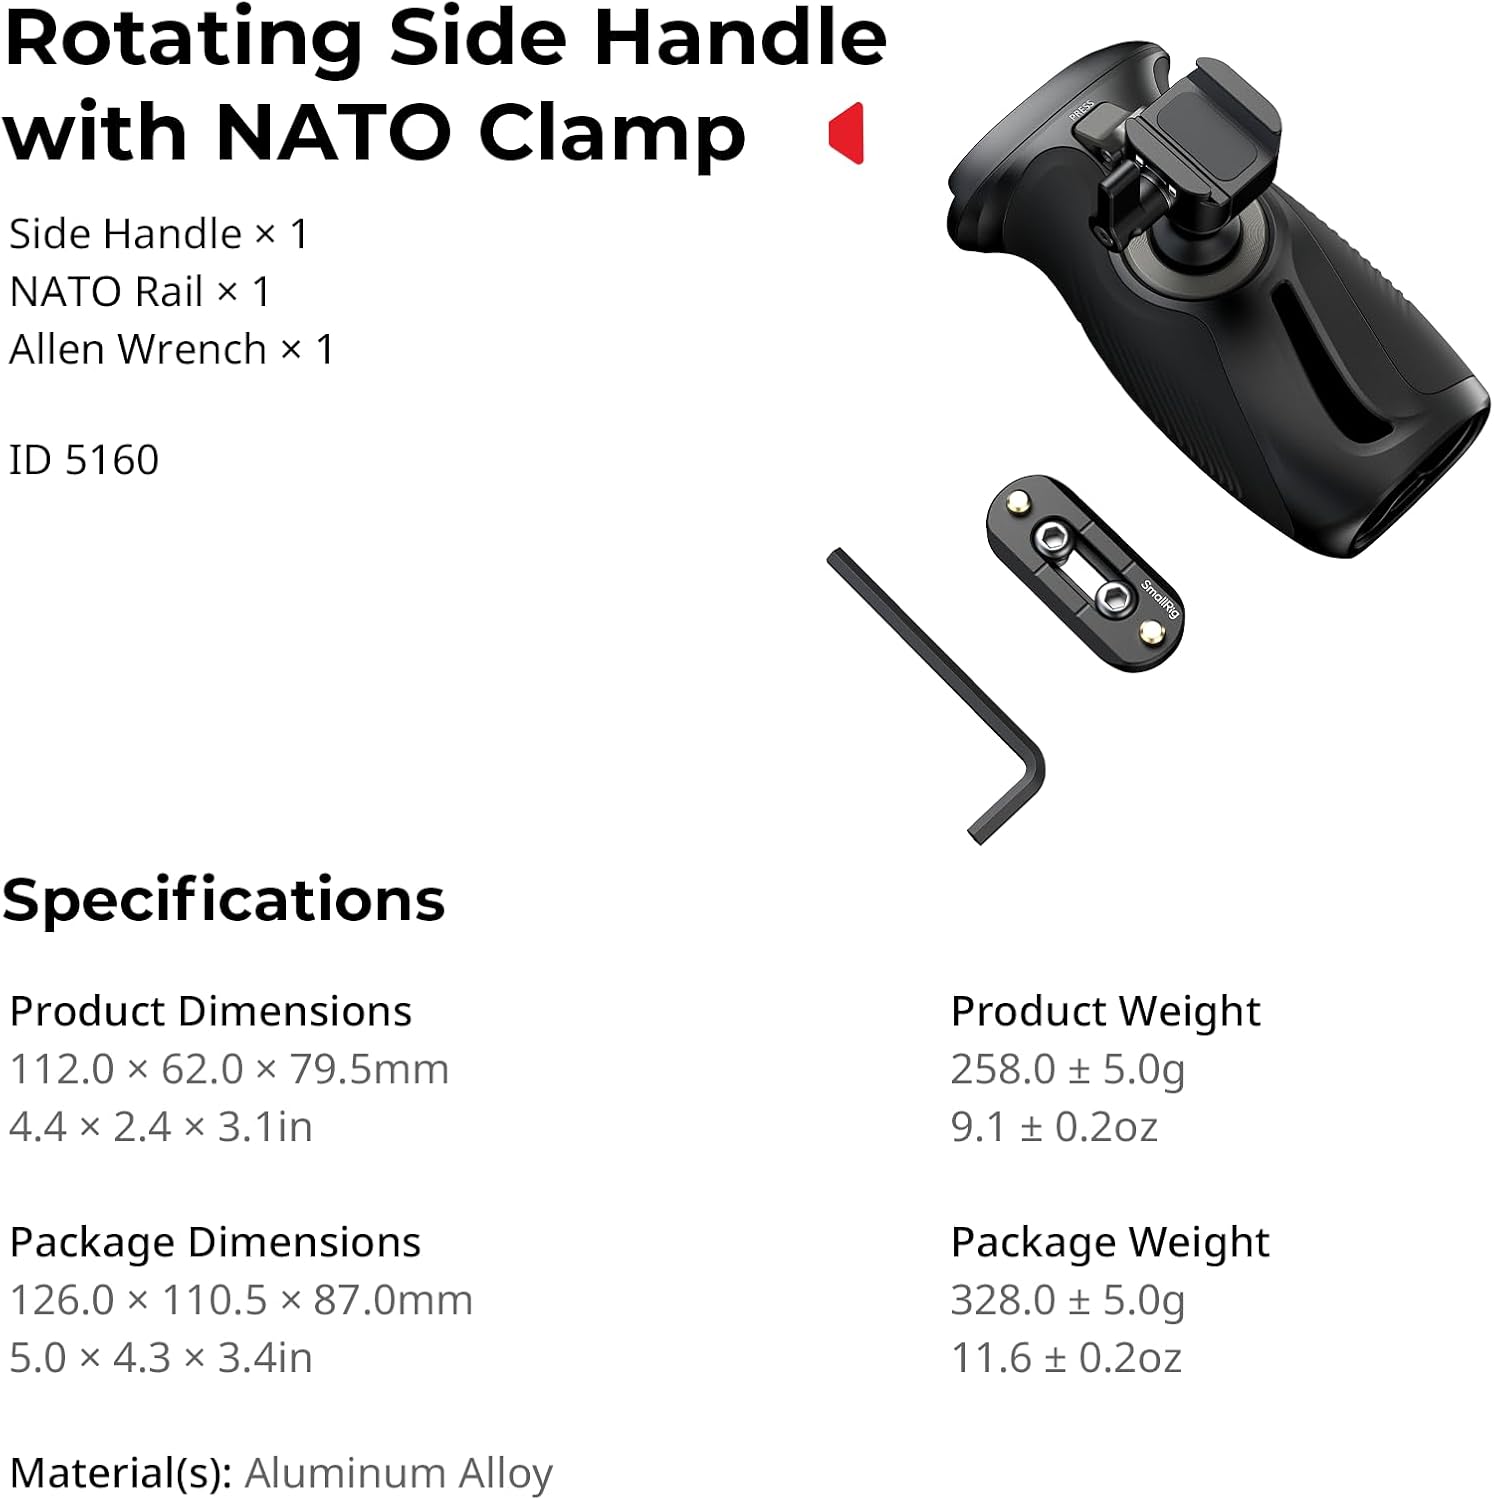
- Poignée latérale x 1
- NATO Rail x 1
- Clé Allen x 1
Caractéristiques principales
- Conception rotative : Features a push-button mechanism for 360° rotation, allowing for quick and smooth angle adjustments.
- Compatibilité universelle: Designed for both left and right-hand use, attaching to camera/monitor cages and mounting plates with NATO rails.
- Capacité de charge élevée : Supports a maximum load of 15kg (33lb), ensuring stability for various camera setups.
- Poignée ergonomique : Constructed with anti-slip silicone for a comfortable and secure hold, even in varying conditions.
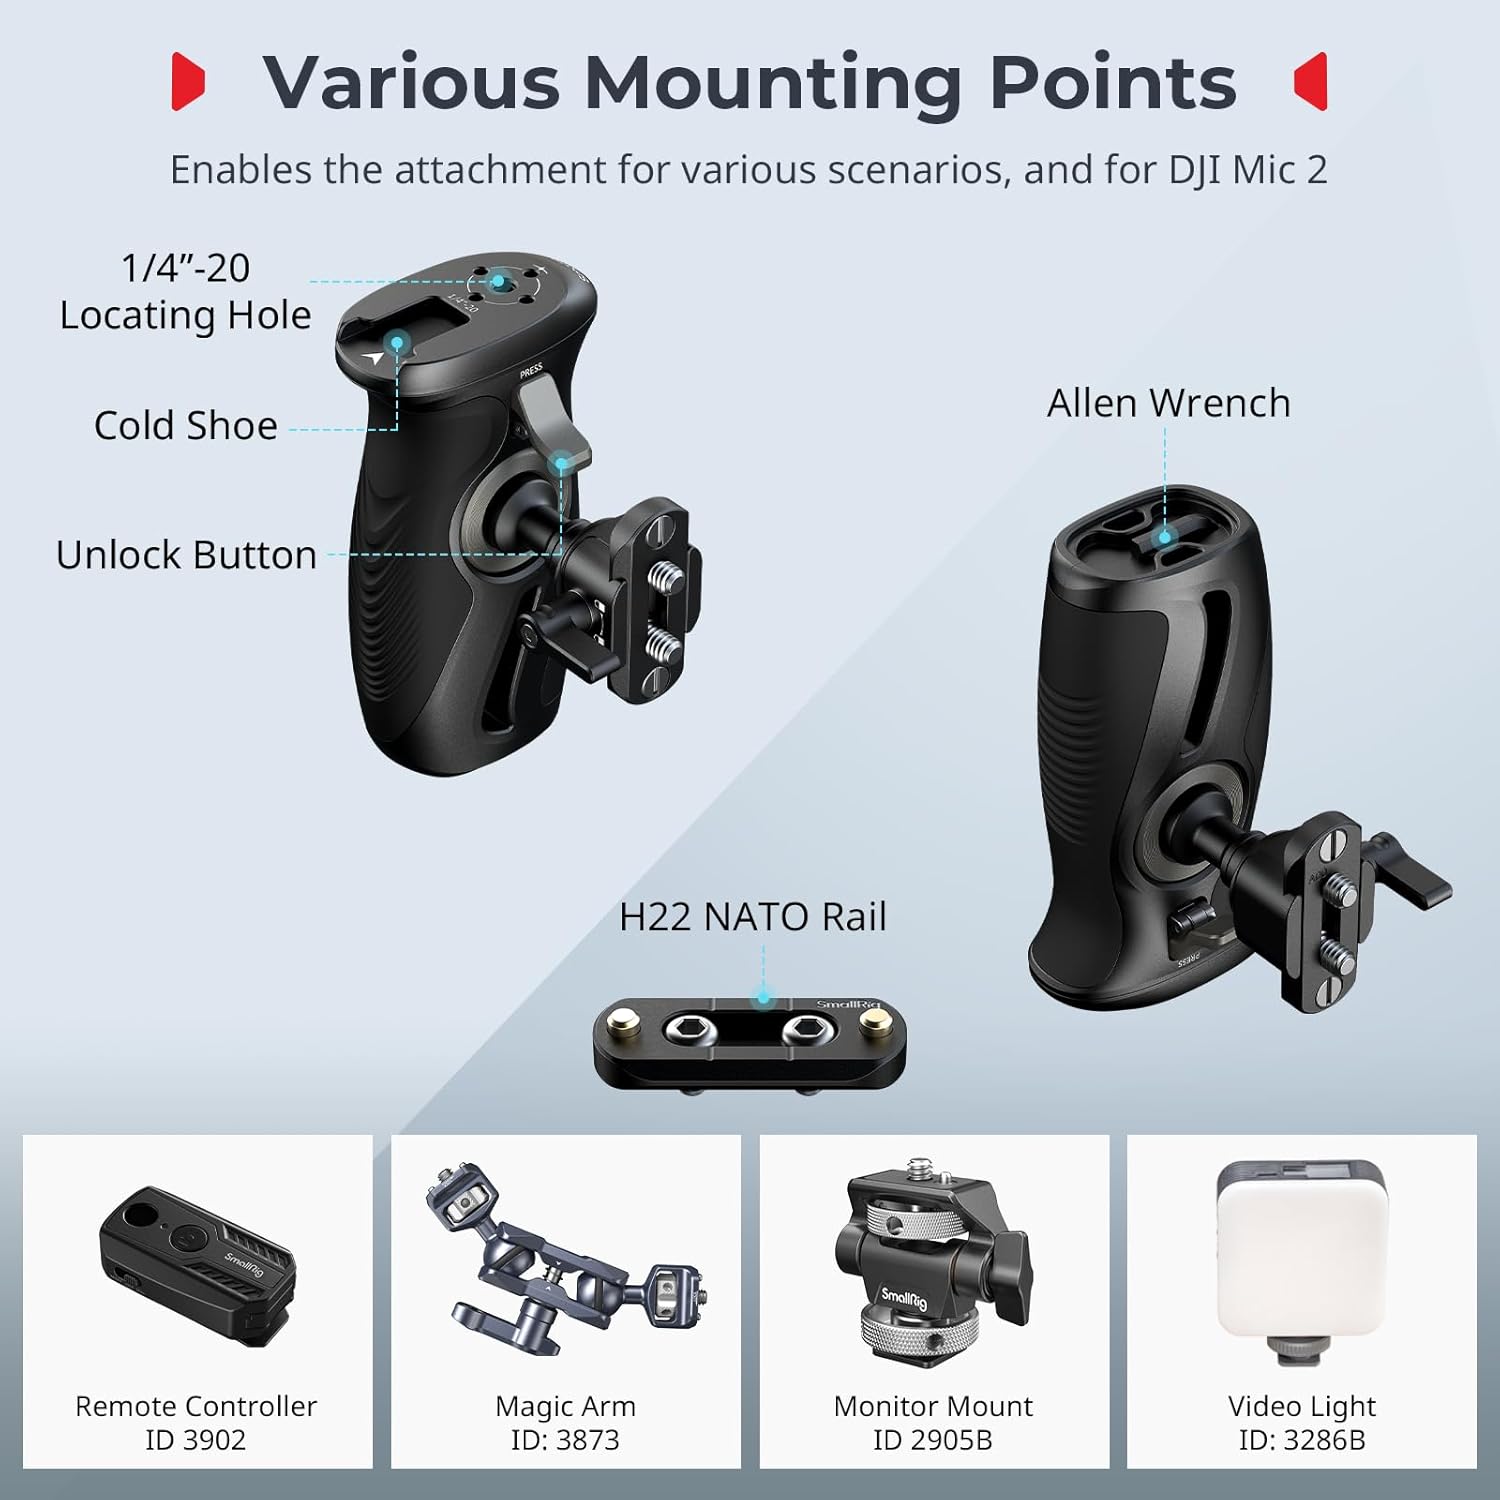
- Points de fixation multiples : Includes 1/4"-20 locating holes and a cold shoe mount for attaching accessories like remote controllers, magic arms, monitors, microphones, and video lights.
Instructions d'installation
- Attach NATO Rail (if necessary): If your camera cage or mounting plate does not have a built-in NATO rail, use the included NATO rail and Allen wrench to securely attach it to your desired position on the cage. Ensure it is tightened firmly to prevent movement.
- Mount the Side Handle: Alignez les lignes de l'OTANamp on the side handle with the NATO rail on your camera setup. Slide the handle onto the rail.
- Fixez la poignée : Tighten the locking knob on the NATO clamp to firmly secure the side handle in place. Verify that the handle is stable and does not wobble.

Mode d'emploi
Rotation à 360°
The side handle features a push-button mechanism for quick angle adjustments. To rotate the handle:
- Locate the unlock button on the handle.
- Appuyez sur le bouton de déverrouillage et maintenez-le enfoncé.
- While holding the button, rotate the handle to your desired angle (up to 360°).
- Release the button to lock the handle in the new position.
Précaution de sécurité importante : When adjusting the angle, always hold the camera or rig securely with your other hand to prevent accidental drops or damage.

Fixation des accessoires
The handle provides various mounting points for additional accessories:
- 1/4"-20 Locating Holes: Use these threaded holes to attach remote controllers, magic arms, or other accessories with 1/4"-20 screws.
- Support de sabot froid : The integrated cold shoe mount allows for direct attachment of accessories such as monitor mounts, microphones, or video lights.
Entretien
- Regularly inspect all screws and connections to ensure they are tight. Use the included Allen wrench for tightening if necessary.
- Clean the handle and NATO rail with a soft, dry cloth. Avoid using harsh chemicals or abrasive materials that could damage the finish or silicone grip.
- Store the handle in a dry, dust-free environment when not in use.
Dépannage
Handle is loose or wobbly after attachment
Ensure the locking knob on the NATO clamp is fully tightened. If the issue persists, check if the NATO rail itself is securely attached to your camera cage. Re-tighten any loose screws using the Allen wrench.
Rotation mechanism feels stiff or does not lock properly
Ensure the unlock button is fully depressed when attempting to rotate. If the mechanism feels stiff, check for any debris or obstructions around the rotating joint. Avoid forcing the rotation; if resistance is significant, contact customer support.
Caractéristiques
| Fonctionnalité | Détail |
|---|---|
| Nom du modèle | 12669 |
| Dimensions du produit | 112.0 x 62.0 x 79.5mm (4.41 x 2.44 x 3.15 pouces) |
| Poids du produit | 0.26 kilogrammes (9.1 oz) |
| Matériel | Alliage d'aluminium, silicone |
| Max. La capacité de charge | 15 kilogrammes (33 lb) |
| Angle de rotation | 360° |
| Type de montage | Cl OTANamp (Montage en surface) |
| Appareils compatibles | Camera / monitor cages, mounting plates with NATO rail |

Garantie et assistance
Informations sur la garantie
This SMALLRIG product is covered by a Garantie fabricant d'un an À compter de la date d'achat, cette garantie couvre les défauts de matériaux et de fabrication dans des conditions normales d'utilisation. Elle ne couvre pas les dommages causés par une mauvaise utilisation, un accident, une modification non autorisée ou une installation incorrecte.
Assistance clientèle
For technical assistance, warranty claims, or product inquiries, please contact SMALLRIG customer support through their official website or the retailer where the product was purchased. Please have your product model number (12669) and proof of purchase ready when contacting support.