1. Introduction
Thank you for choosing the VEVOR Nugget Ice Maker, Model DIM-15A. This manual provides essential information for the safe operation, installation, maintenance, and troubleshooting of your new ice maker. Please read this manual thoroughly before use and retain it for future reference.
The VEVOR Nugget Ice Maker is designed to produce chewable nugget ice efficiently, suitable for various beverages and applications in home, kitchen, and office environments.
2. Consignes de sécurité
- Lisez toutes les instructions avant d'utiliser l'appareil.
- Assurer l'alimentation voltage correspond à l'étiquette de puissance figurant sur l'appareil.
- Do not operate any appliance with a damaged cord or plug. If the supply cord is damaged, it must be replaced by the manufacturer or a qualified service agent.
- Ne plongez pas l'appareil, le cordon d'alimentation ou la prise dans l'eau ou tout autre liquide.
- Débranchez l'appareil de la prise de courant lorsqu'il n'est pas utilisé, avant de le nettoyer ou avant d'ajouter/retirer des pièces.
- Gardez l'appareil à l'écart des sources de chaleur et de la lumière directe du soleil.
- Cet appareil est destiné à un usage intérieur uniquement.
- Ne laissez pas les enfants utiliser la machine à glaçons sans surveillance.
- Utilisez uniquement de l'eau potable dans le réservoir d'eau.
- Ensure proper ventilation around the appliance. Maintain at least 5 inches of clearance on all sides.
3. Composants du produit
Familiarize yourself with the parts of your VEVOR Nugget Ice Maker:
- Unité de machine à glaçons
- Pelle à glace
- Bac d'égouttage
- Manuel d'instructions

Figure 3.1 : The VEVOR Nugget Ice Maker showing its dimensions (9.5"D x 13.9"W x 11.9"H) and included accessories: an ice scoop and a drip tray. The image also highlights the model number DIM-15A and key specifications.
4. Installation
4.1 Déballage
- Retirez délicatement la machine à glaçons de son emballage.
- Retirez tous les matériaux d'emballage, y compris le ruban adhésif et les films protecteurs.
- Vérifiez l'état du produit pendant le transport. En cas de dommage, n'utilisez pas le produit et contactez le service client.
4.2 Placement
- Placez la machine à glaçons sur une surface stable et plane, à l'abri de la lumière directe du soleil et des sources de chaleur.
- Ensure there is at least 5 inches (12.7 cm) of space around the unit for proper ventilation.
- Do not place the unit near appliances that generate heat, such as ovens or radiators.
4.3 Nettoyage initial
Before first use, it is recommended to clean the unit. Refer to the "Maintenance and Cleaning" section for detailed instructions, or use the self-cleaning function.
4.4 Remplissage du réservoir d'eau

Figure 4.1 : Illustrates the process of pouring water into the ice maker's 1.5L water tank, which is essential for ice production.
- Ouvrez le couvercle de la machine à glaçons.
- Fill the water tank with potable water up to the MAX fill line. The tank capacity is 1.5 liters (1.6 quarts).
- Fermez bien le couvercle.
5. Mode d'emploi
5.1 Mise sous/hors tension
- Branchez la machine à glaçons sur une prise électrique mise à la terre.
- Appuyez sur le MARCHE/ARRÊT button on the control panel to turn the unit on. The indicator light will illuminate.
- Pour éteindre l'appareil, appuyez sur la MARCHE/ARRÊT Appuyez à nouveau sur le bouton.
5.2 Procédé de fabrication de la glace

Figure 5.1 : The VEVOR Nugget Ice Maker in operation, showing the transparent window and the blue light inside, indicating ice production.
- Once powered on and with sufficient water, the ice maker will automatically begin the ice production cycle.
- The unit can produce up to 33 pounds of nugget ice within 24 hours.
- Nugget ice is characterized by its chewable, brittle texture, which is ideal for retaining beverage flavor.

Figure 5.2 : A visual representation of nugget ice, highlighting its desirable characteristics: it retains flavor, is chewable, and brittle.
5.3 Voyants lumineux
- Water Low Indicator: This light will illuminate when the water level in the tank is too low. Refill the water tank to resume ice production.
- Indicateur de glace pleine : This light will illuminate when the ice basket is full. The ice maker will pause operation until ice is removed.
5.4 Ice Transfer

Figure 5.3 : Demonstrates the convenient transfer of ice from the machine using the included ice scoop and the removable ice basket.
Use the provided ice scoop to transfer ice from the ice basket. The ice basket is removable for easier access and cleaning.
6. Entretien et nettoyage
6.1 Nettoyage automatique
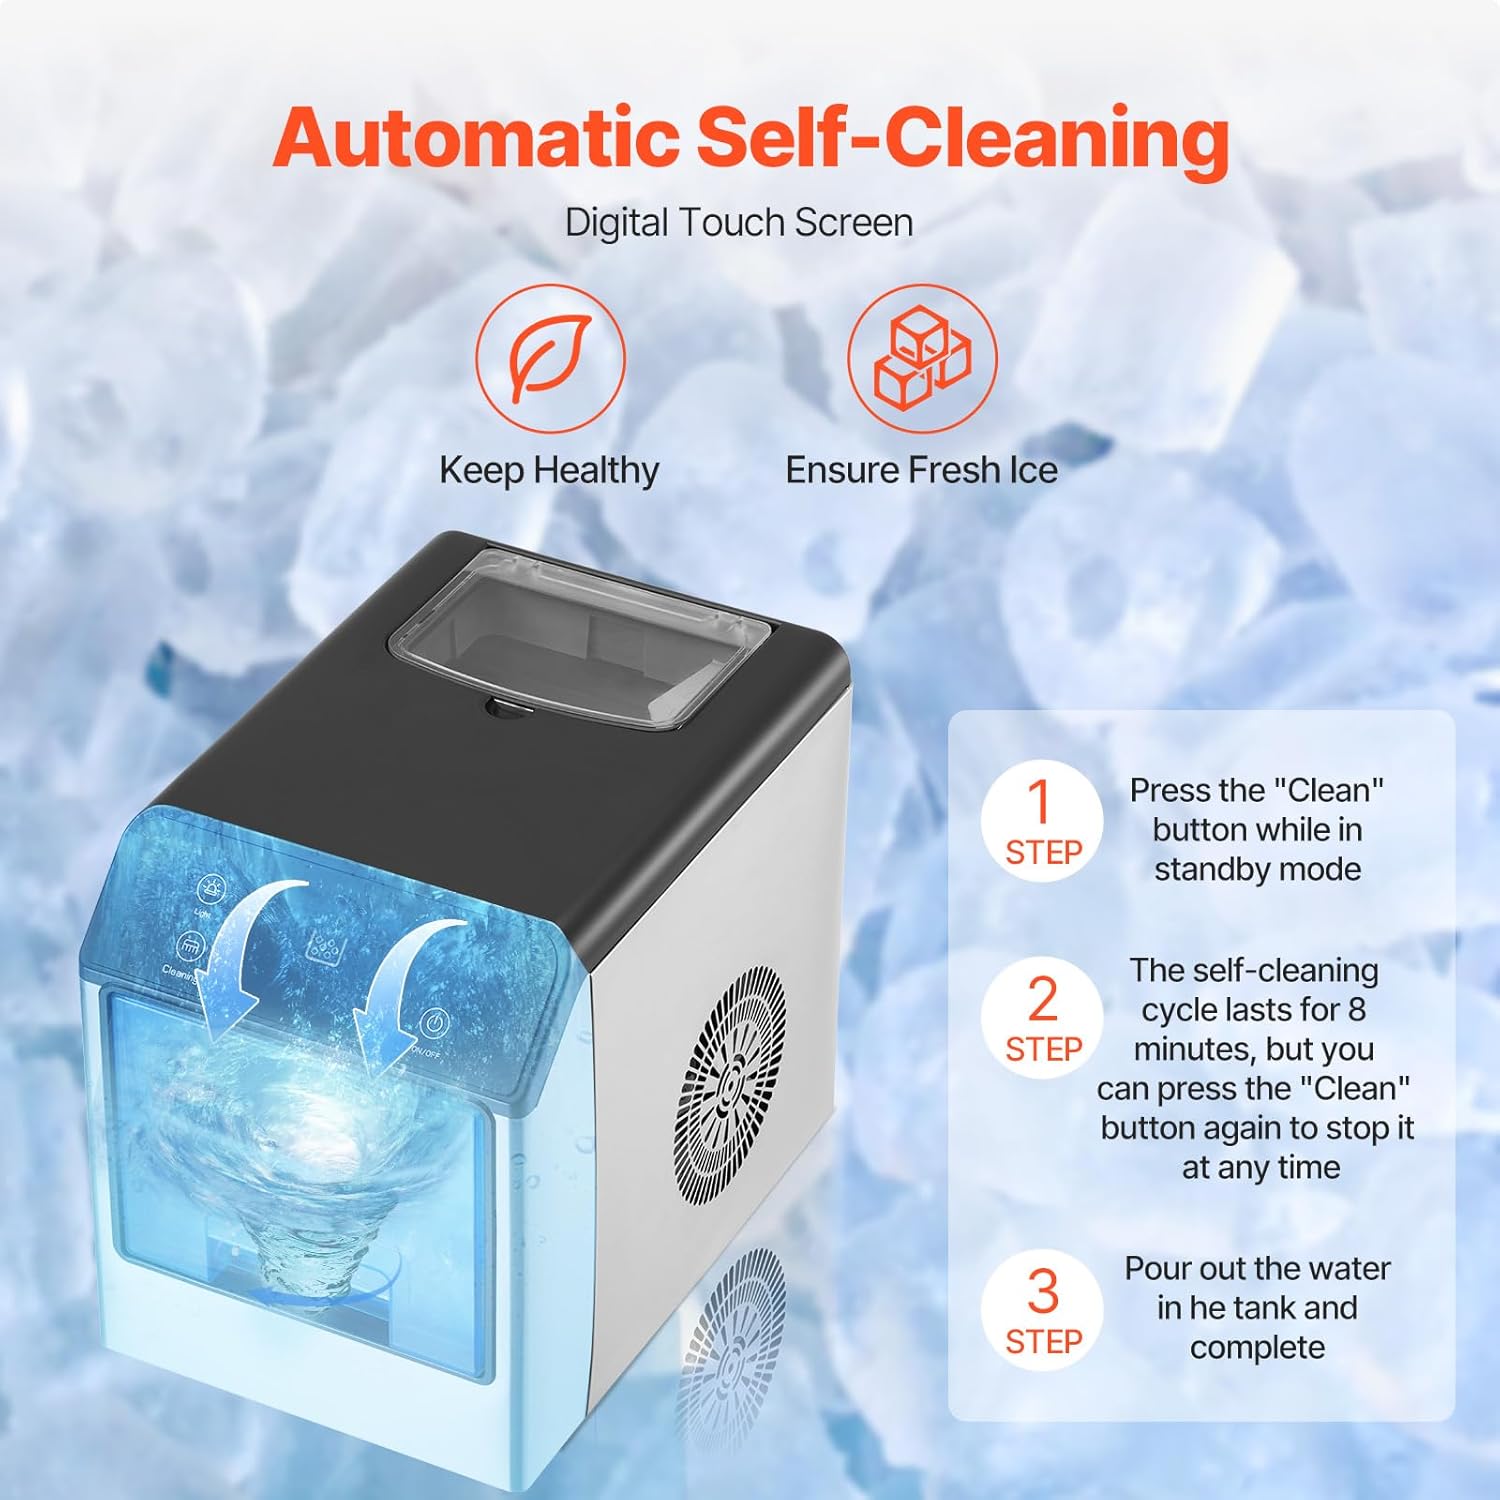
Figure 6.1 : Visual guide for the automatic self-cleaning process, detailing steps to initiate and complete the cycle.
- Ensure the unit is in standby mode (powered on but not making ice).
- Appuyez et maintenez enfoncé le Nettoyage button for 5 seconds to activate the 30-minute self-cleaning mode.
- The self-cleaning cycle will run for 30 minutes. You can press the Nettoyage button again at any time to stop it.
- After the cycle, drain the water from the unit and wipe the interior dry.
6.2 Nettoyage régulier
- Débranchez toujours la machine à glaçons avant de la nettoyer.
- Nettoyez l'extérieur avec un doux, damp chiffon. N'utilisez pas de nettoyants abrasifs ou de solvants.
- Remove the ice basket and drip tray and wash them with mild soap and warm water. Rinse thoroughly and dry.
- For the interior, wipe surfaces with a soft cloth dampened with a solution of water and white vinegar (1:1 ratio). Rinse by wiping with a clean, damp tissu.
- Assurez-vous que toutes les pièces soient parfaitement sèches avant de remonter et de mettre en marche l'appareil.
- It is recommended to clean the ice maker at least once a week, or more frequently depending on usage.
7. Dépannage
| Problème | Cause possible | Solution |
|---|---|---|
| La machine à glaçons ne produit pas de glace. | Pas d'eau dans le réservoir. Cordon d'alimentation débranché. Température ambiante trop élevée. | Fill water tank to MAX line. Assurez-vous que le cordon d'alimentation est bien branché. Opérer dans un environnement plus frais. |
| "Water Low" indicator is on. | Water tank is empty or below minimum level. | Remplissez le réservoir d'eau avec de l'eau potable. |
| Le voyant « Glace pleine » est allumé. | Le panier à glace est plein. | Retirez les glaçons du panier à glaçons. |
| Bruit inhabituel pendant le fonctionnement. | L'unité n'est pas de niveau. Internal components vibrating. | Assurez-vous que l'appareil est placé sur une surface plane et stable. This is often normal during ice production; if excessive, contact support. |
| Ice has an unusual taste or odor. | L'appareil a besoin d'être nettoyé. Eau stagnante. | Perform a self-cleaning cycle and regular cleaning. Use fresh, potable water. |
If you encounter issues not listed here or if the problem persists after attempting the solutions, please contact VEVOR customer support.
8. Spécifications
| Fonctionnalité | Spécification |
|---|---|
| Marque | VEVOR |
| Nom du modèle | Machine à glaçons pépite |
| Numéro de modèle | DIM-15A |
| Dimensions du produit (P x L x H) | 9.5" x 13.9" x 11.9" (242 x 354 x 302 mm) |
| Capacité du réservoir d'eau | 1.5 litres (1.6 pintes) |
| Capacité maximale de fabrication de glaçons | 33 lb / 24 heures |
| Capacité de stockage de glace | 1.35 kg (3 lb) |
| Voltage | 110 volts |
| Réfrigérant | R600a |
| Poids de l'article | 26 livres (11.8 kg) |
| Niveau de bruit | ≤ 50 dB |
| Principaux matériaux | Acier inoxydable, ABS |
9. Garantie et assistance
This product comes with a standard manufacturer's warranty. Please refer to the warranty card included in your packaging or visit the official VEVOR webConsultez le site pour connaître les conditions générales de garantie détaillées.
For technical support, service, or replacement parts, please contact VEVOR customer service. Have your model number (DIM-15A) and purchase information ready when contacting support.
Included Components: 1 x Instruction Manual, 1 x Ice Scoop, 1 x Drip Tray.