
AAU FC-BP120
AAU Blood Pressure Monitor FC-BP120 User Manual
Modèle : FC-BP120
1. Introduction
This manual provides detailed instructions for the proper use and maintenance of your AAU Automatic Upper Arm Blood Pressure Monitor, model FC-BP120. Please read this manual thoroughly before using the device to ensure accurate measurements and safe operation. Keep this manual for future reference.

Image 1.1: The AAU Blood Pressure Monitor FC-BP120, showing the main unit and the adjustable arm cuff.
2. Informations importantes sur la sécurité
Observe the following precautions to ensure safe and effective use:
- Consultez votre médecin avant d'utiliser cet appareil si vous souffrez d'un quelconque problème médical.
- N’utilisez pas cet appareil sur les nourrissons, les enfants ou les personnes incapables d’exprimer leur consentement.
- Évitez de prendre des mesures dans un véhicule en mouvement ou pendant une activité physique.
- N’essayez pas de réparer ou de modifier l’appareil vous-même. Contactez le service client pour obtenir de l’aide.
- Gardez l'appareil et le brassard à l'abri de l'eau et des températures extrêmes.
- This device is intended for home use and should not replace professional medical advice or treatment.
3. Contenu du colis
Vérifiez que tous les éléments sont présents dans le colis :
- 1 x AAU Blood Pressure Monitor (Model FC-BP120)
- 1 x Adjustable Upper Arm Cuff (8.66-16.54 inches / 22-42 cm)
- 1 x câble USB Type-C
- 1 x Manuel d'instructions
- 1 x Guide de démarrage rapide

Image 3.1: The complete package contents, including the monitor, cuff, USB cable, and manuals.
4. Produit terminéview
4.1. Main Unit and Display
The monitor features a large LCD display and intuitive buttons for easy operation. The display provides clear readings of systolic pressure, diastolic pressure, pulse rate, and other indicators.

Image 4.1: Labeled diagram of the LCD display, indicating battery icon, user number, systolic pressure, diastolic pressure, pulse rate, time/date, cuff self-check icon, body motion detection icon, average icon, memory icon, and irregular heartbeat icon.
4.2. Boutons
- Bouton de réglage: Used to enter settings mode (e.g., date, time, user selection).
- Bouton MARCHE/ARRÊT : Initiates and stops a measurement. Also used to power the device on/off.
- Bouton MEM : Accède aux enregistrements de mesures stockés.
5. Installation
5.1. Alimentation électrique
The monitor can be powered by either AAA batteries or a Type-C USB cable.
- Installation de la batterie : Open the battery compartment cover on the back of the monitor. Insert four (4) AAA batteries, ensuring correct polarity (+/-). Close the cover securely.
- Alimentation USB Type-C : Connect the provided Type-C USB cable to the monitor's port and to a compatible USB power adapter (not included) or a computer USB port.
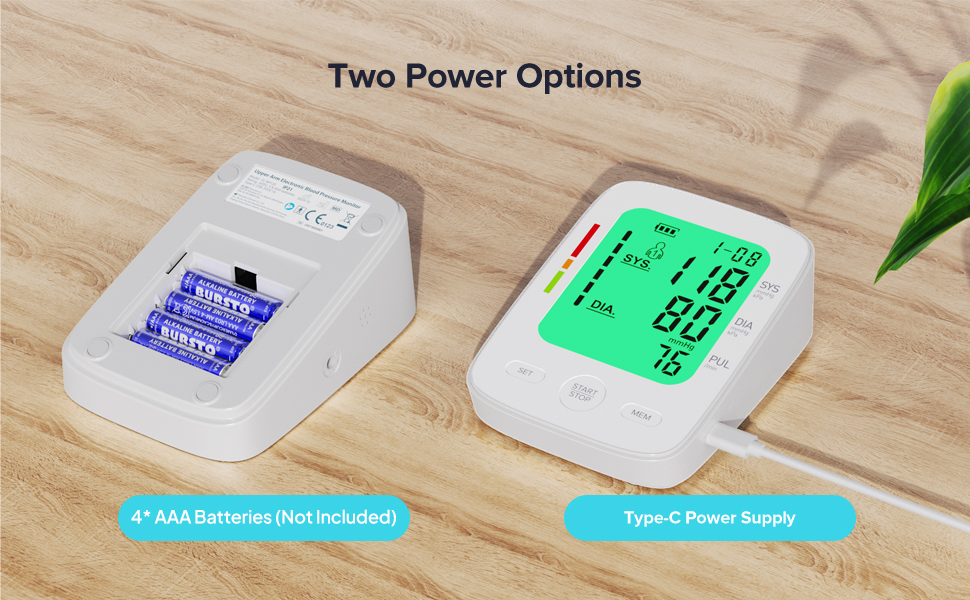
Image 5.1: Illustration of the two power options: inserting 4 AAA batteries into the compartment or connecting via a Type-C USB cable.
5.2. Fixation du bracelet
Insérez fermement l'embout pneumatique du brassard dans la prise d'air située sur le côté du moniteur.
6. Mode d'emploi
6.1. Préparation à la mesure
For accurate readings, follow these steps before taking a measurement:
- Asseyez-vous confortablement, le dos soutenu et les pieds à plat sur le sol.
- Posez votre bras sur une table de façon à ce que le bracelet soit à hauteur du cœur.
- Ensure the cuff is placed directly on your bare upper arm, 1-2 cm above the elbow joint. The air tube should run down the center of your arm.
- Relax for 5 minutes before measuring. Avoid talking or moving during the measurement.
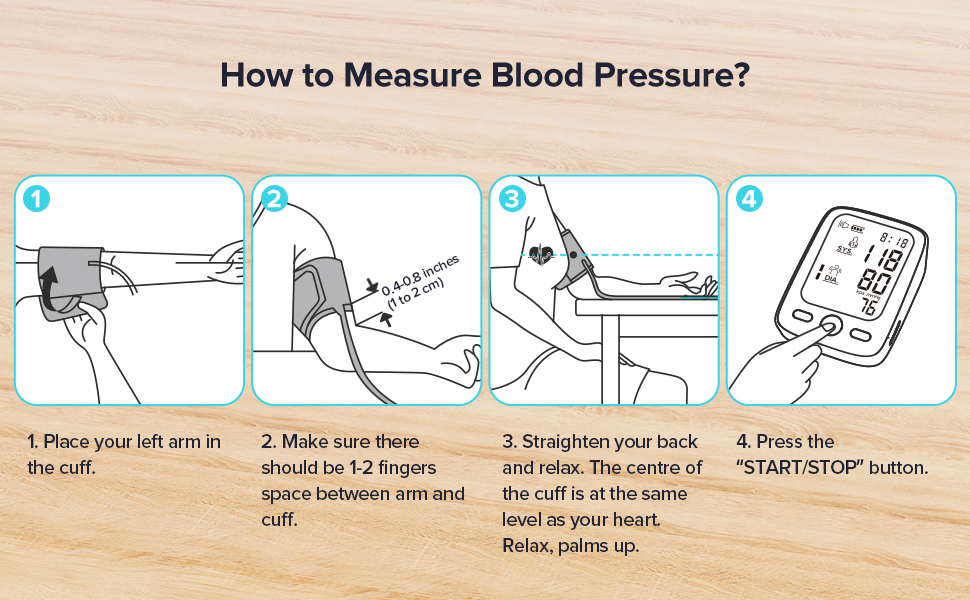
Image 6.1: A visual guide demonstrating the four key steps for proper blood pressure measurement: cuff placement, finger space, arm position, and pressing the start button.
6.2. Prendre une mesure
With the cuff correctly positioned and the device powered on:
- Appuyez sur le DÉMARRER/ARRÊTER bouton. Le bracelet se gonflera automatiquement.
- Remain still and silent during inflation and deflation.
- Once the measurement is complete, the results (Systolic, Diastolic, Pulse) will be displayed on the screen.
- The device will automatically shut off after 2 minutes of inactivity to conserve power.
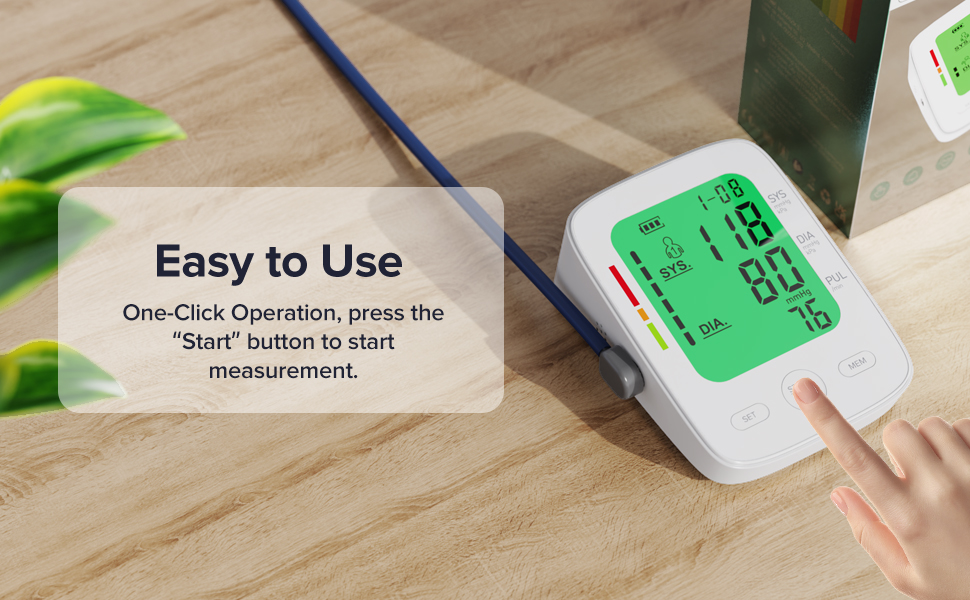
Image 6.2: A hand initiating a measurement by pressing the START/STOP button on the monitor.
6.3. Comprendre vos résultats
The monitor displays Systolic (SYS), Diastolic (DIA), and Pulse (PUL) readings. It also features a 3-color backlight display to help interpret blood pressure levels:
- Vert: Indicates blood pressure within the normal range.
- Orange: Indicates elevated or pre-hypertensive blood pressure.
- Rouge: Indicates high blood pressure (hypertension).
An irregular heartbeat icon will appear if an irregular pulse is detected during measurement.
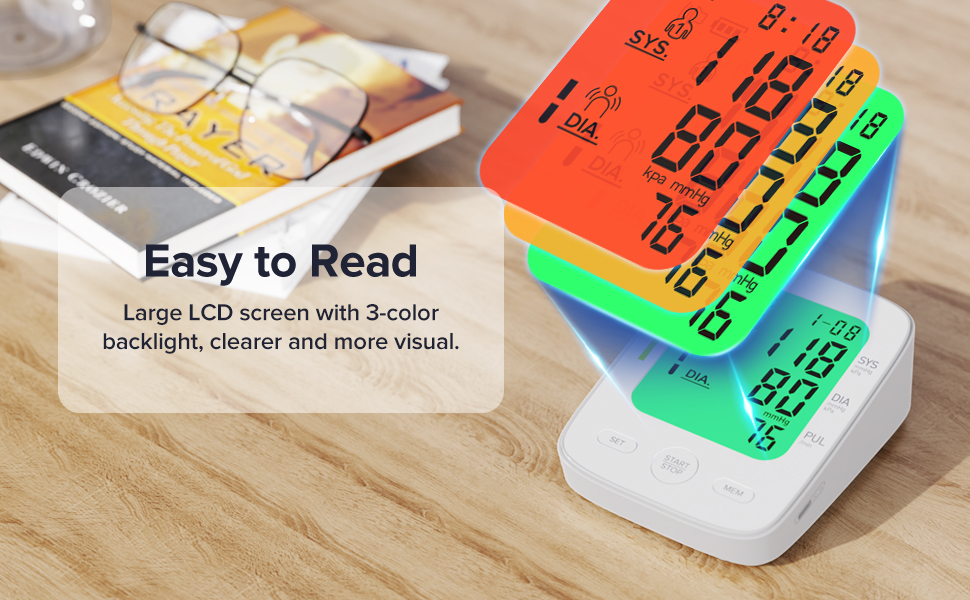
Image 6.3: The monitor's display with a visual guide explaining the 3-color backlight system for blood pressure interpretation (Green for normal, Orange for elevated, Red for high).
6.4. Dual User Mode and Memory Function
The device supports two users, each with 99 memory sets, allowing for tracking of individual blood pressure trends.
- Selecting a User: En mode veille, appuyez sur la touche ENSEMBLE button to toggle between User 1 and User 2.
- Viewmémoire : Appuyez sur le MEM bouton pour view stored readings. Repeatedly press MEM to scroll through records.
- Average Function: The monitor can display the average of the last three measurements.
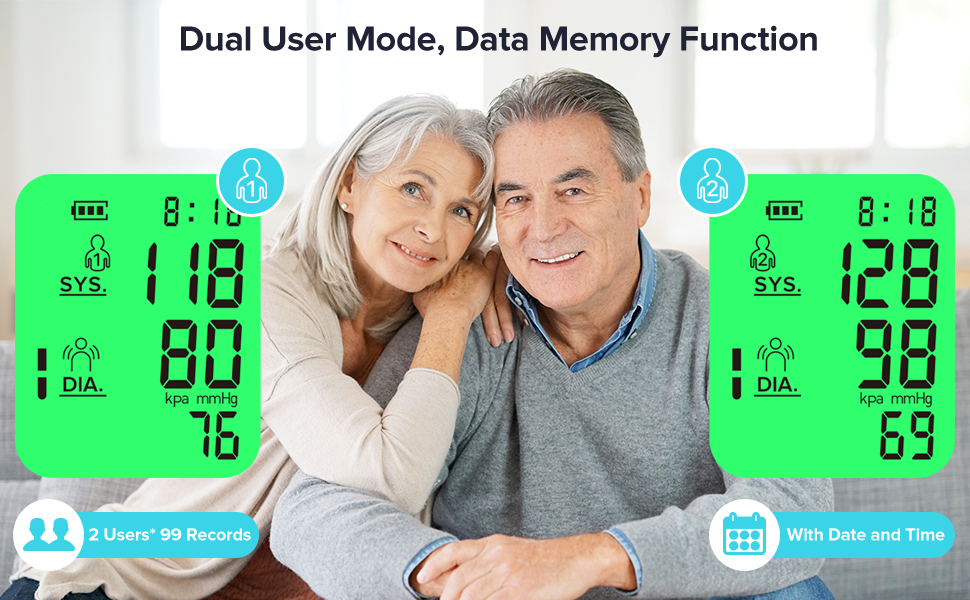
Image 6.4: An illustration of the dual-user mode, showing separate measurement records for User 1 and User 2.
7. Entretien
7.1. Nettoyage
Essuyez le moniteur et le brassard avec un chiffon doux et sec. Si nécessaire, utilisez un chiffon légèrement humidifié.amp Nettoyez l'appareil avec un chiffon imbibé de savon doux, puis essuyez-le. N'utilisez pas de nettoyants abrasifs et n'immergez pas l'appareil dans l'eau.
7.2. Stockage
Store the device in a clean, dry place, away from direct sunlight, extreme temperatures, and humidity. If not in use for an extended period, remove the batteries.
8. Dépannage
| Problème | Cause possible | Solution |
|---|---|---|
| No power/Display blank | Les piles sont déchargées ou mal insérées ; le câble USB n’est pas connecté. | Remplacez les piles par des neuves en respectant la polarité. Vérifiez la connexion du câble USB. |
| "Err" or "E" displayed | Cuff not applied correctly; excessive movement during measurement; air leakage. | Reapply cuff correctly. Remain still and silent. Check cuff and tube for damage. |
| Lectures inexactes | Incorrect posture; talking during measurement; cuff size incorrect. | Ensure proper posture and silence. Verify cuff fits arm circumference (8.66-16.54 inches). |
| Le brassard ne se gonfle pas. | Air plug not fully inserted; cuff or tube damaged. | Ensure air plug is securely connected. Check for visible damage to cuff or tube. |
9. Spécifications
- Nom du modèle : FC-BP120
- Dimensions du produit : 5.5 po L x 3.5 po l x 2.7 po ép.
- Poids de l'article : 0.9 livre (environ 14.4 onces)
- Taille du brassard: Réglable, 8.66-16.54 pouces (22-42 cm)
- Source d'alimentation : 4* AAA Batteries (not included) or Type-C Power Supply
- Type d'affichage : LCD numérique
- Mémoire: 2 utilisateurs x 99 séries de lectures
- Méthode de mesure : Oscillométrique
- Fabricant: Shenzhen Finicare Co., Ltd.
10. Garantie et support client
AAU provides professional customer service. If you have any questions or require assistance with your FC-BP120 Blood Pressure Monitor, please contact our customer support team. Refer to the contact information provided in your quick start guide or product packaging for details.
Ask a question about this manual
Ask about setup, troubleshooting, compatibility, parts, safety, or missing instructions. Manuals+ will review the question and use this page’s manual context to help answer it.