Introduction
This manual provides detailed instructions for the NineLeaf Bike Alarm, model KS-SF32R. This device is designed to provide anti-theft protection for various items including motorcycles, e-bikes, e-scooters, mopeds, UTVs, ATVs, doors, and windows. It features 3D displacement sensors, adjustable sensitivity, and remote control operation.
Paramètres du produit
- Alarm Battery: 4.2V 700mAh lithium battery. Working time: approximately 1-3 months. Standby time: approximately 6 months.
- Alarm Charge Port: Standard USB-C 5V. Note: Some quick chargers may not be compatible.
- Batterie à distance:
- WL03C Remote: 27A (12V) Alkaline battery. Working time: approximately 1-2 years (based on 5 uses per day).
- WL09C Remote: CR2032 (3V) Button battery. Working time: approximately 2-4 years (based on 5 uses per day).
- Fréquence de travail : 433.92 MHz
- Température de l'environnement de travail: -40°C à +70°C
- Humidité de l'environnement de travail : <80%
- Température de stockage : -40°C à +70°C
Configuration : Guide d'installation
Installation Method 1: Bracket Installation
This method is suitable for bikes, electric bikes, and tricycles, allowing fixation on handlebars, front axle frames, seat tubes, rear frames, or other hidden locations.
- Rotate the bracket into the back of the alarm until it locks, then screw it on to fix it securely.
- Place two silicone pads on the two-part bracket. Align the contours on the silicone pad with the grooves on the inside of the brackets.
- Place the two-part bracket with silicone pads on the selected tube, and tighten the screw until the mount does not slide on the tube. Note: Periodically check the tightness of the screw.

Figure 1 : Plusview of the three available installation methods for the alarm unit.
Installation Method 2: Zip Ties / Double-Sided Tape Installation
This method is ideal if the bracket diameter is not suitable for your frame, or if you wish to install the alarm in locations such as under the seat cushion, in the trunk, under the pedal, or in the front storage box.
- Choose zip ties if the bracket diameter is incompatible with your frame.
- For installation in areas like the seat cushion, trunk, under the pedal, or front storage box, use double-sided adhesive tape.
- Étape d'installation : Rotate the bracket base into the back of the alarm until it locks. Then, attach the alarm using zip ties or double-sided tape to your chosen position.
Mode d'emploi
Fonctions de la télécommande
The alarm is operated using the provided remote control. The remote allows for easy control of the alarm's status.

Figure 2 : Disposition et fonctions de la télécommande.
- Bras: Press the arm button to activate the alarm. The alarm will enter monitoring mode.
- Désarmer: Press the disarm button to deactivate the alarm.
- Change Tone: Use this button to cycle through various alarm ringtones.
- Fonction de recherche : Press this button to locate your bike or item by triggering a short alarm sound.
Réglage de la sensibilité
The alarm features 7 levels of adjustable sensitivity, allowing you to customize how easily the alarm is triggered, from a gentle touch to a strong impact.

Figure 3: Visual representation of the 7 sensitivity levels.
Refer to the product's specific instructions for how to enter sensitivity adjustment mode and select your desired level.
Réglage du volume
The alarm offers a three-step volume adjustment function, with a maximum output of up to 110dB, ensuring the alarm sound is appropriate for your environment.

Figure 4: The alarm activating during a theft attempt, demonstrating its 110dB sound output.
Entretien
Chargement de la batterie
The alarm unit is equipped with a built-in high-capacity lithium battery that supports USB-C standard charging. A single charge can provide approximately 1-3 months of use, with a standby time of about 6 months.
- Connect a standard USB-C 5V charger to the alarm's charging port.
- During charging, a red LED light inside the alarm will illuminate.
- The red light will turn off once the battery is fully charged.
- The device incorporates power-saving technology to extend battery life and reduce charging frequency.
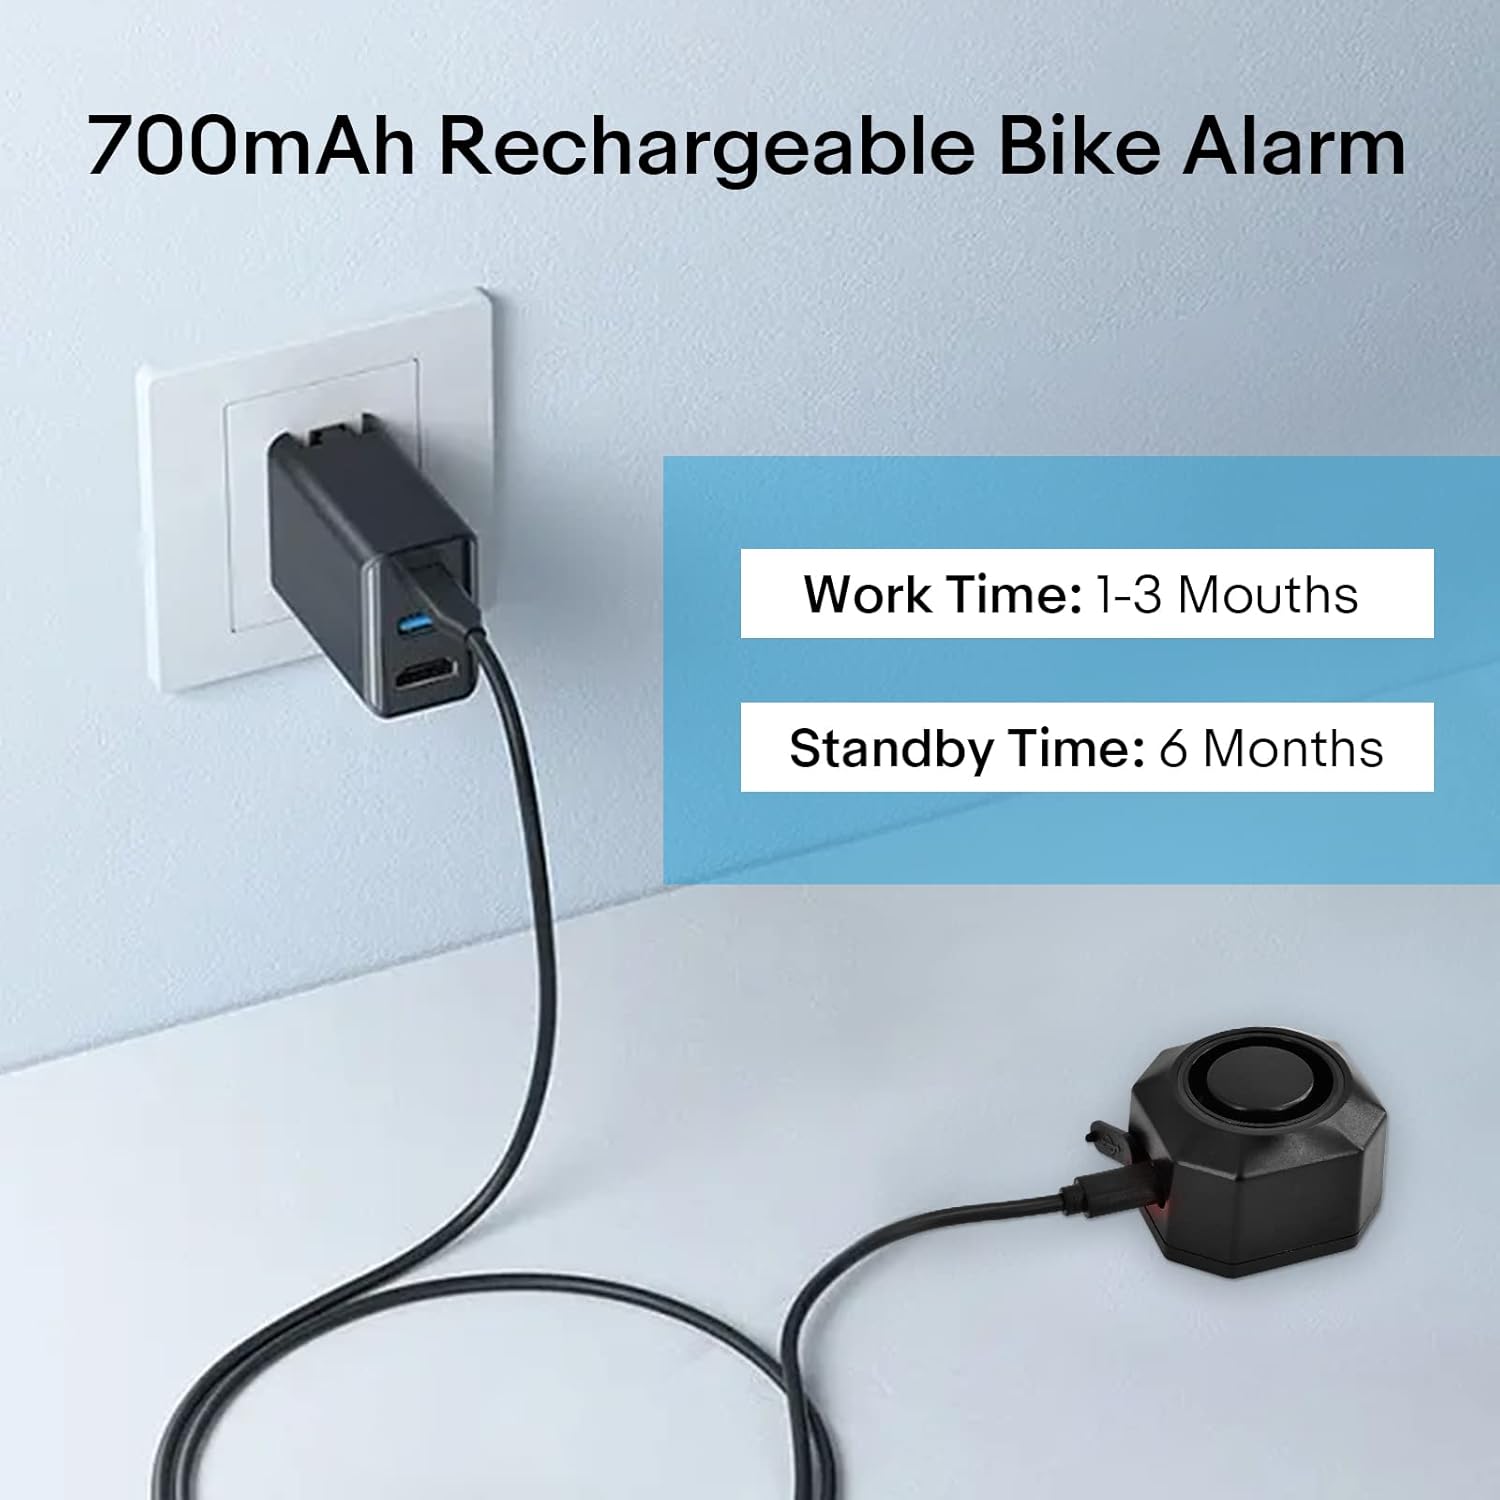
Figure 5: The alarm unit being charged via USB-C, highlighting its battery life.
Étanche à l'eau et à la poussière
The alarm is constructed from PC+ anti-UV material, providing IP54 waterproof and dustproof functionality. This design allows the device to operate reliably in various environmental conditions, including rain, wind, and extreme temperatures.

Figure 6: The alarm demonstrating its IP54 waterproof capability.
Dépannage
- L'alarme ne répond pas à la télécommande :
- Vérifiez la pile de la télécommande. Remplacez-la si nécessaire.
- Ensure the alarm unit is charged.
- Verify that the remote and alarm are within effective operating range.
- Fausses alertes :
- Adjust the sensitivity level to a lower setting.
- Ensure the alarm is mounted securely and not subject to excessive vibrations from external sources (e.g., strong winds, passing heavy vehicles).
- Alarme pas assez forte :
- Adjust the volume setting to a higher level using the remote control.
- Ensure the alarm speaker is not obstructed.
- Problèmes de charge :
- Ensure you are using a standard USB-C 5V charger. Some quick chargers may not be compatible.
- Check the USB-C cable for damage.
- Verify the charging port on the alarm is clean and free of debris.
Caractéristiques
| Fonctionnalité | Détail |
|---|---|
| Numéro de modèle de l'article | KS-SF32R |
| Poids de l'article | 12 onces |
| ASIN | B0DMP6LSJ5 |
| Date de première disponibilité | 11 novembre 2024 |

Figure 7: Dimensions of the alarm unit and remote control.
Garantie et assistance
For warranty information and technical support, please refer to the documentation included with your purchase or visit the official NineLeaf website. Conservez votre reçu d’achat pour les réclamations au titre de la garantie.
For further assistance, you may contact NineLeaf customer service through the contact information provided on their official websur le site ou auprès du détaillant où le produit a été acheté.