1. Introduction
This manual provides detailed instructions for the installation, operation, maintenance, and troubleshooting of the Fydun ZL-7901A Incubator Controller. This device is designed for precise and automatic control of temperature and humidity in various incubation environments, ensuring optimal conditions for successful hatching.
2. Produit terminéview
The Fydun ZL-7901A is a high-precision digital incubator controller capable of managing both temperature and humidity. It features a clear display and intuitive controls for easy programming and monitoring.
Caractéristiques principales :
- Contrôle précis : High-accuracy temperature and humidity regulation for stable incubator environments.
- Forte résistance aux interférences : Designed for reliable operation in various conditions.
- High Stability and Accuracy: Ensures consistent performance for critical incubation processes.
- Large application : Suitable for a variety of eggs including chicken, duck, goose, pigeon, quail, parrot, and peacock.
- Opération automatique: Fully automatic control reduces manual intervention.
Composants:

Figure 2.1 : Devant view of the Fydun ZL-7901A Incubator Controller, showing the display and control buttons.

Figure 2.2 : The ZL-7901A controller packaged with its temperature and humidity sensors and connecting cables.

Figure 2.3 : The ZL-7901A controller shown in an incubator environment, demonstrating its application for egg incubation.
3. Consignes de sécurité
- Lisez attentivement toutes les instructions avant l'installation et l'utilisation.
- Assurer l'alimentation voltage matches the controller's requirements (100V-240V).
- Tous les travaux de câblage doivent être effectués par un professionnel qualifié afin de prévenir les risques électriques.
- N’exposez pas le contrôleur à l’eau ou à une humidité excessive.
- Gardez l'appareil à l'écart des matériaux inflammables.
- Coupez l'alimentation électrique avant d'effectuer toute opération de maintenance ou de modification du câblage.
- Cet appareil n'est pas un jouet. Tenir hors de portée des enfants.
4. Configuration et installation
4.1 Montage du contrôleur
The ZL-7901A controller is designed for panel mounting. Ensure a secure and stable location within your incubator setup.

Figure 4.1 : Côté view illustrating the mounting bracket for panel installation.
4.2 Connexions de câblage
Carefully connect the power supply, sensors, and output devices (heater, humidifier, fan, egg turner) to the appropriate terminals on the back of the controller. Refer to the wiring diagram provided with your product for specific connections. Ensure all connections are tight and secure.

Figure 4.2 : Arrière view of the controller, showing the terminal blocks for electrical connections.
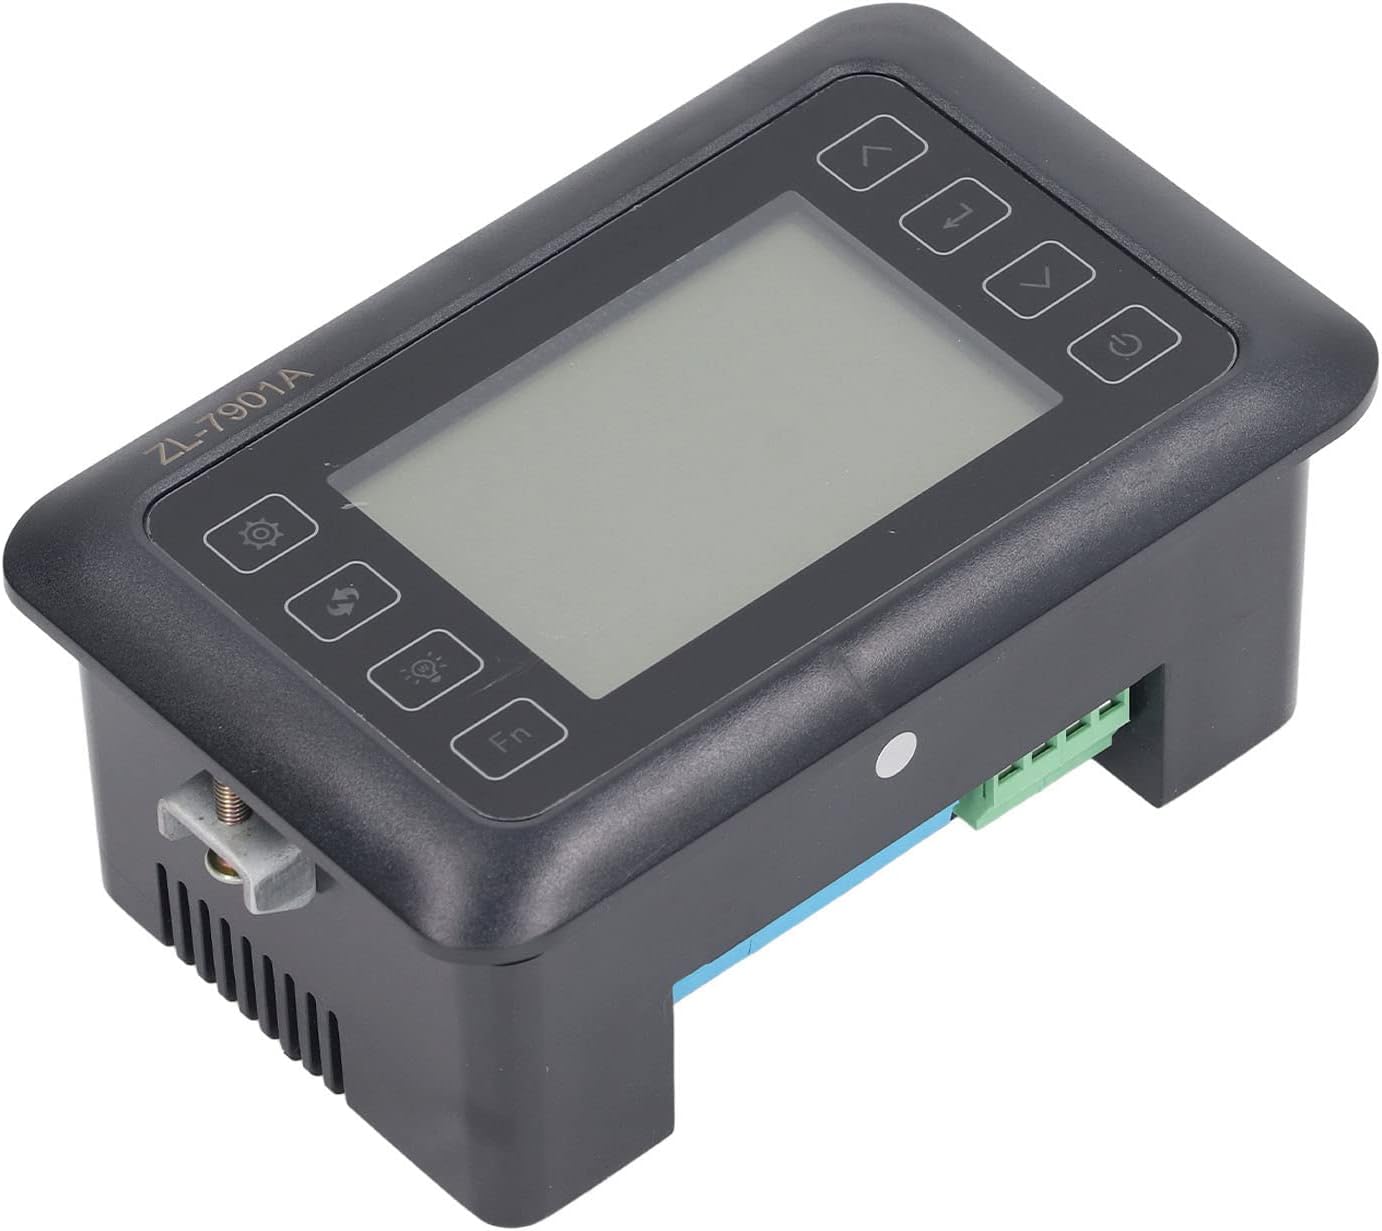
Figure 4.3 : Incliné view highlighting the various connection points on the controller's side.
After all connections are made, double-check them for correctness before applying power.
5. Mode d'emploi
5.1 Mise sous/hors tension
Appuyez sur le Bouton d'alimentation to turn the controller on or off. The display will illuminate upon power-on. The power button is located on the right side of the controller's front panel.
5.2 Affichage terminéview
The main display shows the current temperature and humidity readings. Additional indicators may show the status of heating, humidifying, and turning functions.
5.3 Réglage des paramètres
- Appuyez sur le Bouton Paramètres (gear icon) to enter the parameter setting mode. This button is on the left side of the controller's front panel.
- Utilisez le Up (flèche vers le haut) et Vers le bas (down arrow) buttons to navigate through different parameters (e.g., target temperature, target humidity, egg turning interval). These buttons are on the right side of the controller's front panel.
- Appuyez sur le Bouton Entrée (return arrow icon) to select a parameter for editing. This button is on the right side of the controller's front panel.
- Utilisez le Up et Vers le bas boutons pour régler la valeur.
- Appuyez sur le Bouton Entrée à nouveau pour confirmer la nouvelle valeur.
- Repeat for all desired parameters.
- Exit the setting mode by pressing the Bouton Paramètres à nouveau ou en attendant l'expiration du délai.
Note: Consult the full product manual (if provided separately) for a complete list of parameters and their functions.
5.4 boutons de fonction
- Bouton lumineux (light bulb icon): Controls the internal light of the incubator (if connected). This button is on the left side of the controller's front panel.
- Bouton Fn: Activates special functions or enters advanced settings. Refer to the detailed manual for specific Fn button operations. This button is on the left side of the controller's front panel.
6. Entretien
6.1 Nettoyage
- Ensure the controller is powered off and disconnected from the power source before cleaning.
- Wipe the exterior of the controller with a soft, dry cloth.
- N’utilisez pas de nettoyants abrasifs, de solvants et n’immergez pas l’appareil dans l’eau.
- Keep the sensor probes clean and free from debris to ensure accurate readings.
6.2 Entretien des capteurs
Handle the temperature and humidity sensors with care. Avoid bending or damaging the cables. If readings appear inaccurate, gently clean the sensor tips. Do not attempt to disassemble the sensors.
7. Dépannage
| Problème | Cause possible | Solution |
|---|---|---|
| Le contrôleur ne s'allume pas. | Absence d'alimentation électrique ; connexion desserrée ; câble d'alimentation défectueux. | Check power outlet; ensure all connections are secure; test power cable. |
| Relevés de température/humidité inexacts. | Sensor dirty or damaged; sensor not properly placed; calibration needed. | Clean sensor; reposition sensor away from direct airflow/heat; refer to advanced settings for calibration (if available). |
| Heater/Humidifier not activating. | Output device not connected; setpoint not reached; faulty output device. | Verify wiring connections; check setpoint values; test heater/humidifier independently. |
| L'écran affiche le code d'erreur. | Sensor fault; internal error. | Note the error code and consult the full product manual or contact support. |
8. Spécifications
| Fonctionnalité | Détail |
|---|---|
| Modèle | ZL-7901A |
| Marque | Fydun |
| Vol d'entréetage | 100V-240V CA |
| Type de contrôle | Fully Automatic Digital Temperature and Humidity Control |
| Précision | High precision for both temperature and humidity |
| Application | Incubators for various poultry and bird eggs |
| Montage | Montage sur panneau |
9. Garantie et assistance
Fydun is committed to providing quality products and excellent customer service. If you encounter any issues or have questions regarding your ZL-7901A Incubator Controller, please contact our customer service team.
For support, please refer to the contact information provided with your purchase or visit the official Fydun store on Amazon: Fydun Amazon Store.
Our professional customer service team is ready to assist you promptly.