WININMETA HHSP01
WININMETA Solar Panel Charger User Manual
Model: HHSP01
1. Introduction
Thank you for choosing the WININMETA Solar Panel Charger. This product is designed to provide continuous, eco-friendly power to your compatible Eufy security cameras, eliminating the need for frequent battery recharges. With its robust, weather-resistant design and flexible installation options, it ensures your surveillance system remains operational year-round.
This manual provides detailed instructions for the setup, operation, and maintenance of your solar panel charger. Please read it thoroughly before installation and keep it for future reference.
2. Produit terminéview & Contenu du colis
The WININMETA Solar Panel Charger is a high-efficiency 5W solar panel designed for outdoor use. It features a durable construction and a long cable for versatile placement.
Contenu du colis :
- 3 x Solar Panels (with 3M/9.8ft Micro USB cable attached)
- 3 x USB-C Port Connectors
- 3 x 360-degree Adjustable Mounting Brackets
- 9 x vis
- 240 x Attaches de câble

Image: All components included in the 3-pack solar panel charger kit.
Compatibilité:
This solar panel is compatible with various Eufy camera models, including Eufycam 3/3C/2C/2C Pro/E40/E20/2/2 Pro/E/L20/L40/Solo/SoloCam Spotlight.

Image: Visual representation of compatible Eufy camera models.
3. Configuration et installation
Proper installation is crucial for optimal performance. Follow these steps to install your solar panel charger.
3.1 Choosing an Installation Location:
Select a location that receives direct sunlight for most of the day, ideally 5-6 hours. Avoid areas shaded by trees, buildings, or other obstructions. The 9.8ft (3M) cable provides flexibility for placement away from the camera if needed.

Image: Illustrates the importance of direct sunlight for the solar panel.
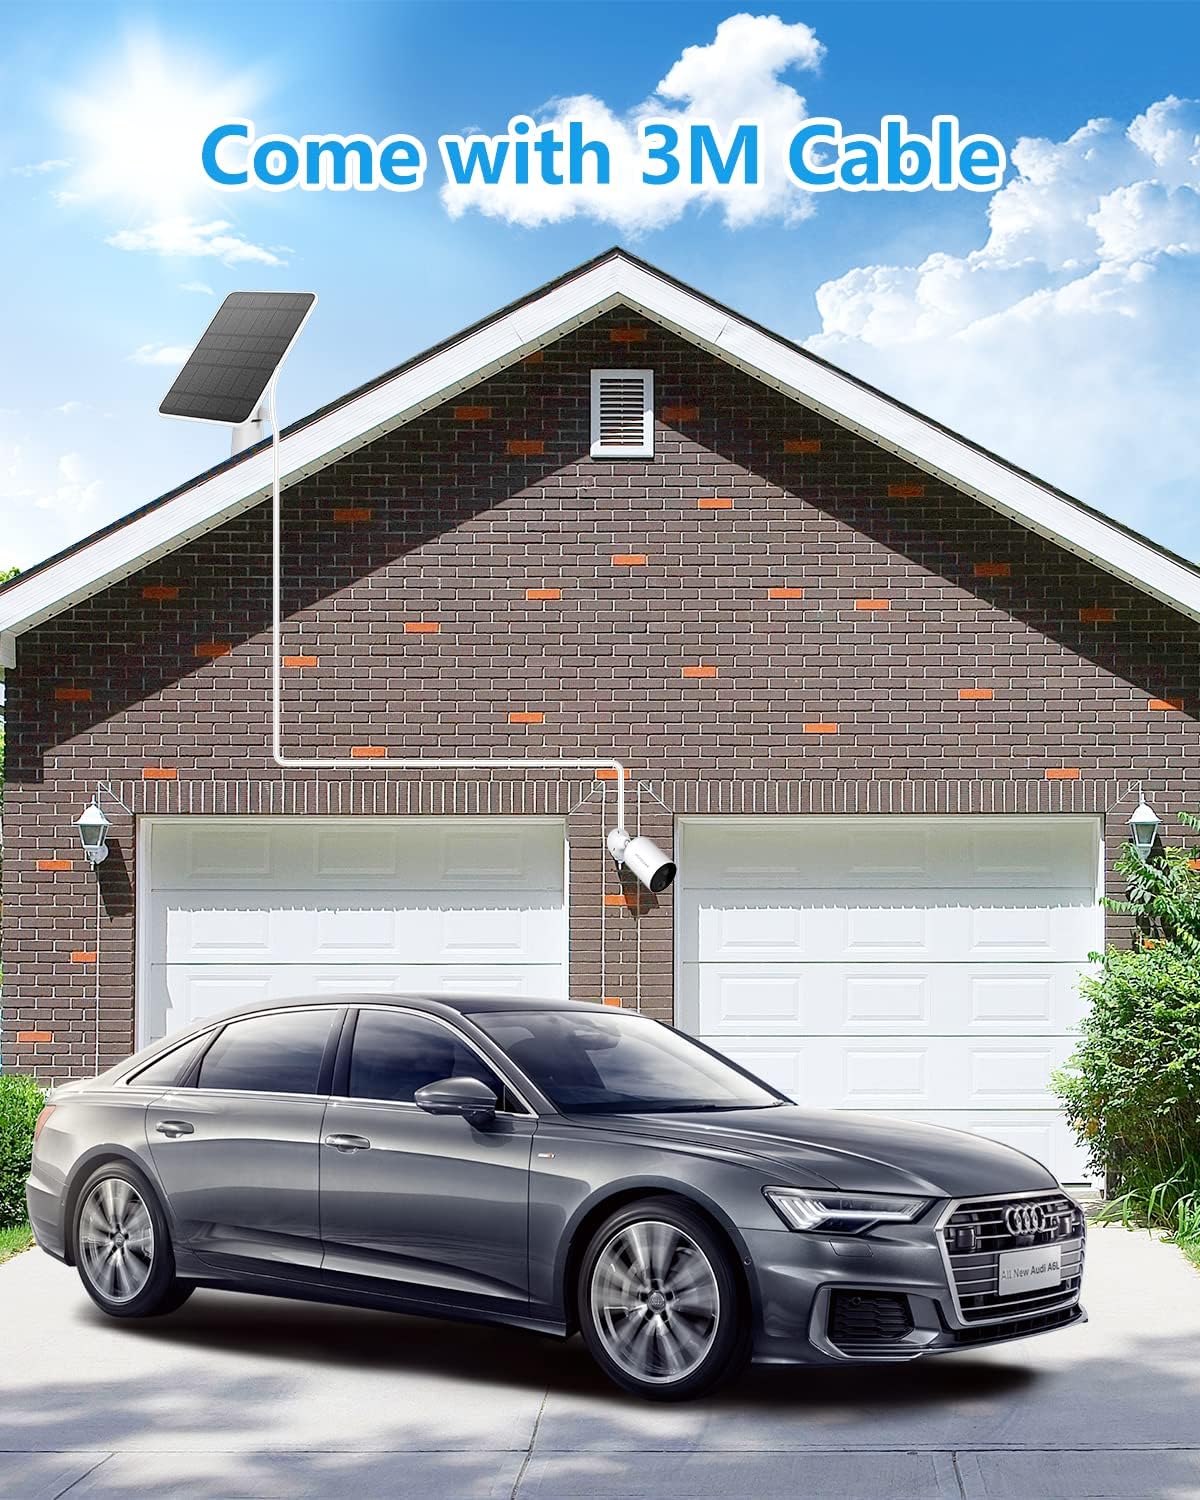
Image: Solar panel installed on a roof, connected to a camera below, highlighting the long cable.
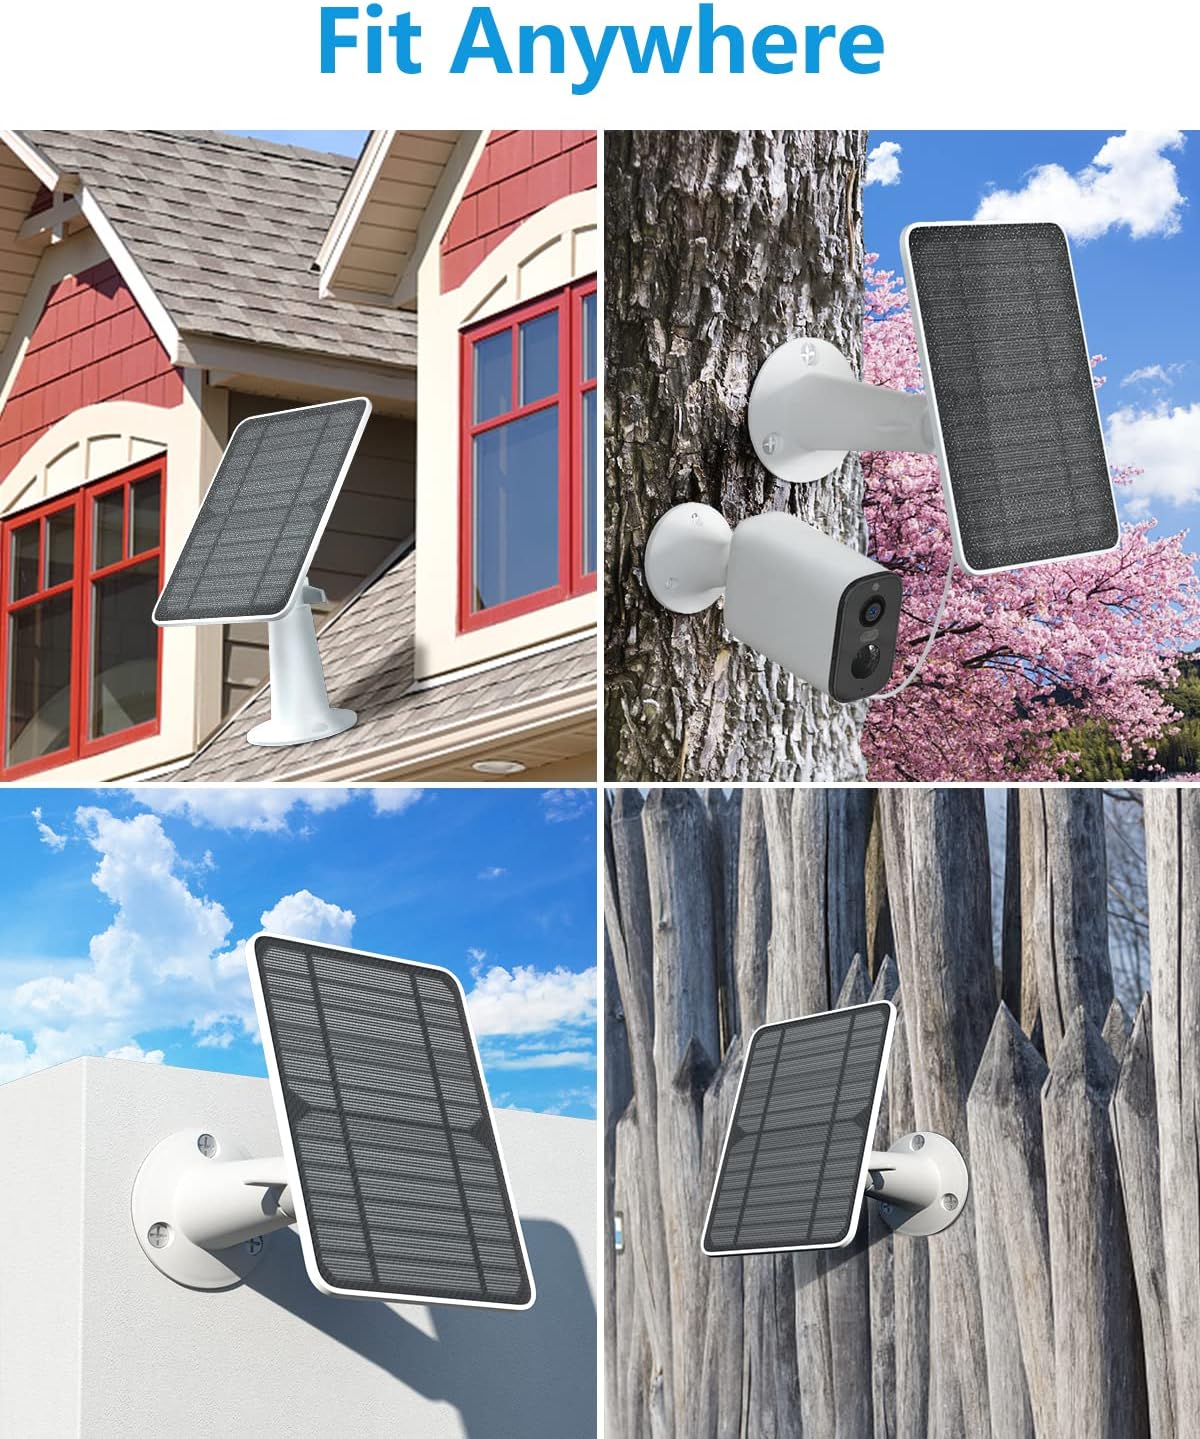
Image: Various suitable locations for mounting the solar panel.
3.2 Mounting the Solar Panel:
- Marquer les positions des trous : Hold the mounting bracket against the desired installation surface. Use a pencil to mark the positions for the screw holes.
- Trous de forage : Drill pilot holes at the marked positions. Insert the wall anchors (if necessary for your surface type).
- Fixer le support : Fixez le support de montage au mur à l'aide des vis fournies.
- Fixer le panneau solaire : Screw the solar panel onto the mounting bracket. Ensure it is firmly attached.
- Ajuster l'angle : Utilize the 360-degree adjustable bracket to position the solar panel for maximum sun exposure. The bracket allows for both 360° rotation and 90° tilt.
- Se connecter à la caméra : Plug the Micro USB or USB-C connector from the solar panel cable into your Eufy camera's charging port. Ensure the connection is secure and sealed to maintain waterproofing.

Image: Step-by-step visual guide for solar panel installation.

Image: The adjustable bracket allows for precise positioning.
Video: A detailed guide on installing the Eufy solar panel, demonstrating marking hole positions, mounting the bracket, attaching the panel, and adjusting its angle for optimal sunlight.
4. Mode d'emploi
Once installed and connected, the solar panel will automatically begin charging your Eufy camera when exposed to sufficient sunlight. The charging efficiency depends on the intensity of the sun's rays and the power consumption of your camera.
- Charge continue : The 5W power output ensures efficient and faster charging compared to standard solar panels, providing continuous power to your camera.
- Paramètres de l'appareil photo : For optimal performance, ensure your Eufy camera's power settings are configured to recognize and utilize the solar panel for charging. Refer to your Eufy camera's manual for specific instructions on adjusting power settings.
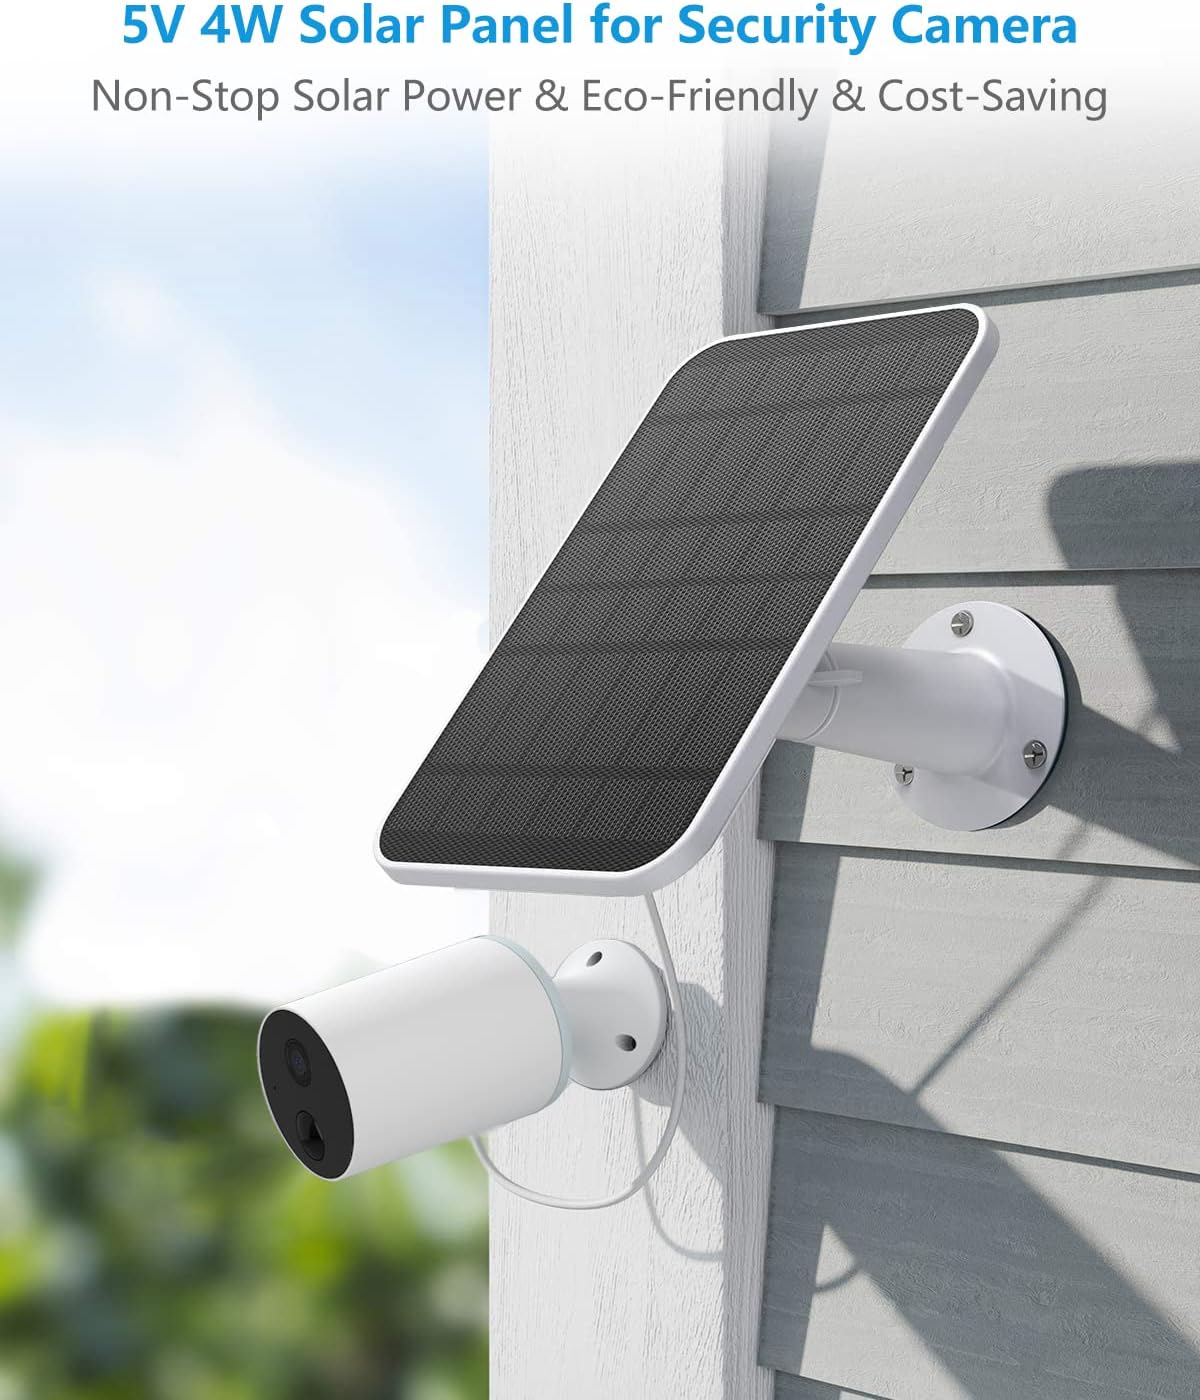
Image: Solar panel providing power to a security camera.

Image: The solar panel provides continuous charging under various light conditions.
5. Entretien
To ensure the longevity and optimal performance of your solar panel charger, periodic maintenance is recommended.
- Nettoyage: Regularly clean the surface of the solar panel to remove dust, dirt, leaves, or other debris that may obstruct sunlight. Use a soft, damp Chiffon. Évitez les nettoyants abrasifs ou les produits chimiques agressifs.
- Vérification de la connexion : Periodically inspect the cable connection to the camera to ensure it remains secure and waterproof.
- Stabilité de montage : Check the mounting bracket and screws to ensure they are still firmly attached to the surface, especially after severe weather conditions.
- Résistance aux intempéries : The solar panel is IP65 waterproof, designed to withstand heavy snow, heavy rain, and other severe weather conditions.

Image: The solar panel is designed to be IP65 waterproof, withstanding rain.
6. Dépannage
If you encounter issues with your solar panel charger, try the following troubleshooting steps:
| Problème | Cause possible | Solution |
|---|---|---|
| L'appareil photo ne charge pas. | Ensoleillement insuffisant. | Déplacez le panneau solaire dans un endroit plus ensoleillé. Assurez-vous qu'aucun obstacle ne le bloque. |
| L'appareil photo ne charge pas. | Loose or improper connection. | Check that the Micro USB/USB-C cable is securely plugged into both the solar panel and the camera. Ensure the waterproof seal is intact. |
| L'appareil photo ne charge pas. | Surface du panneau solaire sale. | Clean the solar panel surface to remove any dirt, dust, or debris. |
| Camera battery draining quickly. | High camera activity or low light conditions. | Adjust camera settings to reduce power consumption (e.g., motion detection sensitivity). Ensure the solar panel receives adequate sunlight. |
| Panneau non fixé correctement. | Loose screws or bracket. | Tighten all screws on the mounting bracket. Consider using threadlocker for added security if needed. |
7. Spécifications
| Fonctionnalité | Détail |
|---|---|
| Marque | WININMETA |
| Numéro de modèle | HHSP01 |
| Puissance de sortie | 5 W (maximum) |
| Voltage | 5 volts |
| Longueur du câble | 9.8 pieds (3M) |
| Connecteurs | Micro-USB et USB-C |
| Indice d'étanchéité | IP65 |
| Température de fonctionnement | 14℉-122℉ (-10°C to 50°C) |
| Matériel | Monocrystalline Silicon (surface), ABS Plastic (frame) |
| Poids de l'article | 2.4 livres (pour un paquet de 3) |
| Dimensions (L x l x H) | 7.87 x 5.12 inches (per panel) |
8. Garantie et assistance
WININMETA is committed to providing high-quality products and customer satisfaction. While specific warranty details are not provided in this manual, please refer to the product packaging or the seller's information on the purchase platform for warranty terms and conditions.
For any questions, concerns, or technical assistance, please contact WININMETA customer support through the platform where you purchased the product. Your satisfaction is always our aim.
Vous pouvez également visiter le WININMETA Store on Amazon pour plus d'informations et de produits.