1. Introduction
The BETAFPV 1103 11000KV Brushless Motors are designed for high-performance FPV micro drones, specifically optimized for 2S Lipo battery systems and the Beta75X frame. These motors provide efficient power delivery for agile flight characteristics. This manual outlines the essential information for proper installation, operation, and maintenance to ensure optimal performance and longevity of your motors.

Figure 1: BETAFPV 1103 11000KV Brushless Motors
2. Spécifications
Refer to the table below for detailed technical specifications of the BETAFPV 1103 11000KV Brushless Motors.
| Spécification | Valeur |
|---|---|
| Article | BETAFPV 1103 11000KV Motor |
| KV (rpm/V) | 11000KV |
| Diamètre de l'arbre | 1.5 mm |
| Longueur de l'axe | 6.4 mm |
| Motor Mount Holes | 8.5mm (M1.6 screw) |
| Dimensions du moteur | 13.5mm x 13.5mm x 16mm (Diameter x Diameter x Height) |
| Weight (per motor) | 3.25g |
| Voltage | 7.4V (2S Lipo Battery) |
| Courant de charge | 1.8-3.8A |
| Tirer | 23-40g |
| Pouvoir | 6.7-28W |
| Efficacité | 3.4-1.4g/W |

Figure 2: Motor Dimensions

Figure 3: Motor Weight Measurement
3. Contenu du colis
Le forfait comprend les éléments suivants :
- 4 x BETAFPV 1103 11000KV Brushless Motors
- 16 x M1.6 Screws (for motor mounting)

Figure 4 : Contenu de l'emballage
4. Configuration et installation
Follow these steps for proper installation of the motors on your drone frame.
- Contrôle de compatibilité: These motors are designed specifically for the Betafpv 2S FPV frame. Ensure your frame has 8.5mm motor mount holes and uses M1.6 screws. These motors are pas compatible with other 80-110mm frames.
- Montage: Securely attach each motor to the drone frame using the provided M1.6 screws. Ensure the screws are tightened sufficiently to prevent vibration but do not overtighten, which could damage the motor windings.
- Câblage : Connect the motor wires to the Electronic Speed Controller (ESC) on your flight controller. Pay close attention to the wiring diagram of your ESC to ensure correct motor rotation direction. If the motor spins in the wrong direction, you can reverse two of the three motor wires (if soldering) or adjust in your flight controller software (e.g., Betaflight).
- Installation de l'hélice : Once motors are mounted and wired, install the propellers. Ensure propellers are balanced and correctly oriented for lift.
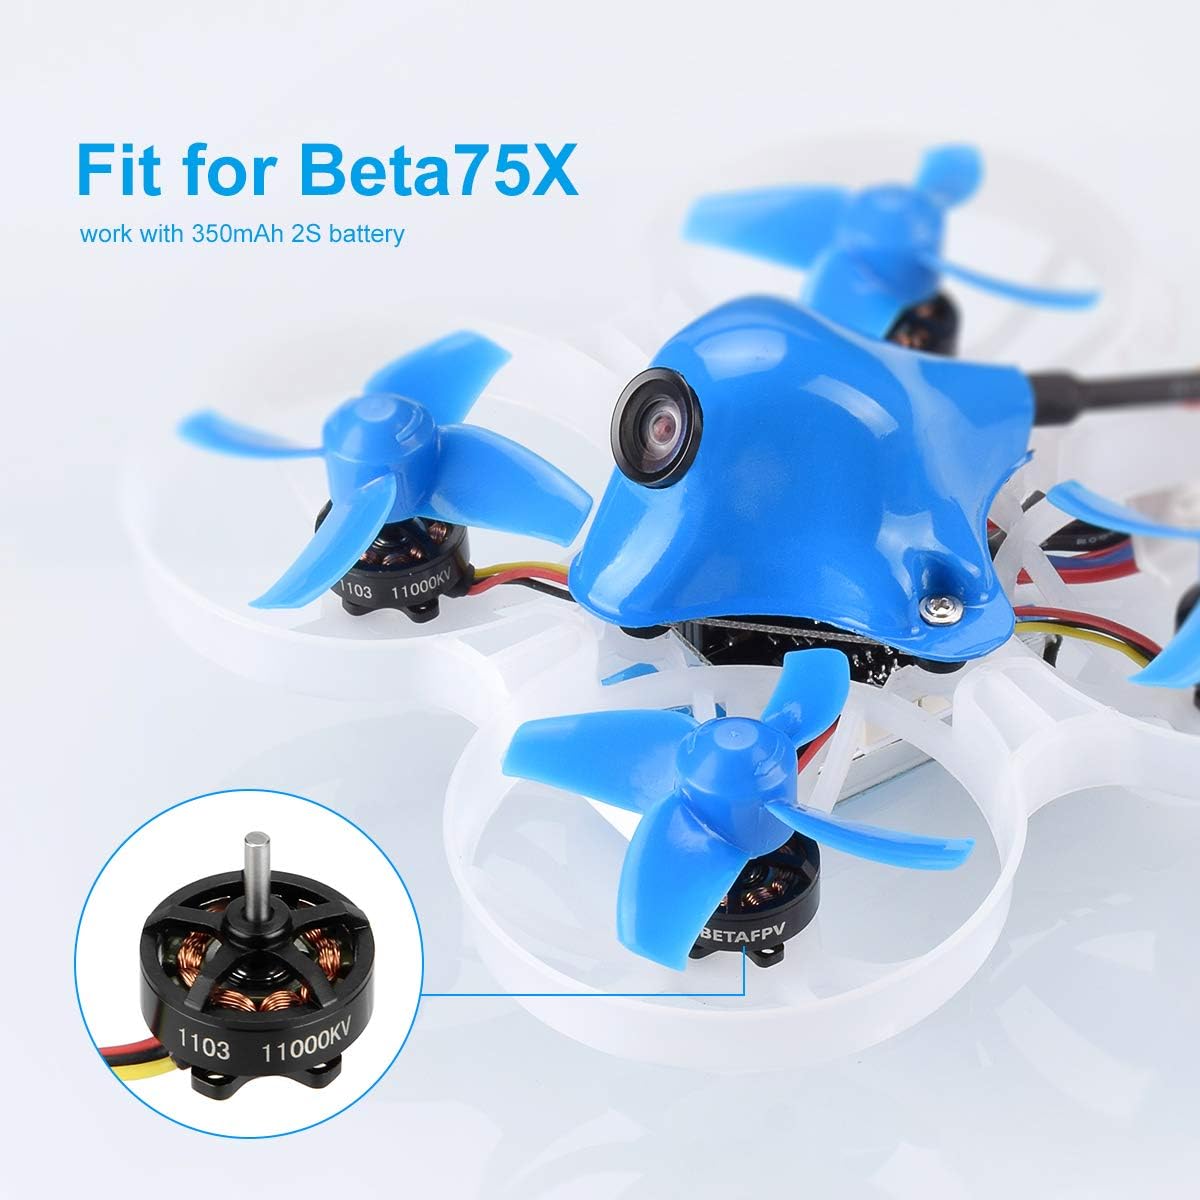
Figure 5: Motor installed on Beta75X frame
5. Mode d'emploi
These motors are designed for use with 2S Lipo batteries (7.4V). Adhere to the following guidelines for safe and effective operation:
- Vol batterietage: Only use 2S Lipo batteries (7.4V). Using higher voltage batteries can lead to motor overload and damage.
- Taille de l'hélice : Use propellers recommended for the Beta75X frame or similar 2S micro drones. Using oversized propellers can cause motor overload and reduced flight performance.
- Test initial : After assembly, perform a low-power test flight to verify motor function and stability before engaging in aggressive maneuvers.
6. Entretien
Un entretien régulier contribue à prolonger la durée de vie et à maintenir les performances de vos moteurs.
- Nettoyage: Periodically inspect motors for dirt, dust, or debris. Use compressed air or a soft brush to gently clean the motor bell and stator. Ensure no foreign objects are lodged within the motor.
- Vérification des roulements : Gently spin the motor bell by hand to check for any roughness or excessive play in the bearings. Worn bearings can lead to increased vibration and reduced efficiency.
- Inspection des fils : Check motor wires for any cuts, fraying, or loose connections. Repair or replace damaged wires promptly.
- Serrage des vis : Ensure all mounting screws remain tight. Loose screws can cause vibrations and potential motor detachment during flight.
7. Dépannage
This section addresses common issues you might encounter with your motors.
| Problème | Cause possible | Solution |
|---|---|---|
| Le moteur ne tourne pas ou broute. | Loose wire connection; damaged motor winding; ESC issue; foreign object obstructing motor. | Check all wire connections. Inspect motor for physical damage or debris. Test with a different ESC or motor if possible to isolate the problem. |
| Surchauffe du moteur | Oversized propeller; excessive voltage; motor overload; short circuit. | Ensure correct propeller size and battery voltage (2S Lipo). Reduce throttle input. Check for any short circuits in wiring. |
| Motor making unusual noise/vibration | Bent motor shaft; damaged bearings; loose mounting screws; unbalanced propeller. | Inspect motor shaft for bends. Check bearings for smooth rotation. Tighten mounting screws. Ensure propellers are balanced and undamaged. |
| Moteur grillé | Vol de surchargetage; foreign objects aspirated; motor shell deformation; incompatible ESC. | Replace the motor. Review precautions to prevent recurrence. Ensure all components are compatible. |
8. Précautions importantes
Adhering to these precautions will help prevent damage to your motors and ensure safe operation:
- These motors are specifically designed for the Betafpv 2S FPV frame. Using them with other frames (e.g., 80-110mm) may lead to incompatibility and performance issues.
- Avoid working with oversized propellers or providing overload voltage entrée, as this can cause the motor to overload, overheat, and potentially burn out or go out of control.
- Prevent the motor from aspirating objets étrangers, especially metal items. These motors have strong magnets, making them prone to attracting metal, which can cause the motor to seize and burn out.
- Assurez-vous que motor shell is not deformed. Any deformation can cause the motor to bind, leading to a stall and burnout.
- Verify that the motor is compatible with other drone components, particularly the Electronic Speed Controller (ESC). Incompatibility can result in erratic motor behavior or burnout.
- For beginners, it is recommended to build and set up the drone under the guidance of an experienced FPV pilot.
9. Garantie et assistance
For warranty information or technical support, please refer to the official BETAFPV webConsultez leur site web ou contactez directement leur service client. Conservez votre reçu d'achat comme preuve d'achat pour toute réclamation au titre de la garantie.