1. Introduction
The Kaito Voyager Pro KA600 is a versatile digital emergency radio designed for both daily use and emergency preparedness. It features multiple power options, comprehensive radio band coverage, and additional functions like a smartphone charger, reading lamp, and flashlight. This manual provides detailed instructions for its setup, operation, and maintenance.
2. Consignes de sécurité
- Do not expose the radio to extreme temperatures, direct sunlight for prolonged periods, or high humidity.
- Évitez de faire tomber la radio ou de la soumettre à des chocs violents.
- Tenez la radio éloignée des champs magnétiques puissants.
- Ne tentez pas de démonter ou de modifier la radio. Cela annulera la garantie.
- Utilisez uniquement les piles et adaptateurs secteur recommandés.
- When charging external devices, ensure they are compatible with 5V USB output.
3. Contenu du colis
Vérifiez que tous les éléments sont présents dans votre colis :
- Kaito Voyager Pro KA600 Digital Emergency Radio
- Écouteurs
- Manuel de l'utilisateur (ce document)
- Carte de garantie
4. Produit terminéview
Familiarize yourself with the main components of your Kaito Voyager Pro KA600 radio.

Figure 1 : disposition du panneau avant
This image displays the front of the Kaito Voyager Pro KA600 radio, highlighting the digital display, numeric keypad, speaker grille, and various control buttons and knobs for tuning and volume.
Composants clés :
- Affichage numérique: Shows frequency, time, temperature, humidity, and other operational information.
- Conférencier: Sortie audio.
- Clavier: Numeric buttons for direct frequency entry and function selection.
- Bouton de réglage : Pour le réglage manuel de la fréquence.
- Bouton de volume : Régule le niveau de sortie audio.
- Power Select Switch: Choose between battery, solar/crank, or adapter power.
- Antenne télescopique : Pour une meilleure réception radio.
- Manivelle: Pour la production d'énergie manuelle.
- Panneau solaire : Pour la recharge solaire.
- Port de sortie USB : Pour recharger des appareils externes.
- Lecture LED Lamp & Flashlight: Integrated lighting features.
Video 1: Kaito Voyager Pro KA600 Radio Overview
This video provides a visual demonstration of the Kaito Voyager Pro KA600 radio, showcasing its various features and components in action, including tuning and power options.
5. Installation
5.1 Alimentation de la radio
The KA600 offers multiple power options:
- Internal Rechargeable Ni-MH Battery: The radio includes a built-in rechargeable battery pack (3 Ni-MH batteries, 600mAh). This battery can be charged via hand crank, solar panel, USB input, or an optional AC/DC adapter.
- Piles AA (non incluses) : For extended use, insert three (3) AA batteries into the battery compartment.
- Dynamo à manivelle : Rotate the hand crank on the side of the radio to generate power and charge the internal battery.
- Panneau solaire : Expose the integrated solar panel to direct sunlight to charge the internal battery.
- USB Input (5V): Connect the radio to a computer or a standard USB wall adapter using a USB cable (not included) to charge the internal battery.
- AC/DC Adapter (Optional): A 6V DC wall power adapter (sold separately) can be used to power the radio and charge the internal battery.

Figure 2 : compartiment de la batterie
This image shows the rear of the radio with the battery cover removed, revealing the internal rechargeable Ni-MH battery and the slots for optional AA batteries.
5.2 Extension d'antenne
For optimal reception, extend the telescopic antenna fully when listening to FM, LW, SW, or NOAA Weather bands. For AM reception, the radio uses an internal ferrite bar antenna, so the telescopic antenna is not required.
6. Mode d'emploi
6.1 Mise en marche/arrêt et sélection de la bande
Appuyez sur le POUVOIR button to turn the radio on or off. Use the FM/WB button to cycle through FM and NOAA Weather bands. Use the AM button to select the AM band. For Longwave (LW) and Shortwave (SW), use the appropriate band selection buttons or direct frequency entry.
6.2 Méthodes de réglage
The KA600 offers several ways to tune into stations:
- Réglage manuel: Faites pivoter le RÉGLAGE knob on the side of the radio to manually scan frequencies.
- Saisie directe par clavier : Enter the desired frequency directly using the numeric keypad and press ENTRER (or similar confirmation button, refer to display).
- Système de réglage automatique (ATS) : This function automatically scans and stores strong stations. Refer to the on-screen prompts or specific button for ATS activation.
- Réglage de la mémoire : Store your favorite stations into memory for quick access. Use the M+ et M- boutons pour naviguer entre les stations enregistrées.
6.3 Fonction d'alerte météo NOAA
The NOAA Weather Alert feature automatically activates the radio to broadcast emergency weather alerts. To enable this:
- Ensure the radio is set to a NOAA Weather channel (1-7).
- Activate the "Alert" mode (refer to the specific button or menu option on the radio, typically labeled ALERTE).
- The radio will remain in standby and automatically turn on with an audible alert and broadcast the weather warning when activated by the NOAA network.
6.4 RDS (Radio Data System)
When tuned to an FM station broadcasting RDS, the radio's display may show additional information such as station name, program type, or song title. This feature is automatic when available.
6.5 Emergency Mobile Charger
The KA600 can charge external devices via its built-in standard DC 5V USB output port.
- Connect your smartphone, GPS unit, MP3 player, or digital camera to the USB output port using a compatible USB cable.
- Ensure the radio has sufficient power (internal battery charged, or actively cranking/solar charging).
- La charge commencera automatiquement.
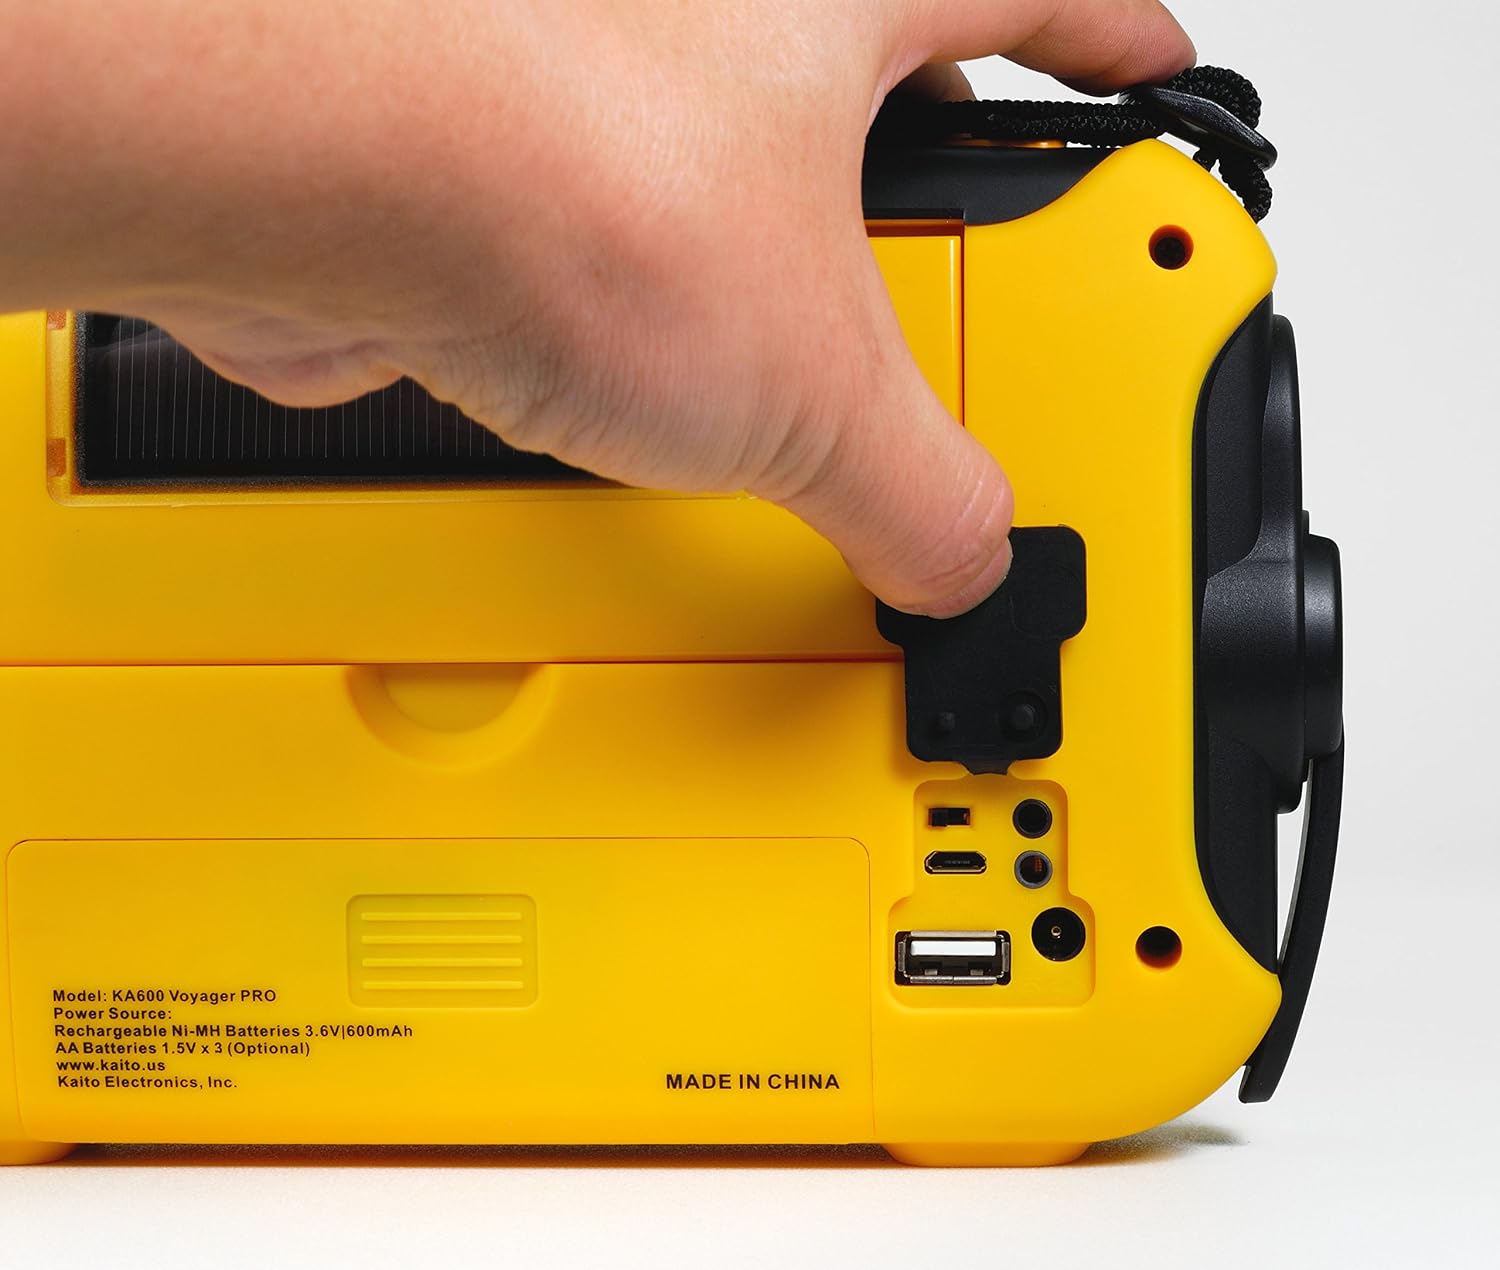
Figure 3: USB Output Port
This image highlights the USB output port on the side of the radio, used for charging external mobile devices.
6.6 Fonctionnalités d'éclairage
- Lampe de lecture à 5 LEDamp: Flip up the solar panel to reveal the integrated reading lamp. Activate it using the designated button.
- Lampe de poche LED: A powerful LED flashlight is integrated into the radio. Activate it using its dedicated button.
- Red LED S.O.S. Beacon Light: In emergencies, activate the S.O.S. beacon for signaling.

Figure 4: Reading Lamp and Solar Panel
This image shows the rear of the radio with the solar panel raised, exposing the 5-LED reading lamp pour l'éclairage.
7. Entretien
- Nettoyage: Essuyez la radio avec un chiffon doux, damp chiffon. N'utilisez pas de nettoyants abrasifs ou de solvants.
- Entretien de la batterie: If storing the radio for an extended period, remove any non-rechargeable AA batteries to prevent leakage. Ensure the internal Ni-MH battery is charged periodically to maintain its lifespan.
- Stockage: Rangez la radio dans un endroit frais et sec, à l'abri de la lumière directe du soleil et des températures extrêmes.
8. Dépannage
| Problème | Cause possible | Solution |
|---|---|---|
| La radio ne s'allume pas. | Batterie faible ou déchargée ; source d’alimentation incorrecte sélectionnée. | Charge the internal battery via hand crank, solar, or USB. Insert fresh AA batteries. Ensure the power select switch is in the correct position. |
| Mauvaise réception radio. | Antenne non déployée ; signal faible ; interférences. | Fully extend the telescopic antenna. Reposition the radio for better signal. Avoid sources of electronic interference. |
| Impossible de charger l'appareil externe. | Radio battery too low; incompatible device; faulty cable. | Ensure the radio's internal battery is sufficiently charged. Verify device compatibility. Try a different USB cable. |
| NOAA Alert not activating. | Not on a NOAA channel; Alert mode not enabled; no active alerts. | Tune to a NOAA Weather channel. Ensure Alert mode is activated. Confirm there are active alerts in your area. |
9. Spécifications
- FM: 88 - 108 MHz
- AM (MW) : 520 - 1710 kHz
- LW (Longwave): 150 - 521 kHz
- Ondes courtes (OC) : 2,300 - 23,000 kHz
- Météo NOAA : Channels 1 - 7
- Intervenant interne : Diamètre 66 mm
- Prise casque : 3.5 mm
- Batteries rechargeables: 3 Ni-MH batteries, 600mAh
- Dimensions: 9.5 x 5.5 x 2.5 pouces (24.13 x 13.97 x 6.35 cm)
- Poids: 1 livres (0.45 kg)
- Connectivité : USB (pour charger des appareils externes)
- Sources d'alimentation : Hand crank, solar panel, 3x AA batteries (not included), 5V USB input, 6V DC adapter (optional), internal Ni-MH battery.
10. Garantie et assistance
Your Kaito Voyager Pro KA600 radio comes with a warranty. Please refer to the included Warranty Card for details on coverage, terms, and how to register your product. For technical support or service inquiries, please visit the official Kaito website ou contactez leur service client.
Kaito Official Website: www.kaito.us