
1. Introduction
Merci pour votre achatasing the onlyfire Stainless Steel Rotisserie Kit. This kit is designed to enhance your grilling experience by allowing you to rotisserie cook various foods on your compatible Weber gas grill. Please read this manual thoroughly before assembly and operation to ensure safe and efficient use of your new rotisserie kit.
2. Consignes de sécurité
- Always ensure the grill is turned off and cooled before installing or removing the rotisserie kit components.
- Keep the electric motor away from water and moisture. Do not operate the motor in wet conditions.
- Ensure the power cord is not in contact with hot surfaces of the grill.
- Use heat-resistant gloves when handling hot rotisserie components.
- Do not overload the spit rod. The motor is designed to handle loads up to 50 lbs. Exceeding this limit may damage the motor or cause unsafe operation.
- Gardez les enfants et les animaux domestiques éloignés du gril pendant son fonctionnement.
- Always use a drip pan under the food to catch drippings and prevent flare-ups.
3. Contenu du colis
Vérifiez que tous les composants énumérés ci-dessous sont inclus dans votre colis :
- 5/16" Stainless Steel Square Spit Rod
- 2 fourchettes à viande à 4 dents
- Electric Motor (110V) with waterproof on/off switch and auto reverse function
- Support moteur
- Tige Poignée
- Hardware (screws, washers, nuts)

Figure 3.1 : All components included in the onlyfire Rotisserie Kit.
4. Compatibilité
This onlyfire Rotisserie Kit (Model F-BRK6045-SS1) is compatible with the following Weber grill models:
- Weber Spirit/Spirit II 2-Burner Grills: E-210, S-210, E-220, S-220, Spirit II E-210, Spirit II S-210
- Weber Spirit/Spirit II 3-Burner Grills: E-310, S-310, E-320, S-320, E-330, SP-330, Spirit II E-310, Spirit II S-310
NOTE: This kit is NOT compatible with Weber Spirit Grills manufactured in 2025 or later, such as Spirit E-210, E-310/325/EP-325, E-425/435, EP-425/435.

Figure 4.1 : Visual guide for compatible and incompatible Weber Spirit grill models.
5. Instructions de configuration
Follow these steps to assemble and install your rotisserie kit:
- Fixez le support moteur : Secure the motor bracket to the side of your grill using the provided hardware. Ensure it is firmly attached and level.
- Installation du moteur électrique : Slide the electric motor onto the motor bracket. The motor should fit snugly and be securely seated.
- Assembler la tige de broche : The stainless steel spit rod may come in multiple pieces. Connect them by screwing the threaded ends together. Ensure they are tightly fastened to form a single, sturdy rod.
- Attacher les fourchettes à viande : Slide the 4-prong meat forks onto the spit rod. Position them according to the size of the food you plan to cook. Secure them in place with the thumbscrews.
- Insert Spit Rod into Motor: Insert the square end of the assembled spit rod into the motor's receptacle. Ensure it is fully engaged.
- Rest Spit Rod on Grill: Place the pointed end of the spit rod into the support notch on the opposite side of the grill. The spit rod should be level and rotate freely.
- Connecter l'alimentation : Plug the motor's power cord into a grounded 110V electrical outlet.

Figure 5.1 : Assembled rotisserie kit on a grill.

Figure 5.2 : Détaillé view of the spit rod and motor dimensions.
6. Mode d'emploi
Once the rotisserie kit is installed and your grill is preheated, follow these steps to rotisserie cook your food:
- Préparer la nourriture: Season and truss your meat (e.g., chicken, roast) as desired. Ensure it is compact and balanced to prevent uneven cooking and strain on the motor.
- Load Food onto Spit: Carefully slide the food onto the spit rod, centering it between the meat forks. Push the forks firmly into the meat to secure it. Tighten the thumbscrews on the forks to prevent the food from slipping during rotation.
- Install Spit Rod with Food: With the grill off and cooled, carefully place the loaded spit rod back into the motor and the opposite support notch.
- Position Drip Pan: Place an aluminum drip pan directly under the food on the grill grates to catch drippings. This helps prevent flare-ups and keeps your grill cleaner.
- Démarrer la rotation : Turn on the electric motor using its waterproof on/off switch. The spit rod should begin to rotate smoothly.
- Surveiller la cuisson : Close the grill lid to maintain consistent temperature. Monitor the internal temperature of your food using a meat thermometer. Adjust grill burners as needed to maintain desired cooking temperature.
- Retirer les aliments : Once the food reaches the desired internal temperature, turn off the motor and unplug it. Using heat-resistant gloves, carefully remove the spit rod with the cooked food from the grill. Transfer the food to a cutting board and allow it to rest before carving.

Figure 6.1 : Chicken cooking on the rotisserie kit.
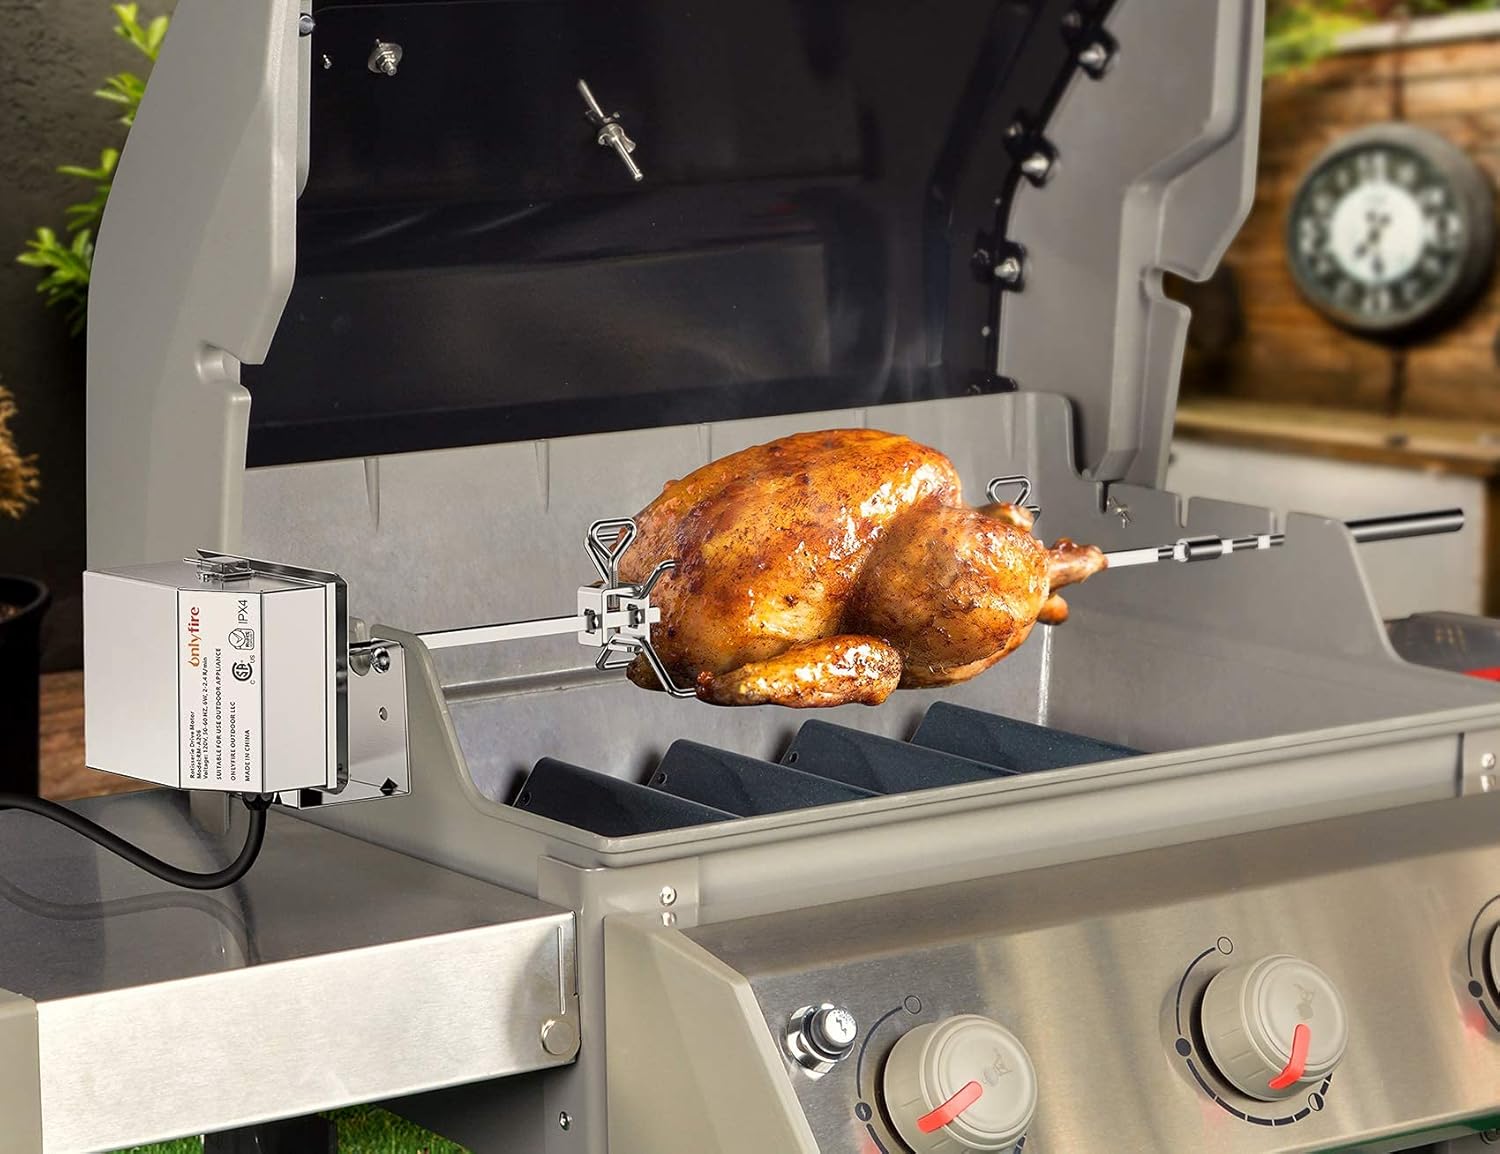
Figure 6.2 : Close-up of rotisserie in action.
7. Entretien
Proper maintenance ensures the longevity and performance of your rotisserie kit:
- Nettoyage de la broche et des fourchettes : Après chaque utilisation, laissez refroidir la broche et les fourchettes à viande. Lavez-les à l'eau chaude savonneuse avec une éponge non abrasive. Rincez abondamment et séchez complètement pour éviter la rouille.
- Cleaning Motor: Wipe the exterior of the electric motor with a damp cloth. Do not immerse the motor in water or spray it directly with water.
- Stockage: Store all components in a dry place when not in use. Consider storing the spit rod and forks in their original packaging or a protective bag to prevent scratches.
- Inspection: Periodically inspect the spit rod, forks, and motor for any signs of wear, damage, or corrosion. Replace any damaged parts immediately.
8. Dépannage
| Problème | Cause possible | Solution |
|---|---|---|
| Le moteur ne démarre pas. | Not plugged in; power outlet issue; motor switch off; damaged motor. | Ensure motor is securely plugged into a working 110V outlet. Check the on/off switch. If still not working, contact customer support. |
| Spit rod does not rotate. | Spit rod not fully engaged in motor; food too heavy/unbalanced; motor malfunction. | Ensure the square end of the spit rod is fully inserted into the motor. Check food weight and balance. Reduce load if necessary. If motor runs but spit doesn't turn, contact support. |
| Food slips on spit rod. | Meat forks not secured; food not properly trussed. | Ensure meat forks are pushed firmly into the food and thumbscrews are tightened. Truss food tightly with butcher's twine. |
| Cuisson inégale. | Food unbalanced; inconsistent grill temperature. | Ensure food is balanced on the spit rod. Monitor grill temperature and adjust burners to maintain even heat. |
9. Spécifications
| Fonctionnalité | Détail |
|---|---|
| Spit Rod Material | Acier inoxydable |
| Spit Rod Type | Carré de 5/16 po |
| Vol moteurtage | 110V |
| Capacité du moteur | Jusqu'à 50 XNUMX lb |
| Caractéristiques du moteur | Waterproof on/off switch, auto reverse function |
| Longueur du cordon d'alimentation | 36 pouces |
| Dimensions du colis | 14.88 x 6.42 x 4.02 pouces |
| Poids de l'article | 4.1 livres |
| Numéro de modèle | F-BRK6045-SS1 |
10. Informations sur la garantie
onlyfire products are manufactured to high-quality standards and are warranted against defects in materials and workmanship. For specific warranty terms and conditions, please refer to the warranty card included with your product or visit the official onlyfire webConsultez le site. Conservez votre preuve d'achat pour toute réclamation au titre de la garantie.
11. Assistance clientèle
If you have any questions, require assistance with assembly, or need troubleshooting support, please contact onlyfire customer service:
- Website: Visitez la boutique Onlyfire sur Amazon
- E-mail: Veuillez vous référer à l'emballage du produit ou aux instructions officielles. website pour l'adresse e-mail de contact.
- Téléphone: Veuillez vous référer à l'emballage du produit ou aux instructions officielles. website pour le numéro de téléphone de contact.
Please have your model number (F-BRK6045-SS1) and purchase date ready when contacting support.