1. Introduction
Merci pour votre achatasing the Ivation Portable Digital HD LCD Microscope. This device is designed for detailed observation and analysis, offering up to 220x optical and 500x digital magnification. Featuring a 3.5-inch LCD screen, 14MP HD sensor, and photo/video capture capabilities, it is suitable for various applications including education, inspection, and hobby use. Please read this manual thoroughly before use to ensure proper operation and to maximize the lifespan of your microscope.
Précautions de sécurité
- N’exposez pas l’appareil à des températures extrêmes, à l’humidité ou à des substances corrosives.
- Avoid dropping or subjecting the microscope to strong impacts.
- Keep the lens clean and free from dust. Use a soft, lint-free cloth for cleaning.
- Do not attempt to disassemble or modify the microscope, as this will void the warranty.
- Utilisez uniquement l'adaptateur secteur et la batterie fournis.
2. Composants du produit
Familiarize yourself with the various parts of your Ivation Digital Microscope:
- Écran d'affichage ACL de 3.5 pouces
- Control Buttons (Power, Menu, OK, Navigation)
- Molette de mise au point
- Éclairage LED réglable
- Adjustable Specimen Stage with Clips
- Stage Adjustment Knob (Up/Down)
- MicroSD Card Slot
- USB Port (for PC connection and charging)
- Port de sortie HDMI
- Rechargeable Li-ion Battery (pre-installed or included)
- Adaptateur secteur
- Câble USB
- Câble HDMI
- Software CD (for Windows XP SP2 driver, other OS are driver-free)

Devant view of the Ivation Digital Microscope, highlighting the LCD screen and control buttons.

Côté view of the Ivation Digital Microscope, showing the adjustable stage and focus knob.
3. Installation
3.1 Installation et charge de la batterie
- Ensure the microscope is powered off.
- Locate the battery compartment on the underside of the base.
- Open the compartment cover and insert the provided Li-ion battery, ensuring correct polarity.
- Fermez soigneusement le couvercle du compartiment à piles.
- Connect the power adapter to the microscope's USB port and plug it into a power outlet to charge the battery. The charging indicator light will illuminate. A full charge takes approximately 3 hours and provides about 2 hours of operation.
Official product demonstration video for the Ivation Portable Digital HD LCD Microscope, showcasing its features and usage, including battery installation.
3.2 Mise sous/hors tension
- To power on, press and hold the Power button (usually marked with a circle and vertical line) on the LCD screen panel until the screen illuminates.
- Pour éteindre l'appareil, maintenez le bouton Marche/Arrêt enfoncé jusqu'à ce que l'écran s'éteigne.
3.3 Installation de la carte microSD
- Insert a MicroSD card (not included, up to 32GB recommended) into the MicroSD card slot on the side of the LCD unit. Ensure the card is inserted in the correct orientation until it clicks into place.
- Pour la retirer, poussez délicatement la carte vers l'intérieur jusqu'à ce qu'elle se détache.
3.4 Connexion à un ordinateur (USB)
- Connect the microscope to your computer using the supplied USB cable.
- Allumez le microscope.
- On the microscope's LCD screen, navigate to the menu and select 'PC Camera' mode. For Windows XP SP2, you may need to install the driver from the included CD. For Windows 7/8 and Mac OS 10.5-10.9, it is typically driver-free.
- Open a compatible camera application on your computer to view le flux en direct.
3.5 Connecting to a Television/Monitor (HDMI)
- Connect the microscope to an HDMI-enabled display using the supplied HDMI cable.
- Power on the microscope and the external display.
- Select the correct HDMI input on your television or monitor. The microscope's display will mirror on the external screen.
4. Fonctionnement
4.1 Placing a Specimen
- Place the specimen directly onto the adjustable stage.
- Use the metal clips to secure slides or other flat objects if necessary.
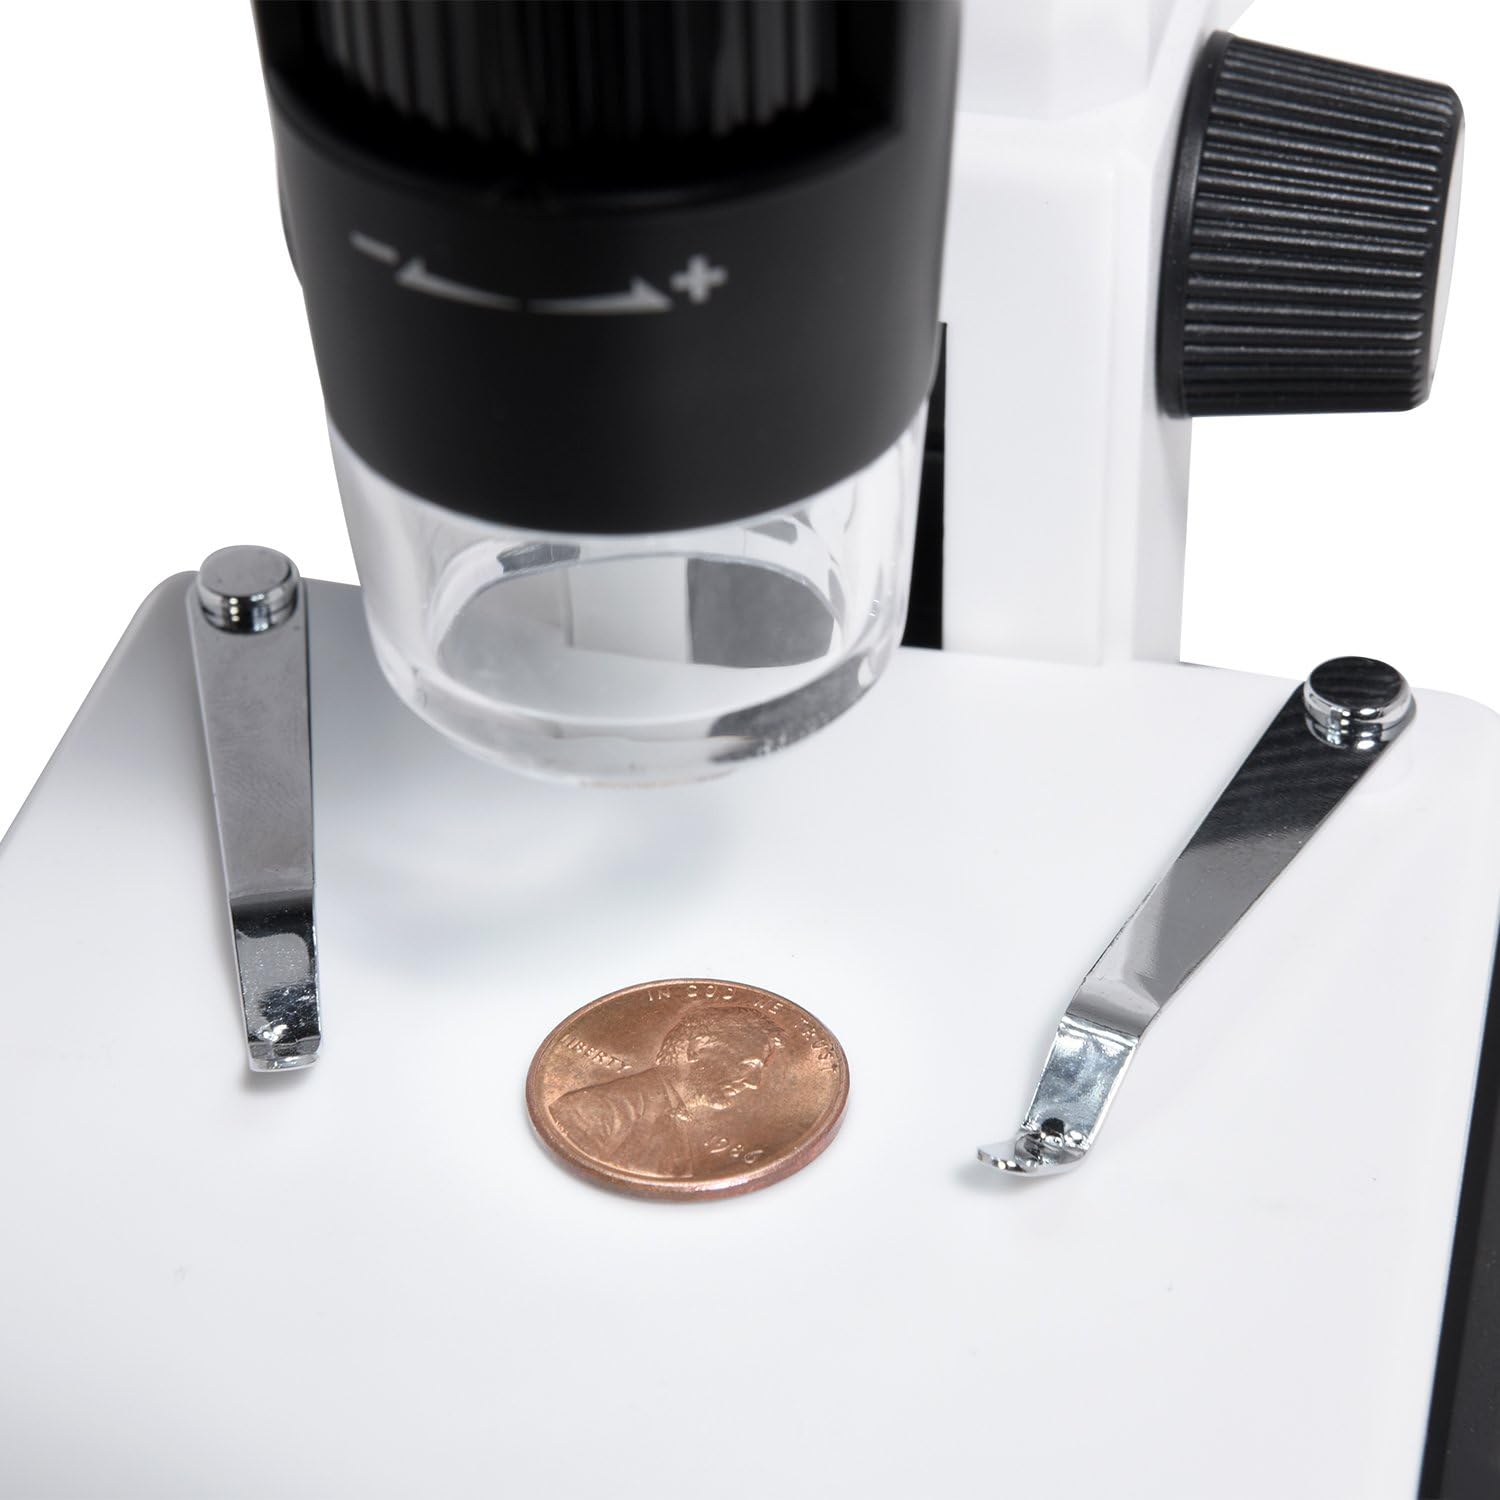
A penny placed on the adjustable stage for microscopic examination.
4.2 Adjusting Focus and Magnification
- Use the large focus wheel on the side of the microscope to bring the image into sharp focus on the LCD screen.
- The microscope offers 220x optical magnification. For additional magnification up to 500x, use the digital zoom function via the control buttons on the LCD panel.
- Adjust the height of the specimen stage en utilisant le stage adjustment knob (Up/Down) for larger or smaller objects, or to achieve initial focus before fine-tuning with the focus wheel.

Adjusting the focus wheel for clear observation.

Close-up of the LCD screen displaying a highly magnified section of a dollar bill.
4.3 Réglage de l'éclairage LED
- The microscope features 8 adjustable LED lights.
- Use the LED brightness control dial (typically on the side of the LCD unit) to increase or decrease the illumination intensity for optimal viewing.
4.4 Capture de photos et de vidéos
- Assurez-vous qu'une carte microSD est insérée.
- En direct view En mode photo, appuyez sur le bouton « OK » pour capturer une image fixe.
- To record video, press the 'Menu' button to enter video mode, then press 'OK' to start/stop recording.
- Captured photos and videos are saved to the MicroSD card.
5. Entretien
5.1 Nettoyage
- Lentille: Use a soft, lint-free cloth or lens paper to gently wipe the lens. For stubborn smudges, a small amount of lens cleaning solution can be applied to the cloth, not directly to the lens.
- Corps: Wipe the microscope body with a soft, dry cloth. Avoid using harsh chemicals or abrasive cleaners.
- Écran: Clean the LCD screen with a soft, dry, anti-static cloth.
5.2 Stockage
- Store the microscope in a cool, dry place away from direct sunlight and dust.
- En cas de stockage prolongé, retirez la batterie pour éviter les fuites.
- Keep the microscope in its original packaging or a protective case to prevent damage.
6. Dépannage
- Pas d'alimentation :
- Assurez-vous que la batterie est correctement installée et chargée.
- Verify the power adapter is securely connected if operating via AC power. - Aucune image à l'écran :
- Check if the microscope is powered on.
- Adjust the focus wheel.
- Assurez-vous que les voyants LED sont allumés et réglés à une luminosité appropriée. - Image floue :
- Adjust the focus wheel carefully.
- Ensure the specimen is properly positioned on the stage.
- Clean the lens if smudges are visible. - Impossible de prendre des photos/vidéos :
- Verify a MicroSD card is inserted and has sufficient free space.
- Ensure the MicroSD card is not locked (read-only).
- Format the MicroSD card if issues persist (this will erase all data). - No Image on PC/TV:
- For PC connection, ensure 'PC Camera' mode is selected on the microscope and the correct software is running on the computer. Check USB cable connection.
- For TV connection, ensure the HDMI cable is securely connected to both devices and the correct HDMI input is selected on the TV.
7. Spécifications
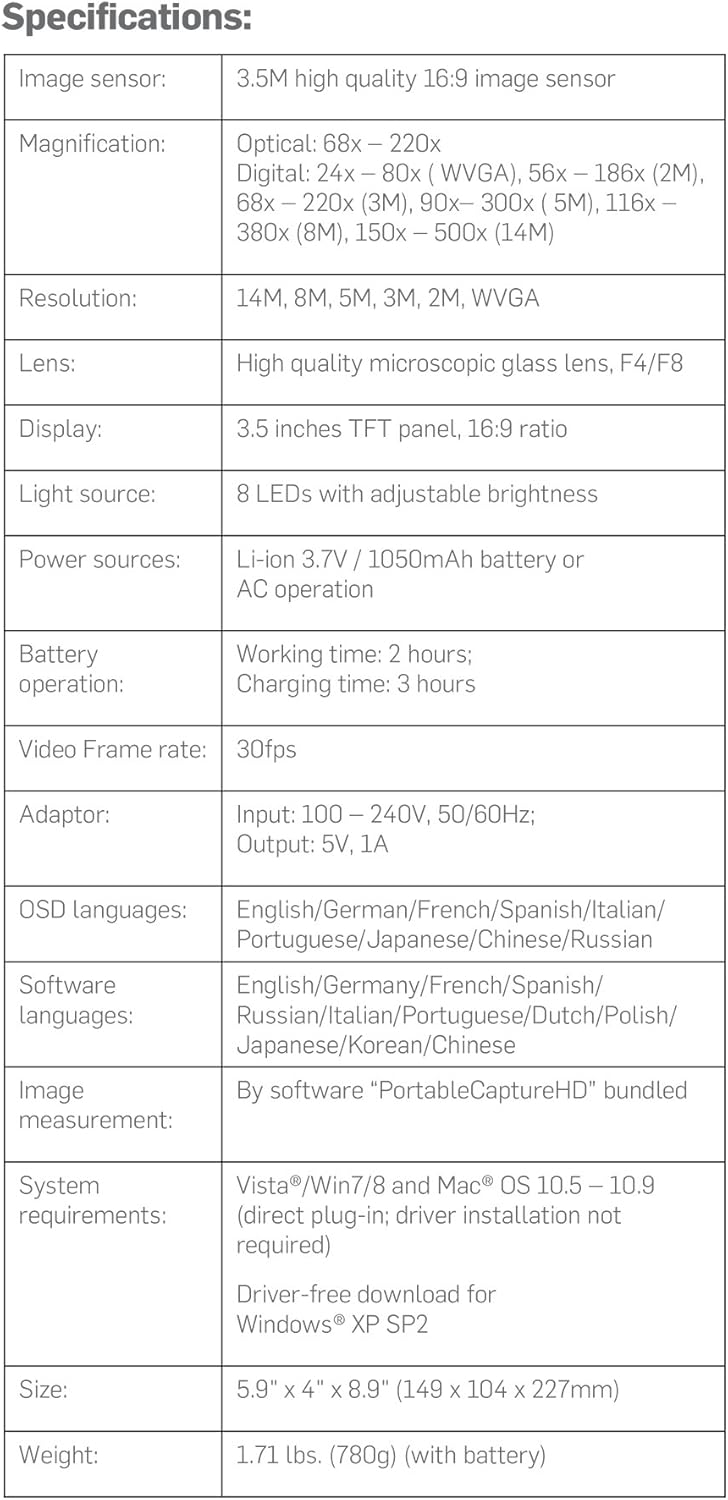
Detailed technical specifications of the Ivation Digital Microscope.
| Fonctionnalité | Détail |
|---|---|
| Capteur d'images | 3.5M high quality 16:9 image sensor |
| Grossissement | Optical: 68x – 220x; Digital: 24x – 80x (WVGA), 56x – 186x (2M), 68x – 220x (3M), 90x – 300x (5M), 116x – 380x (8M), 150x – 500x (14M) |
| Résolution | 14M, 8M, 5M, 3M, 2M, WVGA |
| Lentille | High quality microscopic glass lens, F4/F8 |
| Afficher | 3.5 inches TFT panel, 16:9 ratio |
| Source de lumière | 8 LEDs with adjustable brightness |
| Sources d'énergie | Li-ion 3.7V / 1050mAh battery or AC operation |
| Fonctionnement sur batterie | Working time: 2 hours; Charging time: 3 hours |
| Fréquence d'images vidéo | 30 images par seconde |
| Adaptateur | Input: 100 – 240V, 50/60Hz; Output: 5V, 1A |
| Langues OSD | English, German, French, Spanish, Italian, Portuguese, Japanese, Chinese, Russian |
| Langages des logiciels | Anglais, Allemand, Français, Espagnol, Russe, Italien, Portugais, Néerlandais, Polonais, Japonais, Coréen, Chinois |
| Mesure d'image | By software "PortableCaptureHD" bundled |
| Configuration requise | Vista/Win7/8 and Mac® OS 10.5 – 10.9 (direct plug-in; driver installation not required); Driver-free download for Windows® XP SP2 |
| Taille | 5.9" x 4" x 8.9" (149 x 104 x 227 mm) |
| Poids | 1.71 lbs. (780g) (with battery) |
8. Garantie et assistance
Ivation products are designed to provide reliable performance. For specific warranty information regarding your Ivation Portable Digital HD LCD Microscope, please refer to the warranty card included in your product packaging or visit the official Ivation website.
If you encounter any issues or have questions not covered in this manual, please contact Ivation Customer Support:
- Website: Boutique Ivation sur Amazon
- E-mail: Se référer à l'emballage du produit ou website pour les coordonnées.
- Téléphone: Se référer à l'emballage du produit ou website pour les coordonnées.
Please have your model number (IVAMS04HD) and purchase date ready when contacting support.