1. مقدمه
Thank you for choosing the Sharmeal Jump Starter with Air Compressor. This device is designed to provide reliable jump-starting for vehicles and convenient tire inflation. Please read this manual thoroughly before use to ensure safe and optimal operation.
۲. چه چیزهایی در جعبه است؟

بسته شامل موارد زیر است:
- 1 x Portable Jump Starter with Air Compressor
- 1 x Safety Jump Cables
- ۱ عدد شلنگ پمپ هوا
- 3 x Gas Nozzles (various types for inflation)
- 1 عدد کابل شارژ Type-C
- 1 x دفترچه راهنمای کاربر
- 1 عدد جعبه بسته بندی
This image displays all components included in the Sharmeal Jump Starter package, neatly arranged next to the main unit and its packaging.
3. مشخصات
| ویژگی | مشخصات |
|---|---|
| نام تجاری | شرمیل |
| شماره مدل | GL902 |
| حداکثر جریان خروجی | 6000 Amps |
| ترکیب سلول باتری | لیتیوم یون |
| ظرفیت باتری | 8000 میلیونamp ساعت |
| فشار کمپرسور هوا | تا 150 PSI |
| ابعاد محصول (D x W x H) | ۵.۹ اینچ در ۱۱.۸ اینچ در ۱۴.۶ اینچ |
| وزن مورد | 5.76 پوند |
| نوع سرویس خودرو | All Gas/10.0L Diesel engines, 12V vehicles |
4. اطلاعات ایمنی
Your safety is paramount. This jump starter incorporates multiple safety protections. Always follow these guidelines to prevent injury or damage.
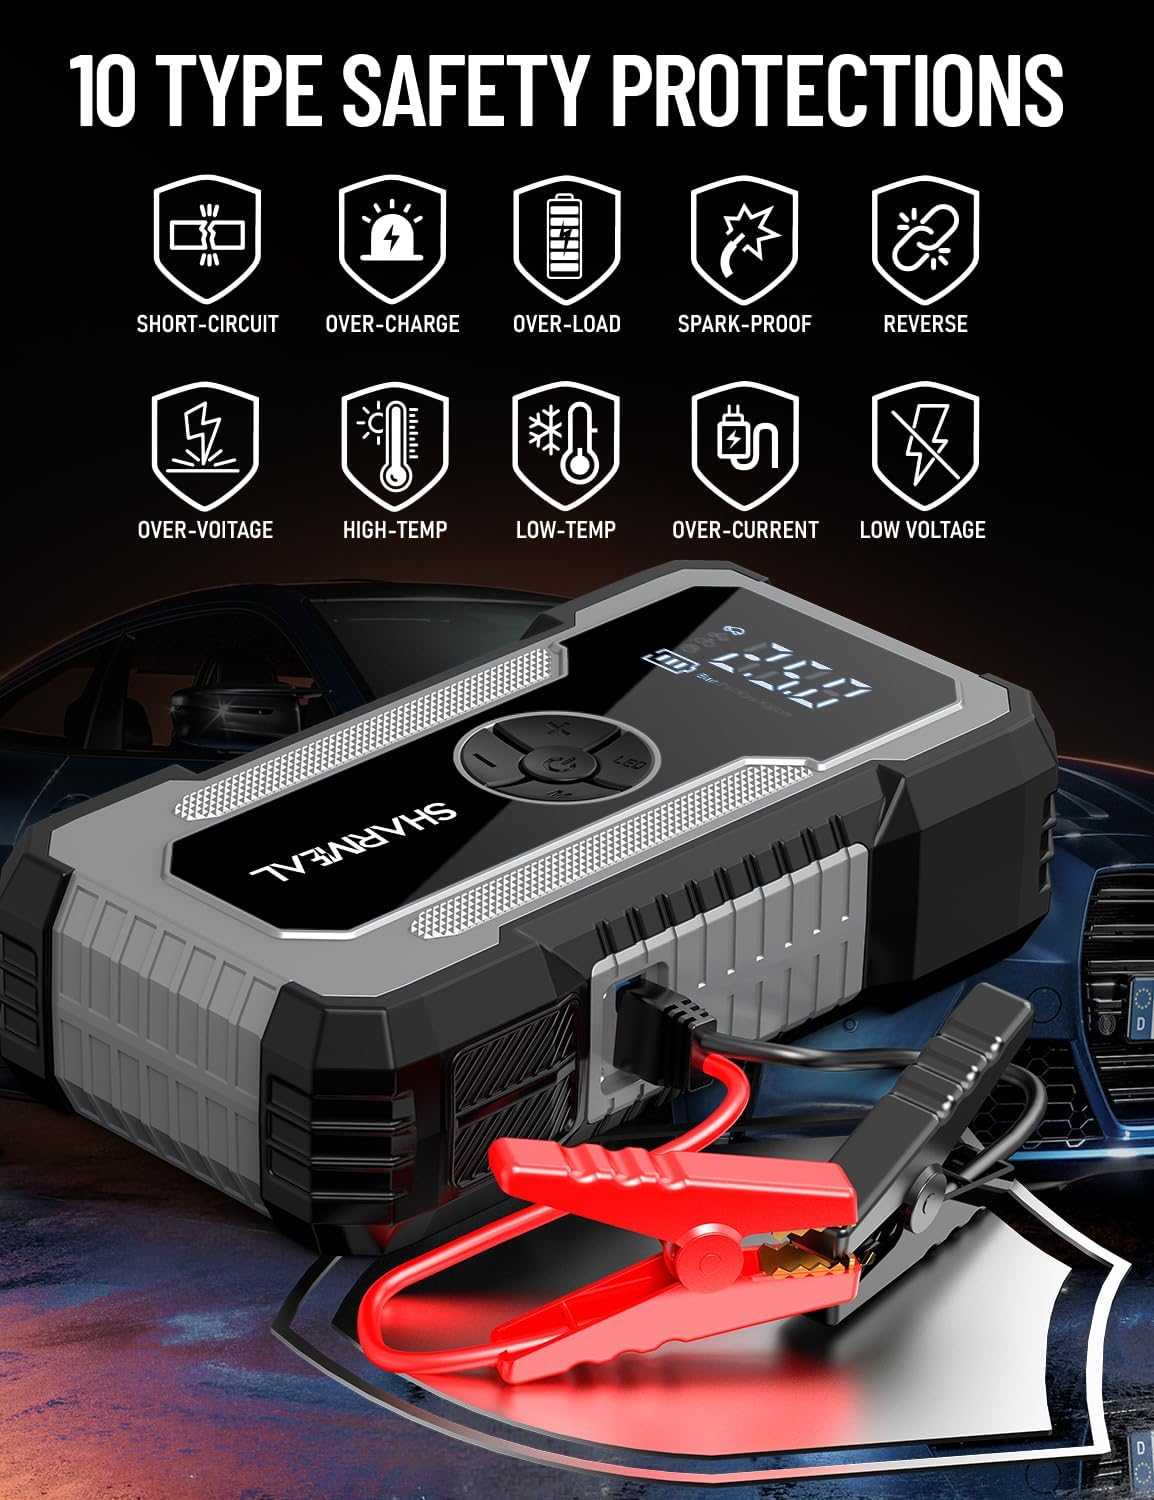
This image illustrates the ten types of safety protections integrated into the device, including short-circuit, over-charge, over-load, spark-proof, reverse connection, over-voltage, high-temperature, low-temperature, over-current, and low voltage حفاظت
- حفاظت از اتصال معکوس: در صورت کلر از آسیب جلوگیری می کندamps اشتباه وصل شده اند.
- حفاظت در برابر جریان بیش از حد: محافظت در برابر جریان بیش از حد مجاز.
- Overvoltagحفاظت e: Protects the device and vehicle from voltage خوشه.
- حفاظت از اضافه بار: Prevents damage from exceeding the device's capacity.
- Overcharge/Discharge Protection: Extends battery life by preventing overcharging or deep discharging.
- عملکرد بدون جرقه: Ensures safe connection without sparks.
- دور از دسترس کودکان نگهداری شود.
- دستگاه را جدا نکنید.
- در معرض دما یا رطوبت شدید قرار ندهید.
۲. راهاندازی و شارژ اولیه
5.1 شارژ اولیه
Before first use, fully charge the jump starter. Connect the provided Type-C charging cable to the jump starter's input port and a suitable USB power adapter (not included). The digital display will indicate the charging status. A full charge is recommended for optimal performance.
5.2 بررسی سطح باتری
The digital display shows the current battery level. Ensure the jump starter has sufficient charge before attempting to jump-start a vehicle or inflate tires.
6. دستورالعمل های عملیاتی
6.1 پرش وسیله نقلیه را روشن می کند
Follow these steps carefully to jump-start a dead car battery:
- Step 1: Insert Jumper Cable. Insert the blue end of the smart jumper cable into the jump starter's 12V output port. Ensure a firm connection.
- Step 2: Connect Clamps. cl قرمز را وصل کنیدamp به قطب مثبت (+) باتری ماشین و cl سیاهamp to the negative (-) terminal. The smart cable's indicator light will show a successful connection (usually a solid green light).
- Step 3: Start Engine. Return to your vehicle and start the engine. If the car does not start immediately, wait 30 seconds and try again. Do not crank for more than 3 seconds per attempt.
- Step 4: Remove Clamps. Once the car starts, immediately remove the jumper clampاز باتری ماشین جدا کنید، سپس کابل رابط را از جامپ استارتر جدا کنید.

This image visually guides the user through the four steps of jump-starting a vehicle: inserting the cable, connecting clamps, starting the engine, and removing clamps.
6.2 Using the Air Compressor for Tire Inflation
The integrated air compressor can inflate tires and other inflatables up to 150 PSI.
- Step 1: Assemble the Tube. Screw the air pump hose onto the air outlet port of the jump starter.
- Step 2: Connect Air Nozzle. Connect the appropriate gas nozzle to the air pump hose and then securely attach it to the tire valve or inflatable item.
- Step 3: Set Pressure. Use the '+' and '-' buttons on the device to adjust the desired inflation pressure. The digital display will show the preset value.
- Step 4: Start Inflation. Long press the power button (usually indicated by a 'U' or power symbol) to start inflating. The compressor will automatically stop once the preset pressure is reached.

This image demonstrates the four steps for using the air compressor: assembling the hose, connecting to the tire, setting the desired pressure, and starting inflation.
6.3 استفاده از چراغ LED
The device features an 800 lumens bright LED light with three modes:
- چراغ قوه: برای روشنایی عمومی.
- حالت SOS: Emits an SOS signal for emergencies.
- حالت بارق: Provides a flashing light for signaling or warning.
برای تغییر حالتها، دکمهی روشن/خاموش را فشار دهید.
۶.۳ استفاده به عنوان پاوربانک قابل حمل
The jump starter can also function as a portable power bank to charge your electronic devices. Connect your phone, tablet, or other USB-powered devices to the USB output port using a compatible charging cable.
7. تعمیر و نگهداری
- شارژ کردن: برای حفظ سلامت باتری، دستگاه را هر ۳ تا ۶ ماه، حتی اگر استفاده نمیشود، شارژ مجدد کنید.
- تمیز کردن: Wipe the unit with a dry, soft cloth. Do not use harsh chemicals or abrasives.
- ذخیره سازی: استارتر پرشی را در جای خشک و خنک و دور از نور مستقیم خورشید و دمای شدید نگهداری کنید.
- مراقبت از کابل: Inspect jumper cables and air hose for damage before each use. Replace if worn or damaged.
8 عیب یابی
| مشکل | علت احتمالی | راه حل |
|---|---|---|
| Jump starter not turning on | باتری ضعیف است یا دستگاه خاموش است. | Charge the unit fully. Press the power button to turn it on. |
| Vehicle not starting after jump attempt | cl نادرستamp connection, severely dead battery, or other vehicle issues. | cl را تضمین کنیدamps are connected correctly (red to +, black to -). Wait 30 seconds between attempts. If still no start, the vehicle may have other problems requiring professional assistance. |
| کمپرسور هوا باد نمیشود | Hose not connected properly, incorrect pressure setting, or low jump starter battery. | Check all connections. Ensure desired pressure is set. Charge the jump starter. |
| Smart cable indicator light not green | Reverse polarity, short circuit, or low voltage. | clamp connections for correct polarity. Ensure the jump starter is adequately charged. |
9. گارانتی و پشتیبانی
Sharmeal products are designed for reliability and performance. For warranty information, technical support, or service inquiries, please refer to the contact information provided on the product packaging or visit the official Sharmeal webرسید خرید خود را به عنوان مدرک خرید نگه دارید.
For further assistance, you may contact Sharmeal customer service through their official channels.