1. دستورالعمل های ایمنی مهم
Always observe basic safety precautions when using this power tool to reduce the risk of fire, electric shock, and serious personal injury.
1.1 هشدارهای ایمنی عمومی ابزار برقی
- ایمنی محل کار: محل کار را تمیز و به خوبی روشن نگه دارید. مناطق بهم ریخته یا تاریک باعث تصادف می شود. ابزارهای برقی را در محیط های انفجاری مانند در حضور مایعات، گازها یا گرد و غبار قابل اشتعال کار نکنید. ابزارهای برقی جرقه هایی ایجاد می کنند که ممکن است گرد و غبار یا دود را مشتعل کند.
- ایمنی برق: از تماس بدن با سطوح زمینی یا زمینی مانند لوله ها، رادیاتورها، بردها و یخچال ها خودداری کنید. اگر بدن شما زمین یا زمین باشد، خطر برق گرفتگی افزایش می یابد.
- ایمنی شخصی: Always wear eye protection. Use safety glasses, goggles, or a face shield. Wear hearing protection when operating the tool for extended periods. Dress properly. Do not wear loose clothing or jewelry. Keep your hair, clothing and gloves away from moving parts.
- استفاده و مراقبت از ابزار: ابزار برقی را به زور به کار نیندازید. از ابزار برقی مناسب برای کاربرد خود استفاده کنید. ابزار برقی مناسب، کار را با سرعتی که برای آن طراحی شده است، بهتر و ایمنتر انجام میدهد. قبل از انجام هرگونه تنظیم، تغییر لوازم جانبی یا انبار کردن ابزارهای برقی، دوشاخه را از منبع تغذیه و/یا باتری را از ابزار برقی جدا کنید.
2. محصول تمام شدview
The VEVOR 20V Portable Band Saw Kit (Model BW2110) is designed for efficient and precise cutting of various materials. It features a brushless motor, variable speed control, and a compact design for portability.
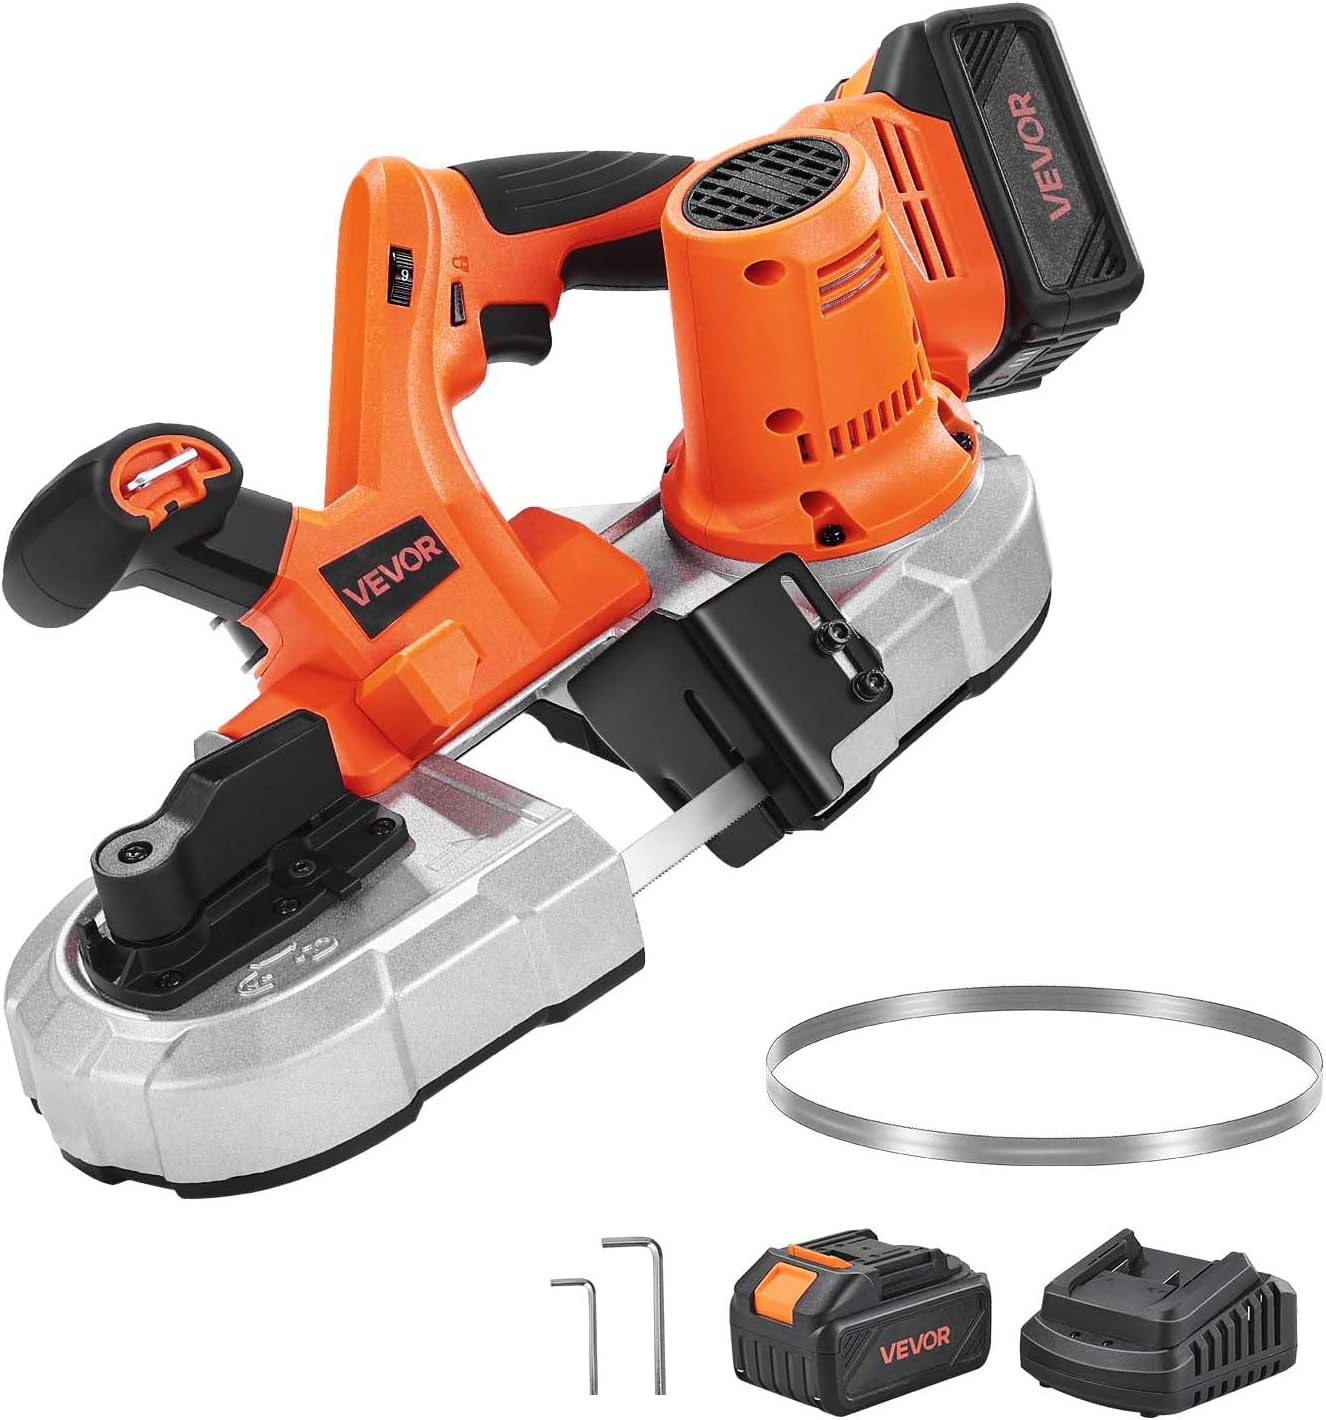
Figure 2.1: VEVOR 20V Portable Band Saw Kit, showing the main unit, battery, charger, and spare blade.
2.1 ویژگی های کلیدی
- 2.56-Inch Deep Cut: Capable of cutting up to 2.56 x 2.56 inches (65 x 65 mm), suitable for small and precise cutting tasks.
- موتور بدون جارو: A robust 360W brushless motor ensures fast, smooth cuts with minimal sparks and clean finishes without burrs.
- کنترل سرعت متغیر: Stepless adjustment knob allows speed changes from 0 to 192 m/min to match different materials and applications.
- چراغ LED یکپارچه: Brightens the work surface for enhanced visibility and accurate cutting, especially in low-light conditions.
- راحتی و آسایش: Features an integrated hook for secure hanging, a quick-change blade lever for easy blade swaps, and a lightweight design (10.69 lbs / 4.85 kg).
- سازگاری با باتری: Equipped with a 4000 mAh Li-ion battery compatible with Makita interface.

Figure 2.2: Illustration of the 2.56-inch cutting depth capability, ideal for small-scale and detailed tasks.

Figure 2.3: Visual representation of the smooth, burr-free, and sparkless cutting performance achieved by the 360W brushless motor.

Figure 2.4: The integrated LED light provides clear visibility of the cutting line, even in low-light conditions, with a 20-second automatic delay.

Figure 2.5: Demonstrates comfort and convenience features including tool-free blade changes, integrated hanging hook, 4000 mAh Li-ion battery charging, and the lightweight design for easy handling.
3. راه اندازی
3.1 باز کردن بسته بندی
Carefully remove all components from the packaging. Inspect the tool for any signs of damage during transit. Retain packaging materials for future storage or transport if needed.
۵.۱ نصب و شارژ باتری
- Ensure the battery is fully charged before first use. Connect the charger to a power outlet and insert the battery pack. The indicator light on the charger will show charging status.
- To install the battery, align the battery pack with the receptacle on the tool handle and slide it in until it clicks securely into place.
- برای برداشتن باتری، دکمهی رهاسازی روی باتری را فشار داده و آن را به بیرون بکشید.
3.3 نصب تیغه
The VEVOR Portable Band Saw features a quick-change blade system for effortless replacement.
- Ensure the tool is powered off and the battery is removed.
- Locate the blade changing lever. Push or pull the lever to loosen the blade tension.
- Open the blade cover (if applicable) or gently spread the guides to remove the old blade.
- Carefully position the new blade around the drive wheels, ensuring the teeth are oriented correctly for cutting.
- Once the blade is seated, release the blade changing lever to apply tension. Ensure the blade is properly aligned within the guides.

Figure 3.1: Step-by-step guide for hassle-free blade replacement, demonstrating how to loosen tension and install a new blade.

Figure 3.2: Illustrates the tool-free blade rod replacement, highlighting easy disassembly and quick blade locking.
4. عملیات
4.1 روشن/خاموش کردن
To turn the band saw on, depress the trigger switch. To turn it off, release the trigger switch. Some models may include a lock-on button for continuous operation; press the trigger and then the lock-on button to engage, and press the trigger again to release.
4.2 تنظیم سرعت
The stepless adjustment knob allows you to vary the blade speed. Rotate the knob to increase or decrease the speed according to the material being cut. Refer to the guidelines below for optimal cutting speeds.

Figure 4.1: Recommended speed settings for different materials to achieve optimal cutting performance.
۵.۲ تکنیکهای برش
- محکم کردن قطعه کار: Always secure the workpiece firmly using a vise or clampبرای جلوگیری از حرکت در حین برش.
- شروع برش: Allow the blade to reach full speed before engaging with the workpiece. Apply steady, even pressure.
- سازگاری مواد: This band saw is suitable for cutting steel, aluminum, cables, angle iron, PVC pipes, wood, and other similar materials.

شکل 4.2: مثالamples of materials that can be efficiently cut with the VEVOR Portable Band Saw.

Figure 4.3: Proper operation demonstrating the use of the band saw on a workpiece secured in a vise.
5. تعمیر و نگهداری
Regular maintenance ensures the longevity and optimal performance of your VEVOR Portable Band Saw.
5.1 تمیز کردن
- After each use, disconnect the battery and clean the tool. Remove any dust, chips, or debris from the blade area, motor vents, and housing using a brush or compressed air.
- Do not use harsh chemicals or abrasive cleaners, as they may damage plastic parts.
5.2 تعویض تیغه
Replace the blade when it becomes dull or damaged. Refer to Section 3.3 for detailed instructions on blade installation.
5.3 ذخیره سازی
Store the band saw in a clean, dry place, out of reach of children. If storing for an extended period, remove the battery pack.
6 عیب یابی
This section addresses common issues you might encounter with your band saw. For problems not listed here, contact VEVOR customer support.
| مشکل | علت احتمالی | راه حل |
|---|---|---|
| ابزار شروع نمی شود | باتری شارژ نشده یا به درستی نصب نشده است. | مطمئن شوید که باتری کاملاً شارژ شده و محکم در جای خود قرار گرفته است. |
| تیغه به طور موثر برش نمیدهد | Dull or damaged blade; incorrect speed setting for material. | Replace blade; adjust speed according to material (refer to Section 4.2). |
| لرزش یا سر و صدای زیاد | تیغه شل؛ تیغه آسیب دیده؛ اجزای فرسوده. | Check blade tension and alignment; replace blade if damaged. If problem persists, seek professional service. |
| Blade comes off during operation | Insufficient blade tension; improper blade installation. | Ensure blade is correctly installed and tensioned (refer to Section 3.3). |
7. مشخصات
Detailed technical specifications for the VEVOR 20V Portable Band Saw Kit.
| شماره مدل مورد | BW2110 |
| جلد عملیاتیtage | DC 20 ولت |
| تنظیم سرعت | 0-192 متر در دقیقه |
| وزن خالص | 10.69 پوند / 4.85 کیلوگرم |
| مواد اصلی | ADC12+PA6-GF30 |
| عمق برش | 2.56 2.56. 65 اینچ / 65 XNUMX XNUMX میلی متر |
| ابعاد تیغه | 32.88 x 0.51 x 0.02 اینچ / 835 x 13 x 0.5 میلیمتر |
| ابعاد محصول (L x W x H) | 17.2 x 7.09 x 9.65 اینچ / 437 x 180 x 245 میلیمتر |
| اجزای شامل | 1 x Portable Band Saw, 1 x S4 Hex Wrench, 1 x S6 Hex Wrench, 1 x Saw Blade, 1 x Battery Pack & Charger |
| نوع باتری | لیتیوم یون (۵۰۰ میلیآمپر ساعت) |

شکل ۳: ابعاد محصول و مشخصات کلیدی.
8. گارانتی و پشتیبانی
محصولات VEVOR برای دوام و عملکرد بالا طراحی شدهاند. برای اطلاعات گارانتی، پشتیبانی فنی یا سوالات مربوط به خدمات، لطفاً به وبسایت رسمی VEVOR مراجعه کنید. webسایت یا با بخش خدمات مشتریان آنها تماس بگیرید.
پشتیبانی آنلاین: www.vevor.com/support
Please have your model number (BW2110) and purchase information ready when contacting support.