
1. Important Safety Information
Read all instructions carefully before using the appliance. Keep this manual for future reference. Always follow basic safety precautions to reduce the risk of fire, electric shock, or injury to persons.
- Ensure the washing machine is properly grounded.
- Do not operate the machine with a damaged power cord or plug.
- Keep children away from the appliance during operation.
- Do not wash articles that have been cleaned in, washed in, soaked in, or spotted with combustible or explosive substances.
- Unplug the appliance before cleaning or performing any maintenance.
2. Product Overview and Features
This Samsung semi-automatic top load washing machine is designed for efficient and economical laundry care. It features a 7.5 kg capacity, suitable for large families, and boasts a 5-star energy efficiency rating.

Figure 2.1: Key Features Overview - This image highlights the Hexa Storm Pulsator for powerful washing, 5 Star Energy Efficiency for reduced power consumption, the Magic Mixer for optimal detergent dissolution, and the Air Turbo Drying System for faster drying.
Key Features:
- Hexa Storm Pulsator: Provides a powerful and multi-directional water flow for effective cleaning.
- 5 Star Energy Efficiency: Ensures low power consumption, making it an economical choice.
- Air Turbo Drying System: Reduces drying times by removing more water from clothes.
- Magic Filter: Effectively collects lint and particles from the wash water.
- Magic Mixer: Designed to dissolve detergent thoroughly for better wash performance.
- Auto Restart: Automatically resumes operation after a power outage.
- Rust-proof Body: Durable plastic body designed to resist rust.
- Caster Wheels: For easy movement and positioning of the machine.
- Rat Mesh Protection: Integrated mesh at the base to prevent rodent entry.

Figure 2.2: Auto Restart and Wash Cycles - This image illustrates the Auto Restart function and the selection of 4 distinct wash cycles available on the control panel.

Figure 2.3: Magic Filter and Soak Function - A top-down view emphasizing the Magic Filter's location, the machine's overall elegant design, and the control knob for the Soak function.
3. Setup and Installation
Proper installation is crucial for the safe and efficient operation of your washing machine. Ensure the machine is placed on a firm, level surface.
Unpacking:
- Carefully remove all packaging materials.
- Check for any damage during transit. Contact your dealer immediately if damage is found.
- Ensure all included components are present: Washing Machine, Hose Drain, Hose Inlet, Shutter (Rat Mesh), Clip Ring, Screw Fitting.
Placement:
- Place the machine on a stable, flat surface to minimize vibration and noise.
- Allow adequate space around the machine for ventilation and access.
- Utilize the caster wheels for easy positioning.

Figure 3.1: Machine Dimensions and Features for Placement - This image provides the product dimensions (48.5D x 83W x 100H Centimeters) and highlights features like 4 wheels for mobility, a rust-proof body, and rat protection for durability and safety.
Water and Drain Connection:
- Connect the inlet hose to a water tap with appropriate water pressure (0.05~0.3MPa).
- Position the drain hose to ensure proper water drainage.
Electrical Connection:
- Plug the power cord into a grounded 220 Volt AC outlet.
- Do not use extension cords or adapters.

Figure 3.2: Energy Label and Rat Protection - This image displays the Power Savings Guide (energy label) indicating the machine's 5-star efficiency and a detailed view of the rat protection hole at the base.
4. Operating Instructions
Follow these steps for effective washing and drying.
Washing Process:
- Load Laundry: Open the wash tub lid and place clothes inside. Do not overload.
- Add Detergent: Add appropriate amount of detergent to the wash tub. The Magic Mixer helps dissolve detergent.
- Select Water Level: Fill the wash tub with water to the desired level using the water selector.
- Choose Wash Program: Turn the 'Wash Selector' knob to choose one of the 4 wash programs: Delicates, Normal, Heavy, Gentle. An additional 'Soak' option is available.
- Set Wash Timer: Set the 'Wash Timer' for the desired duration.
- Start Washing: The machine will begin the wash cycle.

Figure 4.1: Control Panel - A detailed view of the control panel, showing the Water Selector, Wash Timer, Wash Selector (Delicates, Normal, Heavy, Gentle), Drain Selector, and Spin Timer.
Spin Drying Process:
- Transfer Laundry: After the wash cycle, transfer the wet clothes to the spin tub.
- Close Spin Lid: Ensure the spin tub lid is securely closed.
- Set Spin Timer: Turn the 'Spin Timer' knob to set the desired spin duration. The Air Turbo Drying System will assist in faster drying.
- Start Spinning: The machine will begin the spin cycle.
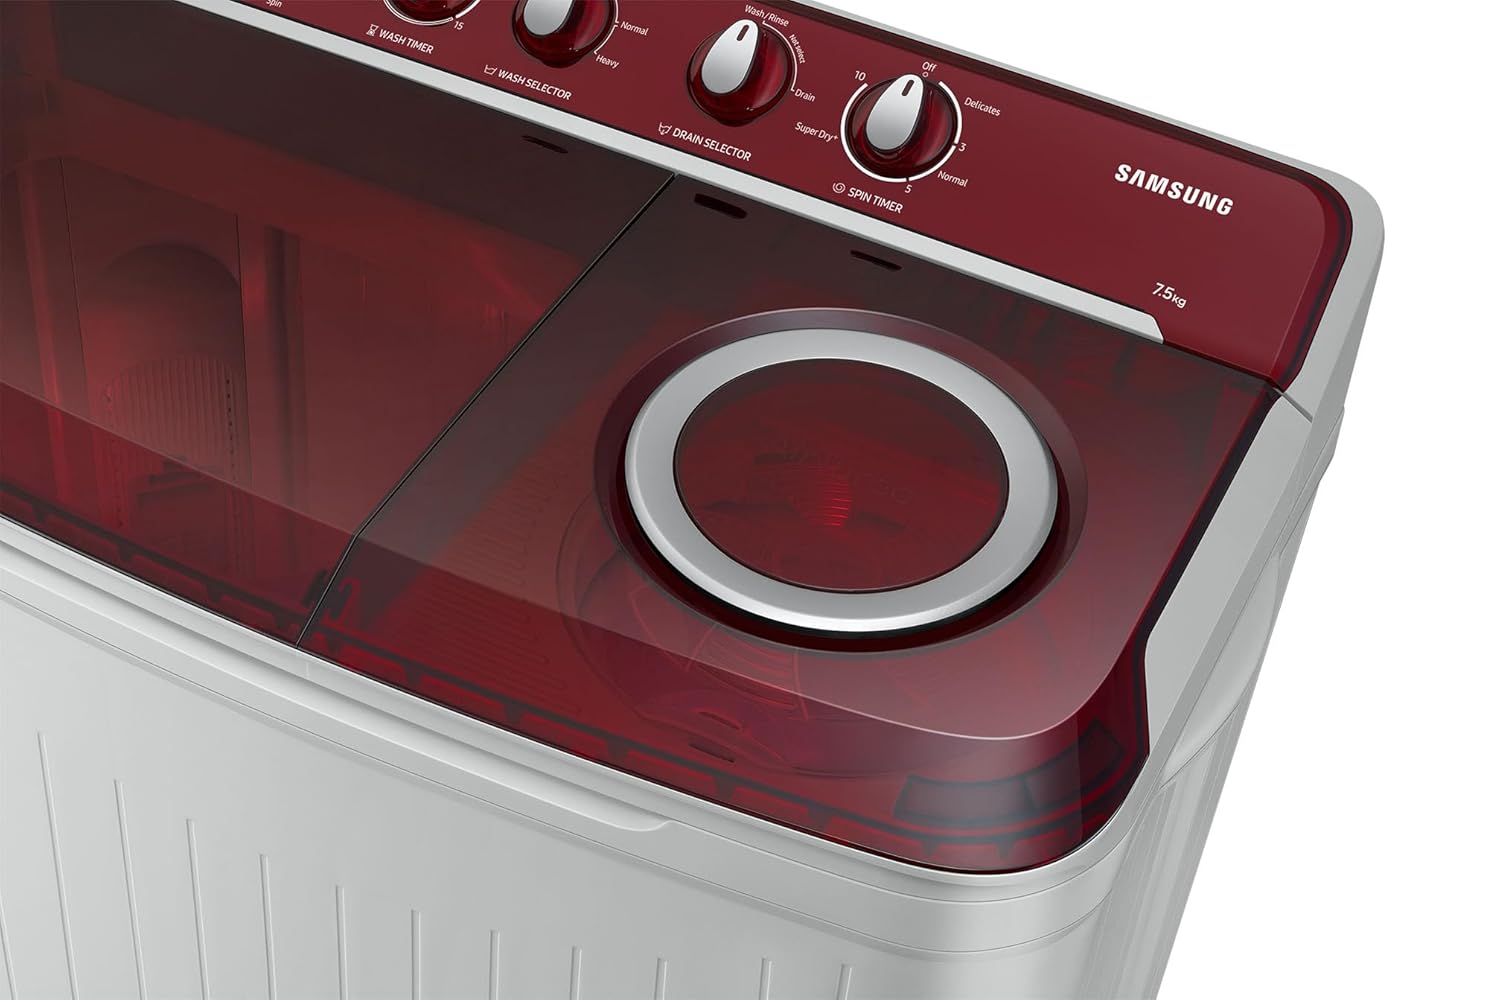
Figure 4.2: Spin Tub with Air Turbo - This image provides a close-up of the spin tub, highlighting the Air Turbo Drying System designed to enhance water removal and reduce drying time.
5. Maintenance
Regular maintenance ensures the longevity and optimal performance of your washing machine.
Cleaning the Magic Filter:
- The Magic Filter collects lint and debris during washing.
- Remove the filter after every few washes.
- Clean it under running water and reinsert it properly.
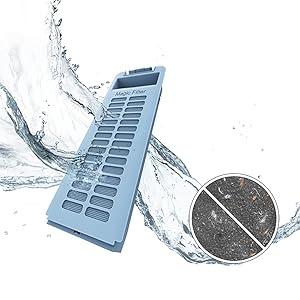
Figure 5.1: Magic Filter Cleaning - This image demonstrates the process of removing and cleaning the Magic Filter to maintain effective lint collection.
Cleaning the Exterior:
- Wipe the exterior with a soft, damp cloth.
- Do not use abrasive cleaners or solvents.
Tub Clean Cycle:
- Periodically run a Tub Clean cycle to remove detergent residue and odors from the wash tub.
6. Troubleshooting
Refer to this section for common issues and their solutions.
| Problem | Possible Cause | Solution |
|---|---|---|
| Machine does not start | Power cord unplugged; Power outage; Lid not closed properly. | Check power connection; Wait for power to resume (Auto Restart feature); Ensure lids are fully closed. |
| Excessive vibration/noise | Machine not level; Overloaded; Clothes unevenly distributed. | Adjust machine's position; Reduce load; Redistribute clothes evenly. |
| Water not draining | Drain hose kinked or blocked; Drain selector not set correctly. | Check and clear drain hose; Ensure drain selector is in the correct position. |
| Poor washing results | Insufficient detergent; Overloading; Water temperature too low. | Use recommended detergent amount; Do not overload; Use appropriate water temperature. |
If the problem persists after attempting these solutions, please contact customer support.
7. Specifications
| Feature | Detail |
|---|---|
| Model Name | WT75B3200RR/TL |
| Product Dimensions (D x W x H) | 48.5D x 83W x 100H Centimeters |
| Brand | Samsung |
| Capacity | 7.5 kg |
| Special Feature | Inverter |
| Access Location | Top Load |
| Finish Types | Painted (Light Gray, Red) |
| Cycle Options | Tub Clean |
| Controls Type | Knob/Manual |
| Operation Mode | Semi Automatic |
| Max Rotational Speed | 1300 RPM |
| Voltage | 220 Volts |
| Number of Standard Cycles | 4 |
| Installation Type | Freestanding |
| Washer Dispenser Options | Magic Dispenser |
| Material Type | Plastic Body, Stainless Steel Drum |
| Item Weight | 23700 Grams |
| Included Components | Washing Machine, Hose Drain, Hose Inlet, Shutter (Rat Mesh), Clip Ring, Screw Fitting |
8. Warranty and Support
Warranty Information:
This product comes with a manufacturer's warranty:
- 2 years comprehensive warranty on the product.
- 5 years warranty on the wash motor.
Terms and Conditions Apply. To avail warranty service, provide the product's model name and seller's details from your invoice.
Customer Support:
For all product-related complaints or assistance, please contact Samsung Customer Care:
- Telephone (Toll Free): 1800 40 7267864 (1800 40 SAMSUNG)
- WhatsApp: 1800-57-267864
- Email: support.india@samsung.com
You can also visit the official Samsung India website for more information and to access the user manual.


