1. مقدمه
Thank you for choosing the Generic Solar Outdoor Wall Mounted Light. This manual provides essential information for the proper installation, operation, and maintenance of your solar light. Please read these instructions carefully before use and retain them for future reference.
This solar light is designed for outdoor use, providing illumination for fences, porches, patios, and other areas. It features automatic charging during the day and turns on automatically at night, incorporating a light-sensitive device and motion sensor for efficient operation.
2. محصول تمام شدview
The solar light integrates a solar panel, LED light source, and motion sensor into a compact, wall-mountable unit. It is constructed from durable plastic, designed to withstand outdoor conditions.

شکل 2.1: The solar light automatically charges during daylight hours and illuminates at night.
3. محتویات بسته
- 1 x Solar Outdoor Wall Mounted Light
- سختافزار نصب (پیچ، پریز برق) - (Note: Specific hardware may vary, ensure suitability for your mounting surface)
- راهنمای دستورالعمل (این سند)
4. مشخصات
| ویژگی | مشخصات |
|---|---|
| شماره مدل | B0DP9SQF81 |
| ابعاد | Approximately 5.98 × 5.12 inches (15.2 × 13 cm) |
| مواد | پلاستیک |
| رنگ | مشکی |
| منبع نور | LED |
| منبع تغذیه | انرژی خورشیدی |
| نوع سنسور | Light Sensitive Device, Motion Sensor |
| وزن مورد | 8.6 اونس (تقریباً 244 گرم) |

شکل 4.1: ابعاد محصول برای برنامهریزی نصب.
5. راه اندازی و نصب
5.1 انتخاب مکان
- Select a location that receives at least 6-8 hours of direct sunlight daily to ensure optimal charging.
- Avoid placing the light under eaves, trees, or other obstructions that may block sunlight.
- Ensure the chosen location is away from other strong light sources (e.g., streetlights, other outdoor lights) at night, as these may interfere with the light sensor and prevent the solar light from turning on.
5.2 دستورالعمل نصب
- سطح نصب را آماده کنید: Ensure the wall or fence surface is clean and stable.
- علامت گذاری نقاط مته: Hold the solar light in the desired position and mark the locations for the mounting screws.
- سوراخ های مته: Use an appropriate drill bit to drill holes at the marked points. Insert wall plugs if necessary for your mounting surface.
- نور را ایمن کنید: Align the light with the drilled holes and secure it firmly using the provided screws.
6. دستورالعمل های عملیاتی
6.1 استفاده اولیه
Before first use, allow the solar light to charge in direct sunlight for at least 8-10 hours. This ensures the internal battery is fully charged for optimal performance.
6.2 عملکرد خودکار
- The solar light is equipped with a light-sensitive device. It will automatically turn off and charge during the day when sufficient light is detected.
- At dusk or when ambient light levels drop, the light will automatically turn on.
6.3 Motion Sensor Function
The integrated motion sensor detects movement within its range, typically up to 10 meters. When motion is detected, the light will illuminate at full brightness. After a period of no motion, the light will return to a dimmer state or turn off, depending on its specific mode (if multiple modes are available, refer to product packaging for details).
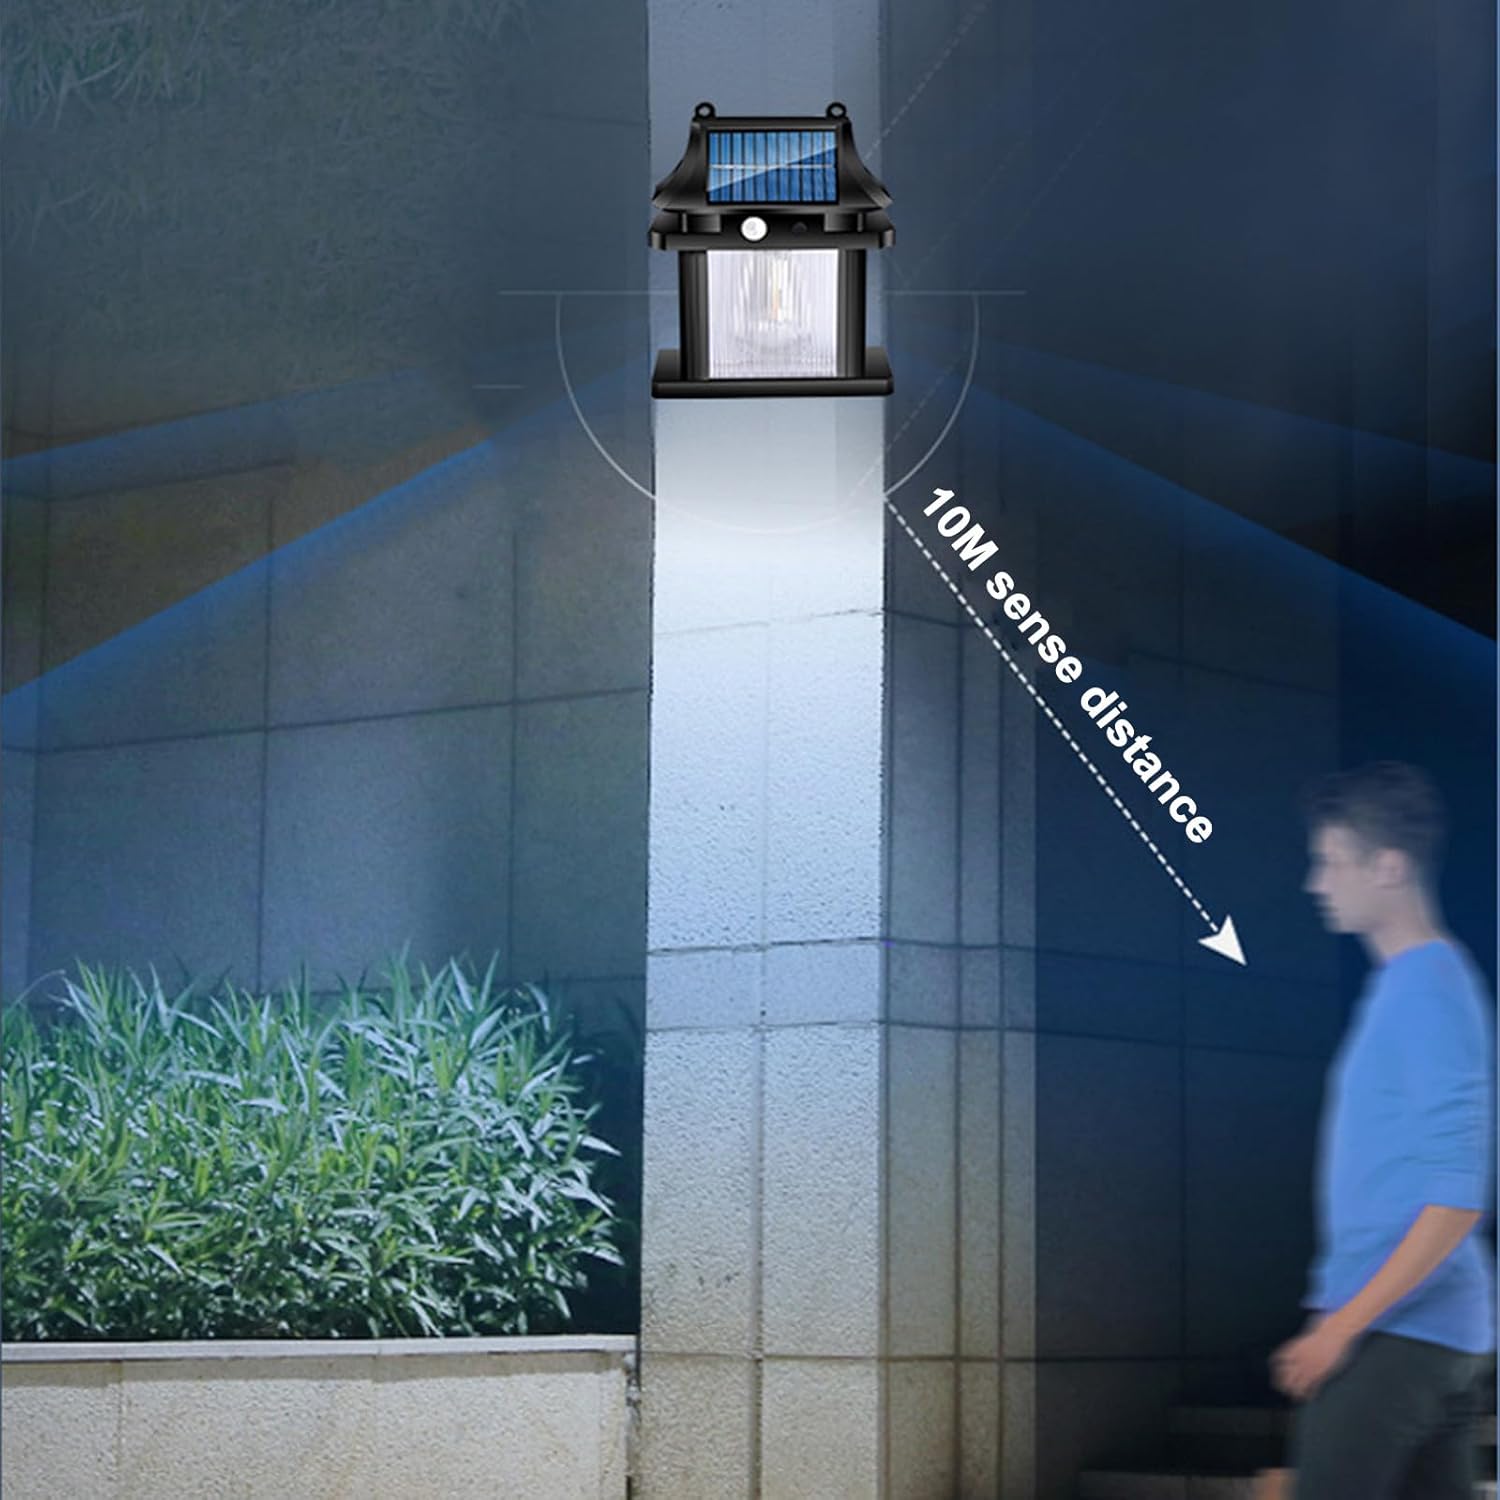
شکل 6.1: The motion sensor detects movement up to 10 meters.
7. تعمیر و نگهداری
7.1 تمیز کردن
- سطح پنل خورشیدی را مرتباً با یک پارچه نرم و لطیف تمیز کنید.amp یک پارچه برای پاک کردن گرد و غبار، کثیفی و آلودگی. یک پنل تمیز، شارژ کارآمد را تضمین میکند.
- Do not use abrasive cleaners or harsh chemicals, as these can damage the solar panel or light housing.
۶.۳ مقاومت در برابر آب و هوا
This solar light is designed to be waterproof and withstand various outdoor weather conditions, including rain. However, prolonged exposure to extreme weather may affect its lifespan.

شکل 7.1: The solar light is designed to be waterproof.
8 عیب یابی
| مشکل | علت احتمالی | راه حل |
|---|---|---|
| نور در شب روشن نمی شود. | نور خورشید برای شارژ کافی نیست. | Relocate the light to an area with more direct sunlight. Ensure the solar panel is clean. |
| Ambient light interference. | Ensure the light is not installed near other strong light sources (e.g., streetlights) that might trick the sensor into thinking it's daytime. | |
| نور کم است یا فقط برای مدت کوتاهی روشن میماند. | باتری به طور کامل شارژ نشده است. | Allow the light to charge for 1-2 full sunny days. Clean the solar panel. |
| سنسور حرکتی حرکت را تشخیص نمیدهد. | Obstruction in sensor's path. | Clear any foliage or objects blocking the sensor's view. |
| Sensor range issues. | Ensure movement is within the 10-meter detection range. |
9. گارانتی و پشتیبانی
For warranty information and customer support, please refer to the details provided by your retailer or contact the manufacturer directly. Keep your purchase receipt as proof of purchase.
If you encounter issues not covered in this manual, please reach out to the seller or manufacturer for assistance.