Pilipane B0CWV71P6B
Pilipane Stand Alone Access Control Keypad User Manual
Model: B0CWV71P6B
1. مقدمه
This manual provides comprehensive instructions for the installation, operation, and maintenance of your Pilipane Stand Alone Access Control Keypad. This system is designed to provide secure and automated access control for various environments, including homes, offices, factories, and communities. Please read this manual thoroughly before installation and use to ensure proper functionality and safety.
The system supports multiple access methods: RFID key card, password, or a combination of both. It features a built-in ID card reader module and allows for 3-6 digit passwords.
2. محتویات بسته
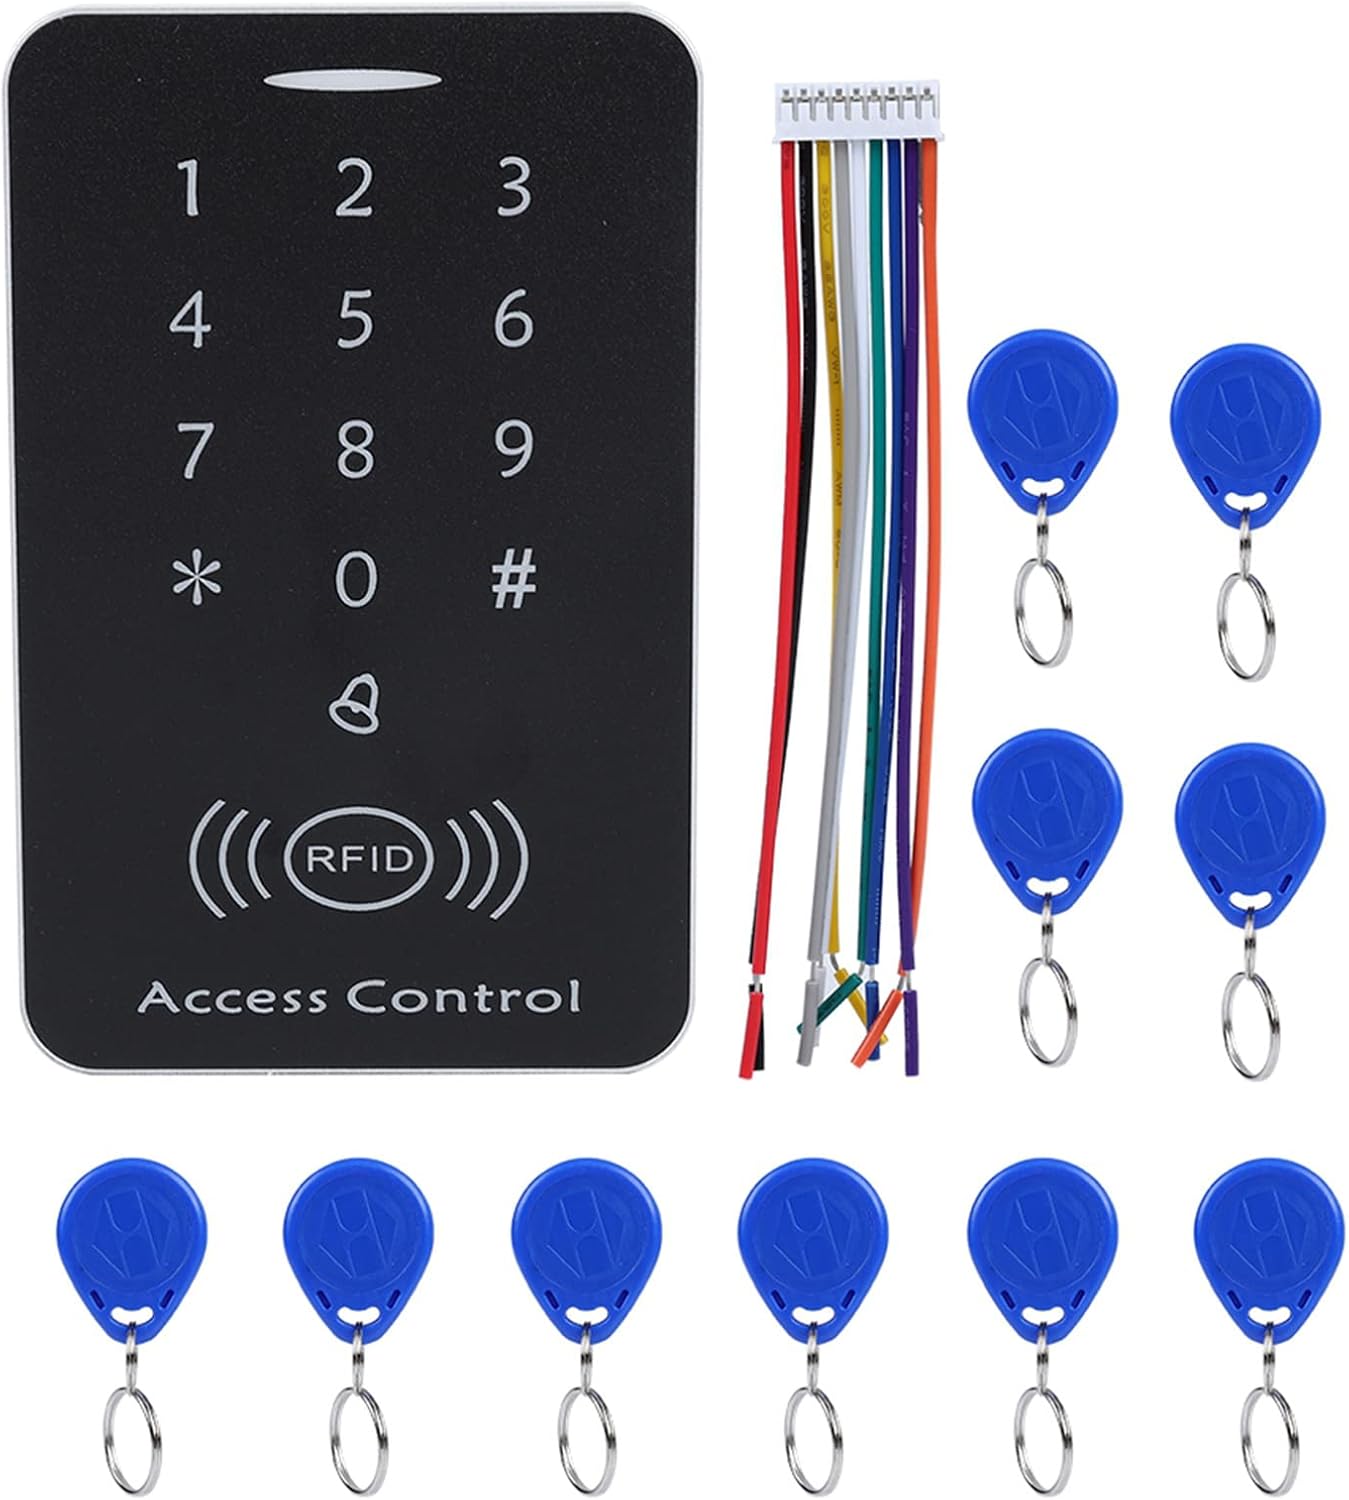
مطمئن شوید که تمام موارد ذکر شده در زیر در بسته شما موجود است:
- 1 x RFID One-door Access Controller (Keypad Unit)
- 10 x Key Fobs (RFID Cards)
- ۱ عدد کابل اتصال
- ۱ عدد دفترچه راهنمای کاربر انگلیسی (این سند)
3. مشخصات
| ویژگی | مشخصات |
|---|---|
| مواد | پی وی سی |
| جلد کارtage | DC 12 ولت |
| رنگ | نقرهای + مشکی |
| Identification Way | Smart Card (RFID) |
| Inductive Way | ID Card + Password |
| فاصله کارتخوانی | 2-10 سانتی متر |
| ظرفیت ذخیره سازی | 1000 کاربر |
| نوع باز کردن قفل | ID Card / Password / ID Card + Password |
| ابعاد | تقریباً ۲۷.۲ × ۱۶ × ۱۰.۷ سانتیمتر (۱۰.۷ × ۶.۳ × ۴.۲ اینچ) |
| وزن | تقریباً 149 گرم (5.3 اونس) |

4. راه اندازی و نصب
4.1 نمودار سیم کشی
Proper wiring is crucial for the correct operation of the access control system. Refer to the internal circuit board for connection points.

اتصالات سیم کشی:
- + 12 ولت: Connect to the positive terminal of a DC 12V power supply.
- GND: Connect to the negative terminal of the DC 12V power supply.
- فشار دادن: Connect to the exit button.
- زنگ: Connect to an external door bell.
- NC (به طور معمول بسته): Connect to the NC terminal of an electric lock.
- COM (مشترک): Connect to the COM terminal of an electric lock.
- خیر (به طور معمول باز): Connect to the NO terminal of an electric lock.
- باز کن: Connect to the door sensor (if applicable).
Ensure all connections are secure and correctly matched to avoid damage to the device or connected components.
4.2 روشن شدن اولیه
After completing all wiring, apply DC 12V power to the unit. The keypad should illuminate, indicating it is ready for programming.
۴. عملیات و برنامهریزی
5.1 تنظیمات پیش فرض
- Default Administrator Password: 123456
- Default Door Open Mode: Card or Password
5.2 ورود به حالت برنامه نویسی
- را فشار دهید *.
- Enter the Administrator Password (default: 123456).
- را فشار دهید #.
- The indicator light will change, confirming entry into programming mode.
5.3 Changing Administrator Password
- وارد حالت برنامه نویسی شوید.
- را فشار دهید 0.
- Enter the new 6-digit Administrator Password.
- را فشار دهید # برای تایید
- با فشار دادن از حالت برنامه نویسی خارج شوید *.
5.4 Adding User Cards (RFID Fobs)
- وارد حالت برنامه نویسی شوید.
- را فشار دهید 1.
- Present the RFID card to be added to the reader. The unit will beep to confirm.
- Repeat for additional cards.
- با فشار دادن از حالت برنامه نویسی خارج شوید *.

5.5 Deleting User Cards
- وارد حالت برنامه نویسی شوید.
- را فشار دهید 2.
- Present the RFID card to be deleted to the reader. The unit will beep to confirm deletion.
- Repeat for additional cards.
- با فشار دادن از حالت برنامه نویسی خارج شوید *.
5.6 Setting User Passwords
Each user can have a 3-6 digit password. Passwords are associated with user IDs, which are automatically assigned when a card is added.
- وارد حالت برنامه نویسی شوید.
- را فشار دهید 3.
- Enter the User ID (e.g., 001 for the first card added).
- را فشار دهید #.
- Enter the new 3-6 digit password.
- را فشار دهید # برای تایید
- با فشار دادن از حالت برنامه نویسی خارج شوید *.

5.7 Setting Door Open Mode
The system supports three door open modes:
- Card Only: Access granted by presenting a registered RFID card.
- Password Only: Access granted by entering a registered password.
- Card + Password: Access granted by presenting a registered RFID card followed by its associated password.

- وارد حالت برنامه نویسی شوید.
- را فشار دهید 4 for Card Only mode.
- را فشار دهید 5 for Password Only mode.
- را فشار دهید 6 for Card + Password mode.
- را فشار دهید # برای تایید
- با فشار دادن از حالت برنامه نویسی خارج شوید *.
5.8 عملکرد بازنشانی
To reset the device to factory default settings (Administrator Password: 123456, Door Open Mode: Card or Password, all user data deleted):
- برق را از واحد جدا کنید.
- Locate the reset button or jumper on the circuit board (refer to Image 3).
- While holding the reset button/jumper, reconnect power.
- Hold for approximately 5 seconds until you hear a long beep.
- Release the button/jumper. The system is now reset.
6. تعمیر و نگهداری
- تمیز کردن: برای تمیز کردن سطح صفحه کلید از یک پارچه نرم و خشک استفاده کنید. از پاک کننده ها یا حلال های ساینده خودداری کنید.
- منبع تغذیه: Ensure a stable DC 12V power supply is used. Fluctuations can affect performance.
- حفظ داده ها: The device utilizes integrated circuit techniques to prevent data loss during power failures, ensuring settings and user data are retained.
- تست منظم: Periodically test all access methods (card, password, card+password) to ensure proper functionality.
7 عیب یابی
| مشکل | علت احتمالی | راه حل |
|---|---|---|
| صفحه کلید روشن نمیشود. | No power, incorrect wiring, faulty power supply. | Check DC 12V power connection. Verify wiring according to diagram. Test power supply. |
| Door does not unlock with valid card/password. | Incorrect door open mode, card/password not registered, faulty lock connection. | Verify door open mode setting. Re-register card/password. Check lock wiring (NC/NO/COM). |
| نمیتوان وارد حالت برنامهریزی شد. | Incorrect administrator password. | Ensure correct administrator password is used. If forgotten, perform a factory reset. |
| RFID card not detected. | Card not registered, card damaged, interference. | Ensure card is registered. Try a different card. Avoid placing metal objects near the reader. |
8. گارانتی و پشتیبانی
For warranty information or technical support, please refer to the seller's policy or contact the manufacturer, Pilipane, directly through their official channels. Keep your purchase receipt as proof of purchase.
Manufacturer: Pilipane
Ask a question about this manual
Ask about setup, troubleshooting, compatibility, parts, safety, or missing instructions. Manuals+ will review the question and use this page’s manual context to help answer it.