1. بیش ازview
The Godox XProII-S is a TTL wireless flash trigger specifically designed for Sony cameras. It offers advanced features for controlling lighting in flash photography, including TTL autoflash, 1/8000s High-Speed Sync (HSS), and a robust 2.4G wireless system. This manual provides comprehensive instructions for the setup, operation, and maintenance of your XProII-S trigger, ensuring you can achieve professional lighting results with ease.
ویژگی های کلیدی:
- TTL Autoflash and Manual Flash Modes
- 1/8000s High-Speed Sync (HSS) and Second-Curtain Sync
- TCM (TTL-Convert-Manual) Function for efficient workflow
- Integrated 2.4GHz Godox Wireless System for reliable control
- Bluetooth Connectivity for remote control via Godox Flash App
- New Quick-Release Lock for secure and easy mounting
- SCAN Function for automatic channel selection

Figure 1.1: The Godox XProII-S TTL Wireless Flash Trigger, a versatile tool for Sony camera users.

Figure 1.2: The XProII-S features an upgraded control system for an intuitive, efficient, and professional lighting experience.
2. راه اندازی
2.1 نصب باتری
The XProII-S requires two AA batteries (not included). To install:
- پوشش محفظه باتری را در پایین دستگاه پیدا کنید.
- درپوش را بلغزانید.
- Insert the two AA batteries, ensuring correct polarity as indicated inside the compartment.
- درپوش محفظه باتری را محکم ببندید.
2.2 Mounting to Camera Hotshoe
To attach the XProII-S to your Sony camera:
- Slide the trigger's hotshoe foot into your camera's hotshoe.
- Push the quick-release lock lever forward until it clicks into place, securing the trigger firmly to the camera.
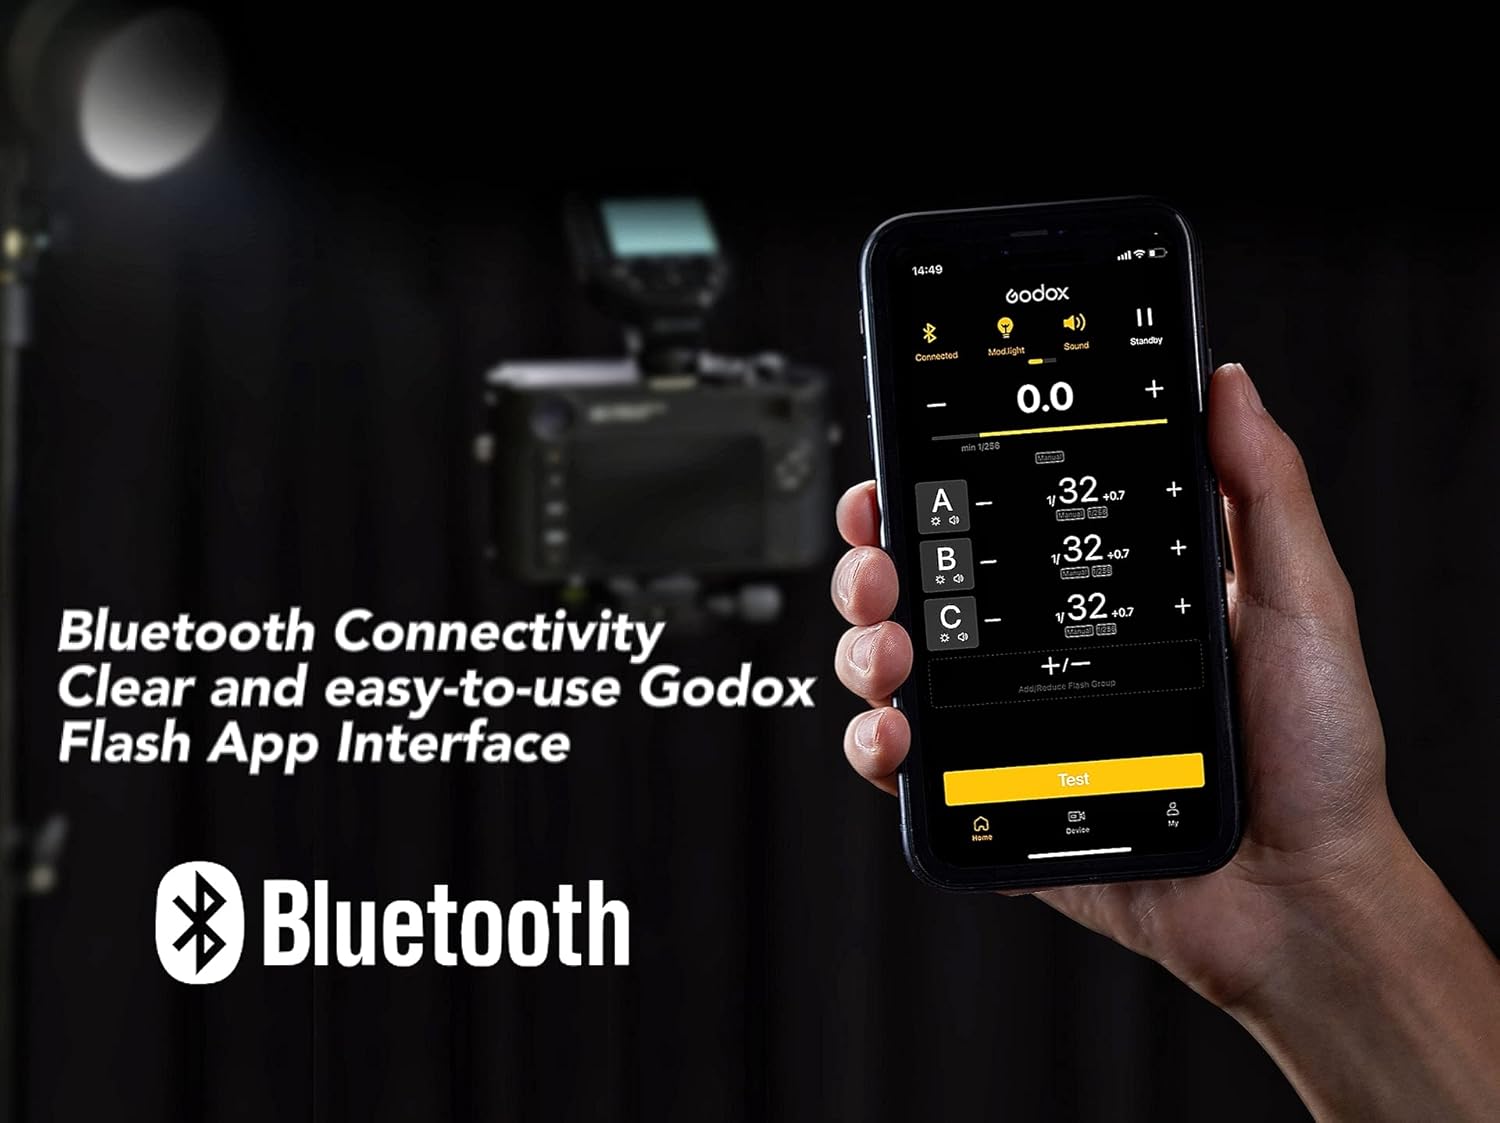
Figure 2.1: The quick-release lock ensures the trigger is securely mounted on the camera's hotshoe.

شکل ۲.۳: یک نمونه دقیق view of the quick-release lock, designed for efficient and convenient attachment.
2.3 روشن/خاموش
Press and hold the power button located on the side of the unit to turn the XProII-S on or off.
2.4 تنظیمات اولیه
Upon first use or after a factory reset, you may be prompted to configure basic settings. Follow the on-screen instructions to set parameters such as language and time. Navigate through menus using the control dial and confirm selections with the SET button.
2.5 جفت بی سیم
The XProII-S utilizes a 2.4GHz Godox Wireless System. To establish communication with compatible flash units:
- Ensure both the XProII-S and the flash unit are powered on.
- Set the same کانال (سی اچ)، گروه (GR), and شناسه بی سیم (ID) on both the trigger and the flash unit. The XProII-S supports 32 channels and either 5 or 16 groups (selectable in the menu), with 99 wireless ID settings (OFF, 01-99).
- Once settings match, the units will automatically pair.
3. دستورالعمل های عملیاتی
۴.۱ حالتهای پایه فلاش
- فلاش خودکار TTL: The trigger supports Through-The-Lens (TTL) autoflash, allowing the camera to automatically determine the correct flash output for optimal exposure.
- فلاش دستی: For precise control, adjust the flash output power manually. This mode is ideal for consistent lighting in controlled environments.
- همگام سازی با سرعت بالا (HSS): Achieve shutter speeds up to 1/8000s. This is useful for freezing fast motion or using wide apertures in bright ambient light conditions.
- همگامسازی پرده دوم: Synchronize the flash with the closing of the shutter curtain. This creates a natural-looking light trail behind moving subjects.
- Stroboscopic Flash: Fire multiple flashes during a single exposure to capture sequential motion of a subject.

Figure 3.1: The extra-large LCD screen provides a real-time display of remote flash settings.

Figure 3.2: The XProII-S supports HSS (High-Speed Sync) up to 1/8000s and TTL (Auto Flash) modes.
3.2 توابع پیشرفته
- TCM (TTL-Convert-Manual) Function: This two-way function allows instant conversion from TTL mode to Manual mode with retained parameters, and back again. This streamlines your workflow by allowing you to fine-tune manual settings based on an initial TTL reading without repetition.

Figure 3.3: TCM mode allows for quick conversion of TTL settings to manual power for fine adjustments.
- Bluetooth Connectivity & Godox Flash App: The XProII-S features built-in Bluetooth. Download the Godox Flash App on your iPhone, Android smartphone, or tablet to remotely adjust lighting parameters with a clear and user-friendly interface.

Figure 3.4: Control your XProII-S and connected flashes remotely using the Godox Flash App via Bluetooth.
- عملکرد اسکن: In environments with potential signal interference, activate the SCAN function. The XProII-S will automatically search for and suggest spare channels and IDs, helping to avoid interference and improve connection stability.

Figure 3.5: Use the SCAN function to find the most stable wireless channel in busy environments.
- جبران نوردهی فلاش (FEC): Adjust flash output by ±3 EV in 1/3 EV increments to fine-tune exposure.
- ZOOM Setting: Control the zoom value of compatible flash units directly from the transmitter, from AUTO or 24mm to 200mm.
- مدل سازی الamp کنترل: Enable or disable the modeling lamp on compatible flash units directly from the XProII-S.
- Beeper Control: Turn the beeper sound on or off for compatible flash units.
- Wireless Shutter: When used with an optional X1R-S receiver (sold separately) and a 2.5mm sync cord, the XProII-S can remotely trigger your camera's shutter.
- Sekonic Light Meter Integration: The XProII-S can integrate with Sekonic L-858 light meters (equipped with a built-in Godox 2.4G module) to adjust flash parameters directly after metering, enhancing precision and convenience.

Figure 3.6: The XProII-S can be used in conjunction with a Sekonic L-858 light meter for precise flash control.

Figure 3.7: The L-858 mode allows the light meter to prioritize control over connected lights.
4. تعمیر و نگهداری
4.1 تمیز کردن
Use a soft, dry cloth to clean the exterior of the XProII-S. Avoid using harsh chemicals, solvents, or abrasive materials, as these can damage the finish or internal components.
4.2 مراقبت از باتری
If the trigger will not be used for an extended period, remove the AA batteries to prevent potential leakage and damage to the unit.
4.3 سیستم عامل ارتقا دهید
Godox periodically releases firmware updates to improve performance and add new features. Check the official Godox website for the latest firmware. Upgrades can be performed via the Type-C USB port on the side of the unit.
5 عیب یابی
If you encounter issues with your XProII-S, refer to the following common problems and solutions:
- Trigger not firing flash:
- Ensure the XProII-S is securely mounted on the camera's hotshoe.
- Check that both the trigger and the flash unit have sufficient battery power.
- Verify that the flash unit is powered on and properly paired (same channel, group, and wireless ID).
- Confirm the camera's flash settings are correctly configured.
- خروجی فلش متناقض:
- Check for potential signal interference; use the SCAN function to find a clear wireless channel.
- Ensure the flash unit is within the effective transmission range (approximately 0-100m).
- Verify battery levels in both the trigger and the flash unit.
- مشکلات اتصال بلوتوث:
- Ensure Bluetooth is enabled on both the XProII-S and your smart device.
- Restart the Godox Flash App and the XProII-S.
- Check for updates to the Godox Flash App.
- LCD screen not displaying correctly:
- Restart the trigger.
- سطح باتری را بررسی کنید.
- If the issue persists, contact Godox customer support.
6. مشخصات
| ویژگی | مشخصات |
|---|---|
| مدل | XProII-S |
| منبع تغذیه | 2 * AA batteries (Not Included) |
| ابعاد (L x W x H) | 95mm x 62mm x 49mm (3.74 x 2.44 x 1.93 اینچ) |
| وزن خالص | 93 گرم (3.28 اونس) |
| دوربین های سازگار | For Sony cameras (TTL autoflash), e.g., a77 II, a77, a99, ILCE-6000L, a9, A7R, A7RII, a350, DSC-RX10, A7IV, A7C, A7M4 |
| مدل های فلش سازگار | AD300Pro, AD100Pro, AD600B, AD200, AD200Pro, V850II/III series, V1 series, V860II/III series, TT685II series, TT685 series, TT585 series, TT600 series, V350S, TT350S, QTIII series, SK300IIV, SK400IIV, MS300V, MS200V, DPII series, DPIII series |
| فلاش خودکار TTL | بله |
| فلش دستی | بله |
| فلاش استروبوسکوپی | بله |
| جبران نوردهی فلاش | ±3EV (1/3 EV increment) |
| قفل نوردهی فلاش | بله |
| همگامسازی با سرعت بالا (HSS) | بله (تا 1/8000 ثانیه) |
| همگام سازی پرده دوم | بله |
| کمک فوکوس | بله |
| مدل سازی الamp کنترل فلش | بله |
| کنترل بیپر | بله |
| شاتر بی سیم | Yes (via 2.5mm sync cord jack with receiver) |
| تنظیم زوم | AUTO یا 24 تا 200 |
| عملکرد TCM | بله |
| ارتقاء سیستم عامل | Via Type-C USB port |
| عملکرد حافظه | Settings stored 2 seconds after last operation and recovered after restart |
| نمایش | پنل LCD بزرگ، نور پس زمینه روشن یا خاموش |
| برد انتقال (تقریبا) | 0-100 متر |
| بی سیم داخلی | 2.4 گیگاهرتز |
| حالت مدولاسیون | MSK |
| کانال | 32 |
| شناسه بی سیم | خاموش، 01-99 |
| گروه | 5 groups or 16 groups (selectable in menu) |
7. ضمانت و پشتیبانی
For detailed warranty information, product registration, and technical support, please refer to the warranty card included with your product or visit the official Godox webسایت. توصیه میشود رسید خرید خود را به عنوان مدرک خرید برای هرگونه ادعای گارانتی نگه دارید.