
Homtime 4336301751
Homtime Alarm Clock Radio User Manual
Model: 4336301751
Introduction
Thank you for purchasing the Homtime Alarm Clock Radio. This device combines a digital alarm clock, wireless Bluetooth speaker, FM radio, and dual USB charging station, designed to enhance your bedroom or office environment. Please read this manual carefully before use to ensure proper operation and to fully utilize all features.
Important Safety Information
- Do not expose the unit to rain or moisture to prevent fire or electric shock.
- Do not expose the unit to direct sunlight, heat sources, or excessive dust.
- Ensure proper ventilation and do not block any ventilation openings.
- Use only the power adapter supplied with the unit.
- Do not attempt to disassemble or modify the unit. Refer all servicing to qualified personnel.
- Keep the unit away from strong magnetic fields.
- Dispose of batteries properly, following local regulations.
Package Contents
Please check the package for the following items:
- Homtime Alarm Clock Radio Unit
- Power Adapter
- User Manual (this document)
Product Overview
Familiarize yourself with the various parts and controls of your Homtime Alarm Clock Radio.

Figure 1: Front view of the Homtime Alarm Clock Radio, showing the digital display, dual USB charging ports, and top control panel with phone stand.

Figure 2: Various perspectives of the alarm clock radio, highlighting the top control panel, front display, side speaker grilles, and bottom battery compartment.
Control Panel Layout
- Display Screen: Shows time, alarm status, FM frequency, and Bluetooth indicator.
- SNOOZE / DIMMER Button: Activates snooze during alarm, adjusts display brightness.
- Volume Up/Down Buttons: Adjusts audio volume.
- Bluetooth Button: Initiates Bluetooth pairing mode.
- FM Radio Button: Toggles FM radio mode.
- Alarm Set Button: Enters alarm setting mode.
- Time Set Button: Enters time setting mode.
- Dual USB Charging Ports: For charging external devices.
- Phone Stand: Integrated slot for holding a smartphone.
- AUX-in Port (Rear): For connecting external audio devices via cable.
- FM Antenna (Rear): Extendable antenna for FM reception.
Setup
1. Power Connection
- Connect the provided power adapter to the DC 5V input port on the back of the unit.
- Plug the power adapter into a standard wall outlet. The display will light up.
2. Battery Backup (Optional)
The unit supports 3 AAA batteries (not included) for time and alarm settings backup during power outages. This feature does not power the display or audio functions.
- Locate the battery compartment on the bottom of the unit.
- Open the compartment cover.
- Insert 3 AAA batteries, observing the correct polarity (+/-) as indicated inside the compartment.
- Close the battery compartment cover securely.
Operating Instructions
Setting the Time
- Press and hold the Time Set button until the hour digits begin to flash.
- Use the Volume Up/Down buttons to adjust the hour.
- Press the Time Set button again to move to the minute digits.
- Use the Volume Up/Down buttons to adjust the minutes.
- Press the Time Set button one more time to confirm and exit time setting mode.
Setting the Alarm
- Press and hold the Alarm Set button until the alarm hour digits begin to flash.
- Use the Volume Up/Down buttons to adjust the alarm hour.
- Press the Alarm Set button again to move to the alarm minute digits.
- Use the Volume Up/Down buttons to adjust the alarm minutes.
- Press the Alarm Set button again to select the alarm source (Buzzer or FM Radio). Use Volume Up/Down to choose.
- Press the Alarm Set button one more time to confirm and exit alarm setting mode. The alarm icon will appear on the display.
Note: The alarm volume starts low and gradually increases to gently wake you up.
Snooze Function
When the alarm sounds, press the large SNOOZE / DIMMER button on the top of the unit to temporarily silence the alarm. The alarm will sound again after a few minutes.
Display Dimmer
Press the SNOOZE / DIMMER button (when the alarm is not sounding) to cycle through different brightness levels for the display, including an option to turn it off completely.
FM Radio Operation

Figure 3: The alarm clock radio actively receiving FM radio signals, indicated by graphic waves.
- Extend the FM antenna located at the back of the unit for optimal reception.
- Press the FM Radio button to enter FM radio mode. The current frequency will be displayed.
- Press and hold the FM Radio button to auto-scan and save available stations.
- Use the Volume Up/Down buttons to adjust the radio volume.
- To manually tune, briefly press the Volume Up/Down buttons.
- To exit FM radio mode, press the FM Radio button again.
Sleep to Music Timer
While in FM radio mode, you can set a sleep timer (15-60 minutes) to automatically turn off the radio after a set duration. Consult the full manual for specific button presses for this feature.
Bluetooth Pairing

Figure 4: The alarm clock radio wirelessly connected to a smartphone via Bluetooth, ready for audio streaming.
- Press the Bluetooth button on the top panel. The Bluetooth indicator on the display will flash, indicating pairing mode.
- On your Bluetooth-enabled device (e.g., smartphone, tablet), enable Bluetooth and search for available devices.
- Select "Homtime" (or similar name) from the list of devices.
- Once connected, the Bluetooth indicator on the clock's display will stop flashing and remain solid. You can now stream audio from your device to the alarm clock radio.
USB Charging

Figure 5: A smartphone connected to one of the two front USB ports on the alarm clock radio, illustrating the charging capability.
The unit features dual USB charging ports (1 x 2.1A, 1 x 1.0A) on the front for convenient charging of your mobile devices.
- Connect your device's USB charging cable to one of the USB ports on the front of the alarm clock radio.
- Connect the other end of the cable to your smartphone, tablet, or other USB-powered device.
- The device will begin charging automatically.
Note: Built-in surge protection helps prevent overcharging and overheating.
Using the Phone Stand
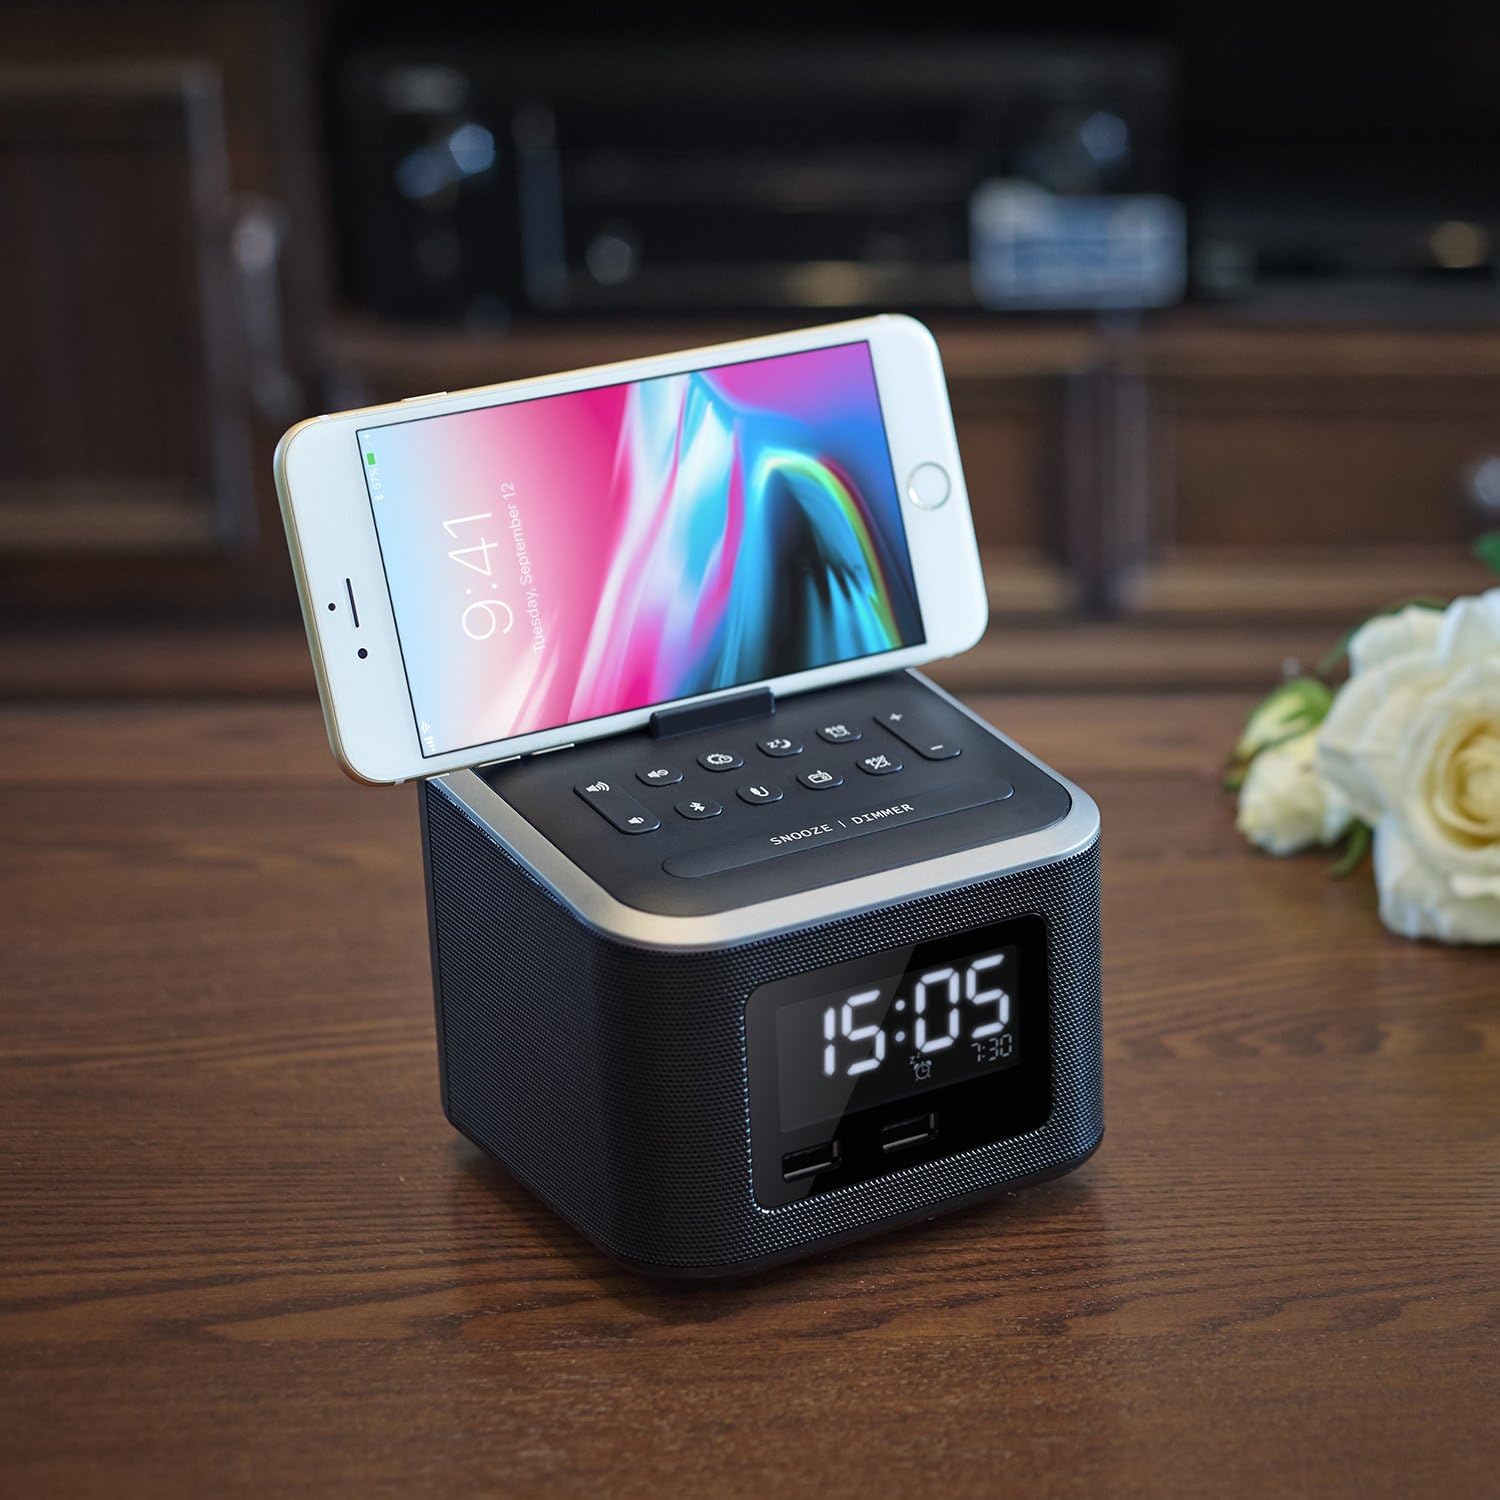
Figure 6: A smartphone securely resting in the dedicated stand on the top surface of the alarm clock radio, ideal for hands-free viewing.
The integrated phone stand on the top of the unit allows you to conveniently dock your smartphone while charging or watching videos.
AUX-in Connection
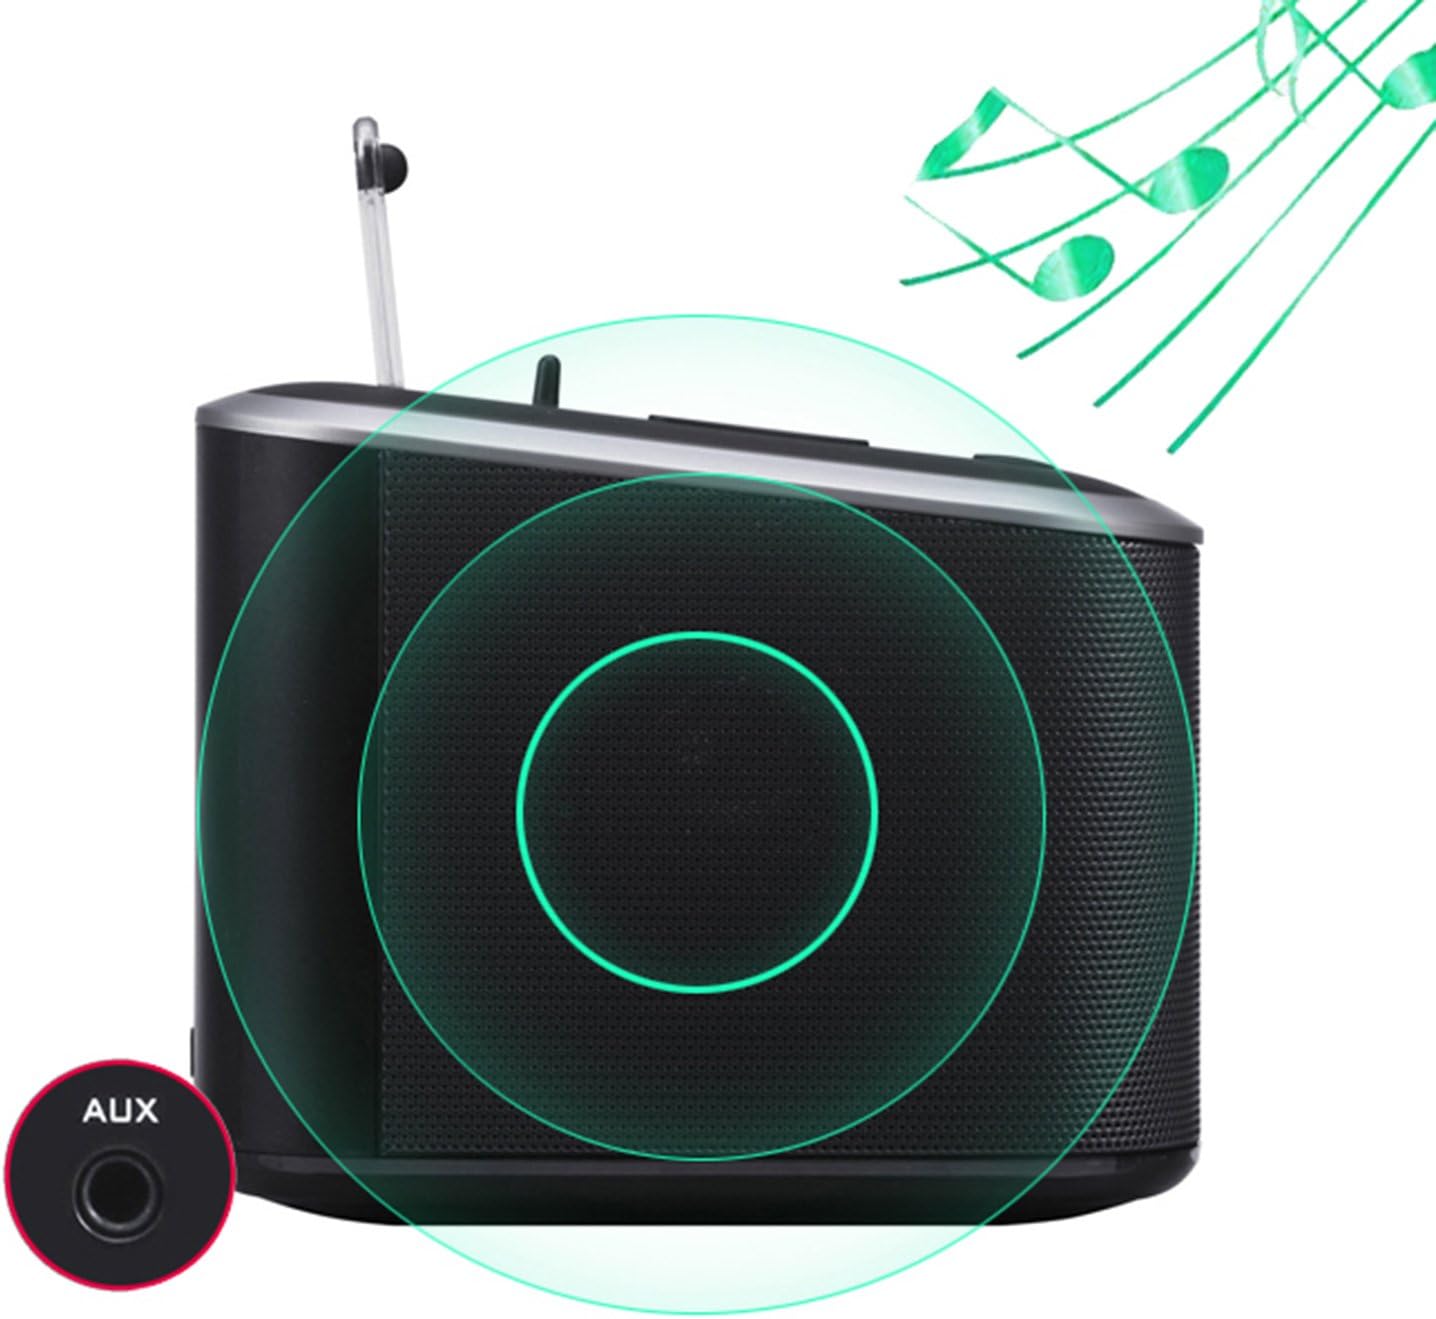
Figure 7: The rear view of the alarm clock radio, specifically highlighting the AUX-in port for connecting external audio devices with a 3.5mm cable.
Connect any audio device with a 3.5mm audio output (e.g., MP3 player, older smartphone) to the AUX-in port on the back of the unit using a 3.5mm audio cable (not included).
- Connect one end of a 3.5mm audio cable to the AUX-in port on the back of the alarm clock radio.
- Connect the other end of the cable to the headphone jack or audio output of your external device.
- The unit will automatically switch to AUX-in mode, or you may need to select it using the mode button (if applicable, otherwise Bluetooth/FM will be off).
- Control playback and volume from your connected device.
Maintenance
- Cleaning: Wipe the unit with a soft, dry cloth. Do not use abrasive cleaners or solvents.
- Storage: If storing for an extended period, disconnect from power and remove backup batteries. Store in a cool, dry place.
- Antenna Care: Handle the FM antenna gently to avoid damage.
Troubleshooting
| Problem | Possible Cause / Solution |
|---|---|
| No power / Display off |
|
| No sound from speakers |
|
| Bluetooth pairing fails |
|
| USB charging not working |
|
| Alarm does not sound |
|
Specifications
| Feature | Detail |
|---|---|
| Brand | Homtime |
| Model Number | 4336301751 |
| Color | Black |
| Display Type | Digital (LCD Panel) |
| Power Source | Corded Electric, Battery Powered (Backup) |
| Battery Type (Backup) | 3 AAA batteries (not included) |
| USB Charging Ports | 2 (1 x 2.1A, 1 x 1.0A total 3.1A) |
| Speaker Output | 6W (Dual high-performance drivers) |
| Connectivity | Bluetooth, FM Radio, AUX-in |
| Material | Plastic (Acrylonitrile Butadiene Styrene) |
| Product Dimensions | 4.7 x 4.7 x 5.2 inches |
| Item Weight | 1.06 Pounds |
Warranty and Support
Homtime products are designed and manufactured to the highest quality standards. For information regarding warranty coverage, technical support, or service inquiries, please refer to the contact information provided with your purchase or visit the official Homtime website.
Please retain your proof of purchase for warranty purposes.
Related documents4336301751


Ask a question about this manual
Ask about setup, troubleshooting, compatibility, parts, safety, or missing instructions. Manuals+ will review the question and use this page’s manual context to help answer it.