Sissejuhatus
The Cornesty GM100 Digital Ultrasonic Thickness Gauge is a precision instrument designed for accurate measurement of material thickness using ultrasonic waves. It is ideal for various industrial applications, including steel testing, and is suitable for both fieldwork and elevated inspections. This manual provides detailed instructions for the proper setup, operation, and maintenance of your GM100 thickness gauge.
Peamised omadused:
- Sound Velocity Measurement: Allows for measuring sound velocity with a given thickness to improve accuracy.
- Automaatne kalibreerimine: Tagab täpsed ja usaldusväärsed mõõtmised.
- Mitmekülgne kasutamine: Designed for use in various environments, including fieldwork and elevated inspections.
- Automaatse väljalülitamise funktsioon: Aitab säästa aku kasutusaega.
- Suur LCD-ekraan: Provides clear and easy-to-read measurement results.
Ohutusteave
Enne seadme kasutamist lugege läbi kõik ohutusjuhised ja veenduge, et need on teile teada. Nende eiramine võib põhjustada vigastusi või seadme kahjustumist.
- Ärge jätke seadet äärmuslike temperatuuride, niiskuse ega söövitava keskkonna kätte.
- Vältige seadme maha kukkumist või tugevate löökide saamist.
- Use only the specified battery type (3 * 1.5V AAA Battery).
- Ärge proovige seadet lahti võtta ega muuta. Jätke kogu hooldus kvalifitseeritud personalile.
- Hoidke seadet ja selle tarvikuid lastele kättesaamatus kohas.
Pakendi sisu
Veenduge, et kõik allpool loetletud esemed on teie pakendis olemas:
- 1 x Ultrasonic Thickness Gauge (GM100)
- 1 x Dia.10 Transducer (5KHz)
- 1 x 4mm Sample Block
- 1 x Operation Manual (This document)

Joonis 1: Contents of the GM100 package. This image shows the orange and red GM100 thickness gauge, a black transducer probe with cables, and a small silver 4mm sample plokk.
Toode läbiview
Familiarize yourself with the components of the GM100 Digital Ultrasonic Thickness Gauge.

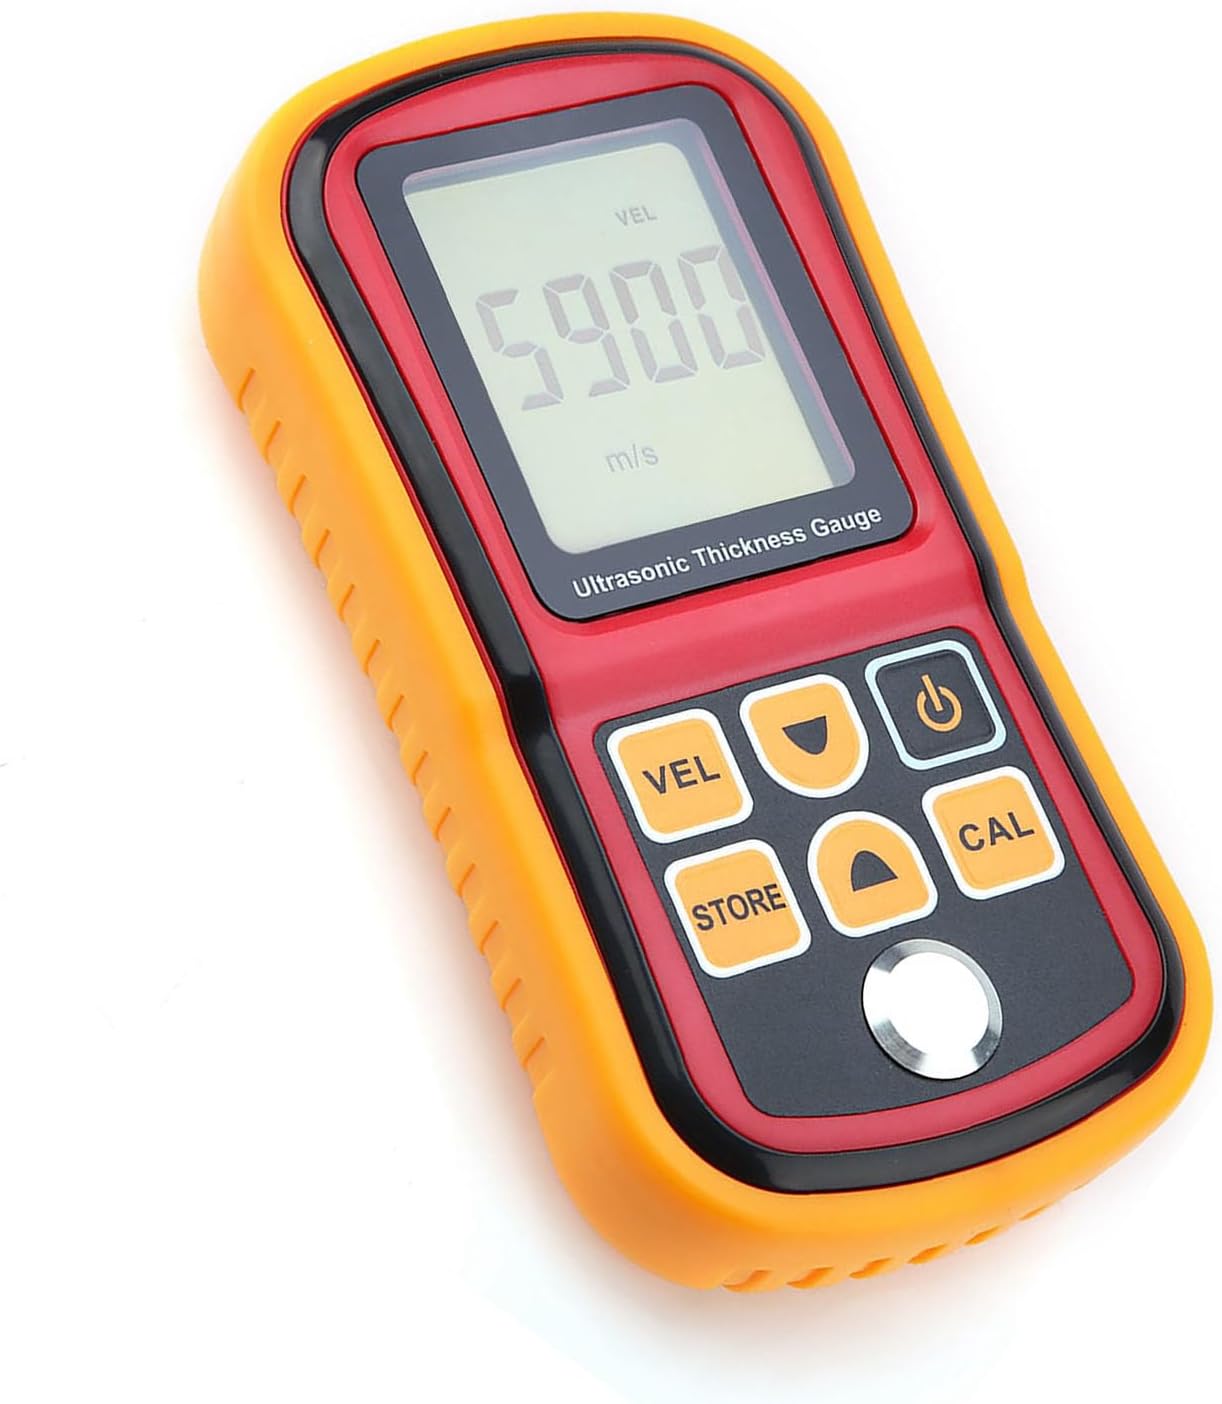
Joonis 2: Esiosa view of the GM100 Ultrasonic Thickness Gauge. The device is orange and red, featuring a large LCD screen at the top displaying "5900 m/s" and buttons below for VEL, STORE, CAL, Power, and navigation arrows.
Komponendid:
- LCD ekraan: Large screen for displaying measurements, units, and status indicators.
- Anduri port: Connects the ultrasonic probe to the main unit.
- Juhtnupud:
- VEL (Velocity): Used for sound velocity measurement mode.
- Pood: For saving measurement data.
- CAL (Calibration): Initiates the auto-calibration process.
- Toitenupp: Lülitab seadme sisse/välja.
- Üles/alla nooled: For navigation and adjusting values.
- Akupesa: Located on the back for AAA batteries.

Joonis 3: Tagasi view of the GM100. This image shows the red back casing of the device with the battery compartment cover removed, revealing slots for three AAA batteries.
Seadistamine
1. Aku paigaldamine
- Locate the battery compartment on the back of the GM100.
- Aku katet avamiseks libistage seda allapoole.
- Sisestage kolm (3) 1.5 V AAA-patareid, jälgides õiget polaarsust (+/-).
- Replace the battery cover, sliding it upwards until it clicks into place.
2. Connecting the Transducer
- Identify the transducer cable with two connectors.
- Connect the two plugs from the transducer cable into the corresponding ports at the top of the GM100 unit. Ensure a secure connection.
- The transducer probe head should be clean and free of debris before use.
Joonis 4: GM100 with transducer connected. This image shows the orange and red GM100 unit with the black transducer cable plugged into the top ports, leading to the silver transducer probe.
Kasutusjuhised
1. Toite sisse / välja lülitamine
- Vajutage nuppu Võimsus button (often marked with a circle and vertical line symbol) to turn the device on. The LCD will illuminate.
- The device features an auto power-off function to save battery life. It will automatically shut down after a period of inactivity.
- To manually turn off the device, press and hold the Võimsus nuppu.
2. Automaatne kalibreerimine
Before taking measurements, it is recommended to perform an auto-calibration for optimal accuracy.
- Ensure the transducer is connected.
- Apply a small amount of coupling gel (not included) to the 4mm sample plokk.
- Place the transducer firmly and flatly on the 4mm sample plokk.
- Vajutage nuppu CAL button. The device will perform the calibration.
- Once calibrated, the display will show the calibrated value, typically 4.0mm.
3. Paksuse mõõtmine
- Ensure the device is calibrated.
- Apply coupling gel to the surface of the material to be measured.
- Place the transducer firmly and flatly on the prepared surface. Ensure good contact.
- The thickness reading will be displayed on the LCD screen.
- For continuous measurement, keep the transducer in contact with the surface.
4. Sound Velocity Measurement
This function allows you to measure the sound velocity of a material if its thickness is known.
- Vajutage nuppu VEL button to enter sound velocity measurement mode.
- Kasutage Üles/alla arrow buttons to input the known thickness of the material.
- Apply coupling gel and place the transducer firmly on the material.
- The device will display the calculated sound velocity for that material.
5. Data Storage (STORE)
The GM100 may have a data storage function. Refer to the on-screen prompts or the full manual for detailed instructions on saving and recalling measurements using the KAUPLUS nuppu.
Hooldus
Puhastamine
- After each use, wipe the transducer and the device body with a soft, dry cloth.
- Ärge kasutage abrasiivseid puhastusvahendeid ega lahusteid.
- Ensure no coupling gel or other residues remain on the transducer face.
Säilitamine
- Store the GM100 in a cool, dry place, away from direct sunlight and extreme temperatures.
- Pikemaajalisel hoiustamisel eemaldage patareid lekke vältimiseks.
Patarei vahetus
- When the low battery indicator appears on the LCD, replace the batteries as described in the "Battery Installation" section.
- Kõrvaldage kasutatud patareid vastavalt kohalikele eeskirjadele.
Veaotsing
| Probleem | Võimalik põhjus | Lahendus |
|---|---|---|
| Seade ei lülitu sisse. | Tühjad või valesti paigaldatud patareid. | Kontrollige patareide polaarsust; vahetage need uute AAA patareide vastu. |
| Ebatäpsed või ebastabiilsed näidud. |
|
|
| "LOW BATT" indicator. | Patareid on tühjad. | Vahetage kõik kolm AAA-patareid välja. |
Tehnilised andmed
| Parameeter | Väärtus |
|---|---|
| Mudel | GM100 |
| Mõõtmisulatus | 1.2-300mm (steel) |
| Täpsus | ±(1%H+0.1mm) H denotes the measured thickness |
| Töösagedus | 5 MHz |
| Resolutsioon | 0.1 mm |
| Minimum Limit for Tube Measuring (steel) | dia. 20*3.0mm (steel) |
| Heli kiiruse vahemik | 1000-9999m/s |
| Toiteallikas | 3 * 1.5 V AAA patareid (ei kuulu komplekti) |
| Kaal | u. 400 g / 14.1 untsi |
| Mõõtmed | Ligikaudu 15 * 8 * 3.2 cm / 5.9 * 3.2 * 1.3 tolli |
| Tootja | Cornesty |
Garantii ja tugi
Specific warranty details for the Cornesty GM100 Digital Ultrasonic Thickness Gauge are typically provided with your purchase documentation or can be obtained by contacting the manufacturer directly.
For technical support, troubleshooting assistance beyond what is covered in this manual, or warranty claims, please contact Cornesty customer service through their official webveebisaidil või ostu sooritamisel antud kontaktandmete kaudu.
Please have your product model (GM100) and purchase details ready when contacting support.