1. Introducción
This manual provides instructions for the safe assembly, operation, and maintenance of your CURSOR FITNESS Exercise Bike Model CBE10. Please read this manual thoroughly before using the product and retain it for future reference.
2. Información importante de seguridad
Before beginning any exercise program, consult with your physician. It is essential to understand all safety precautions. Failure to follow these instructions may result in injury.
- Asegúrese de que todos los pernos y tuercas estén bien apretados antes de cada uso.
- Coloque la bicicleta estática sobre una superficie plana y estable.
- Mantenga a los niños y las mascotas alejados del equipo durante el funcionamiento.
- La capacidad máxima de peso del usuario para esta bicicleta es de 300 libras (136 kg).
- The recommended user height range is 4'8" to 6'5".
- Use ropa y calzado deportivo adecuados.
- Deje de hacer ejercicio inmediatamente si se siente débil, mareado o experimenta dolor.
- Use the emergency stop function (push down on the resistance knob) if necessary.
3. Producto terminadoview
The CURSOR FITNESS Exercise Bike CBE10 is designed for indoor cycling, featuring a silent belt drive and adjustable components for a customized workout.
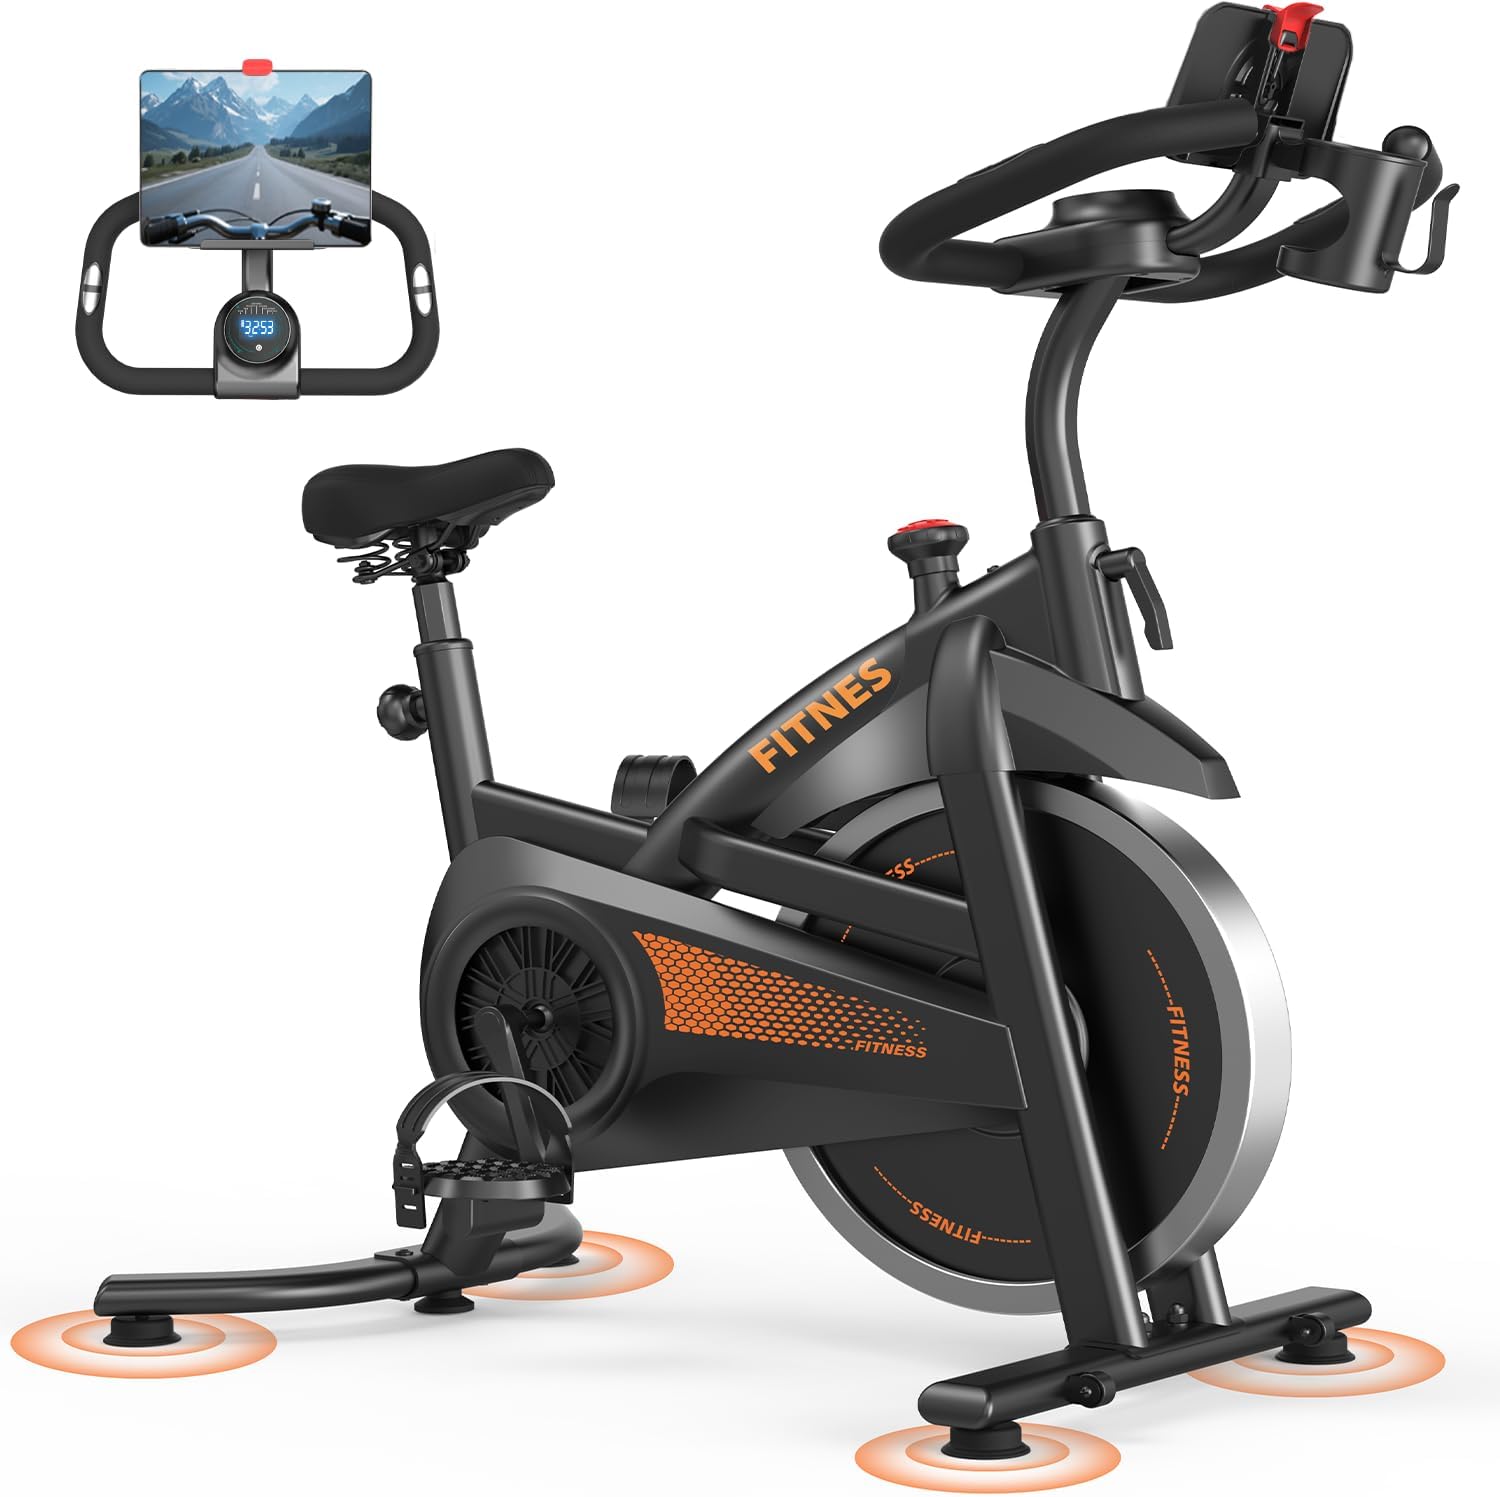
Figura 3.1: Principal view of the CURSOR FITNESS Exercise Bike Model CBE10.
4. Instrucciones de montaje
Assembly of the CURSOR FITNESS Exercise Bike CBE10 typically involves attaching the stabilizer bars, pedals, seat, and handlebars to the main frame. While specific steps are not detailed here, general guidance includes:
- Unpack all components and verify against the parts list (refer to your product's included assembly guide for a complete list).
- Fije las barras estabilizadoras delantera y trasera al marco principal utilizando los pernos y arandelas provistos.
- Install the pedals, ensuring the left pedal is threaded counter-clockwise and the right pedal clockwise.
- Mount the seat post and seat, then the handlebar post and handlebars.
- Connect any console wires if applicable.
- Asegúrese de que todas las conexiones estén seguras antes del primer uso.
5. Ajustes
5.1 Ajuste del asiento
The seat can be adjusted both vertically and horizontally to accommodate various user heights and preferences. It offers 8 vertical settings, ranging from 31.5 inches to 38.6 inches.
- Loosen the adjustment knob located beneath the seat for horizontal movement. Slide the seat forward or backward to your desired position, then tighten the knob.
- Loosen the vertical adjustment knob on the seat post. Raise or lower the seat to a height where your leg has a slight bend at the knee when the pedal is at its lowest point. Tighten the knob securely.

Figure 5.1: Adjusting the seat height for optimal riding posture.
5.2 Ajuste del manillar
The non-slip handlebar offers 4 vertical adjustment levels, ranging from 36.2 inches to 38.6 inches.
- Afloje la perilla de ajuste del manillar.
- Raise or lower the handlebars to a comfortable position that allows for a slight forward lean without straining your back or shoulders.
- Tighten the knob firmly to secure the handlebars.
5.3 Ajuste de la resistencia
The bike features a micro-adjustable tension system with 0 to 100 levels of resistance.
- Turn the resistance knob clockwise to increase resistance, making pedaling more challenging.
- Turn the resistance knob counter-clockwise to decrease resistance, making pedaling easier.
- To engage the emergency brake, press down firmly on the resistance knob. This will bring the flywheel to a quick stop.
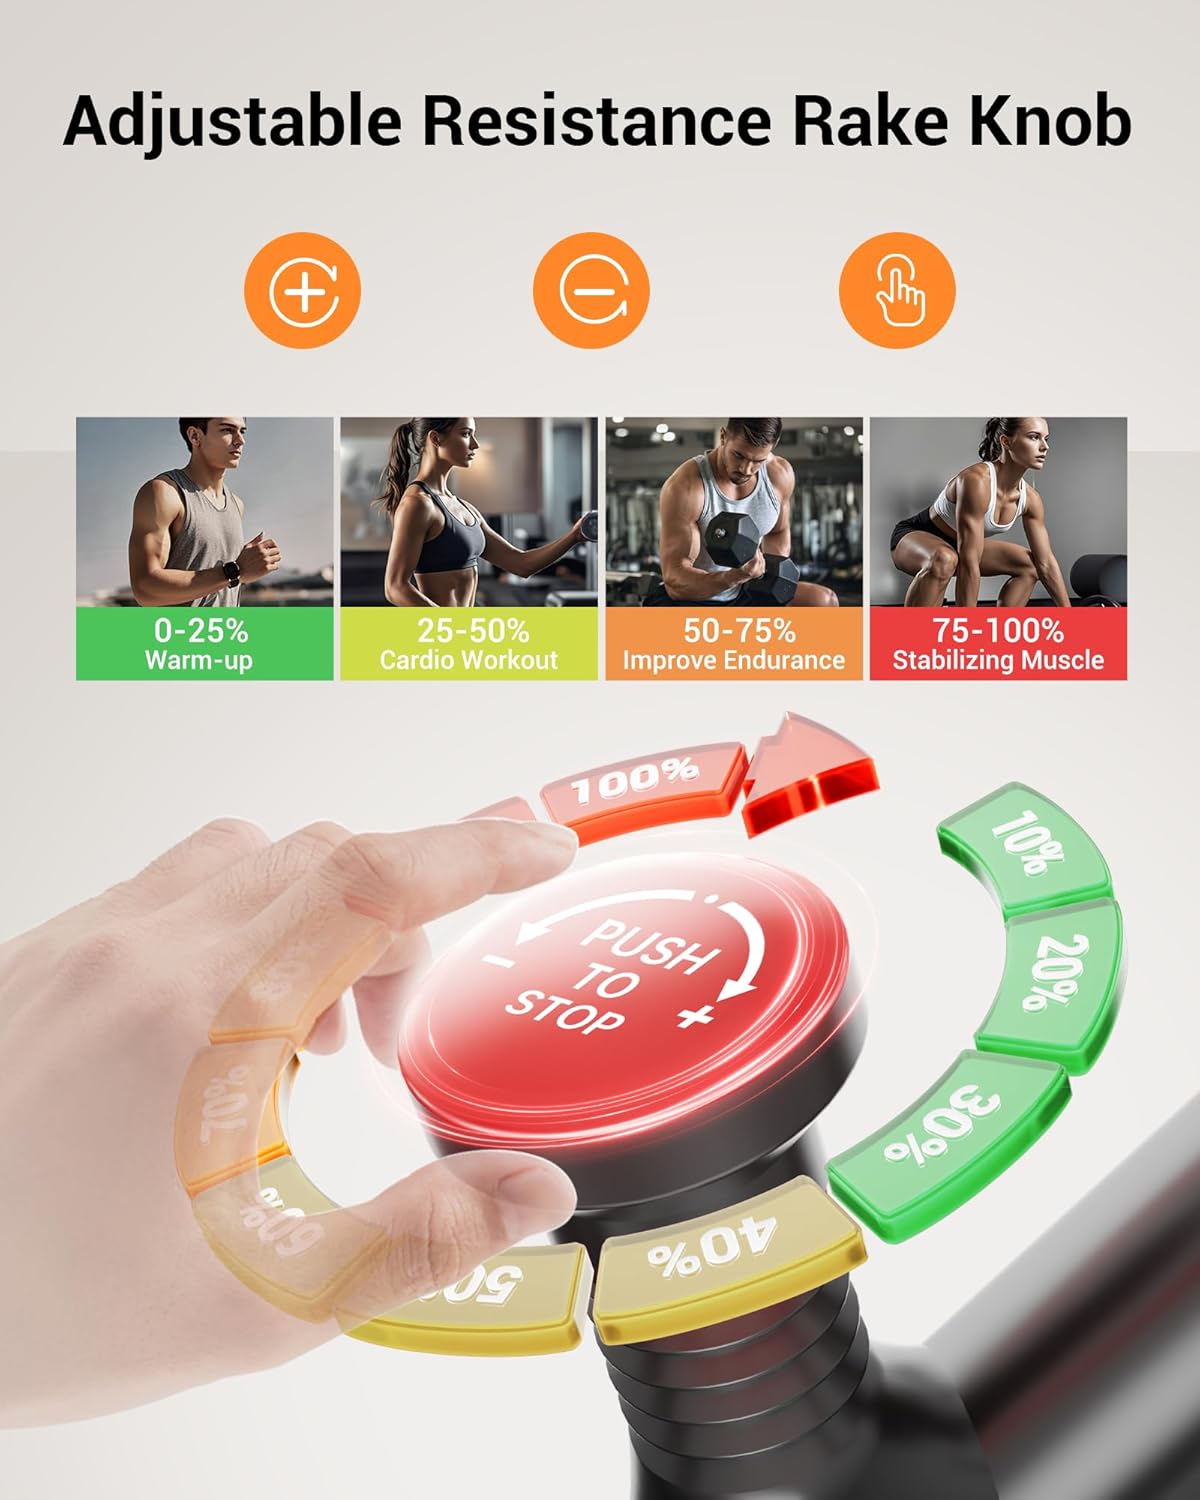
Figure 5.2: Resistance knob for adjusting workout intensity and emergency stop.
6. Funcionamiento de la bicicleta estática
6.1 Comenzar un entrenamiento
- Adjust the seat and handlebars to your preferred positions.
- Place your feet securely in the pedal straps.
- Begin pedaling. The monitor will automatically activate and display your workout data.
6.2 Using the Display Monitor
The integrated display monitor tracks various workout metrics:
- Tiempo: Duración de tu entrenamiento.
- Velocidad: Velocidad de ciclismo actual.
- Distancia: Distancia total recorrida durante el entrenamiento.
- Calorías: Estimación de calorías quemadas.
- Frecuencia cardíaca: (If applicable, requires compatible sensors, not explicitly stated for this model but common for exercise bikes).
- Cuentakilómetros: Distancia total acumulada.
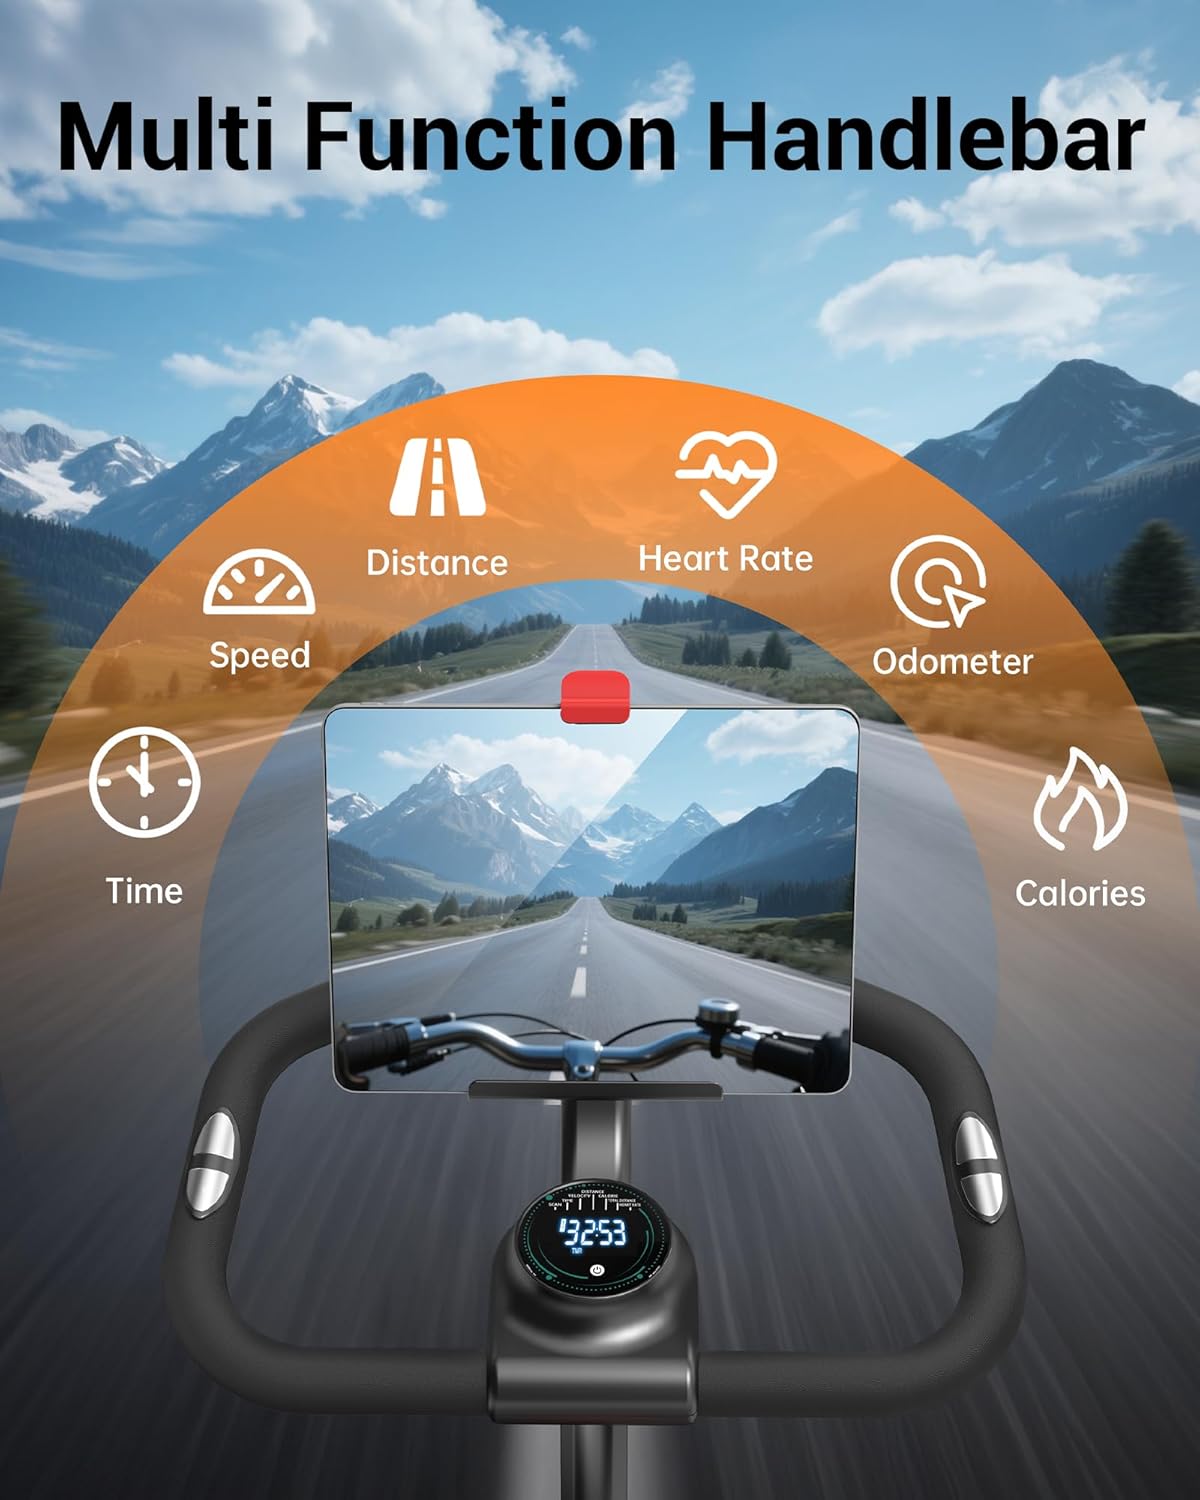
Figure 6.1: Handlebar with display monitor and tablet holder.
7. Características
- Transmisión por correa silenciosa: The multi-slot silent belt drive system reduces noise to below 25dB, providing a smooth and quiet riding experience.
- Tablet & Bottle Holder: Integrated holders on the handlebar allow for convenient placement of a tablet or smartphone and water bottles during your workout.
- Construcción robusta: Built with high-carbon steel and a triangular structure, ensuring durability and stability.
- Ruedas de transporte: Equipped with front-mounted transport wheels for easy relocation of the bike.

Figure 7.1: Silent belt drive mechanism.

Figure 7.2: Transport wheels for easy movement.
8. Mantenimiento
El mantenimiento regular ayuda a garantizar la longevidad y el rendimiento óptimo de su bicicleta de ejercicios.
- Limpieza: Limpie la bicicleta con un anuncioamp Limpie el paño después de cada uso para eliminar el sudor y el polvo. Evite los limpiadores abrasivos.
- Inspección: Revise periódicamente todos los pernos, tuercas y piezas móviles para comprobar su apriete y desgaste. Apriete cualquier componente suelto.
- Lubricación: The belt drive system is generally maintenance-free. Consult the manufacturer if any squeaking or unusual noises occur from the drive system.
- Almacenamiento: Guarde la bicicleta en un lugar seco y fresco, alejado de la luz solar directa y de temperaturas extremas.
9. Solución de problemas
Esta sección aborda problemas comunes que puede encontrar con su bicicleta estática.
- Ruido durante el funcionamiento: Ensure the bike is on a level surface. Check all bolts and nuts for tightness, especially around the pedals and flywheel. If a clicking noise persists, contact customer support.
- Unstable bike: Verify that the bike is placed on a flat surface and adjust the leveling feet on the stabilizer bars if necessary.
- La pantalla no funciona: Check the battery in the monitor and replace if needed. Ensure all connections to the monitor are secure.
- La resistencia no cambia: Inspect the resistance knob and its connection to the flywheel. Ensure it turns freely and engages the resistance mechanism.
For issues not covered here, please contact CURSOR FITNESS customer support.
10. Especificaciones
| Característica | Especificación |
|---|---|
| Marca | APTITUD DEL CURSOR |
| Número de modelo | CBE10 |
| Color | Negro-naranja |
| Material | Acero aleado |
| Mecanismo de resistencia | Friction (Micro-adjustable) |
| Número de niveles de resistencia | 100 |
| Recomendación de peso máximo | 300 libras |
| Peso del artículo | 39.7 libras |
| Dimensiones del producto (LxAnxAl) | 31.5" de profundidad x 21.25" de ancho x 43.3" de alto |
| Fuente de poder | Alimentado por batería (para monitor) |
| Código Postal | 850074066477 |
11. Garantía y soporte
CURSOR FITNESS is committed to providing quality products and customer satisfaction. For warranty information, technical assistance, or any inquiries regarding your Exercise Bike Model CBE10, please refer to the contact information provided with your purchase or visit the official CURSOR FITNESS websitio.
Conserve su comprobante de compra para cualquier reclamo de garantía.