
1. Introducción
This manual provides detailed instructions for the setup, operation, maintenance, and troubleshooting of your Muddy Pro Cam 20 MP Trail Camera. Please read this manual thoroughly before using the camera to ensure proper function and longevity of the device. The Muddy Pro Cam 20 MP is designed for capturing high-resolution images and videos of wildlife with its 20MP sensor and 720p video capabilities.

Figura 1: Frente view of the Muddy Pro Cam 20 MP Trail Camera.
2. Contenido del paquete
Verifique que todos los artículos enumerados a continuación estén incluidos en su paquete:
- Muddy Pro Cam 20 Megapixel Trail Camera with Video Function
3. Características principales
- Imágenes de alta resolución: 20MP camera with 850nm LEDs for clear day and night captures. Supports 20MP, 8MP, and 4MP resolution images.
- Vídeo de alta definición: Captures 720p videos at 30 frames per second (FPS).
- Velocidad de disparo rápida: 0.5-second trigger speed to capture quick movements.
- Versatile Burst Mode: Captures 1 to 3 images per triggering event.
- Amplio rango de detección: 80-foot detection range for broad coverage.
- Fuente de energía: Operates on eight AA batteries.
- Seguridad: Integrated Python lock latch for theft deterrence.
4. Configuración
4.1. Instalación de la batería
- Abra el pestillo de la carcasa de la cámara.
- Ubique el compartimiento de la batería.
- Inserte ocho (8) baterías AA, asegurándose de la polaridad correcta (+/-) como se indica dentro del compartimiento.
- Cierre bien el compartimento de la batería.
4.2. Instalación de la tarjeta SD
- Con la cámara apagada, localice la ranura para tarjeta SD.
- Insert a standard SD card (up to 32GB, not included) into the slot with the metal contacts facing down, until it clicks into place.
- To remove, press the SD card gently to release it.
4.3. Montaje de la cámara
The camera can be mounted using the included strap or a compatible mounting accessory.
- Seleccione una ubicación adecuada, como un árbol o un poste, asegurándose de que haya un espacio libre. view del área deseada.
- Pase la correa de montaje a través de las ranuras en la parte posterior de la cámara.
- Securely fasten the strap around the mounting surface.
- Adjust the camera angle to optimize the field of view and detection zone.
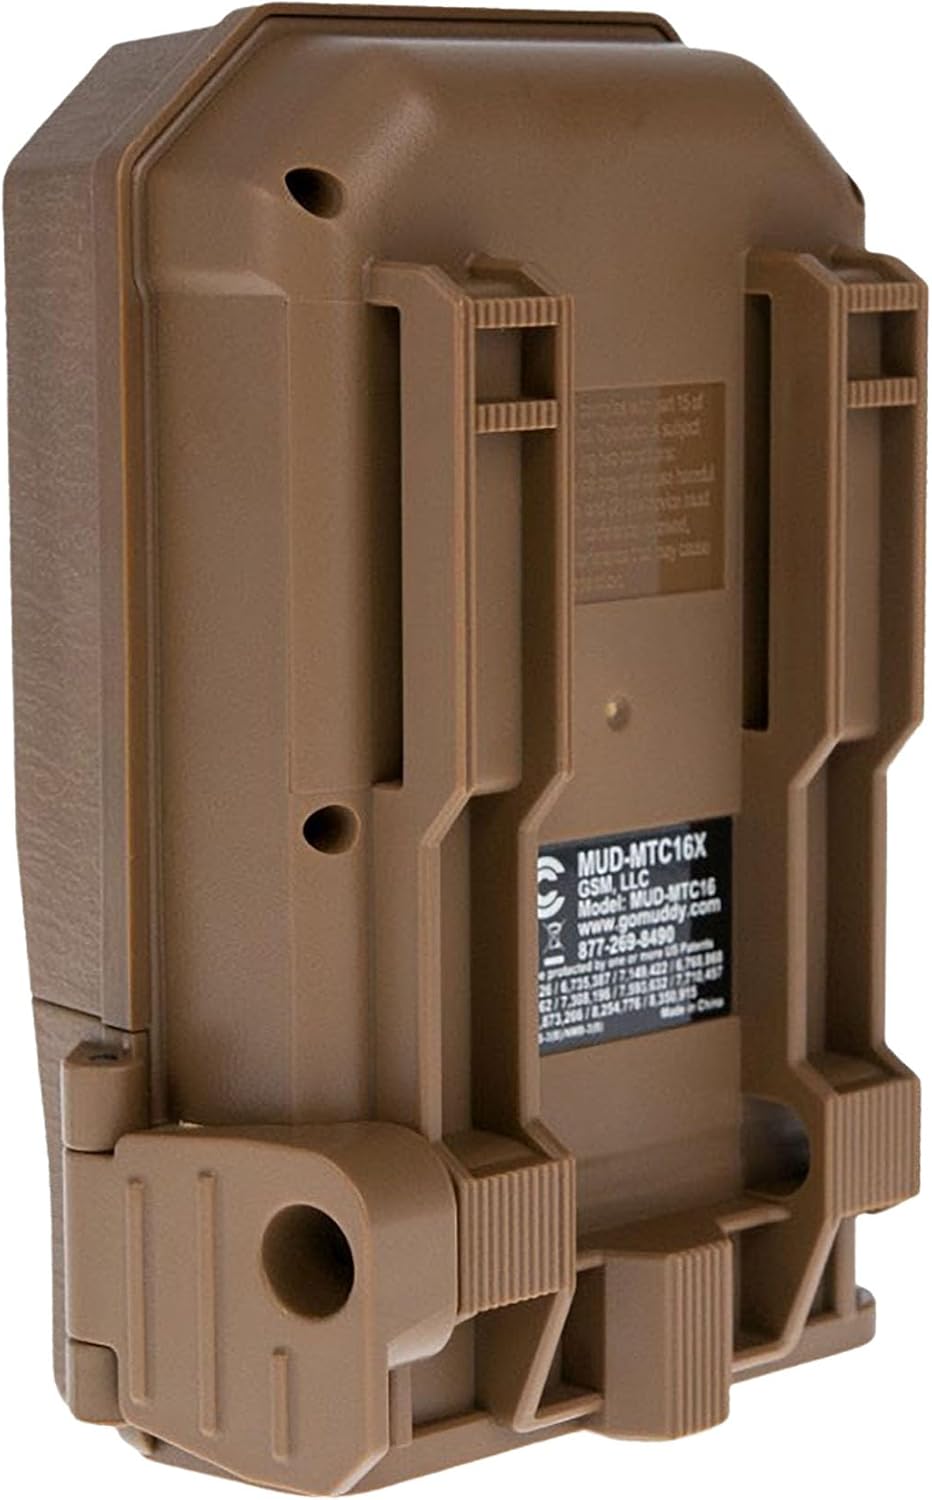
Figura 2: Atrás view of the camera showing mounting slots and product label.
5. Instrucciones de funcionamiento
5.1. Encendido / apagado
- To power on, slide the power switch to the 'ON' position. The camera will perform a self-check.
- Para apagar, deslice el interruptor de encendido a la posición "APAGADO".
5.2. Navegación por el menú
Use the navigation buttons (Up, Down, Left, Right, OK) to move through the menu options and confirm selections. The display screen will show current settings.
5.3. Configuración del modo foto
In the menu, navigate to 'Photo Settings' to adjust:
- Resolución: Select 20MP, 8MP, or 4MP for image quality. Higher resolution results in larger file tamaños.
- Modo ráfaga: Set the number of images captured per trigger (1 to 3 photos).
- Demora: Establezca el intervalo de tiempo entre activaciones consecutivas.
5.4. Configuración del modo de vídeo
In the menu, navigate to 'Video Settings' to adjust:
- Resolución: Set to 720p for video capture.
- Duración del vídeo: Specify the duration of each video clip.
- Grabación de audio: Enable or disable audio capture with video.
5.5. Detection and Trigger
The camera features an 80-foot detection range and a 0.5-second trigger speed. Ensure the detection area is clear of obstructions that might cause false triggers, such as swaying branches.
6. Mantenimiento
6.1. Reemplazo de la batería
When the battery indicator shows low power, replace all eight AA batteries with new ones to ensure optimal performance and prevent data loss.
6.2. Gestión de tarjetas SD
Regularly check the SD card capacity. Format the SD card periodically to maintain optimal performance and prevent corruption. Always power off the camera before inserting or removing the SD card.
6.3. Limpieza
Use a soft, dry cloth to clean the camera lens and housing. Avoid using abrasive cleaners or solvents. Ensure the camera is dry before closing the housing.
7. Solución de problemas
- La cámara no se enciende: Verifique la instalación de la batería y asegúrese de que las baterías estén nuevas.
- No se capturaron imágenes ni vídeos: Verify SD card is inserted correctly and has sufficient space. Check camera settings for proper mode selection and trigger delay.
- Mala calidad de imagen/vídeo: Ensure the lens is clean. Check resolution settings.
- Falsos desencadenantes: Adjust camera placement to avoid moving branches or excessive sunlight in the detection zone.
8. Especificaciones
| Característica | Especificación |
|---|---|
| Número de modelo | MUD-MTC20X |
| Resolución de la imagen | 20MP, 8MP, 4MP |
| Resolución de vídeo | 720p a 30 FPS |
| Rango de detección | 80 pies |
| Velocidad de disparo | 0.5 segundos |
| Tipo de memoria flash | SD (hasta 32 GB) |
| Fuente de poder | 8 pilas AA |
| Tecnología de fotosensor | CMOS |
| Tecnología de conectividad | Infrarrojo |
| Peso del artículo | 12.3 onzas |
| Dimensiones del producto | 1 x 1 x 1 pulgadas |
9. Información de garantía
For detailed warranty information, please refer to the official MUDDY webSitio web o contacte con atención al cliente. Conserve su recibo de compra como comprobante.
10. Soporte
If you require further assistance or have questions not covered in this manual, please visit the MUDDY support page on their official webSitio web o contacte con su departamento de atención al cliente. La información de contacto suele encontrarse en el empaque del producto o en la información del fabricante. websitio.