1. Introducción
Welcome to the instruction manual for your JBL Charge 6 Portable Bluetooth Speaker. This guide provides essential information for setting up, operating, and maintaining your device. The JBL Charge 6 is engineered for robust audio performance and portability, featuring IP68 waterproof and dustproof ratings, extended battery life, and Auracast multi-speaker connectivity.
2. ¿Qué hay en la caja?
Carefully unpack your JBL Charge 6. The package should contain the following items:
- Altavoz Bluetooth portátil JBL Charge 6
- Correa
- Guía de inicio rápido
- Hoja de seguridad
Note: The JBL Charge 6 does NOT include a USB-C charging cable in the box. A compatible standard USB-C cable (sold separately) is required for charging.
This bundle also includes a Megen Hardshell Protection Case for your speaker.

Image: JBL Charge 6 speaker shown with its Megen hardshell protection case and also separately with its attached carrying strap.

Image: The detachable carrying strap for the JBL Charge 6 speaker.

Image: The Megen Hardshell Protection Case designed to store and protect the JBL Charge 6 speaker.
3. Producto terminadoview
Familiarize yourself with the physical components and controls of your JBL Charge 6 speaker.
3.1. Componentes del altavoz

Imagen: Lateral view of the JBL Charge 6 speaker, highlighting its textured fabric exterior and integrated carrying handle.
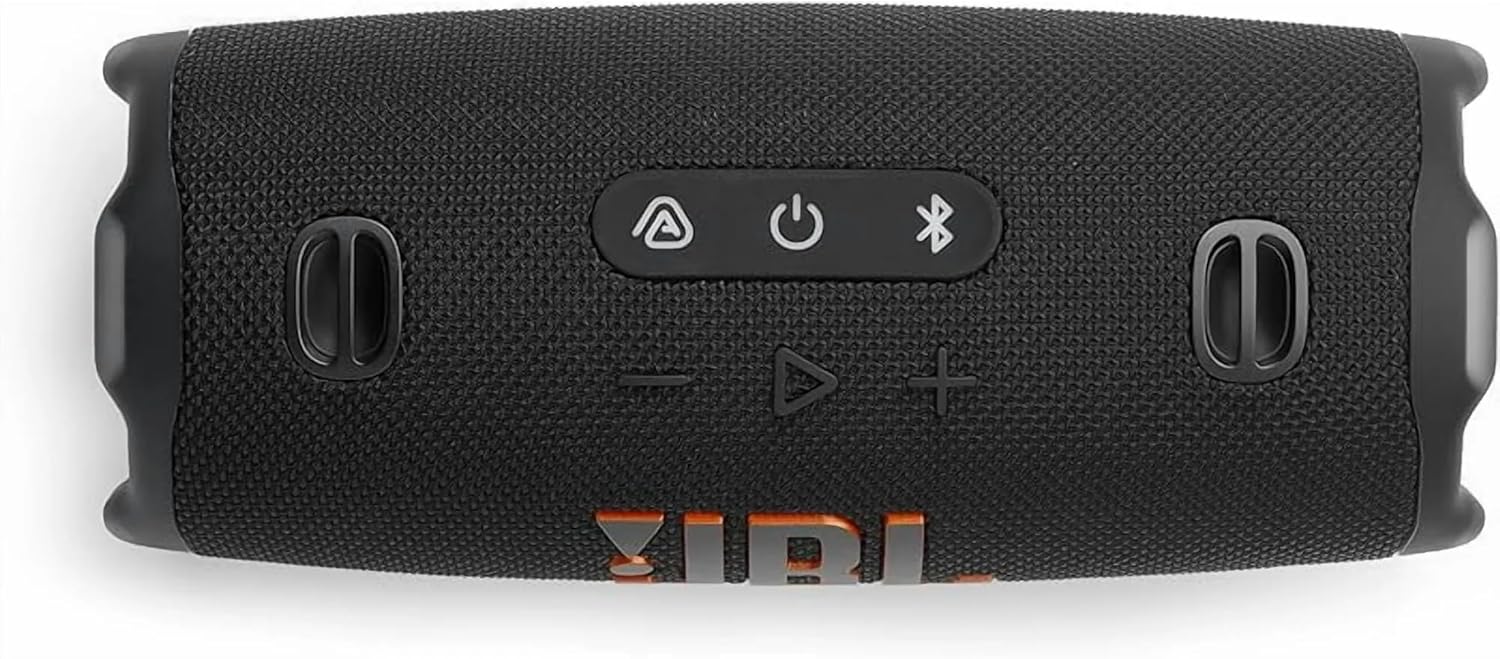
Image: End view of the JBL Charge 6 speaker, showing the passive radiator with the JBL exclamation mark logo.
3.2. Panel de control

Imagen: Arriba view of the JBL Charge 6 speaker, displaying the control buttons: Auracast, Power, Bluetooth, Volume Down, Play/Pause, and Volume Up.
- Botón Auracast: For connecting multiple Auracast-enabled JBL speakers.
- Botón de encendido: Para encender o apagar el altavoz.
- Botón Bluetooth: To initiate Bluetooth pairing mode.
- Botón para bajar el volumen: To decrease the audio volume.
- Botón de reproducción/pausa: Para reproducir o pausar la reproducción de audio.
- Botón para subir el volumen: To increase the audio volume.
3.3. Puertos
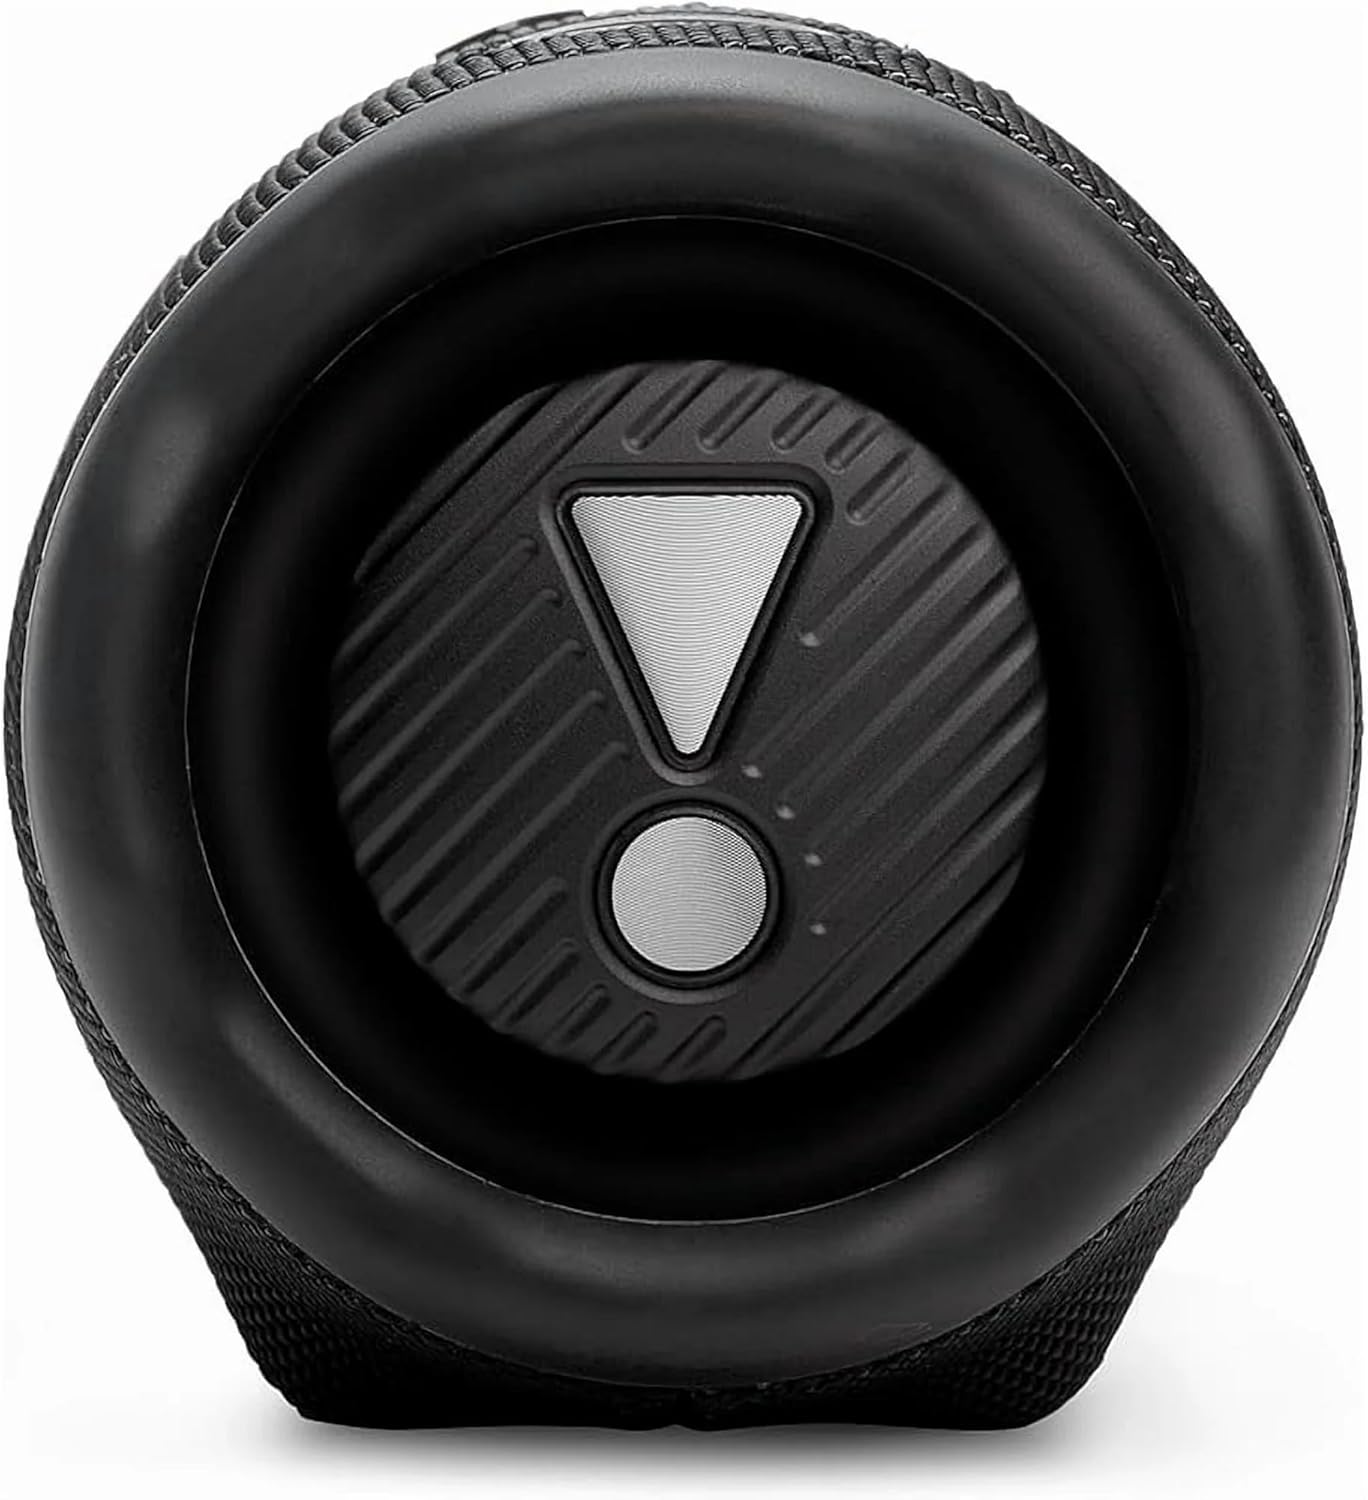
Imagen: Trasera view of the JBL Charge 6 speaker, showing the USB-C charging port and the USB-A power bank port, typically located under a protective flap.
- Puerto de carga USB-C: For charging the JBL Charge 6 speaker.
- USB-A Power Bank Port: For charging external devices from the speaker's battery.
4. Configuración
4.1. Carga inicial
Before first use, it is recommended to fully charge your JBL Charge 6 speaker. Connect a compatible USB-C cable to the speaker's USB-C charging port and then to a power adapter (not included). The battery indicator will show charging status.
4.2. Colocación de la correa
The included strap can be attached to the designated loops on the speaker for easier portability.
5. Instrucciones de funcionamiento
5.1. Encendido y apagado
- Para encender: Presione el Botón de encendido una vez.
- Para apagar: Mantenga presionado el Botón de encendido hasta que el altavoz se apague.
5.2. Emparejamiento Bluetooth
- Turn on your JBL Charge 6 speaker.
- Presione el Botón Bluetooth. The Bluetooth indicator will flash, indicating pairing mode.
- On your mobile device, go to Bluetooth settings and select "JBL Charge 6" from the list of available devices.
- Una vez conectado, el indicador de Bluetooth permanecerá fijo.
5.3. Auracast (Multi-Speaker Connection)
The JBL Charge 6 supports Auracast, allowing you to connect multiple Auracast-enabled JBL speakers for a wider sound stage or to cover a larger area with the same audio.
- Asegúrese de que todos los altavoces que desea conectar estén encendidos y dentro del alcance.
- On the primary speaker (the one connected to your device via Bluetooth), press the Botón Auracast.
- On any additional Auracast-enabled speakers, press their respective Botón Auracast.
- Los altavoces se conectarán automáticamente y el audio se reproducirá simultáneamente en todas las unidades conectadas.
5.4. Carga del altavoz
Connect a USB-C charging cable to the USB-C port on the speaker and to a power source. The battery indicator lights will show the charging progress. A full charge provides up to 28 hours of playtime.
5.5. Usar como banco de energía
The JBL Charge 6 can charge external devices. Open the protective flap on the rear of the speaker and connect your device's charging cable to the USB-A power bank port.
5.6. Control de volumen y reproducción
- Ajuste de volumen: Utilice el Subir volumen (+) y Bajar volumen (-) botones.
- Reproducir/Pausa: Presione el Botón de reproducción/pausa una vez.
- Saltar pista: Presione dos veces el Botón de reproducción/pausa para saltar a la siguiente pista.
6. Características
6.1. IP68 a prueba de agua y polvo
The JBL Charge 6 is rated IP68, meaning it is fully protected against dust ingress and can withstand immersion in water up to 1.5 meters (approximately 5 feet) for up to 30 minutes. This makes it suitable for use in various outdoor environments, including near pools or at the beach.
6.2. Mejora del sonido con IA
Equipped with JBL AI Sound Boost, the speaker utilizes an advanced audio processing algorithm to optimize sound output, delivering full, rich, and immersive audio performance.
6.3. Tiempo de juego extendido
Enjoy up to 28 hours of audio playback on a single charge, ensuring your music lasts through extended listening sessions.
7. Mantenimiento
7.1. Limpieza
Para limpiar el altavoz, utilice un paño suave y húmedo.amp Paño. Evite usar productos químicos fuertes o materiales abrasivos, ya que pueden dañar el acabado o los componentes del altavoz. Asegúrese de que todos los puertos estén secos antes de cargar o conectar dispositivos después de la exposición al agua.
7.2. Almacenamiento
Guarde el altavoz en un lugar fresco y seco, alejado de la luz solar directa y de temperaturas extremas. Si lo va a guardar durante un periodo prolongado, asegúrese de que la batería esté parcialmente cargada (alrededor del 50 %) para prolongar su vida útil.
7.3. Cuidado de la batería
To maximize battery life, avoid fully discharging the speaker frequently. Charge the speaker regularly, even if not in use, to maintain battery health.
8. Solución de problemas
Si tiene problemas con su JBL Charge 6, consulte los siguientes problemas y soluciones comunes:
- El altavoz no se enciende:
Ensure the battery is charged. Connect the speaker to a power source using a USB-C cable and try again. - No se puede emparejar a través de Bluetooth:
Make sure the speaker is in pairing mode (Bluetooth indicator flashing). Ensure your device's Bluetooth is enabled and within range. Try restarting both the speaker and your device. - Sin sonido:
Check the volume levels on both the speaker and your connected device. Ensure the speaker is successfully paired and connected. - Problemas de carga:
Verify that the USB-C cable and power adapter are working correctly. Ensure the charging port is clean and free of debris. - Auracast connection problems:
Ensure all speakers are Auracast-enabled and within close proximity. Follow the Auracast pairing steps carefully.
9. Especificaciones
| Marca | JBL |
| Nombre del modelo | Carga 6 |
| Tipo de altavoz | Interior Exterior |
| Características especiales | Dustproof, Portable, Waterproof |
| Tecnología de conectividad | Bluetooth |
| Tecnología de comunicación inalámbrica | Bluetooth |
| Dispositivos compatibles | Teléfono inteligente |
| Fuente de poder | Funciona con pilas |
| Tipo de batería | 1 batería no estándar (incluida) |
| Potencia máxima de salida del altavoz | 45 vatios |
| Modo de salida de audio | Estéreo |
| Configuración de canales de sonido envolvente | 2.0 |
| Nivel de resistencia al agua | Impermeable (IP68) |
| Material | Fabric, Rubber |
| Dimensiones del producto | 4" de profundidad x 3" de ancho x 2" de alto |
| Peso del artículo | 3.72 libras (1.69 kilogramos) |
| Método de control | Tocar |
| Tipo de montaje | Altavoz portátil |
10. Garantía y soporte
The JBL Charge 6 comes with a Limited Warranty. For detailed warranty information, product support, or to register your product, please visit the official JBL websitio o consulte la Hoja de Seguridad incluida en su paquete.
For further assistance, you may also contact JBL customer service through their official channels.