1. Introducción
This manual provides detailed instructions for the installation, operation, and maintenance of your ANJIELO SMART Wired Video Intercom System. This system is designed for multifamily apartments, offering secure and convenient communication with visitors. Please read this manual thoroughly before installation and use to ensure proper function and safety.
2. Producto terminadoview
The ANJIELO SMART Wired Video Intercom System is a comprehensive solution for building access control and communication. It features a robust outdoor doorbell unit and multiple indoor monitors, enabling visual and audio communication with visitors, as well as remote unlocking capabilities via RFID cards.

Figure 2.1: Multifamily Intercom System Overview. This image illustrates a typical installation in a multi-story building, showing one outdoor doorbell unit connected to multiple indoor monitors, allowing separate monitoring for each unit without interference.
Características principales:
- Multifamily Design: Supports 2 to 12 indoor monitors with one outdoor camera.
- Visión nocturna: Built-in LED infrared lights for clear video in low-light conditions.
- Audio bidireccional: Permite la comunicación entre los monitores interiores y la unidad exterior.
- Modo silencioso: Option to mute doorbell rings for undisturbed rest.
- Resistente a la intemperie IP65: Outdoor unit is resistant to rain and dust.
- Monitor LCD de 7 pulgadas: Slim design, touch-key operation, hands-free display.
- Desbloqueo de tarjeta RFID: Convenient access control for residents.
- Conexión de 4 cables: Standard wiring for reliable communication.
3. Contenido del paquete
Verifique que todos los artículos estén presentes en su paquete:
- Outdoor Doorbell Unit (Quantity: 1)
- Indoor Monitor (Quantity: 3 for this specific model)
- Cable de conexión de 4 núcleos y 5 metros (para fines de prueba)
- Tornillos de montaje y anclajes
- Power adapter(s)
- Manual de usuario (este documento)
Note: Additional cables, electric locks, power supplies for locks, and exit buttons are not included and must be purchased separately if required for your installation.
4. Especificaciones
| Característica | Especificación |
|---|---|
| Nombre del modelo | 60120S-2+67022E |
| Conectividad | Cableado (sistema de 4 cables) |
| Outdoor Unit Functions | Intercom, Monitor, RFID Unlock |
| Pantalla de monitor de interior | LCD TFT 7-inch |
| Resolución de la cámara | 1.0 MP |
| Cámara View Ángulo | 120 grados |
| Visión nocturna | Luz infrarroja LED incorporada |
| Material de la unidad exterior | ABS Plastic, Aluminum Alloy (weatherproof housing) |
| Material del monitor de interior | Plástico de ingeniería ABS |
| Clasificación de impermeabilidad | IP65 (Unidad exterior) |
| Fuente de alimentación (exterior) | 15 V CC, 1.2 A |
| Fuente de alimentación (interior) | Entrada AC100-240V |
| Tipo de instalación | Surface Mounting (Outdoor & Indoor) |
| Temperatura de funcionamiento | -30 °C a +60 °C (Unidad exterior) |
| Outdoor Unit Dimensions (2-6 units) | 264 x 127 x 43 mm |
| Outdoor Unit Dimensions (8-12 units) | 330 x 127 x 43 mm |
| Dimensiones del monitor de interior | 218 x 123 x 22 mm |
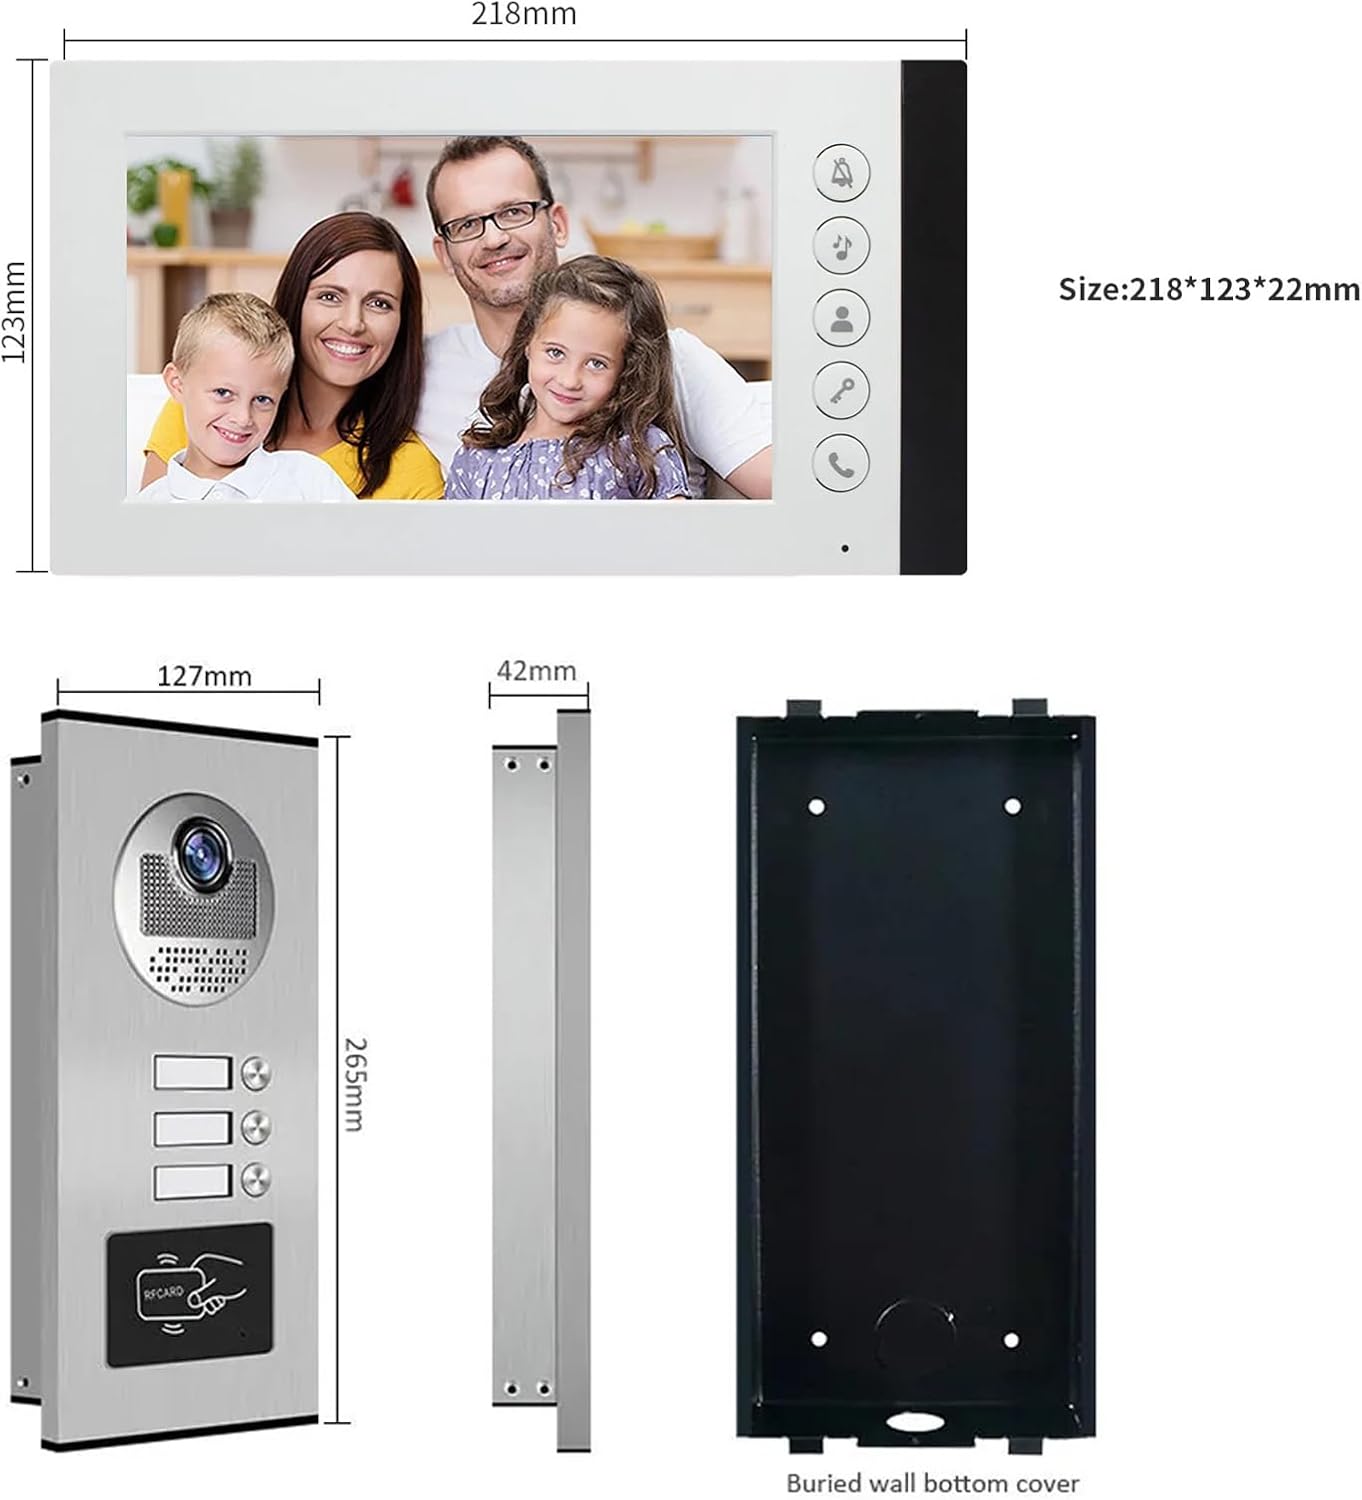
Figure 4.1: Product Dimensions. This image provides detailed measurements for both the indoor monitor and the outdoor doorbell unit, including the buried wall bottom cover for the outdoor unit.
5. Información de seguridad
- Desconecte siempre la alimentación antes de realizar cualquier instalación o mantenimiento.
- Ensure all wiring is correctly connected according to the wiring diagram to prevent damage to the system or electrical hazards.
- Do not expose the indoor monitor to water or high humidity.
- The outdoor unit is IP65 weatherproof, but avoid submerging it in water.
- Use only the provided power adapters or approved replacements.
- Keep the product away from strong magnetic fields or sources of interference.
- Se recomienda la instalación profesional para configuraciones de cableado complejas.
6. Configuración e instalación
6.1 Instrucciones de cableado
The system uses a 4-wire connection. A 5-meter 4-core cable is included for testing. For permanent installation, you will need to purchase longer cables based on the distance between the outdoor unit and the indoor monitors. Refer to the table below for recommended cable types and distances:
| Distancia | Diámetro del cable |
|---|---|
| Hasta 50 metros | 0.5 mm² (AWG 20) |
| 50 - 100 metros | 0.75 mm² (AWG 18) |
| Más de 100 metros | 1.0 mm² (AWG 17) or consult a professional |
Ensure all connections are secure and insulated. Incorrect wiring can damage the system.
6.2 Montaje de la unidad exterior
- Choose a suitable location near your entrance, typically at eye level (around 1.5 meters or 5 feet from the ground).
- Use the included mounting bracket as a template to mark drilling points on the wall.
- Taladre agujeros e inserte anclajes de pared.
- Fije el soporte de montaje a la pared con tornillos.
- Connect the 4-core wiring and power supply to the outdoor unit.
- Attach the outdoor unit to the mounting bracket, ensuring it is firmly in place.
- Verify the unit is level and the camera view está libre de obstáculos.

Figure 6.1: Outdoor Unit Installation. This image shows the outdoor unit installed in an exterior environment, highlighting its weather resistance and suitable mounting location.
6.3 Montaje del monitor interior
- Select a convenient indoor location, such as a hallway or living area, where the monitor is easily accessible.
- Marque los puntos de perforación utilizando el soporte de montaje del monitor.
- Taladre agujeros e inserte anclajes de pared.
- Asegure el soporte de montaje a la pared.
- Connect the 4-core wiring from the outdoor unit and the power adapter to the indoor monitor.
- Carefully attach the indoor monitor to the mounting bracket.
- Conecte el adaptador de corriente a una toma de corriente.
7. Instrucciones de funcionamiento
7.1 Recibir una llamada
When a visitor presses the call button on the outdoor unit, the indoor monitor(s) will ring and automatically display the video feed from the outdoor camera.
- Para responder la llamada, presione la tecla Respuesta button (typically a phone icon) on the indoor monitor.
- You can now speak with the visitor using the two-way audio function.
- Para finalizar la conversación, presione el Respuesta botón de nuevo.
7.2 Monitoreo del área exterior
Puedes hacerlo manualmente view el área exterior en cualquier momento:
- Presione el Monitor button (often an eye icon) on the indoor monitor. The screen will display the live video feed from the outdoor camera.
- Presione el Monitor de nuevo para apagar la pantalla.
7.3 Desbloqueo de la puerta
If an electric lock is connected to the system, you can unlock the door remotely:
- Durante una llamada o mientras se monitorea, presione el botón Descubrir button (often a key icon) on the indoor monitor. The connected electric lock will disengage.
- The outdoor unit also supports RFID card unlocking. Present a pre-programmed RFID card to the reader on the outdoor unit to unlock the door.
7.4 Visión nocturna
The outdoor unit is equipped with built-in LED infrared lights, which automatically activate in low-light conditions to provide clear black-and-white video footage.

Figure 7.1: Day and Night Vision. This image illustrates the system's ability to provide clear visuals both during the day and at night, thanks to its integrated infrared night vision.
7.5 Modo silencioso
To avoid disturbance, especially during nighttime, you can activate the silent mode:
- Presione el Modo silencioso button (often a bell with a slash through it) on the indoor monitor. The doorbell ringtone will be muted.
- The monitor will still display the video feed when a visitor calls, allowing you to see who is at the door without audible notification.
- Presione el Modo silencioso botón nuevamente para desactivarlo.
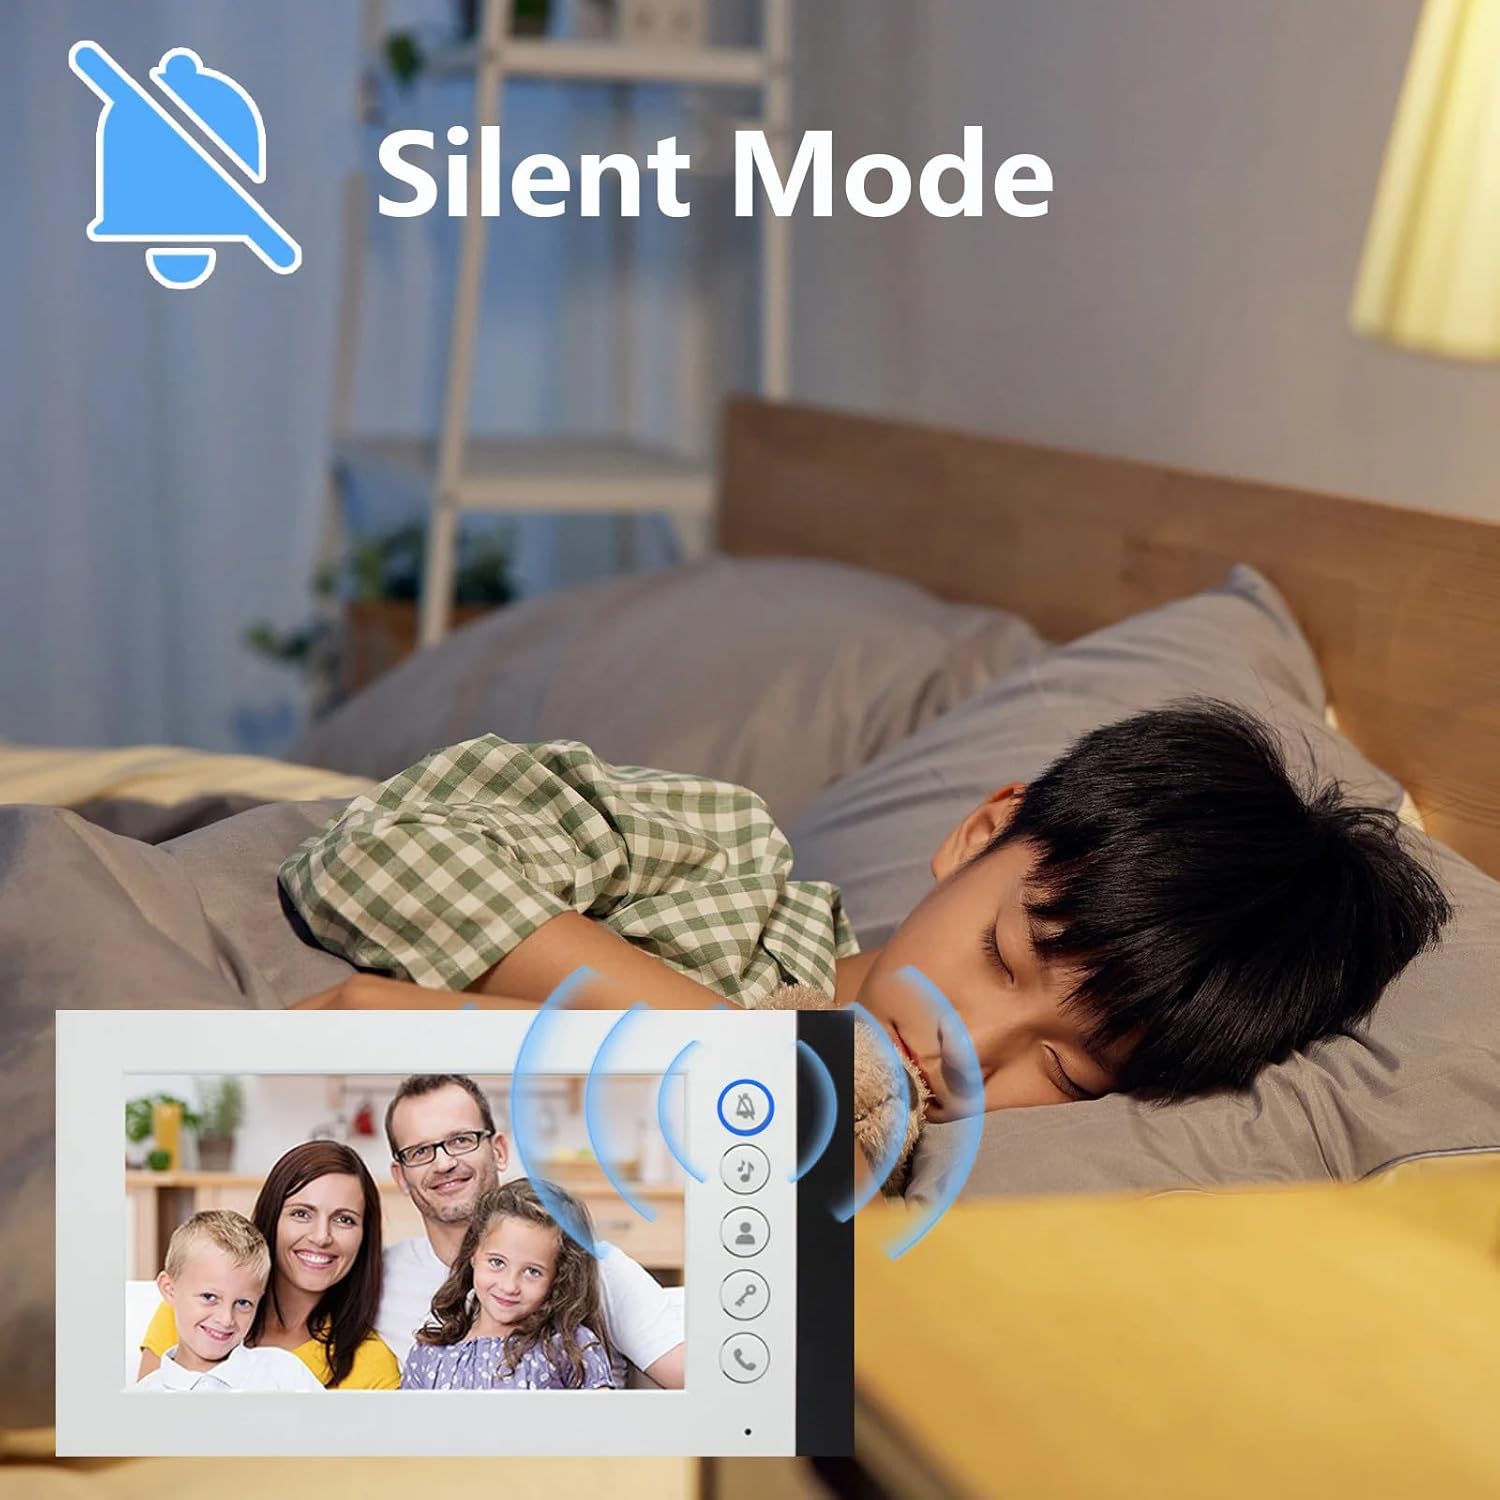
Figure 7.2: Silent Mode Activation. This image demonstrates the silent mode feature, which allows users to mute the doorbell ringtone for undisturbed rest while still being able to see visitors on the monitor.
7.6 selección de tono de llamada
The indoor monitor offers 52 different ringtones. Consult the monitor's on-screen menu or specific buttons to browse and select your preferred ringtone.

Figure 7.3: Ringtone Options. This image highlights the availability of 52 different ringtones for the indoor monitor, allowing users to customize their doorbell sound.
8. Mantenimiento
- Limpieza: Utilice un paño suave y seco para limpiar el monitor interior y la unidad exterior. Para la suciedad difícil de eliminar, utilice un paño ligeramente seco.amp cloth can be used, but ensure no liquid enters the devices. Do not use abrasive cleaners or solvents.
- Inspección de cables: Periodically check all wiring connections for signs of wear, damage, or loose connections. Repair or replace damaged cables immediately.
- Outdoor Unit Lens: Keep the camera lens on the outdoor unit clean and free from obstructions (e.g., dirt, spiderwebs) to ensure clear video quality.
- Fuente de alimentación: Ensure power adapters are not damaged and are securely plugged into outlets.
9. Solución de problemas
| Problema | Posible causa | Solución |
|---|---|---|
| No video or audio on monitor |
|
|
| Monitor not ringing when doorbell is pressed |
|
|
| Mala calidad de video (borroso, oscuro) |
|
|
| La función de desbloqueo de puerta no funciona |
|
|
10. Garantía y soporte
ANJIELO SMART products are designed for reliability and performance. For warranty information, technical support, or service inquiries, please refer to the contact information provided with your purchase documentation or visit the official ANJIELO SMART website. Please have your model number (60120S-2+67022E) and purchase date ready when contacting support.