1. Introducción
This manual provides detailed instructions for the setup, operation, and maintenance of your SMSL AS400 Power AmpAuriculares DAC más duraderos AmpLea este manual detenidamente antes de utilizar el producto para garantizar su correcto funcionamiento y larga duración.
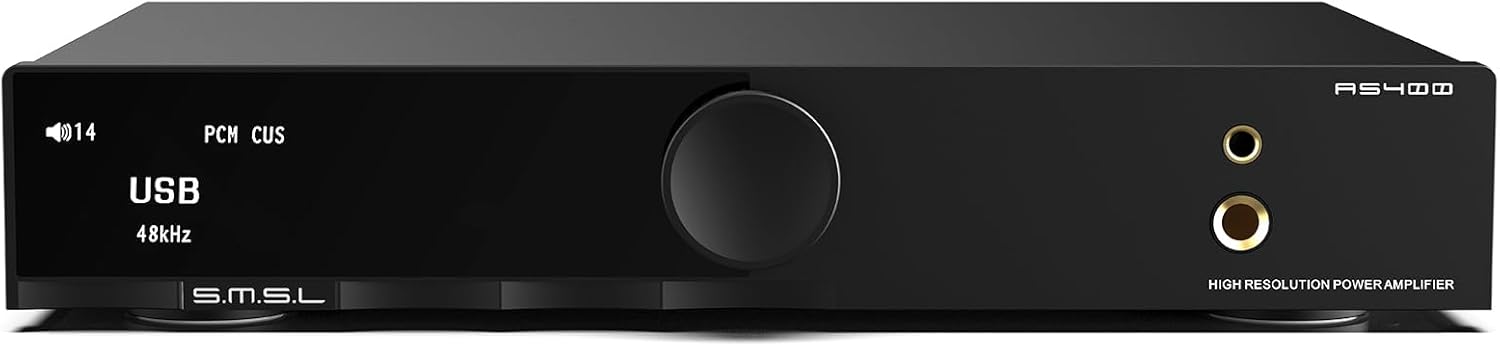
Figura 1: Frente view of the SMSL AS400 unit.
2. Características del producto
- Salida potente: Integrates Cirrus Logic CS43131 DAC, Infineon MA5332MS digital amplifier, and XMOS XU-316. Supports PCM up to 32-bit/768kHz and DSD up to DSD256. Delivers 165W x 165W output (4Ω) with 0.003% THD+N distortion.
- 2.1 Subwoofer System: Features a dedicated subwoofer output for easy integration into a 2.1 channel audio system, providing enhanced bass.
- HDMI ARC TV Connection: Equipped with an HDMI (ARC) port for direct connection to compatible TVs, enabling synchronized audio and video.
- Preamplificador de fono MMampmás duradero: Built-in low-noise MM phono stage for turntables, ensuring high-quality vinyl playback.
- Personalización de audio: Offers 8 EQ settings (Direct, Tone, SDB, Bass, Super Bass, Rock, Soft, Clear) and 5 digital filters (Fast, Phase Compensation, Slow and Low Latency, Slow and Phase Compensation, Non-Oversampabadejo).
- Conectividad integral: Multiple input options including HDMI (ARC), Bluetooth, USB, Optical, Coaxial, Phono, and I2S. Features 4.4mm and 6.35mm headphone outputs.

Figura 2: Sobreview of SMSL AS400 key features.
3. Contenido del paquete
Verifique que todos los artículos estén presentes en el paquete:
- SMSL AS400 Unit
- Cable de alimentación de CA
- Cable USB
- Cable HDMI
- Antena Bluetooth
- Mando a distancia
- Manual de usuario (este documento)
- Tarjeta de servicio
4. Producto terminadoview
4.1 Panel frontal
Figure 3: Front panel layout.
- Pantalla de visualización: Muestra la entrada actual, sampvelocidad, volumen y opciones de menú.
- Perilla de función: Press to enter the menu, hold to exit the menu, rotate to change values or volume.
- Toma de auriculares de 4.4 mm: Salida de auriculares balanceada.
- Salida de auriculares de 6.35 mm: Salida de auriculares estándar.
4.2 Panel trasero

Figure 4: Rear panel layout with input/output labels.
- PHONO Input (L/R): For connecting turntables with MM cartridges. Includes a grounding terminal.
- AUX Input (L/R): Standard analog RCA input.
- SW OUT (Subwoofer Output): Para conectar un subwoofer activo.
- Entrada COAXIAL: Entrada de audio digital coaxial.
- Entrada HDMI (ARC): For connecting to a TV's Audio Return Channel port.
- Entrada USB: Para conectar a una computadora u otra fuente de audio USB.
- Entrada ÓPTICA: Entrada de audio óptica digital.
- Antena Bluetooth: For wireless Bluetooth audio reception.
- SPEAKERS OUT (L/R): Terminales de altavoz para altavoces pasivos.
- Entrada de alimentación de CA: Para conectar el cable de alimentación.
5. Configuración
5.1 Conexión de altavoces
- Ensure the AS400 is powered off.
- Conecte sus altavoces pasivos al ALTAVOCES FUERA terminals on the rear panel. Ensure correct polarity (+ to + and - to -) for both left and right channels.
5.2 Conexión de auriculares
- Conecte sus auriculares a cualquiera de los dos Conector para auriculares de 4.4 mm o el Salida de auriculares de 6.35 mm en el panel frontal.
5.3 Conexión de fuentes de audio
Connect your desired audio sources to the corresponding input ports on the rear panel:
- USB: Connect to a computer using the provided USB cable.
- Bluetooth: Attach the Bluetooth antenna. Select Bluetooth input on the device and pair with your source device.
- Óptico/Coaxial: Connect digital audio sources like CD players or media streamers.
- RCA (AUX): Connect analog audio sources like CD players or other audio devices.
- Fono: Connect a turntable with an MM cartridge. Ensure the turntable's ground wire is connected to the AS400's grounding terminal.
- HDMI (ARCO): Connect to your TV's HDMI ARC port using a compatible HDMI cable.
5.3.1 HDMI ARC Connection Details

Figure 5: HDMI ARC connection setup.
To connect an ARC compatible TV:
- Connect an HDMI cable (19-pin, with HDMI logo indicating ARC compatibility) from your TV's HDMI (ARC) port to the AS400's HDMI (ARC) input.
- Ensure the TV's HDMI IN port is labeled "ARC" or "eARC/ARC". If the port does not support ARC, this function cannot be used.
- You may need to adjust TV settings for ARC. Refer to your TV's user manual.
- This product supports digital audio input via HDMI ARC, not video input.
- If your TV does not support ARC, connect the TV's audio output (Optical, Coaxial, or AUX) to the corresponding input on the AS400.
- Due to ARC input protocol, the AS400's volume cannot be adjusted by the TV remote, nor does it support synchronous power on/off.
- When using HDMI ARC, confirm the TV's audio output format is PCM.
Video 1: Demonstration of HDMI ARC connection to a TV.
6. Instrucciones de funcionamiento
6.1 Funcionamiento básico
- Encendido/apagado: Use the power switch on the rear panel or the remote control.
- Control de volumen: Rotate the function knob on the front panel or use the volume buttons on the remote.
- Selección de entrada: Press the function knob to enter the menu, then rotate to select 'Input'. Alternatively, use the input selection buttons on the remote.
6.2 Navegación por menús
The function knob is used for menu navigation:
- Prensa: Entrar al menú o confirmar una selección.
- Sostener: Salir del menú actual.
- Girar: Desplácese por las opciones del menú o ajuste los valores.
6.3 EQ and Filter Settings

Figure 6: Menu options for EQ and tone control.
Access the 'SETUP MENU' by pressing the function knob. Navigate to 'EQ', 'Treble', 'Bass', or 'Filter' to customize your audio experience:
- Modos de ecualización: Select from Direct, Tone, SDB, Bass, Super Bass, Rock, Soft, and Clear.
- Filtros: Choose from Fast, Phase Compensation, Slow and Low Latency, Slow and Phase Compensation, and Non-Oversampabadejo.
6.4 Reproducción de MQA

Figure 7: MQA and MQA-CD support.
The AS400 supports full MQA and MQA-CD decoding, allowing for native playback of MQA streams/files and MQA-CDs. Connect your MQA-enabled source via USB, Optical, or Coaxial inputs for high-resolution audio.
Vídeo 2: Terminadoview of the SMSL AS400's features and functionality.
7. Especificaciones

Figura 8: Especificaciones detalladas del producto.
| Característica | Especificación |
|---|---|
| Aporte | RCA / BT / USB / Optical / Coaxial / Phono / I2S |
| Distorsión armónica total (THD) + ruido | 0.003% |
| Output Power (RMS) STEREO | 4Ω: 165W x 2, 8Ω: 85W x 2 |
| Input Sensitivity/Input Impedance | 280 mV / 22 kΩ |
| Compatibilidad USB | Windows 7/8/8.1/10/11, Mac OSX, Linux |
| Profundidad de bits | USB: 1bit, 16-32bit; Optical/Coaxial: 1bit, 16-32bit |
| relación señal/ruido | 107 dB |
| Separación de canales | 98 dB |
| Transmisión USB | Asynchronous Transfer |
| Consumo de energía | 40W (Normal Volume) |
| Decodificador MQA | USB / Óptico / Coaxial |
| MQA-CD Decoder | Óptico / Coaxial |
| Samptasa de ling | PCM: 44.1-768kHz (USB), 44.1-192kHz (Optical/Coaxial); DSD: 2.8224-11.2896MHz (USB), DSD64(DoP) (Optical/Coaxial) |
| Tamaño (An) | 210.4 x 46 x 254 mm |
| Peso del artículo | 1.568kg / 3.46lbs |
| Material | Aleación de aluminio |
| Volumentage | 220 voltios |
8. Solución de problemas
8.1 HDMI ARC Function
- Q1: The ARC input is connected to the TV, but the TV does not recognize the device or there is no sound.
A1: The ARC input needs to be connected to the HDMI ARC interface of the TV. The output mode of the TV should be set to "ARC/ARC+TV speakers". - Q2: Can the TV remote control adjust the volume of this product?
A2: No soportado. - Q3: Will the product synchronize on/off after turning on/off the TV?
A3: Not supported. When using HDMI ARC input, this product needs to be restarted when the TV is turned off and then turned on again. - Q4: What should I do if there is no sound after connecting the TV to the product?
A4: When using this product, please confirm that the audio output format of the TV is PCM. - Q5: Does it support connecting to a TV set-top box?
A5: No soportado.
8.2 Solución de problemas generales
- Sin energía: Ensure the AC power cable is securely connected to both the AS400 and a working power outlet. Check the power switch on the rear panel.
- No Sound from Speakers/Headphones: Verify the correct input source is selected. Check all cable connections. Ensure volume is not muted or set too low. Confirm speakers/headphones are properly connected.
- Sonido distorsionado: Check cable connections for looseness or damage. Ensure the audio source is not overdriving the input. Try a different audio source or cable.
- Problemas de conexión Bluetooth: Ensure the Bluetooth antenna is attached. Confirm the AS400 is in Bluetooth pairing mode and your device's Bluetooth is enabled and searching. Try unpairing and re-pairing the device.
9. Mantenimiento
- Limpieza: Use a soft, dry cloth to clean the unit. Avoid using liquid cleaners or solvents.
- Colocación: Place the unit on a stable, level surface with adequate ventilation. Avoid direct sunlight, heat sources, and excessive moisture.
- Fuerza: Desconecte el cable de alimentación del tomacorriente de pared si la unidad no se utilizará durante un período prolongado.
10. Garantía y soporte
For warranty information and technical support, please refer to the service card included in your package or contact the manufacturer directly. Keep your purchase receipt as proof of purchase for warranty claims.