1. Introducción
Thank you for choosing the DCA 20V Brushless Hammer Drill, Model ADJZ2055i. This manual provides essential information for the safe and efficient operation, maintenance, and troubleshooting of your new tool. Please read these instructions carefully before use and keep them for future reference. Proper use and care will ensure long-lasting performance and safety.
2. Instrucciones generales de seguridad
Siga siempre las precauciones básicas de seguridad al utilizar herramientas eléctricas para reducir el riesgo de incendio, descarga eléctrica y lesiones personales.
- Seguridad en el área de trabajo: Mantenga su área de trabajo limpia y bien iluminada. Las áreas desordenadas u oscuras pueden provocar accidentes. No opere herramientas eléctricas en atmósferas explosivas, como en presencia de líquidos, gases o polvo inflamables.
- Seguridad eléctrica: Evite el contacto corporal con superficies conectadas a tierra, como tuberías, radiadores, estufas y refrigeradores. No exponga las herramientas eléctricas a la lluvia ni a la humedad.
- Seguridad personal: Always wear eye protection. Use safety glasses, a dust mask, non-skid safety shoes, a hard hat, or hearing protection as appropriate for the conditions. Dress properly; avoid loose clothing or jewelry. Keep hair, clothing, and gloves away from moving parts.
- Uso y cuidado de herramientas: No fuerce la herramienta eléctrica. Utilice la herramienta eléctrica correcta para su aplicación. Desconecte el enchufe de la fuente de alimentación o la batería de la herramienta eléctrica antes de realizar cualquier ajuste, cambiar accesorios o guardar la herramienta eléctrica.
- Uso y cuidado de la herramienta a batería: Recargue únicamente con el cargador especificado por el fabricante. Utilice herramientas eléctricas únicamente con baterías específicamente diseñadas.
3. Contenido del paquete
Verifique que todos los artículos enumerados a continuación estén incluidos en su paquete. Si falta algún artículo o está dañado, comuníquese con su vendedor.
- 1 x DCA 20V Brushless Hammer Drill
- 2 baterías de iones de litio de 2.0 Ah
- Cargador de batería 1 x
- 1 x Robust Carrying Case
- 9 x Drill Bits (various sizes for masonry, wood, metal)
- 19 x Screwdriver Inserts
- 1 x Varilla de extensión
- 1 x eje flexible
- 1 x portapuntas
- 1 gancho para cinturón.

Image: The DCA 20V Brushless Hammer Drill with its complete set of accessories, including batteries, charger, various drill bits, screwdriver inserts, and a carrying case.
4. Producto terminadoview
Familiarize yourself with the main components of your DCA 20V Brushless Hammer Drill.
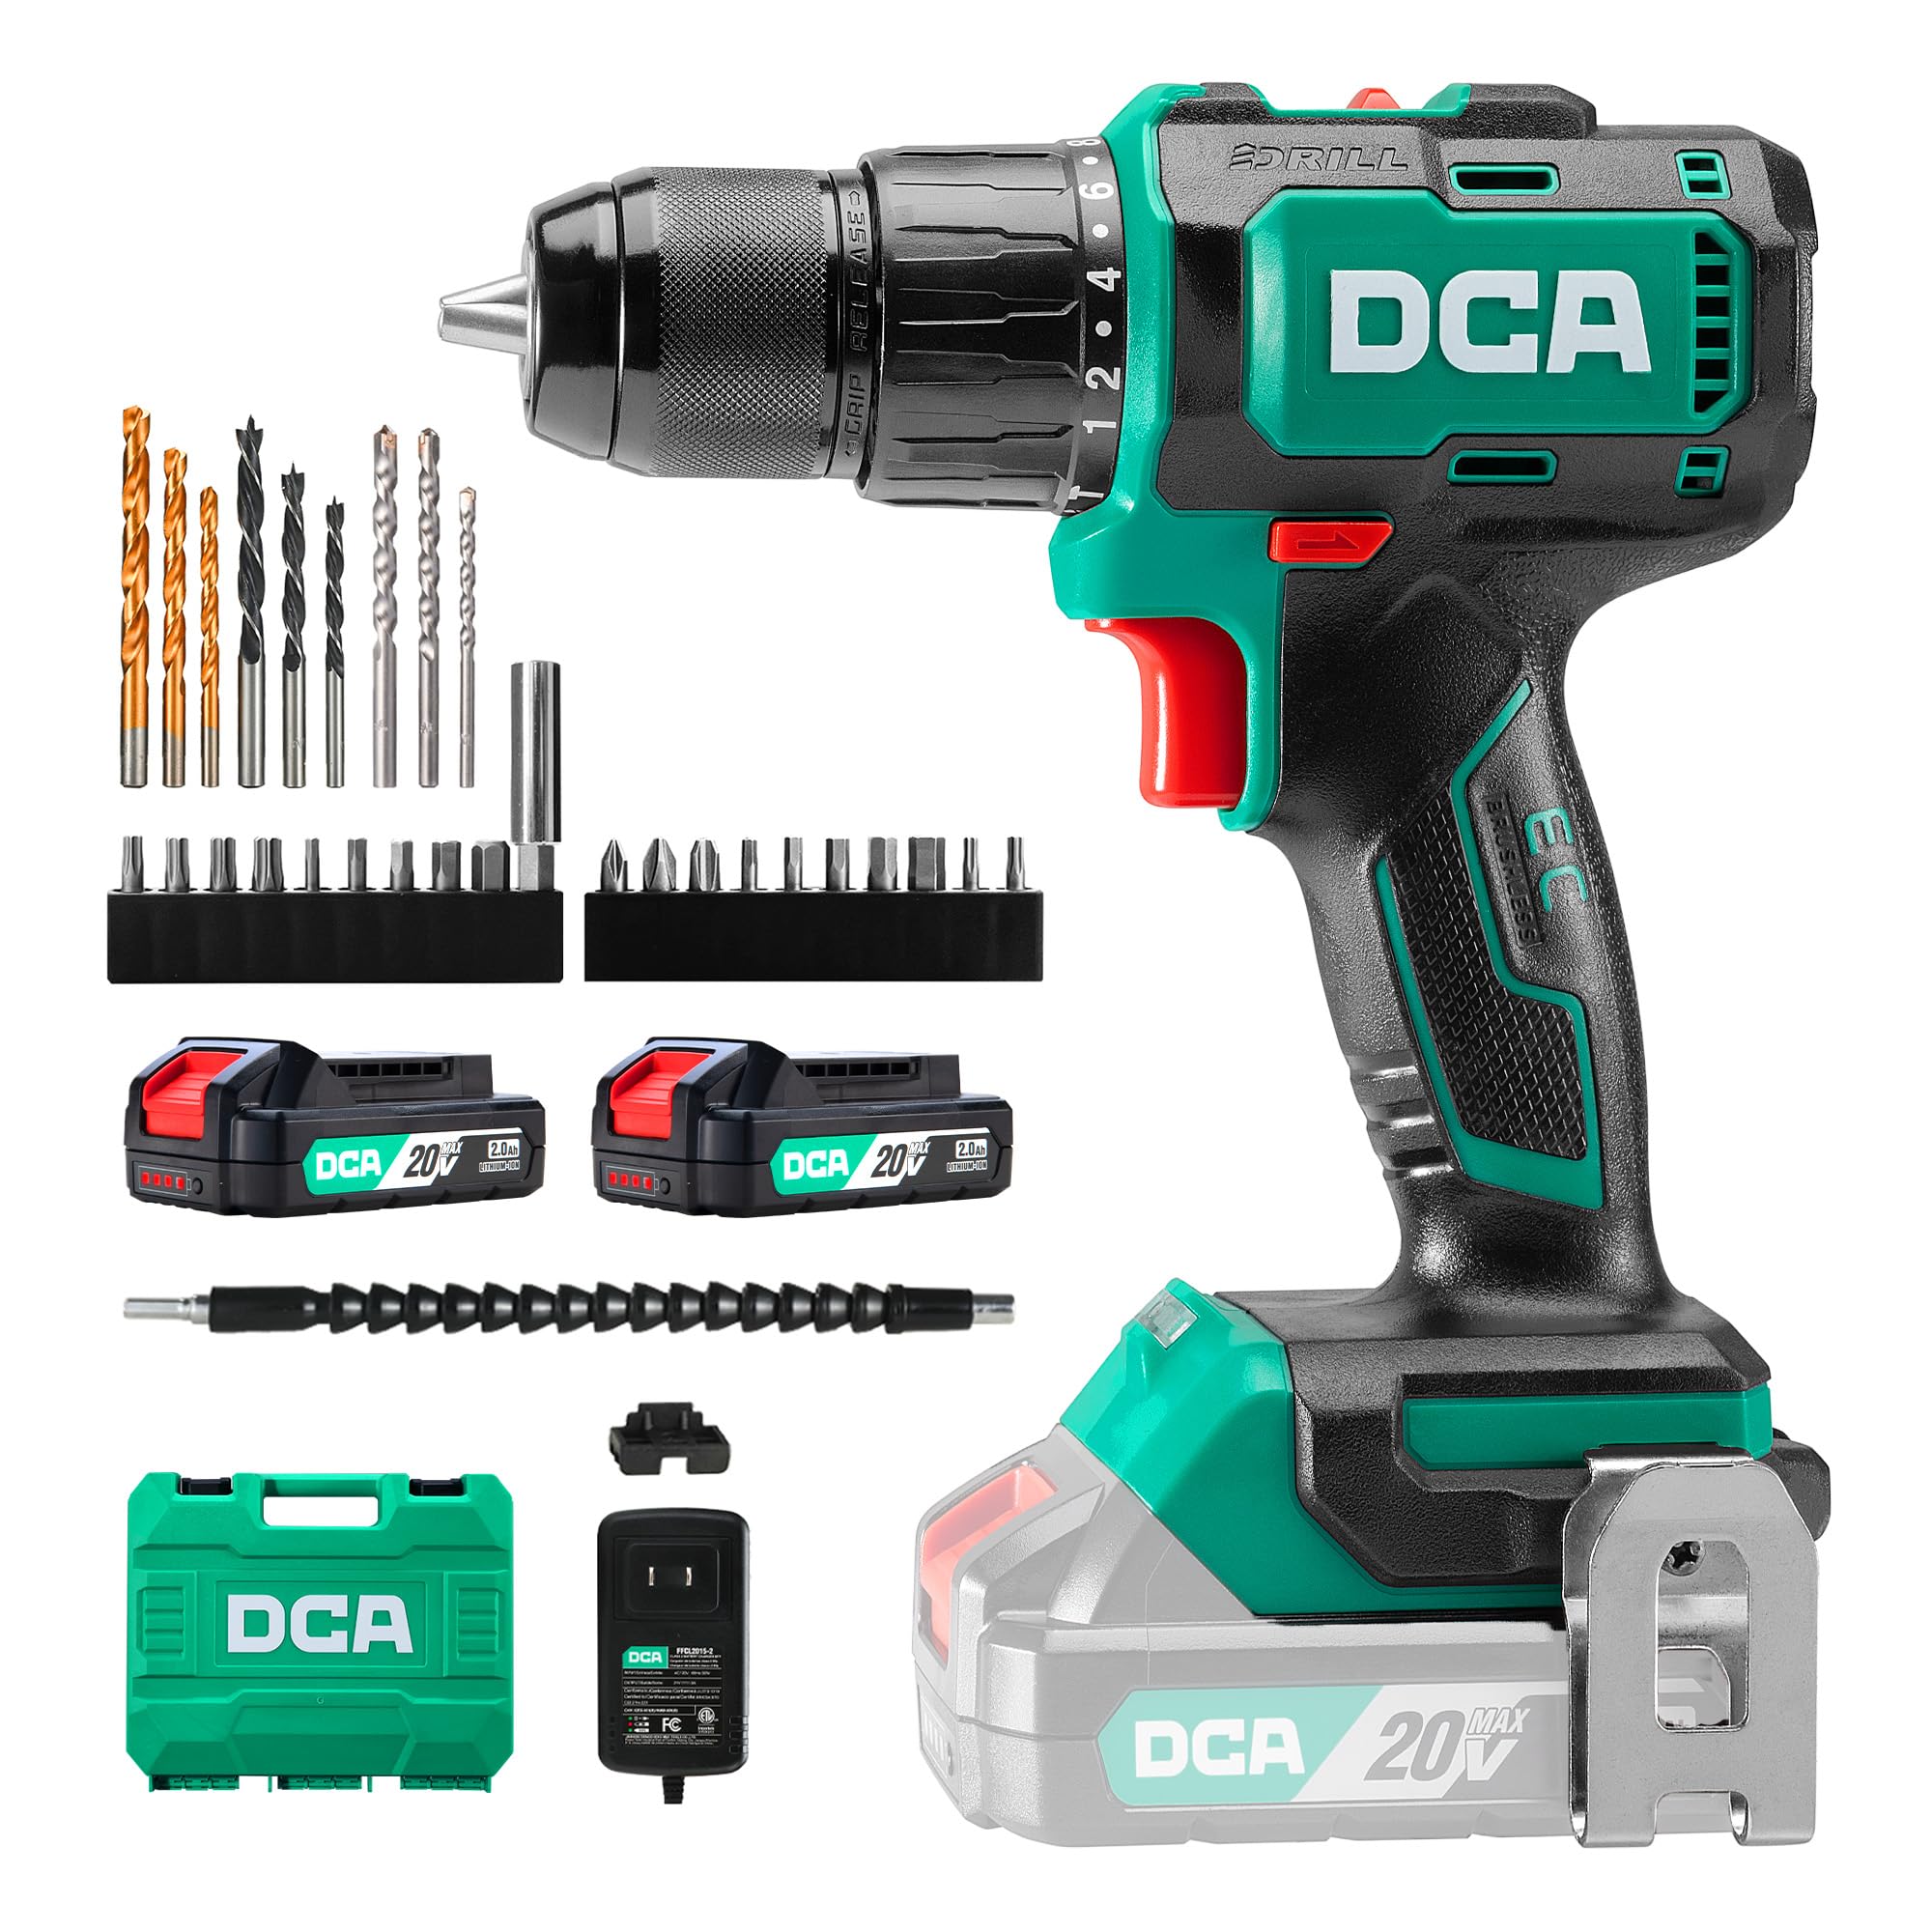
Imagen: Principal view of the DCA 20V Brushless Hammer Drill, highlighting its compact design and ergonomic grip.
Características principales:
- Motor sin escobillas: Delivers up to 55Nm of torque for demanding drilling and screwdriving tasks, ensuring longer runtime and spark-free operation.
- Función del martillo: Provides up to 27,000 impacts per minute for efficient drilling in masonry and brick.
- Caja de cambios de 2 velocidades: Offers variable speed control (0–450 / 0–1800 RPM) for precision in various applications.
- 18+1+1 Torque Settings: Allows precise torque adjustment for screwdriving, drilling, and hammer drilling modes.
- 13mm All-Metal Chuck: Ensures robust and stable bit retention, with drilling capacity up to 35mm in wood and 13mm in steel or masonry.
- Diseño compacto y ergonómico: Weighs only 1.3kg, features a rubberized grip, and an integrated LED light for comfortable use in tight or dimly lit spaces.
5. Configuración
5.1 Carga de la batería
Before first use, fully charge the battery. The charger is designed for the included 2.0Ah Li-ion batteries.
- Conecte el cargador a una toma de corriente estándar.
- Deslice el paquete de baterías sobre el cargador hasta que encaje en su lugar.
- The charging indicator light on the battery will show its status (Red = Charging, Green = Fully Charged).
- Una vez que esté completamente cargada, desconecte la batería del cargador y desenchufe el cargador del tomacorriente.

Image: A DCA 20V Li-ion battery connected to its charger, illustrating the charging process and indicator lights.
5.2 Instalación y extracción de la batería
- Para instalar: Alinee el paquete de baterías con la base del mango del taladro y deslícelo hasta que encaje de forma segura.
- Para eliminar: Presione el botón de liberación de la batería (generalmente ubicado en el frente o en los costados de la batería) y deslice el paquete de baterías hacia afuera.
5.3 Installing and Removing Drill Bits/Screwdriver Inserts
The 13mm all-metal chuck allows for quick and secure bit changes.
- Para abrir Chuck: Rotate the chuck counter-clockwise until the jaws are wide enough to insert the bit.
- Para insertar la broca: Insert the desired drill bit or screwdriver insert into the chuck jaws. Ensure it is seated as far as possible.
- Para cerrar Chuck: Rotate the chuck clockwise until the bit is firmly gripped. For best results, give it an extra twist to ensure it's fully tightened.
- Para quitar bits: Gire el mandril en sentido antihorario para aflojar las mordazas y extraer la broca.

Image: A sequence of three images demonstrating the quick-release chuck operation for inserting and securing drill bits.
6. Instrucciones de funcionamiento
6.1 Encendido/apagado y disparador de velocidad variable
The drill is activated by pressing the variable speed trigger. The speed of the drill is controlled by how far you press the trigger.
- Encender: Presione el interruptor de gatillo.
- Apagar: Suelte el interruptor de gatillo.
- Velocidad variable: Pressing the trigger lightly results in lower speed; pressing it fully results in maximum speed.

Image: A user operating the drill, with an inset highlighting the variable speed trigger and its function.
Selección de 6.2 velocidades
The drill features a 2-speed gearbox for optimal performance across different materials and tasks.
- Velocidad 1 (baja velocidad, 0-450 RPM): Ideal for screwdriving and drilling large diameter holes in wood or soft materials where high torque is required.
- Velocidad 2 (alta velocidad, 0-1800 RPM): Suitable for fast drilling in wood, metal, and for hammer drilling in masonry.
To change speed, use the speed selector switch located on top of the drill. Ensure the drill is stopped before changing speeds.
6.3 Torque and Mode Selection
The torque collar allows you to adjust the clutch setting for screwdriving, or select drilling or hammer drilling modes.
- Ajustes de torque (1-18): For screwdriving, select a torque setting. The clutch will disengage once the set torque is reached, preventing overtightening or stripping screws. Start with a lower setting and increase as needed.
- Modo de taladro (Icono de taladro): For drilling into wood, metal, and plastics. The clutch is bypassed, providing maximum torque.
- Modo taladro percutor (Icono de martillo): For drilling into masonry, brick, and concrete. This mode combines rotation with a hammering action.

Image: The drill operating in standard drilling mode, suitable for wood and metal.

Image: The drill configured for screwdriving tasks, demonstrating precise control.

Image: The drill being used in hammer mode for efficient drilling into a brick wall.
6.4 Rotación hacia adelante/atrás
The forward/reverse selector switch is located above the trigger. Push it to the left for forward rotation (drilling/screwing in) and to the right for reverse rotation (removing screws/bits).
6.5 Luz de trabajo LED
La luz LED integrada ilumina el área de trabajo cuando se presiona el gatillo, mejorando la visibilidad en condiciones de poca luz.

Image: The drill's LED work light effectively illuminating the drilling point on a wooden surface.
6.6 Uso del eje flexible
The included flexible shaft is designed to extend your reach into tight or awkward spaces, allowing you to drive screws or drill in areas inaccessible to the main drill body.
- Insert the flexible shaft into the drill chuck as you would a regular bit.
- Insert the desired screwdriver insert or small drill bit into the end of the flexible shaft.
- Use the drill at a lower speed setting for better control when using the flexible shaft.

Image: A user utilizing the flexible shaft attachment to drive a screw in a confined space under a table.
7. Mantenimiento
El mantenimiento regular garantiza la longevidad y el rendimiento óptimo de su herramienta.
- Limpieza: Mantenga limpias las ranuras de ventilación para evitar el sobrecalentamiento. Utilice un paño suave y seco.amp paño para limpiar la herramienta casing. No utilice productos químicos agresivos ni limpiadores abrasivos.
- Mantenimiento del mandril: Limpie periódicamente las mordazas del mandril para garantizar un agarre adecuado.
- Cuidado de la batería: Guarde las baterías en un lugar fresco y seco, alejado de la luz solar directa. No guarde las baterías completamente descargadas durante períodos prolongados. Recárguelas periódicamente si no las usa.
- Almacenamiento: Store the drill and accessories in the provided carrying case in a dry, secure location out of reach of children.
8. Solución de problemas
Si tiene problemas con su taladro, consulte los siguientes problemas y soluciones comunes.
| Problema | Posible causa | Solución |
|---|---|---|
| El taladro no arranca | La batería no está cargada o está instalada incorrectamente. | Asegúrese de que la batería esté completamente cargada y correctamente insertada. |
| Potencia o rendimiento reducidos | Low battery charge; incorrect speed/torque setting for task. | Recharge battery. Adjust speed or torque setting. |
| La broca se resbala en el mandril | El mandril no está lo suficientemente apretado; mordazas del mandril sucias. | Vuelva a apretar firmemente el mandril. Limpie las mordazas del mandril. |
| Calentamiento excesivo | Ranuras de ventilación bloqueadas; uso intensivo continuo. | Limpie las ranuras de ventilación. Deje que la herramienta se enfríe. |
If the problem persists after attempting these solutions, please contact DCA customer support.
9. Especificaciones
| Característica | Especificación |
|---|---|
| Número de modelo | ADJZ2055i |
| Marca | DCA |
| Fuente de poder | Funciona con pilas |
| Volumentage | 20 voltios |
| Par máximo | 55 Newton Metros (Nm) |
| Velocidad sin carga (Velocidad 1) | 0-450 RPM |
| Velocidad sin carga (Velocidad 2) | 0-1800 RPM |
| Tasa de impacto | Hasta 27,000 IPM |
| Tamaño de Chuck | 13 Millimeters (All-Metal) |
| Ajustes de par | 18+1+1 (Screwdriving, Drilling, Hammer Drilling) |
| Capacidad de la batería | 2000 miliamper-hour (mAh) / 2.0Ah |
| Capacidad máxima de perforación (madera) | 35 milímetros |
| Capacidad máxima de perforación (acero) | 13 milímetros |
| Capacidad máxima de perforación (mampostería) | 13 milímetros |
| Peso (Artículo) | 3.6 Kilograms (including accessories and case) |
| Dimensiones (L x An x Al) | 33L x 27L x 10H cm |
| Características especiales | Adjustable Torque, Quick-Release Chuck, Brushless Motor, Cordless, LED Work Light, Ergonomic Grip |
10. Garantía y soporte
DCA products are manufactured to high-quality standards. For warranty information, technical support, or service inquiries, please refer to the documentation included with your purchase or contact your retailer. Keep your proof of purchase for any warranty claims.