1. Introducción
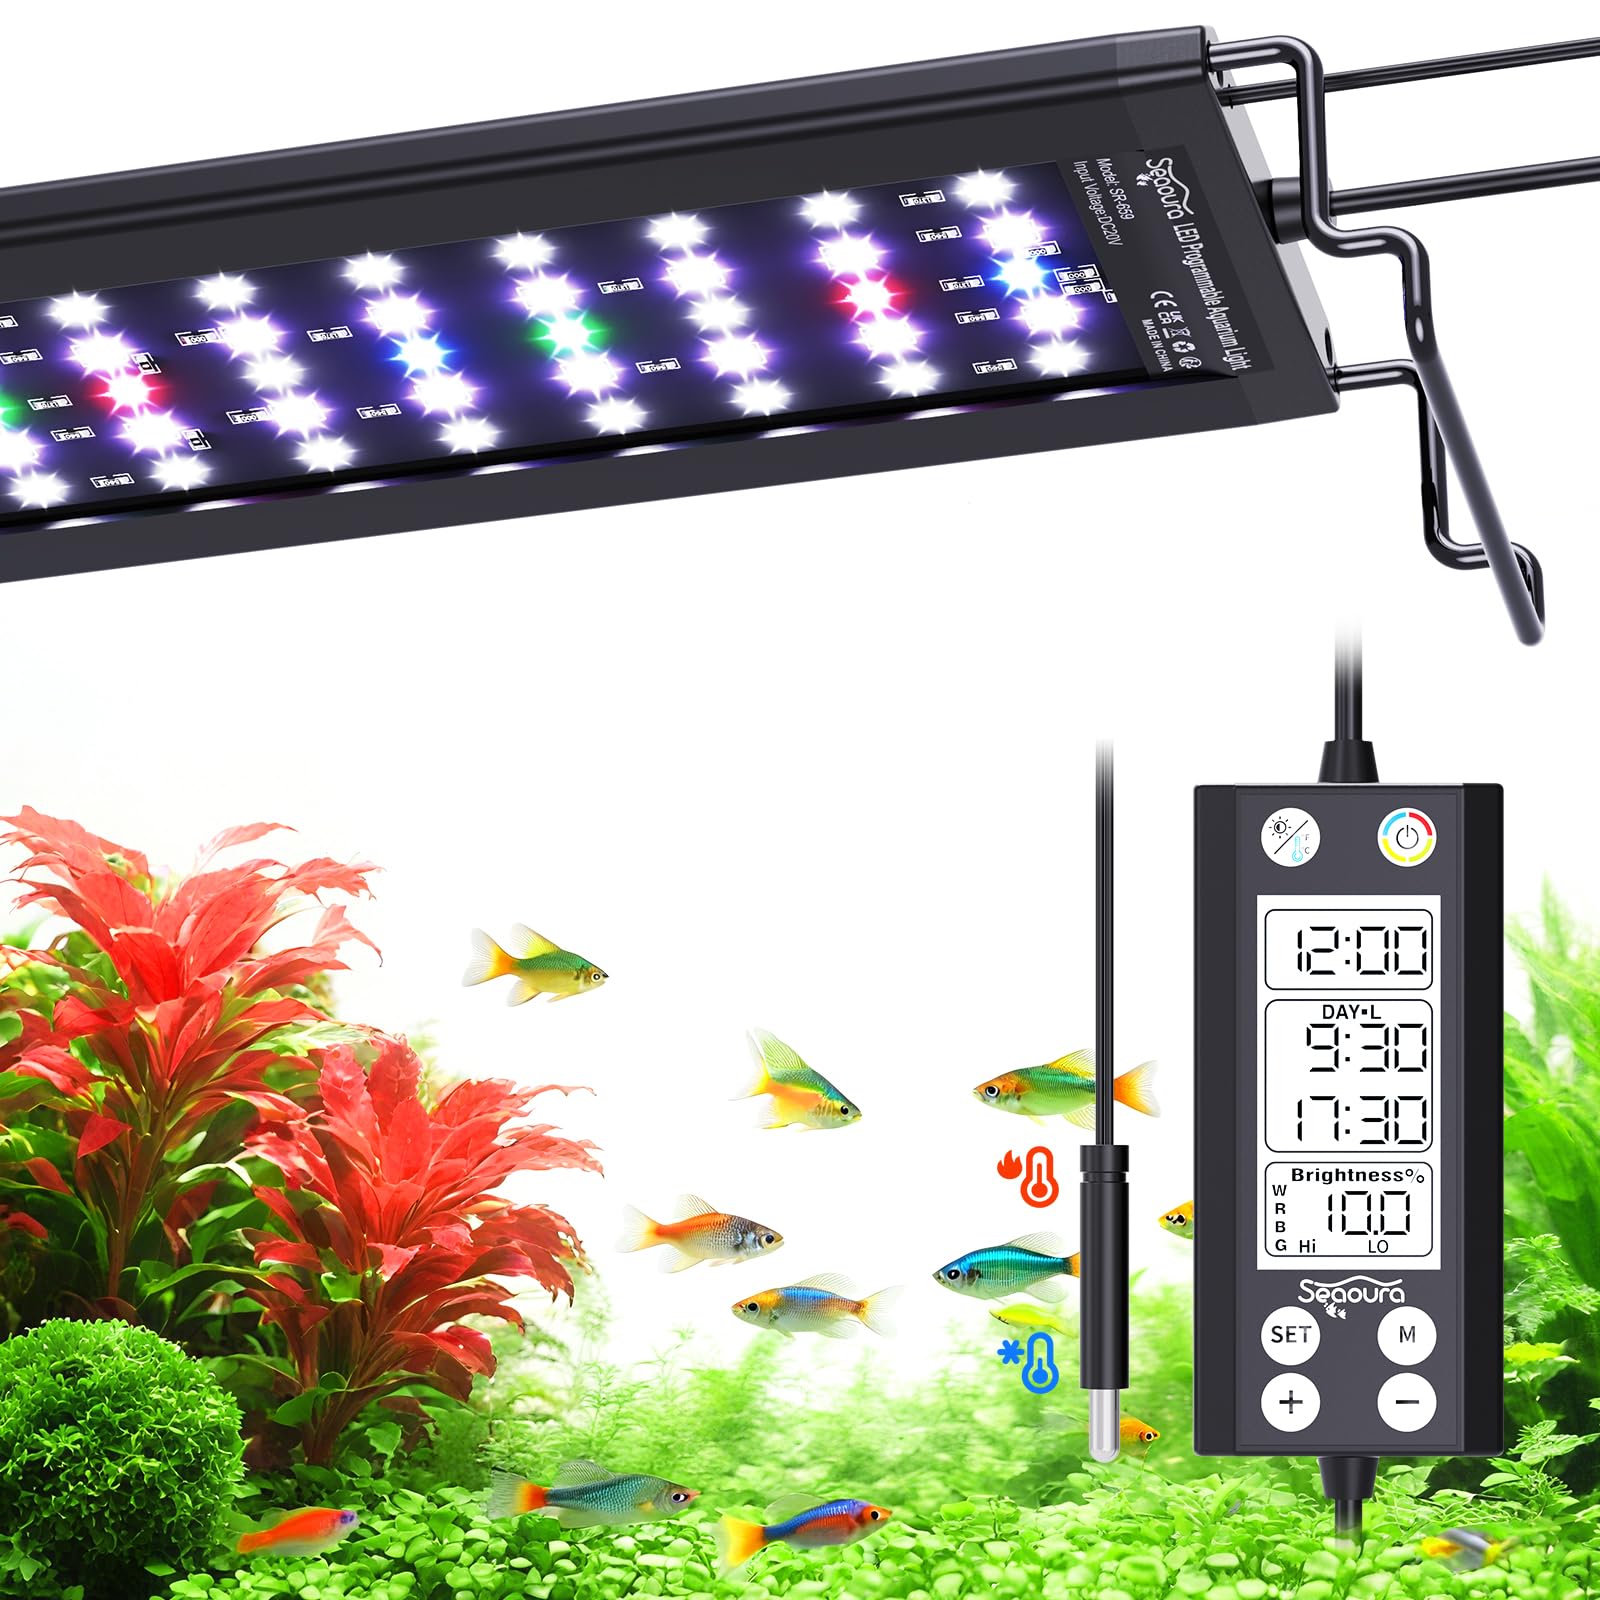
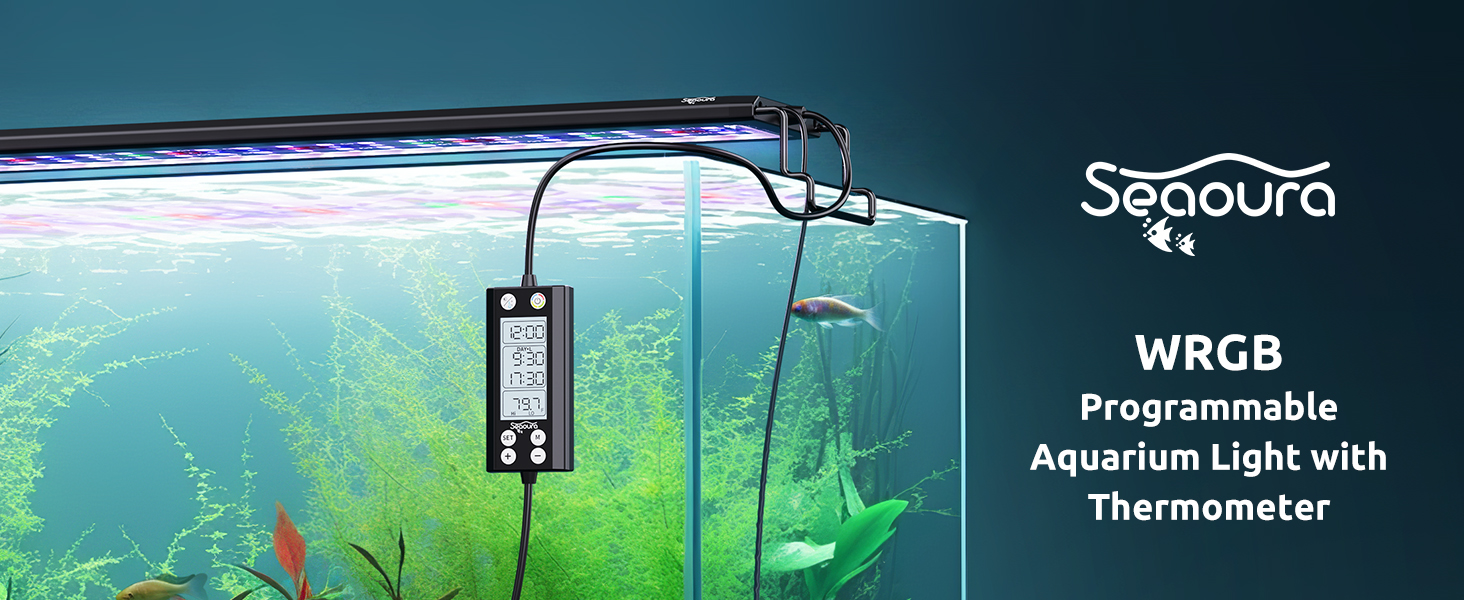
The SEAOURA SR-659 Aquarium LED Light is a full-spectrum lighting solution designed for freshwater aquariums, promoting plant growth and enhancing fish colors. It features advanced programmability, including 24/7 natural light cycles, WRGB customization, 20-level dimmable brightness, and a unique integrated thermometer with high/low temperature alarms. This manual provides detailed instructions for setup, operation, and maintenance to ensure optimal performance and longevity of your aquarium light.
2. ¿Qué hay en la caja?
Upon unpacking your SEAOURA SR-659 Aquarium LED Light, please ensure all the following components are present:
- Aquarium Light (SR-659)
- Extendable Mount (Adjustable Brackets)
- Cable adaptador
- Manual de usuario
- CR1220 Battery (for power-off memory)

For a visual guide on the package contents, please refer to the video below:
3. Características principales
- WRGB DIY & 20-Level Dimmable: Customize the ratio of 4 WRGB channels and adjust brightness with 20 levels. High-quality 5054 and 2835 LED chips provide a high-PAR full spectrum for plant growth and enhanced fish colors. Features 455nm blue and 660nm red light.
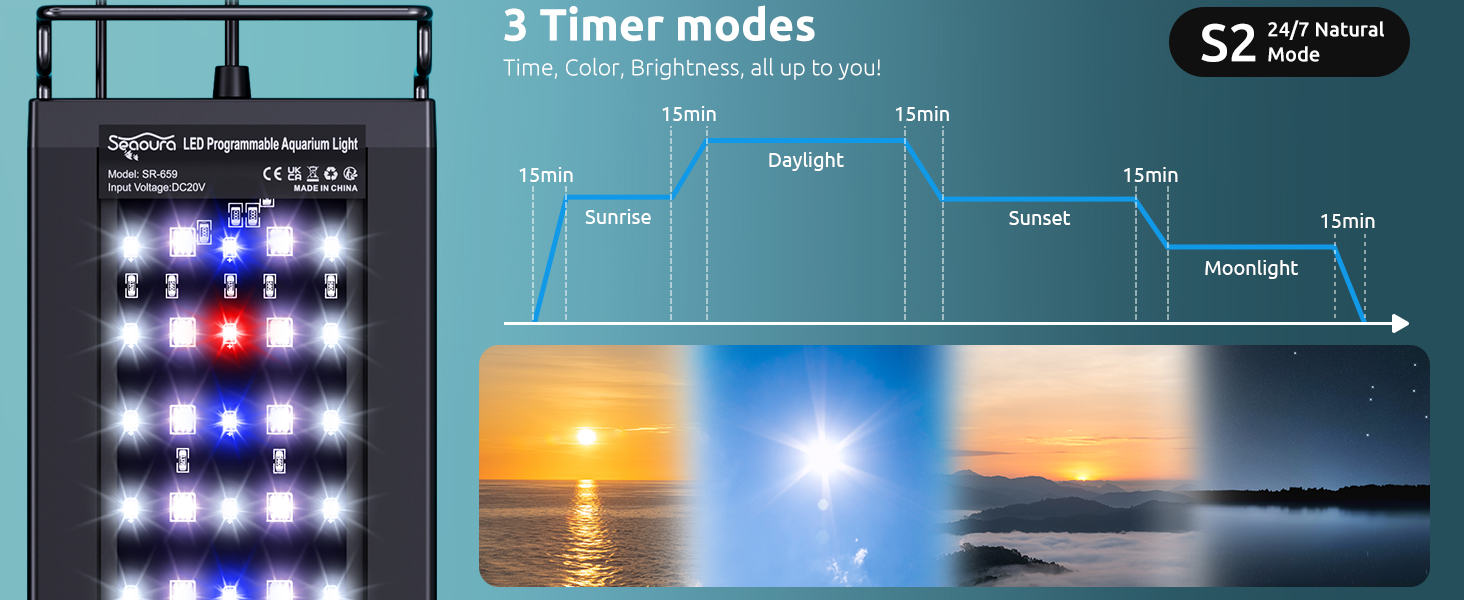
- 3 modos de temporizador: Choose from S1 (DAY-L/MOON-L with preset colors, separate or alternating), S2 (24/7 natural mode with 5 preset stages), or S3 (DIY mode with 8 customizable WRGB stages). Includes a 15-minute gradient for smooth light transitions.
- Memoria de apagado: A CR1220 battery maintains time and settings during power outages, ensuring the light resumes its original working mode without repeated setup. Features intelligent power-saving backlight.
- Monitoreo de temperatura en tiempo real: An upgraded waterproof temperature probe displays real-time temperature on the controller. Supports high and low temperature alarms with an audible beep to protect aquatic life.
- High PAR Full Spectrum: Optimized full spectrum with enhanced red/blue wavelengths maximizes photosynthesis, supporting lush plant growth and vibrant coral/fish colors with up to 90% light penetration. LED QTY: 120Pcs (W:54Pcs/R:6Pcs/G:4Pcs/B:8Pcs/RGB:48Pcs). PAR: 102, Lux: 5229, Lumen: 2580, Color Temperature: 10000K, CRI: 93.
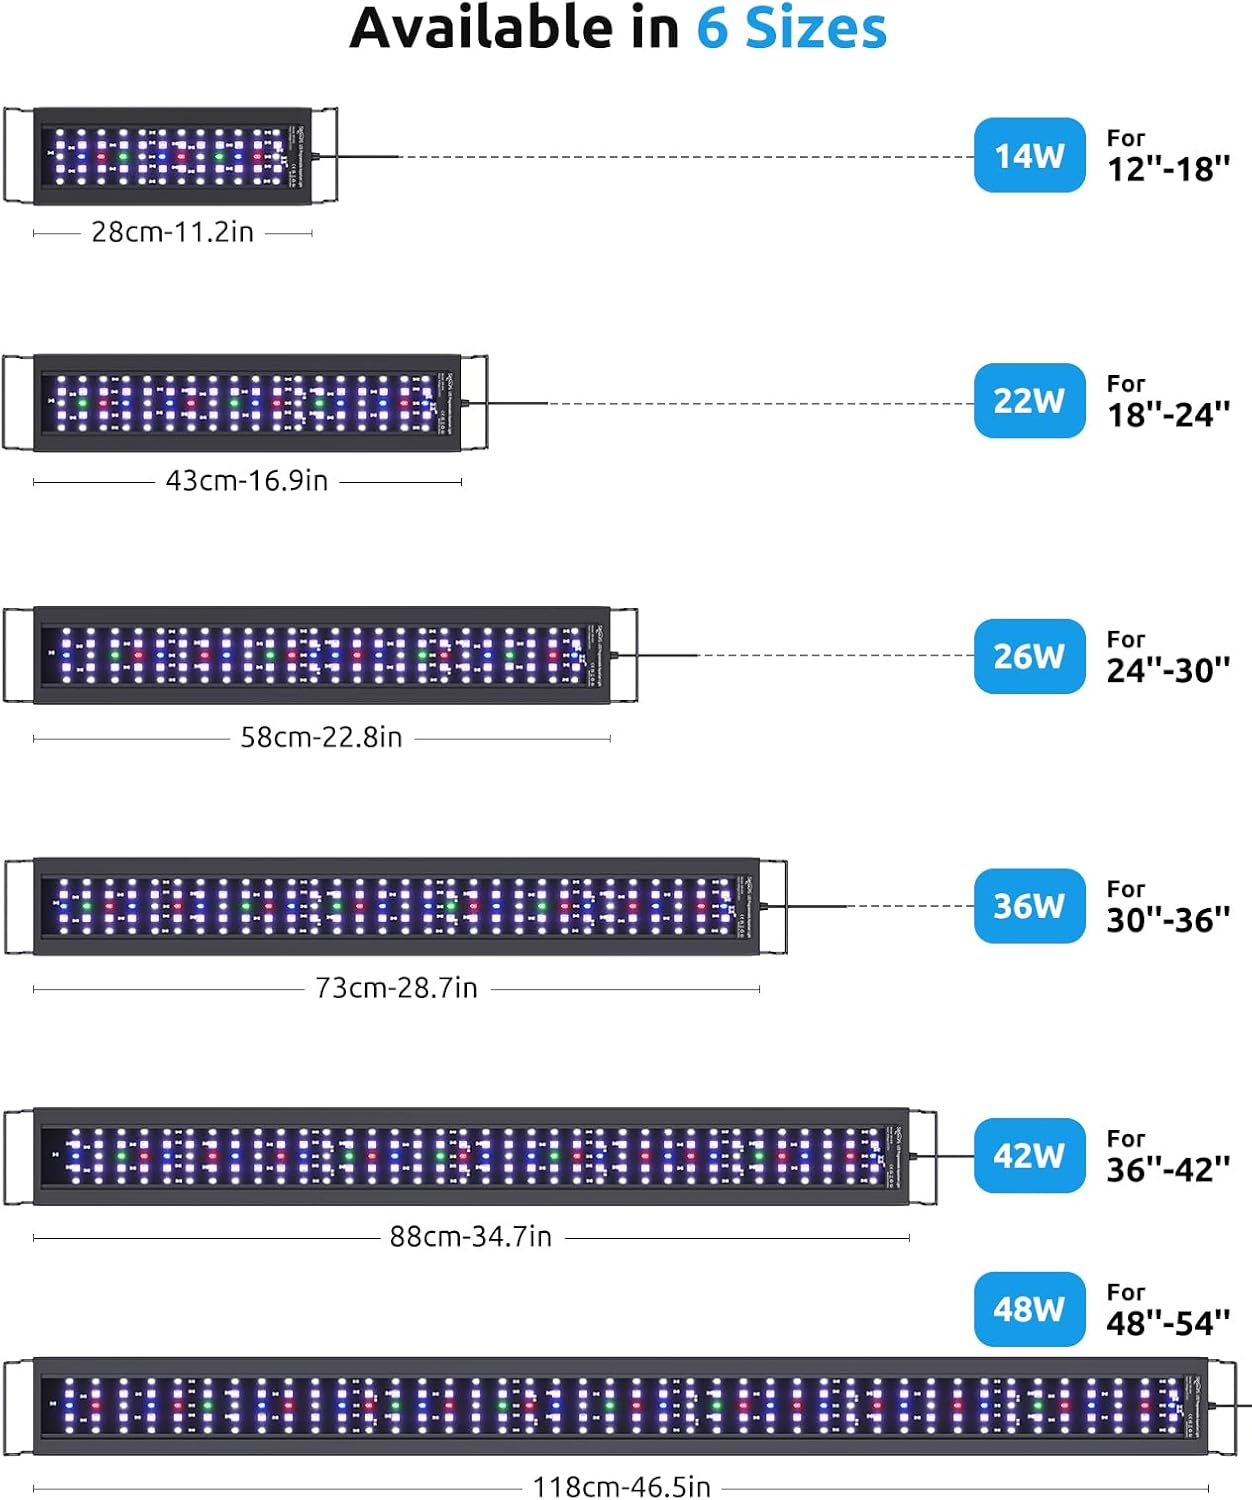
- Taller Retractable Stand: Adjustable mounts fit tanks from 24 to 30 inches (20-28 gallons). The light board is IP68 waterproof with a silicone coating, and the aluminum housing ensures efficient heat dissipation.
4. Instrucciones de configuración
4.1. Montaje de la luz
- Insert the extendable metal brackets into the sockets on both ends of the light fixture.
- Adjust the length of the mounts to fit your aquarium (24-30 inches for this model).
- Carefully place the light fixture with the adjusted mounts onto the edges of your aquarium.

4.2. Connecting the Controller and Temperature Probe
- Connect the power adapter cable to the light fixture.
- Insert the CR1220 battery into the controller unit. This battery is essential for the power-off memory function.
- Place the temperature probe into the aquarium water. Ensure the probe is fully submerged but not obstructing any equipment or fish movement.
- Conecte el adaptador de corriente a una toma de corriente adecuada.
Para una rápida visualizaciónview of the product and its features, including the controller and temperature probe, please watch this video:
5. Instrucciones de funcionamiento
5.1. Controlador sobreview
The controller features an LCD screen displaying current time, timer settings, and temperature. Buttons include SET, M (Mode), +, and - for navigation and adjustments.
5.2. Configurar la hora
- Presione el COLOCAR para ingresar al modo de configuración de hora.
- Usar + y - Botones para ajustar la hora. Presione COLOCAR Para confirmar.
- Repita durante minutos.
5.3. Setting Timer Modes (S1, S2, S3)
The light offers three programmable timer modes:
- S1: DAY-L / MOON-L Mode - Allows separate or alternating day and moon lighting periods with preset colors.
- S2: 24/7 Natural Mode - Simulates a full 24-hour natural light cycle with 5 preset stages (sunrise, daylight, sunset, moonlight, off).
- S3: DIY Mode - Provides 8 customizable stages for WRGB color and brightness.
Para seleccionar un modo, presione el botón M button repeatedly until the desired mode (S1, S2, or S3) is displayed on Screen 1.
5.3.1. S1 DAY-L / MOON-L Setup
This mode allows you to set a daytime period (DAY-L) and a nighttime period (MOON-L) with preset colors. You can choose to have them run separately or alternate.
- Select S1 mode using the M botón.
- Sostener el M button for 3 seconds to enter DAY-L setting.
- Adjust the DAY-L start and end times using + y -, confirmando cada uno con M.
- Adjust the brightness ratio for each WRGB channel using + y -, confirmando con M.
- After setting DAY-L, the controller will automatically move to MOON-L setup.
- Adjust the MOON-L start and end times. MOON-L only supports preset colors (C01-C10).
- Press the color button to cycle through preset colors (C01-C10) and adjust total brightness.
- Confirm all settings with M.
For a visual guide on setting up S1 mode, please refer to the video below:
5.3.2. S2 24/7 Natural Mode Setup
This mode automatically simulates a natural 24-hour light cycle with 5 stages. The times and colors are preset and cannot be customized.
- Select S2 mode using the M botón.
- The light will automatically follow the preset 24/7 cycle.
5.3.3. S3 DIY Mode Setup
This mode allows for full customization of 8 stages (L1 to L8) with individual WRGB color and brightness settings.
- Select S3 mode using the M botón.
- Sostener el M button for 3 seconds to enter L1 setting.
- Para cada stage (L1-L8), set the start time, end time, and individual WRGB brightness ratios using + y -, confirmando cada uno con M.
- The end time of L8 is fixed 1 minute before the next L1.
- To reset the controller to factory settings if S3 becomes messy, hold + y - durante más de 7 segundos.
For a visual guide on setting up S3 DIY mode, please refer to the video below:
5.4. Customizing WRGB Colors and Brightness
In modes that allow customization (S1 DAY-L, S3 DIY), you can adjust the individual brightness of White (W), Red (R), Green (G), and Blue (B) channels.
- While in the setting for a specific stage, presione el M button to cycle through W, R, G, B channels.
- Usar + y - to adjust the brightness percentage (0-100%) for the selected channel.
- The light will display the real-time mixed color.
- Confirmar con M to move to the next channel or save the settings.

For a visual guide on setting colors and brightness, please refer to the video below:
5.5. Temperature Alarm Settings
The controller allows you to set high and low temperature alarms to protect your aquatic environment.
- Press the temperature icon button on the controller to enter temperature alarm settings.
- Usar + y - to set the desired high temperature limit. Press COLOCAR Para confirmar.
- Repeat to set the desired low temperature limit. Press COLOCAR Para confirmar.
- If the water temperature goes outside these limits, the controller will emit an audible beep.
6. Mantenimiento
- Limpieza: Regularly wipe the light fixture and temperature probe with a soft, damp cloth to prevent mineral buildup and ensure optimal performance. Do not use abrasive cleaners.
- Conexiones: Revise periódicamente todas las conexiones de cables para asegurarse de que estén seguras y libres de daños.
- Reemplazo de batería: If the power-off memory function fails, replace the CR1220 battery in the controller unit.
- Integridad impermeable: While the light board is IP68 waterproof, avoid submerging the controller unit or power adapter.
7. Solución de problemas
- La luz no se enciende: Check power connections, ensure the adapter is plugged in, and verify the controller is not in an 'OFF' state.
- Programming Confusion: Refer to the detailed steps in Section 5 for each timer mode. If S3 (DIY Mode) settings become complex, hold + y - for over 7 seconds to reset the controller to factory settings.
- Temperature Alarm Beeping: Check the aquarium water temperature immediately. Adjust your aquarium heater/cooler as needed. Verify the high/low temperature alarm settings on the controller.
- Configuración perdida después de un corte de energíatage: Asegúrese de que la batería CR1220 esté correctamente instalada en el controlador. Reemplácela si es necesario.
- Crecimiento de algas: If excessive algae growth occurs, consider reducing the light intensity or duration. High PAR lights can sometimes lead to algae if not balanced with CO2 and nutrients.
8. Especificaciones
| Atributo | Valor |
|---|---|
| Número de modelo | SR-659 |
| Compatibilidad del tamaño del tanque | 24'' - 30'' (20-28 gallons) |
| Tipo de fuente de luz | Diodo emisor de luz (LED) |
| Cantidad de LED | 120 Pcs (W:54Pcs/R:6Pcs/G:4Pcs/B:8Pcs/RGB:48Pcs) |
| Quétage | 26 vatios |
| Salida de luz máxima | 2580 lúmenes |
| PAR | 102 |
| Lujo | 5229 |
| Temperatura de color | 10000 Kelvin |
| Índice de reproducción cromática (IRC) | 93 |
| Volumentage | 20 voltios |
| Ampanhelo | 1.2 Amps |
| Material | Aluminio, policarbonato (PC) |
| Clasificación de impermeabilidad | IP68 |
| Longitud del cable | 7.2 pies |
| Características especiales | 10 Color 20 Brightness, 3 Timer Modes 15Min Gradient, Memory Function, Temperature Alarm, WRGB DIY |
For more detailed product information, including energy efficiency, please refer to the official product information sheet: Hoja de información del producto EPREL
9. Garantía y soporte
For warranty information, technical support, or any inquiries regarding your SEAOURA SR-659 Aquarium LED Light, please refer to the product packaging or contact SEAOURA customer service directly. Contact details are typically provided in the included user manual or on the official SEAOURA websitio.