sdlogal L93-Y-202
sdlogal L93-Y-202 Dynamic Wireless Microphone System User Manual
Model: L93-Y-202
Introducción
Thank you for choosing the sdlogal L93-Y-202 Dynamic Wireless Microphone System. This manual provides essential information for the proper setup, operation, and maintenance of your new microphone system. Please read it thoroughly before use to ensure optimal performance and longevity of the product.
Qué incluye
- 2 micrófonos de mano
- 1 x unidad receptora
- 1 cable de audio de 6.35 mm
- 1 x cable de alimentación
- 1 x Manual de usuario
Características principales
- Clear and Pristine Sound Quality: Professional cardioid dynamic capsule for excellent, clear, pure, and full sound, effectively eliminating background noise and howling.
- Estabilidad de señal mejorada: Dual antenna design for long-distance transmission and 360-degree signal coverage, significantly improving outdoor reception up to 50-100m.
- Fácil de usar: Plug and play functionality with automatic pairing between microphones and receiver.
- Micrófonos recargables: Equipped with rechargeable 18650 batteries (included) for convenience.
- Compatibilidad con múltiples dispositivos: Connects to various audio devices with 6.35mm (1/4") or XLR ports.
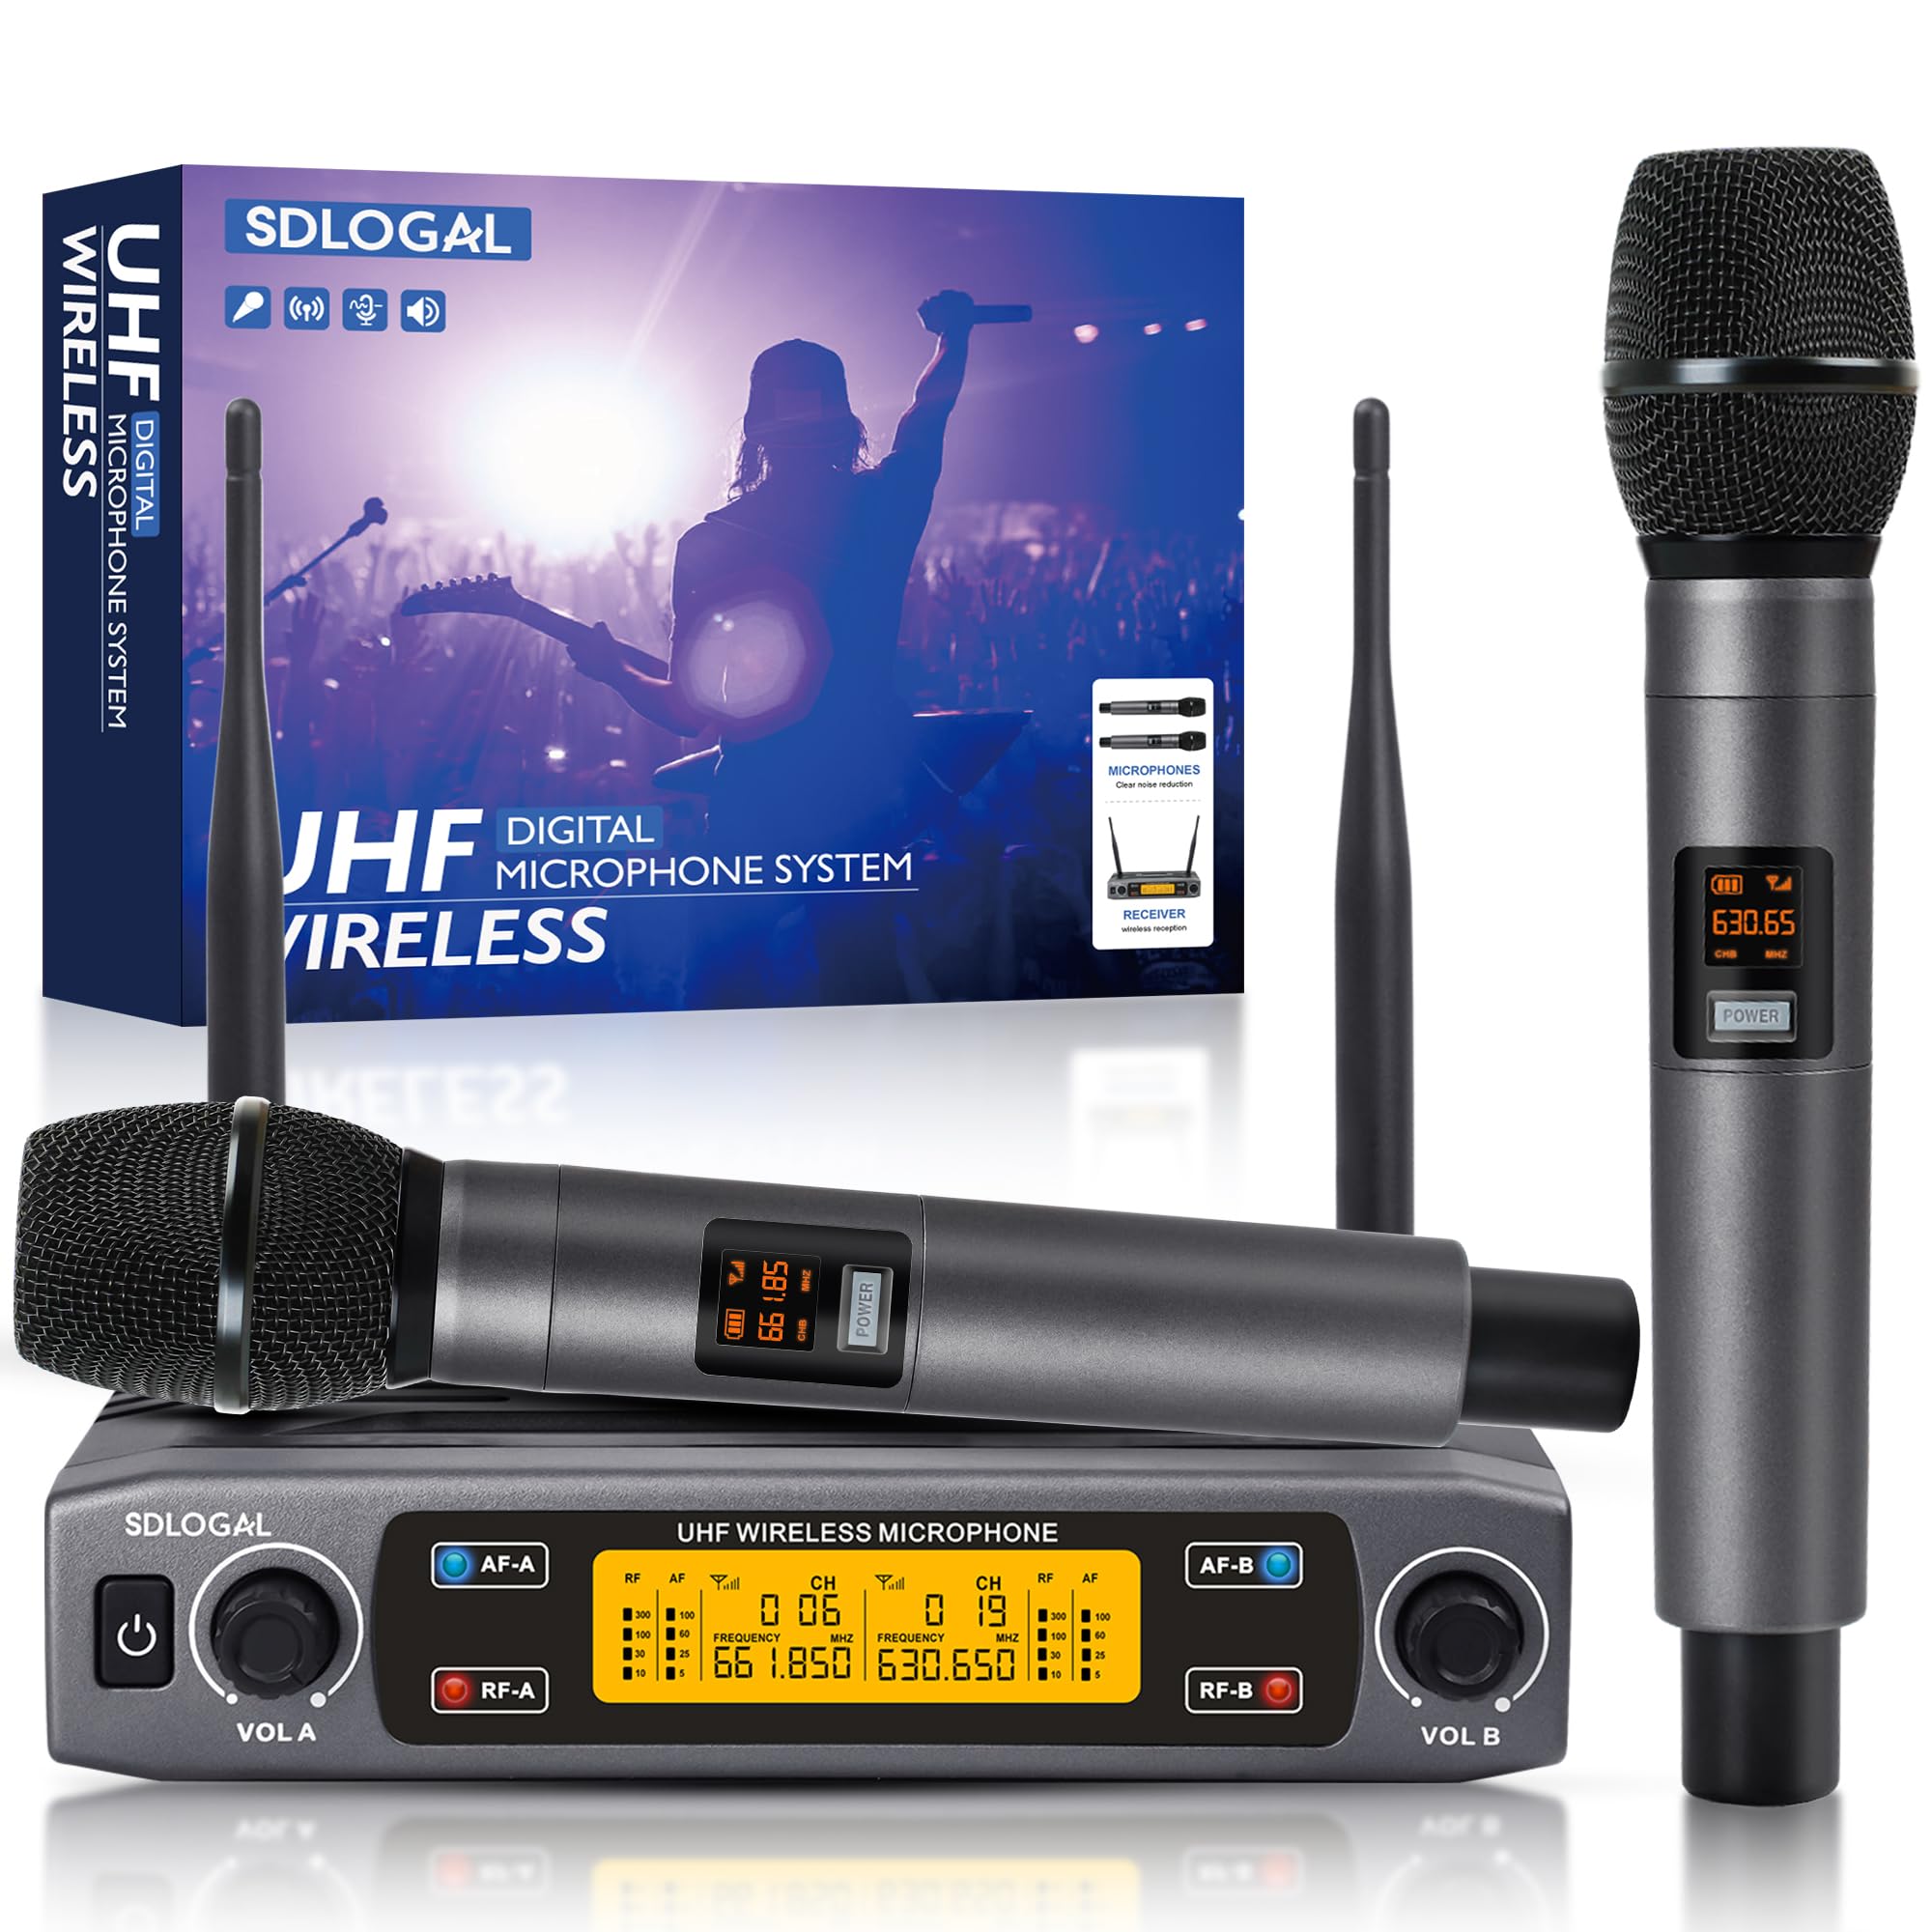
Image: The sdlogal L93-Y-202 Dynamic Wireless Microphone System, showing two handheld microphones and the receiver unit.
Vídeo: Un resumen generalview of the sdlogal L93-Y-202 microphone system and its features.
Configuración
1. Carga del micrófono
The microphones are equipped with rechargeable batteries. Before first use, ensure the microphones are fully charged. Connect the Type-C charging cable (not included, requires a 5V2A charger) to the charging port at the bottom of each microphone.
- Capacidad de la batería: 800 mAh
- Tiempo de carga: 2-3 horas
- Tiempo de trabajo: 4-5 horas

Image: Illustration of the microphone's Type-C charging port and battery specifications.
2. Conexión del receptor
Connect the receiver to your audio system (e.g., mixer, amplifier, powered speaker) using the provided 6.35mm audio cable or an XLR cable (not included).
- Conexión de energía: Connect the power cable to the receiver's power input.
- Salida de audio: Use the 6.35mm Jack or XLR outputs on the rear of the receiver to connect to your audio device.
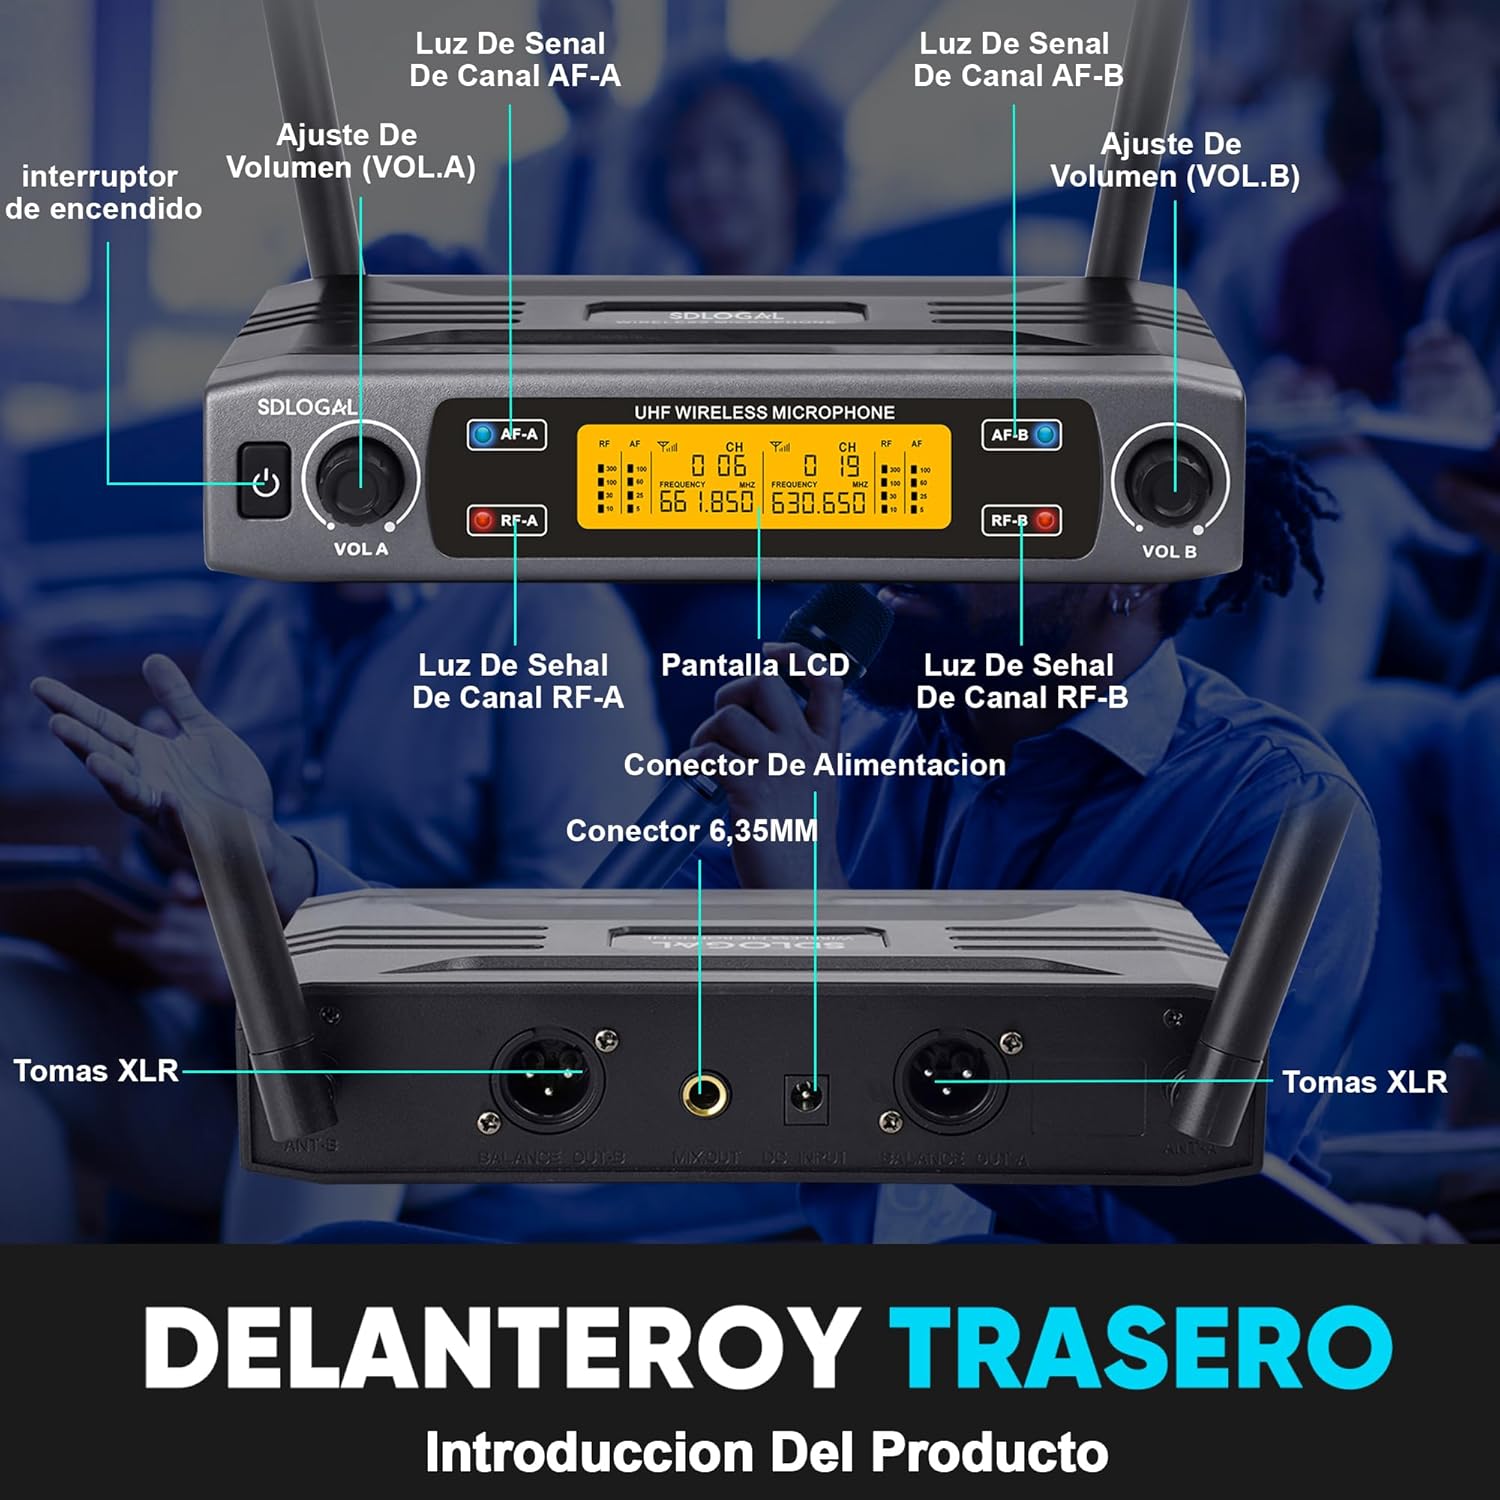
Imagen: Detallada view del panel frontal del receptor con controles y panel trasero con puertos de entrada/salida.

Image: Diagram illustrating various connection options for the receiver with different audio devices.
3. Emparejamiento inicial
The microphones and receiver are designed for automatic pairing. Simply power on the receiver and then power on each microphone. They should connect automatically. If pairing issues occur, refer to the troubleshooting section.

Image: Visual representation of the system's compatibility with various devices like sound cards, power amplifiers, and mixing consoles.
Instrucciones de funcionamiento
1. Secuencia de encendido/apagado
- Optimal Start-up Order: Audio Mixer > Audio Amplifier > Speaker > Receiver > Microphone
- Optimal Shut-down Order: Microphone > Receiver > Speaker > Audio Amplifier > Audio Mixer
2. Controles del micrófono
Each microphone features an LCD display and control buttons:
- Botón de encendido: Mantenga pulsado para encender/apagar.
- Botón de ajuste: Adjusts microphone frequency.
- Botón VOL+: Increases microphone volume.
- Botón VOL-: Decreases microphone volume.
- Pantalla LCD: Shows battery level, signal indicator, and channel.

Image: Detailed diagram of the microphone's display and control buttons.
3. Receiver Controls
The receiver unit provides overall control for the microphone system:
- Interruptor de alimentación: Enciende/apaga el receptor.
- VOL A / VOL B: Adjusts the volume for Microphone A and Microphone B independently.
- Pantalla LCD: Shows channel information, signal strength (AF-A, AF-B, RF-A, RF-B).
- Signal Lights (AF-A, AF-B, RF-A, RF-B): Indicate audio frequency and radio frequency signal presence for each channel.
4. Sound Pickup Pattern
The microphones feature a cardioid polar pattern, designed to pick up sound primarily from the front, reducing noise from the sides and rear. This is ideal for vocal performances and presentations.

Image: Diagram illustrating the 360-degree sound capture and cardioid pickup pattern of the microphone.
5. Escenarios de uso
This microphone system is versatile and suitable for various applications:
- Karaoke Parties
- Conferences and Presentations
- Bodas y eventos
- Live Performances and Shows

Image: Collage showing the microphones being used in various settings such as karaoke, conferences, weddings, and live shows.
Video: Demonstration of the microphone's sound quality and ease of use in a performance setting.
Mantenimiento
1. Limpieza
Regularly clean the microphones and receiver with a soft, dry cloth. For stubborn dirt, a slightly damp cloth can be used, ensuring no moisture enters the device openings. Do not use harsh chemicals or abrasive cleaners.
2. Cuidado de la batería
To prolong battery life, avoid fully discharging the microphones frequently. If storing for an extended period, charge the batteries to about 50% and recharge every few months.
3. Almacenamiento
Store the microphone system in a cool, dry place away from direct sunlight, extreme temperatures, and high humidity. Keep it in its original packaging or a protective case when not in use to prevent damage.
Solución de problemas
If you encounter issues with your sdlogal L93-Y-202 microphone system, please refer to the following common problems and solutions:
| Problema | Posible causa | Solución |
|---|---|---|
| No hay sonido del micrófono | Microphone off, low battery, receiver off, incorrect connection, volume too low. | Ensure microphone and receiver are powered on. Charge microphone batteries. Check all cable connections. Increase microphone and receiver volume. |
| Interferencia o ruido estático | Other wireless devices, too far from receiver, obstacles, low battery. | Move away from other wireless devices. Ensure clear line of sight to receiver. Charge microphone batteries. Try adjusting microphone frequency using the SET button. |
| El micrófono no se empareja | Receiver or microphone not in pairing mode, interference. | Power cycle both microphone and receiver. Ensure they are close to each other during power-on. Check for strong interference sources. |
| Duración corta de la batería | Old battery, frequent full discharge, continuous use. | Ensure full charge before use. Replace battery if significantly degraded. Reduce usage time or have spare charged microphones. |
Presupuesto
| Característica | Especificación |
|---|---|
| Tipo de micrófono | Dynamic, Handheld |
| Patrón polar | Cardioide |
| Tecnología de conectividad | Inalámbrico (UHF) |
| Respuesta de frecuencia | 100Hz - 20KHz |
| Distancia de transmisión | 50-100 meters (outdoor) |
| Batería del micrófono | 18650 Rechargeable Lithium Ion (included) |
| Tiempo de carga del micrófono | 2-3 horas |
| Tiempo de funcionamiento del micrófono | 4-5 horas |
| Número de canales | 2 |
| Tipo de conector | 6.35mm Jack, XLR |
| Dispositivos compatibles | Karaoke machine, Mixers, Amplifiers, Powered Speakers |
| Dimensiones del producto | 35.9 x 35.1 x 6.9 cm; 1.07 kg (Package) |
Garantía y soporte
This product comes with a standard manufacturer's warranty. Please refer to your purchase documentation for specific warranty terms and conditions. For technical support, troubleshooting assistance, or warranty claims, please contact your retailer or the sdlogal customer service department.
Keep your purchase receipt as proof of purchase for any warranty-related inquiries.
Documentos relacionados - L93-Y-202
 |
Auriculares inalámbricos SDLOGAL SDL-718: Manual de usuario y especificaciones Manual de usuario completo de los auriculares inalámbricos SDLOGAL SDL-718. Encuentre información detallada sobre configuración, funcionamiento, normas de seguridad, especificaciones técnicas y cumplimiento de la FCC. |
 |
JOIN JOY Karaoke Machine KM001 Quick Start Guide Quick start guide for the JOIN JOY KM001 portable karaoke machine, covering setup, controls, features, safety instructions, and warranty information. |
 |
Interruptores termomagnéticos Legrand DPX³ 250 - Hoja de datos técnicos Especificaciones técnicas completas para los interruptores termomagnéticos Legrand DPX³ 250 y los interruptores sin disparo DPX³-I 250, que detallan el rendimiento eléctrico, la instalación, las dimensiones y el cumplimiento de las normas IEC/EN. |
 |
How to Change Fuel Filter on Mercedes-Benz C-Class Saloon (W202) - AUTODOC Guide Step-by-step guide from AUTODOC on how to replace the fuel filter for a Mercedes-Benz C-Class Saloon (W202). Includes tools needed, safety precautions, and detailed instructions. |
 |
Arrancador compacto Danfoss VLT MCD 202: Manual de instrucciones y especificaciones Instrucciones de funcionamiento completas, especificaciones, diagramas de cableado y guía de solución de problemas para el arrancador compacto Danfoss VLT MCD 202. Aprenda sobre la instalación, los ajustes y las características de este dispositivo de control de motor. |
 |
Guía de inicio rápido del BOSS RE-202 Space Echo Una guía de inicio rápido para el BOSS RE-202 Space Echo, que detalla descripciones de paneles, combinaciones de modos, cómo guardar y recuperar configuraciones de memoria y cómo colocar patas de goma. |
Ask a question about this manual
Ask about setup, troubleshooting, compatibility, parts, safety, or missing instructions. Manuals+ will review the question and use this page’s manual context to help answer it.