1. Introducción
The VOOPEAK Trail Camera Solar Panel (Model BC643) is designed to provide continuous power to your trail camera, reducing the need for frequent battery changes. This solar panel features a 2200mAh rechargeable battery, IP66 waterproof rating, and is compatible with VOOPEAK trail cameras and other 6V/2A outdoor security cameras. This manual provides detailed instructions for the proper installation, operation, and maintenance of your solar panel.

Image 1.1: VOOPEAK Trail Camera Solar Panel with mounting base.
This image shows the VOOPEAK Trail Camera Solar Panel, a black rectangular panel with a textured surface, attached to a black circular mounting base via an adjustable arm. The panel is angled upwards, indicating its function to capture sunlight.
2. Contenido del paquete
Verifique que todos los artículos enumerados a continuación estén incluidos en su paquete:
- Panel solar (x1)
- Soporte de pared (x1)
- Tornillos (x3)
- Cable de carga USB-C (x1)
- Manual de instrucciones (x1)
Note: The package does not include a Type-C charging block.
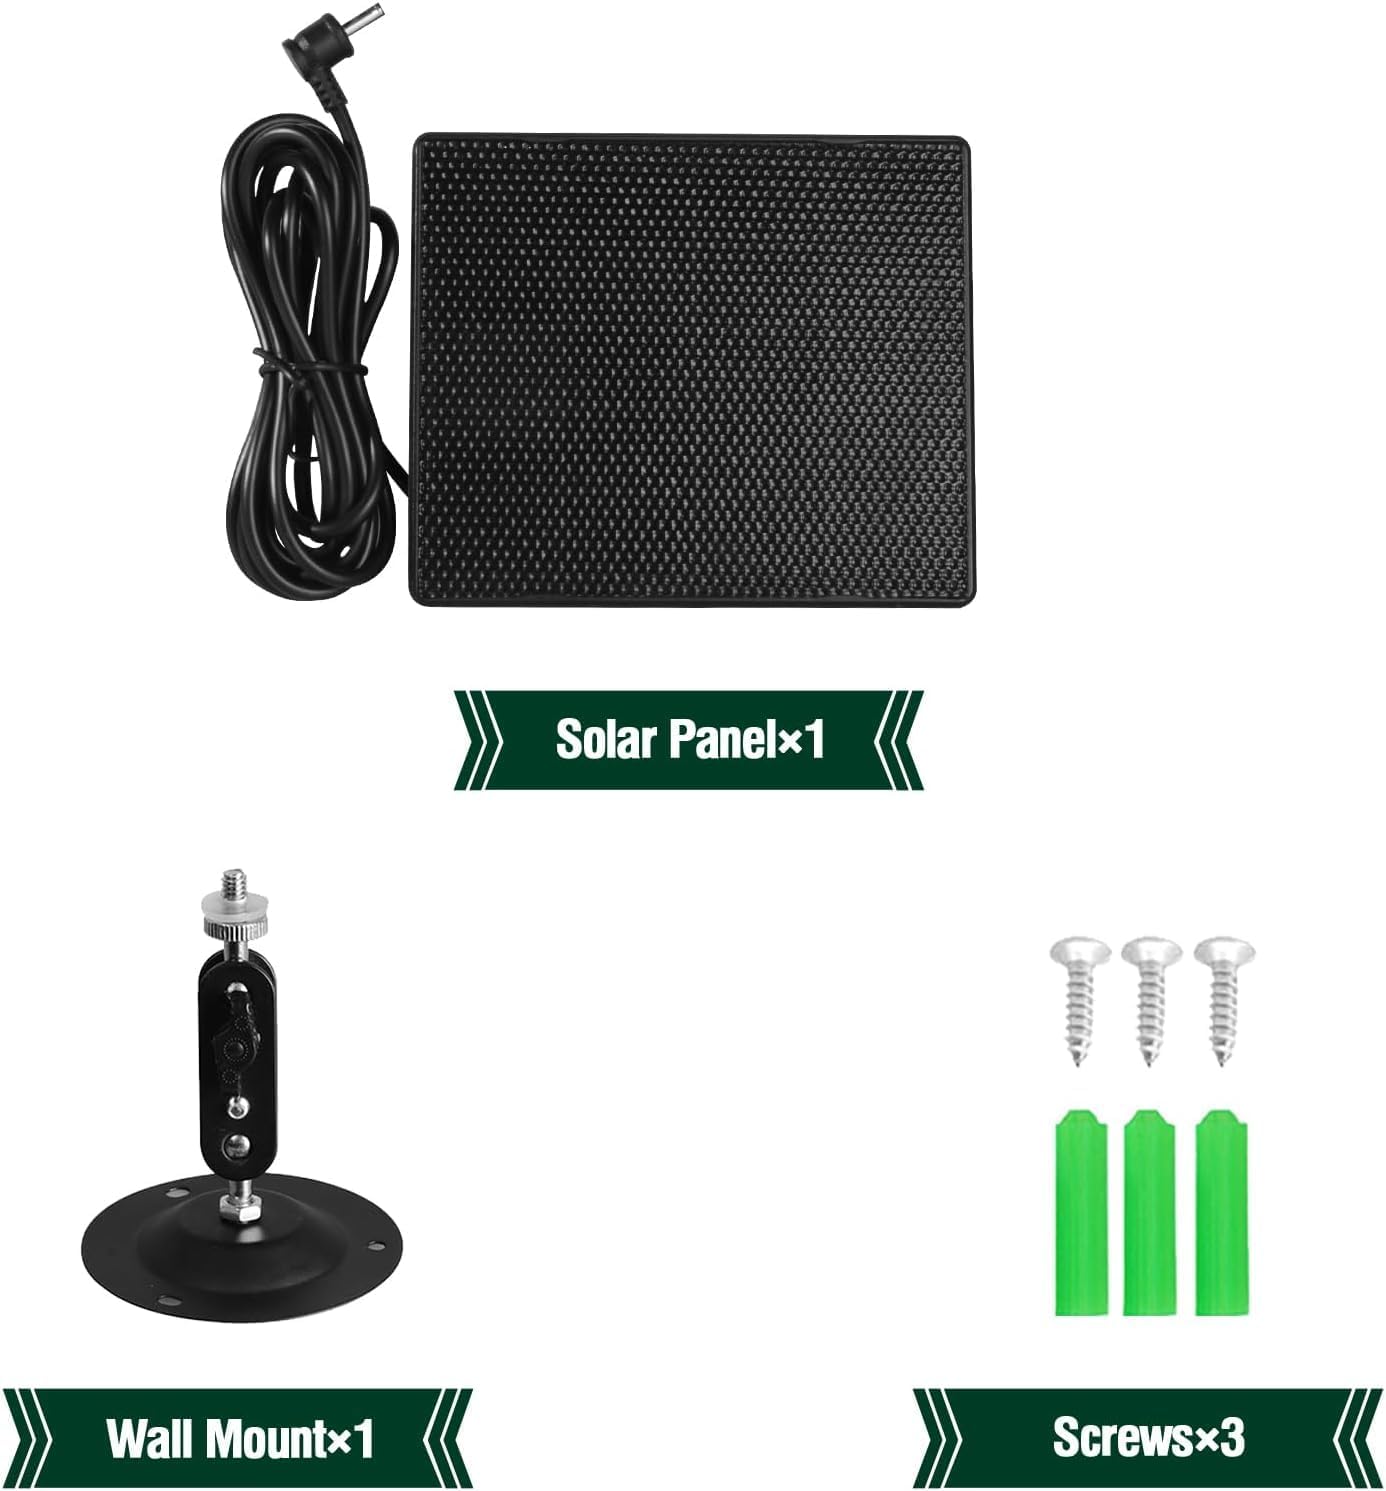
Image 2.1: Contents of the VOOPEAK Solar Panel package.
This image displays the VOOPEAK Solar Panel and its accompanying accessories laid out on a surface. Visible items include the solar panel itself, a wall mount, three screws, and an instruction manual. A charging cable is also shown connected to the solar panel.
3. Configuración e instalación
Follow these steps to set up and install your VOOPEAK Trail Camera Solar Panel:
- Carga inicial: Before first use, fully charge the solar panel's internal 2200mAh battery using a Type-C charger (not included). A full charge typically takes approximately four hours.
- Montaje del panel solar:
- Attach the wall mount to a stable surface (e.g., a tree or wall) using the provided screws. Ensure the mounting location allows for maximum sunlight exposure throughout the day.
- Secure the solar panel to the wall mount. The adjustable design allows you to position the panel for optimal sun exposure.
- Alternatively, use the included strap to secure the solar panel to a tree or pole.
- Connecting to the Trail Camera:
- Locate the DC input port on your trail camera.
- Connect the charging cable from the solar panel to the DC input interface of your trail camera. Ensure a secure connection.
- Activate the output switch on the solar panel to begin supplying power to the camera.
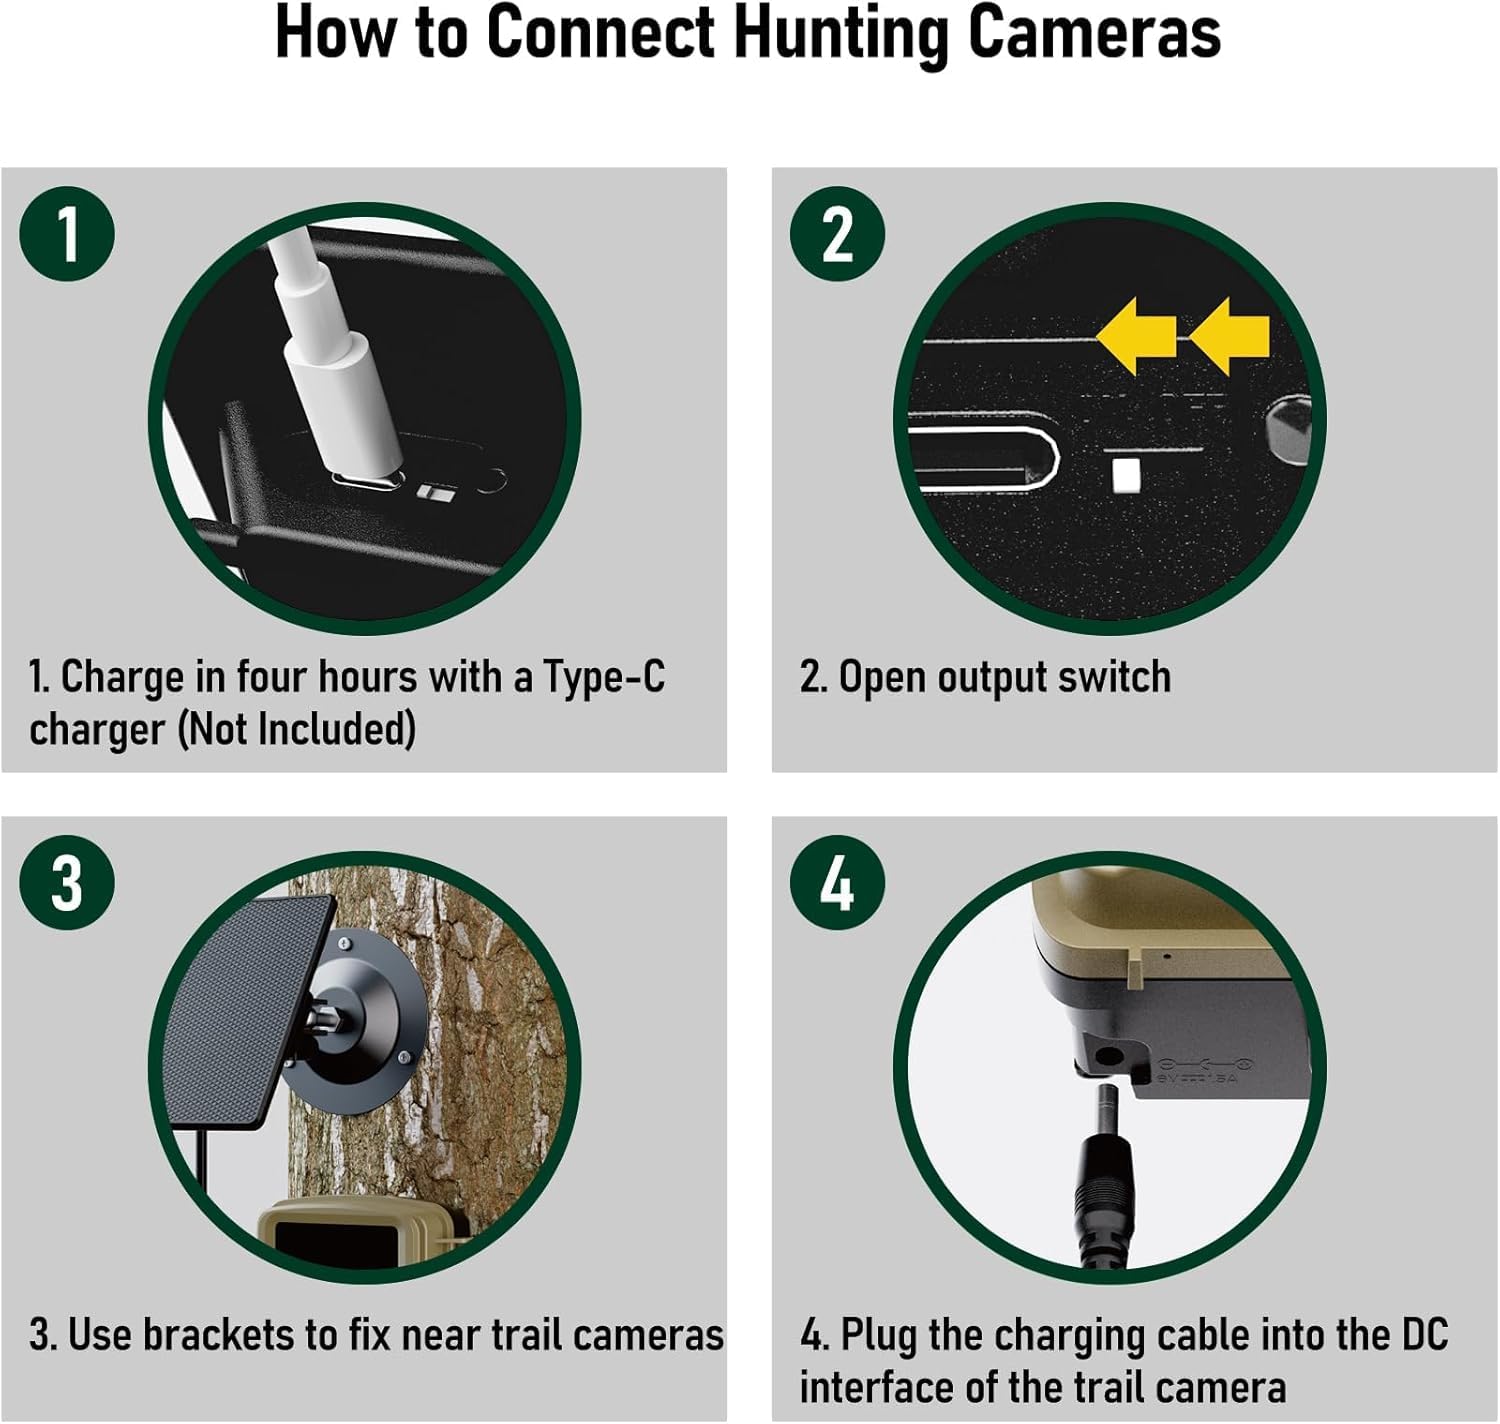
Image 3.1: Step-by-step guide for connecting the solar panel to a trail camera.
This image illustrates four steps for connecting the solar panel to a hunting camera. Step 1 shows charging the panel via a Type-C port. Step 2 indicates opening the output switch. Step 3 depicts using brackets to fix the panel near the trail camera. Step 4 shows plugging the charging cable into the DC interface of the trail camera.
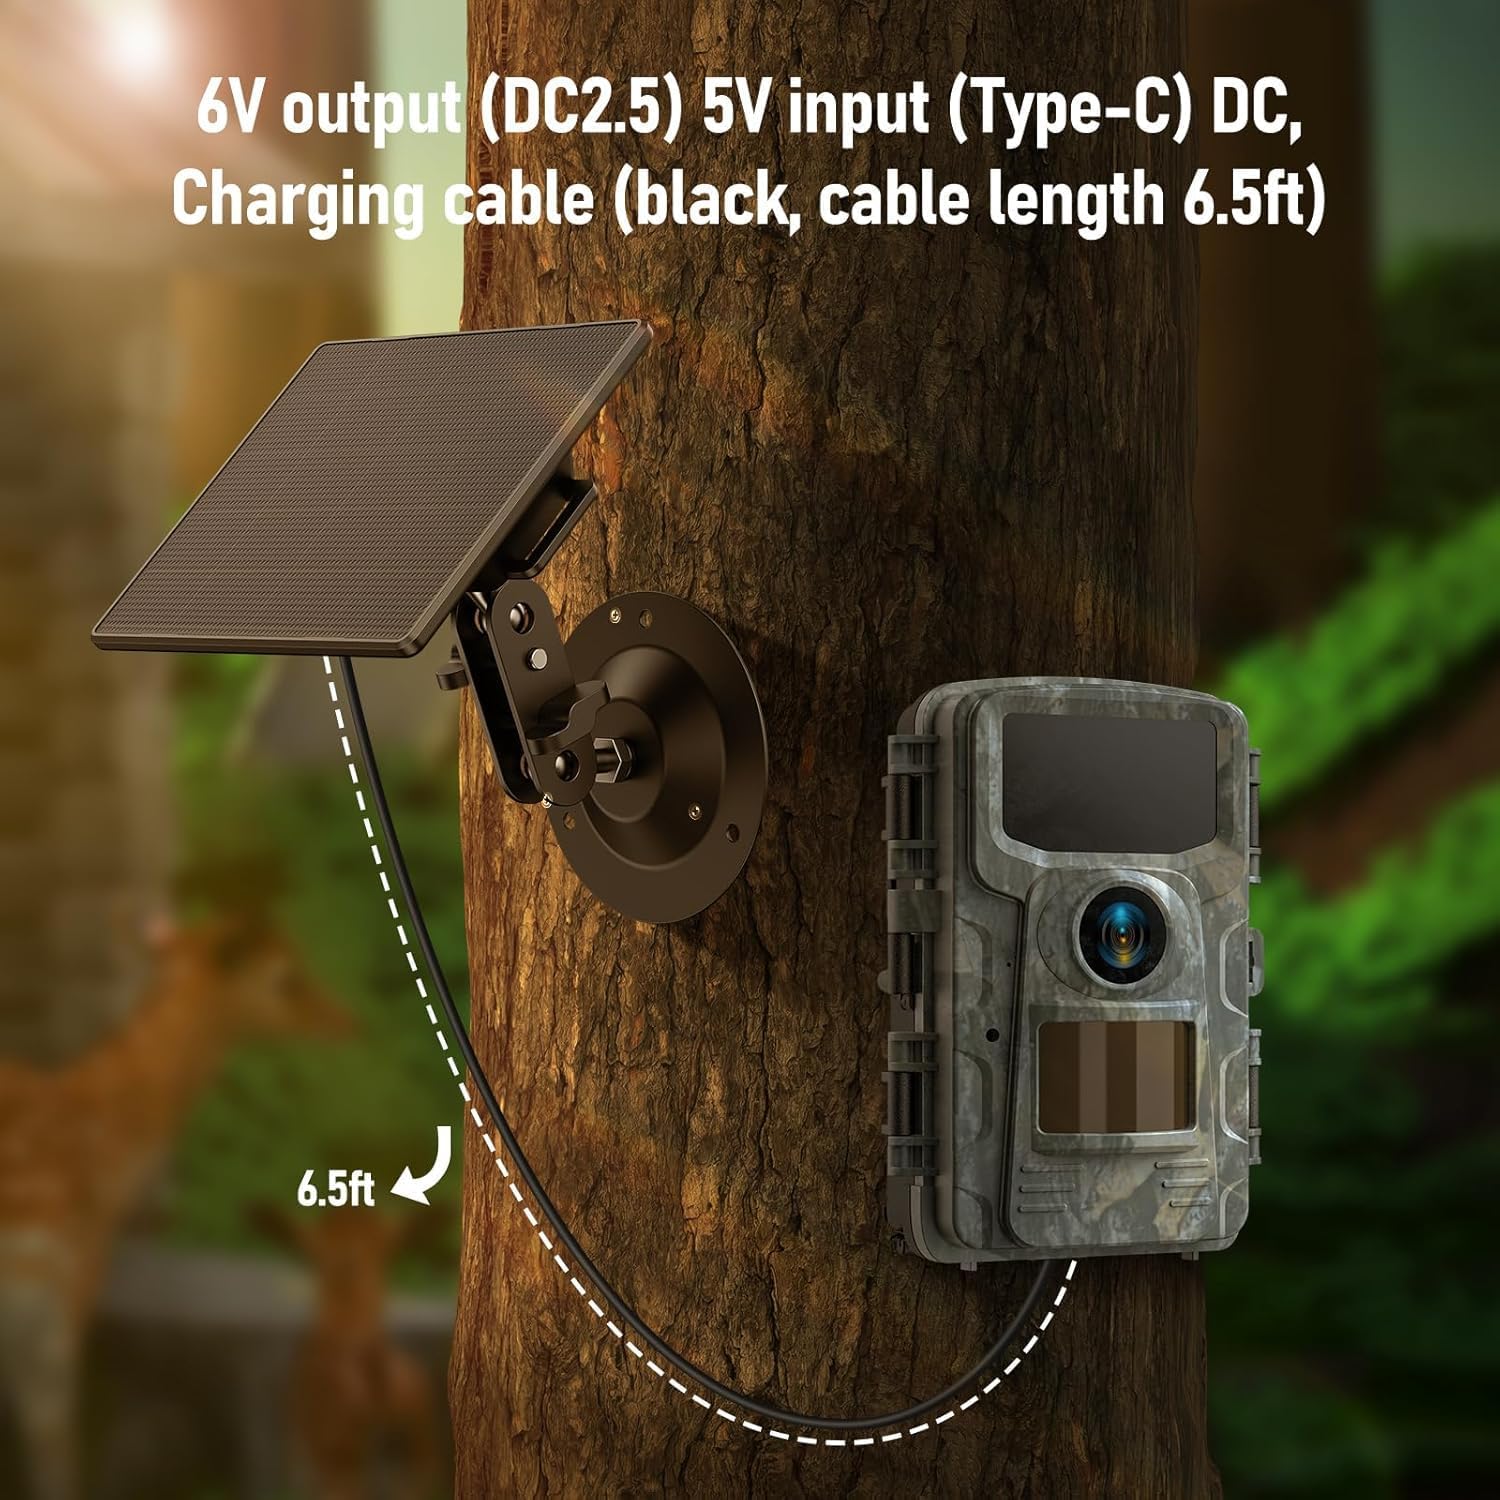
Image 3.2: VOOPEAK Solar Panel and trail camera mounted on a tree.
This image shows the VOOPEAK Solar Panel mounted on a tree, connected via a black cable to a camouflage-patterned trail camera also mounted on the tree. The cable length is indicated as 6.5ft, and the output is 6V (DC2.5) with a 5V input (Type-C) DC.
Nota importante sobre la compatibilidad:
While designed for broad compatibility, some users have reported that the rubber insulation on the solar panel charging cable's plug may be too large to fit into the charging port of certain trail camera models. Ensure the plug fits securely before final installation. If you encounter this issue, please contact support.
4. Instrucciones de funcionamiento
Once installed and connected, the VOOPEAK Trail Camera Solar Panel operates automatically:
- The solar panel continuously charges its internal 2200mAh battery using sunlight.
- The internal battery then supplies stable 6V/2A power to your connected trail camera.
- In conditions of low light or at night, the internal battery will power the camera, ensuring uninterrupted operation.
- The red indicator light on the solar panel indicates charging status.
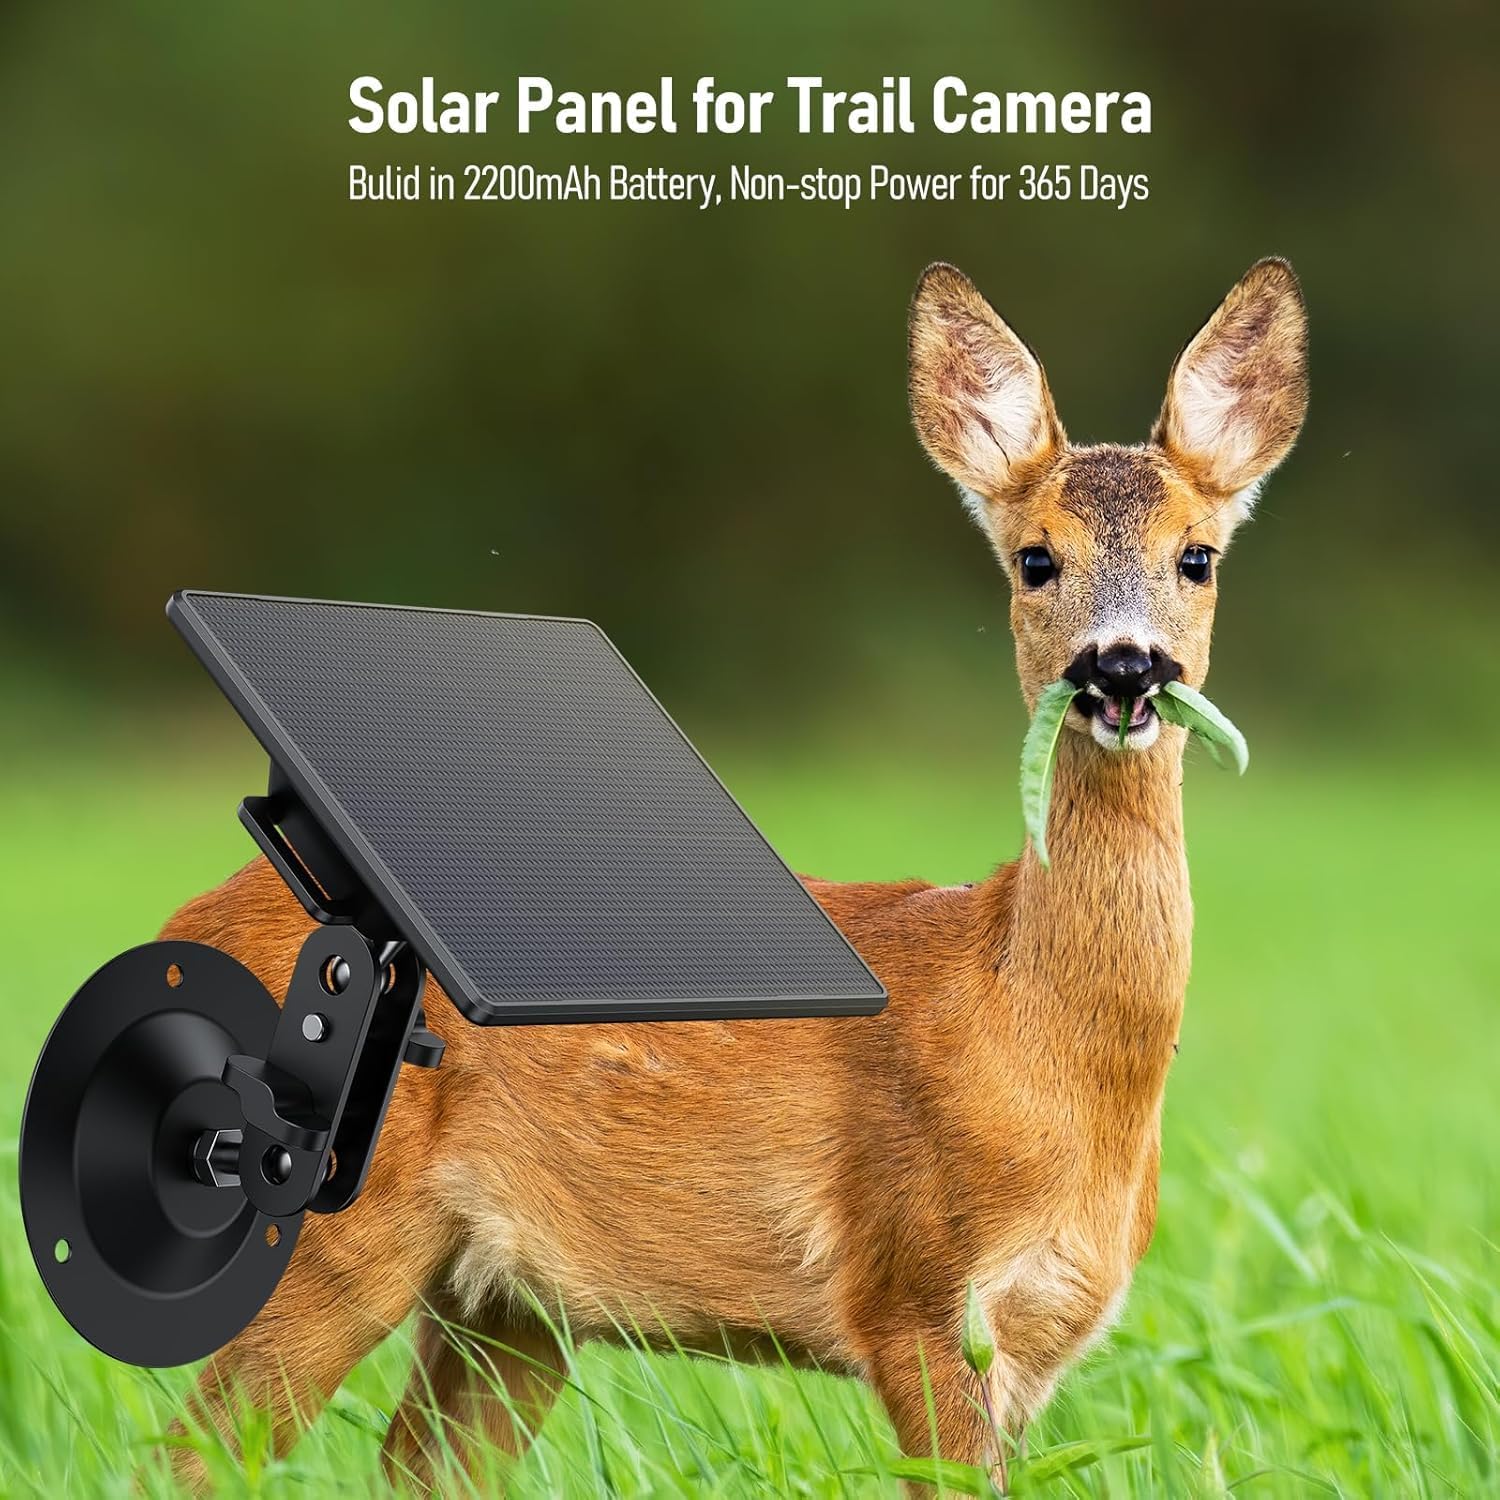
Image 4.1: Solar panel providing power to a trail camera in an outdoor setting.
This image shows the VOOPEAK Solar Panel mounted on a tree, connected to a trail camera. A deer is visible in the foreground, suggesting the camera's purpose for wildlife monitoring. The text overlay indicates "Solar Panel for Trail Camera" and "Built-in 2200mAh Battery, Non-stop Power for 365 Days".
5. Especificaciones
| Característica | Detalle |
|---|---|
| Marca | VOOPEAK |
| Número de modelo | BC643 |
| Material | Vidrio templado |
| Eficiencia | Alta eficiencia |
| Capacidad de la batería | 2200 mAh |
| Salida DC | 6 V / 2 A (máx.) |
| Tipo de entrada-C | 5 V 1 A |
| Clasificación de impermeabilidad | IP66 |
| Dimensiones del producto | 4 x 1.7 x 6 pulgadas |
| Peso del artículo | 11.3 onzas |
| Tipo de montaje | Montaje en árbol |

Image 5.1: Diagram of VOOPEAK Solar Panel ports and specifications.
Esta imagen proporciona una visión detallada view of the solar panel's ports, including Input Type-C, Output Switch, Red indicator light, and DC Interface (3.5mm connector). A table below lists key specifications: Input Type-C (5V 1A), DC Output (6V 2A / Max), Capacity (2200mAh), Waterproof (IP66), and Solar panels Size (108.2 * 92).
6. Mantenimiento
To ensure optimal performance and longevity of your solar panel:
- Limpiar el panel: Limpie periódicamente la superficie del panel solar con un paño suave y seco.amp Paño para eliminar el polvo, la suciedad o los residuos que puedan obstruir la absorción de la luz solar.
- Comprobar conexiones: Inspeccione periódicamente todas las conexiones de cables para asegurarse de que estén seguras y libres de corrosión o daños.
- Monitorear el estado de la batería: Although the solar panel provides continuous power, it is advisable to occasionally check your trail camera's battery status, especially during prolonged periods of low sunlight.
- Protección ambiental: The IP66 waterproof rating protects against rain, snow, and sandstorms. However, avoid submerging the device in water.

Image 6.1: VOOPEAK Solar Panel demonstrating IP66 waterproof capability.
This image shows the VOOPEAK Solar Panel mounted on a rock in rainy conditions, with water droplets visible on its surface. The text "IP66 Waterproof" and "Made of hard material, can adapt to a variety of bad weather" highlights its durability and weather resistance.
7. Solución de problemas
If you encounter issues with your VOOPEAK Trail Camera Solar Panel, refer to the following common solutions:
- Sin salida de potencia:
- Ensure the solar panel's internal battery is charged. Pre-charge it via USB-C if necessary.
- Verify the output switch on the solar panel is in the "ON" position.
- Check the connection cable between the solar panel and the trail camera for damage or loose connections.
- Slow Charging / Insufficient Power:
- Relocate the solar panel to an area with direct and unobstructed sunlight for a longer duration.
- Clean the solar panel surface to remove any dirt or debris that might be blocking sunlight.
- Ensure the panel is angled correctly towards the sun.
- Cable Plug Incompatibility:
- If the charging cable's plug does not fit your trail camera's port due to rubber insulation, do not force it. This may indicate a compatibility issue with specific camera models.
- Contact VOOPEAK customer support for assistance or to inquire about alternative cables/adapters.
8. Garantía y soporte
For additional information, professional support, or to extend your warranty:
- Soporte por correo electrónico: Contact VOOPEAK directly at Support@voopeak.com.
- Extensión de garantía: Scan the QR code provided in the product packaging or on the device itself to extend your warranty to 24 months.
Please refer to the QR codes on the inside of the camera's battery compartment for direct links to support and warranty registration.