1. Introducción
This manual provides detailed instructions for the safe and efficient operation, maintenance, and troubleshooting of your Hisense 50 Pint 3-Speed Dehumidifier with Built-in Pump, Model HT5021KP. This appliance is designed to remove excess moisture from the air in spaces up to 4,500 sq.ft, helping to create a more comfortable and healthy indoor environment.
2. Información de seguridad
IMPORTANT SAFETY INSTRUCTIONS: Read all instructions before using this appliance.
- Conecte siempre el deshumidificador a un tomacorriente de tres clavijas con conexión a tierra. No retire la clavija de conexión a tierra.
- No utilice un adaptador.
- No utilice un cable de extensión.
- Desenchufe el deshumidificador antes de limpiarlo o realizar cualquier mantenimiento.
- Do not operate the dehumidifier if the power cord is damaged.
- Mantenga el deshumidificador alejado de fuentes de calor y de la luz solar directa.
- Ensure the dehumidifier is placed on a level, stable surface to prevent tipping.
- No bloquee las rejillas de entrada y salida de aire.
- Este aparato es solo para uso residencial.
3. Producto terminadoview
3.1. Componentes
The Hisense HT5021KP dehumidifier features a compact design with a front air intake and top air exhaust. Key components include the control panel, removable water bucket, and connections for continuous drainage.

Figura 3.1: Frente view of the Hisense 50 Pint Dehumidifier.
3.2. Panel de control
The intuitive LED digital control panel allows for easy adjustment of settings and monitoring of the dehumidifier's status. It includes buttons for Power, Mode, Fan Speed, Timer, and indicators for Clean Filter and Empty Bucket.
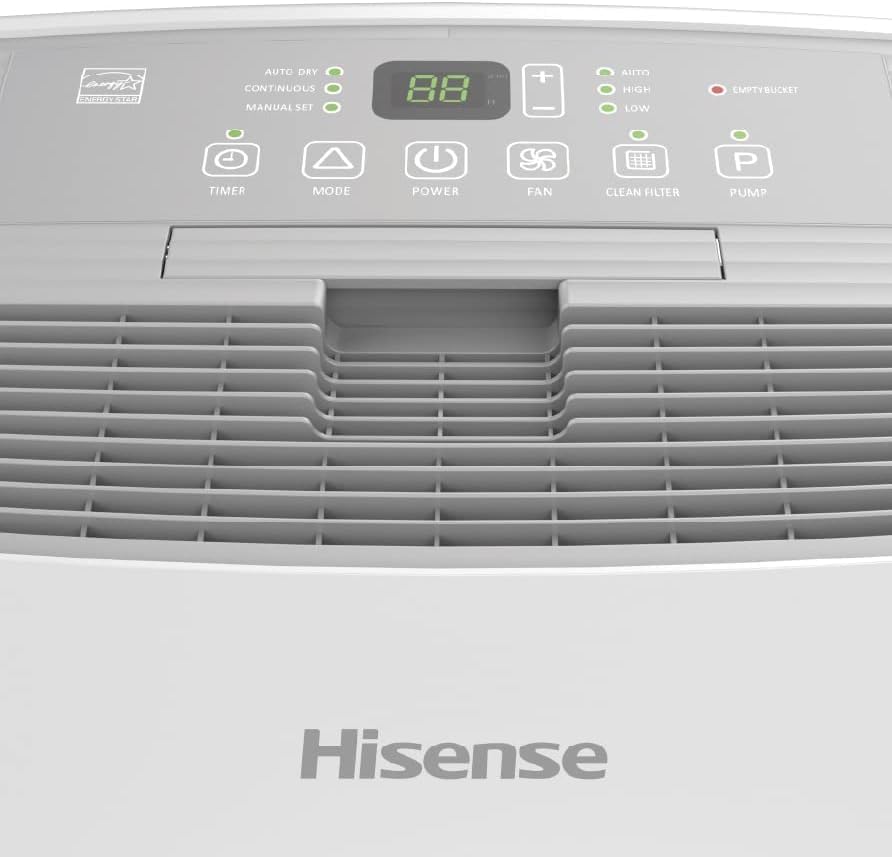
Figure 3.2: Close-up of the dehumidifier's control panel.
3.3. Trasero View and Drainage Port
The rear of the unit houses the air filter access and the continuous drainage port, which allows for direct water discharge via a hose, bypassing the internal bucket.

Figura 3.3: Posterior view showing the air filter and drainage port.
4. Configuración
4.1 Colocación
Place the dehumidifier in a location where the humidity is highest and air circulation is good. Ensure there is at least 8 inches of space around the unit for proper airflow. Avoid placing it near heat-generating appliances or in direct sunlight.
4.2. Continuous Drainage Setup
For continuous operation without needing to empty the bucket, connect a standard garden hose (not included) to the continuous drainage port located on the side/rear of the unit. The built-in pump allows the water to be discharged to a sink or drain, even if it's at a higher elevation.
Para configurar el drenaje continuo:
- Locate the drainage port on the side of the dehumidifier.
- Attach a standard garden hose to the port, ensuring a secure connection to prevent leaks.
- Direct the other end of the hose to a suitable drain, such as a floor drain, utility sink, or basement window. Ensure the hose is sloped downwards to allow for gravity drainage, or if using the pump, ensure the hose is not kinked.
- Verify that the hose is not obstructed and water can flow freely.

Figura 4.1: Lado view illustrating the drainage connection point.
5. Instrucciones de funcionamiento
5.1. Encendido y apagado
Presione el FUERZA Botón en el panel de control para encender o apagar la unidad.
5.2. Modos de funcionamiento
Presione el MODO Botón para recorrer los modos de funcionamiento disponibles:
- Modo de secado automático: The unit automatically adjusts the dehumidification level based on the current room conditions to maintain optimal humidity.
- Modo continuo: The unit runs continuously, regardless of the humidity level, to maintain a consistent dry environment. This is ideal for very damp condiciones o cuando se utiliza drenaje continuo.
- Modo de configuración manual: Allows you to manually set your desired humidity level. The unit will operate until the set humidity is reached, then cycle on and off to maintain it.
5.3. Velocidades del ventilador
Presione el FAN button to select the desired fan speed:
- Alto: Provides maximum moisture removal and rapid dehumidification.
- Bajo: Offers quieter, energy-efficient operation and gentle air circulation.
- Auto: Automatically adjusts fan speed based on the current humidity level and room conditions for efficient operation.
5.4. Setting Humidity Level (Manual Set Mode)
In Manual Set Mode, use the + y - buttons to adjust the desired relative humidity (RH) percentage. The display will show the set humidity level.
5.5. Función de temporizador
Presione el MINUTERO button to set a programmable 24-hour on/off timer. Follow the on-screen prompts to set the desired duration for the unit to turn on or off automatically.
6. Mantenimiento
6.1. Vaciado del cubo de agua
Cuando el cubo de recolección de agua esté lleno,
Ask a question about this manual
Ask about setup, troubleshooting, compatibility, parts, safety, or missing instructions. Manuals+ will review the question and use this page’s manual context to help answer it.