1. Introducción
Gracias por la compraasing the KOORUI KR10G Monitor Arm. This manual provides detailed instructions for assembly, operation, maintenance, and troubleshooting to ensure safe and optimal use of your monitor arm. Please read this manual thoroughly before installation and keep it for future reference.
The KOORUI KR10G is designed to enhance your workspace by providing flexible positioning for your monitor, improving ergonomics, and freeing up valuable desk space. It supports monitors from 13 to 27 inches with a maximum load capacity of 22.0 lbs (10 kg).
2. Contenido del paquete
Please verify that all components are present and undamaged before proceeding with installation. If any parts are missing or damaged, please contact KOORUI customer support.
- Conjunto del brazo del monitor
- Escritorio Clamp Base
- Base con ojal
- Placa VESA
- Kit de hardware (tornillos, arandelas, llaves Allen)
- Clips de gestión de cables
- Manual de usuario

Image: Main components of the KOORUI KR10G Monitor Arm, showing the arm, desk clampy opciones de montaje con ojales.
3. Especificaciones del producto
| Característica | Especificación |
|---|---|
| Modelo | KR10G |
| Tamaño de monitor compatible | 13 - 27 pulgadas |
| Capacidad de carga | Hasta 22.0 libras (10 kg) |
| Compatibilidad VESA | 75 x 75 mm, 100 x 100 mm |
| Ángulo de inclinación | ±72° |
| Ángulo de giro | 90° (izquierda/derecha) |
| Rotación | 360° |
| Longitud máxima del brazo | 12.6 pulgadas (320 mm) |
| Ajuste máximo de altura | 16.9 pulgadas (430 mm) |
| Opciones de montaje | Escritorio ClampBase de ojal |
| Escritorio Clamp Espesor | 0.4 - 2.0 pulgadas (10 - 50 mm) |
| Grosor de la base del ojal | 0.4 - 2.0 pulgadas (10 - 50 mm) |
| Diámetro del orificio del ojal | Mínimo 0.4 pulgadas (10 mm) |
| Material | Metal |
| Color | Negro |

Image: The VESA plate and adjustment screws for monitor attachment.

Image: Illustration demonstrating how proper monitor positioning with the arm can improve posture and reduce strain.
4. Configuración e instalación
Before beginning installation, ensure your desk is sturdy enough to support the monitor arm and your monitor's weight. Clear your workspace and gather all necessary tools.
4.1 Important Notice Regarding Arm Rotation
Tenga en cuenta lo siguiente:
- Screw Direction: The direction of the screws in the connecting part may differ from the images in the instruction manual. This is a normal adjustment made during shipping to accommodate packaging and does not affect usage. Please proceed with confidence.
- Arm Rotation Stiffness: The rotating connection part may feel stiff and not rotate easily by hand before a monitor is attached. This is intentional to prevent unintended rotation during installation. Once the monitor is securely mounted, the arm will rotate smoothly.
Image: Diagram illustrating the connecting part of the monitor arm, with a note about screw direction and initial rotation stiffness.
4.2 Choosing a Mounting Option
The KOORUI KR10G offers two installation methods: Desk Clamp y base con ojales. Elija el método que mejor se adapte a su escritorio.

Image: Visual comparison of the C-clamp mounting option (left) and the grommet base mounting option (right).
4.3 Escritorio Clamp Instalación
This method is suitable for desks with a thickness between 0.4 - 2.0 inches (10 - 50 mm).
- Fije el escritorio clamp to the main pole of the monitor arm.
- Posiciona el clamp en el borde de tu escritorio.
- Apriete el clamp Atornille el brazo hasta que esté firmemente fijado al escritorio. Asegúrese de que esté estable y no se tambalee.
4.4 Instalación de la base del ojal
This method requires a pre-drilled hole in your desk with a diameter of at least 0.4 inches (10 mm) and is suitable for desk thicknesses between 0.4 - 2.0 inches (10 - 50 mm).
- Desmontar el escritorio clamp from the main pole and attach the grommet base.
- Inserte el poste principal a través del orificio del ojal en su escritorio.
- From underneath the desk, secure the grommet base using the provided hardware. Tighten firmly to ensure stability.
4.5 Conexión del monitor
The monitor arm supports VESA patterns of 75x75mm and 100x100mm.
- Attach the VESA plate to the back of your monitor using the appropriate screws from the hardware kit. Ensure the plate is securely fastened.
- Deslice con cuidado el monitor (con la placa VESA adjunta) sobre el cabezal VESA del brazo.
- Secure the monitor to the arm using the provided thumbscrews or locking mechanism.

Image: The KOORUI KR10G Monitor Arm with a monitor mounted, illustrating the final setup.
5. Operating and Adjusting the Monitor Arm
The KOORUI KR10G monitor arm offers extensive adjustability to achieve your optimal viewing angle and ergonomic setup.
5.1 Ajuste de altura
The arm can be adjusted vertically along the main pole. Loosen the collar clamp on the main pole, adjust the arm to the desired height (up to 16.9 inches / 430 mm), and then tighten the clamp firmemente para asegurarlo.
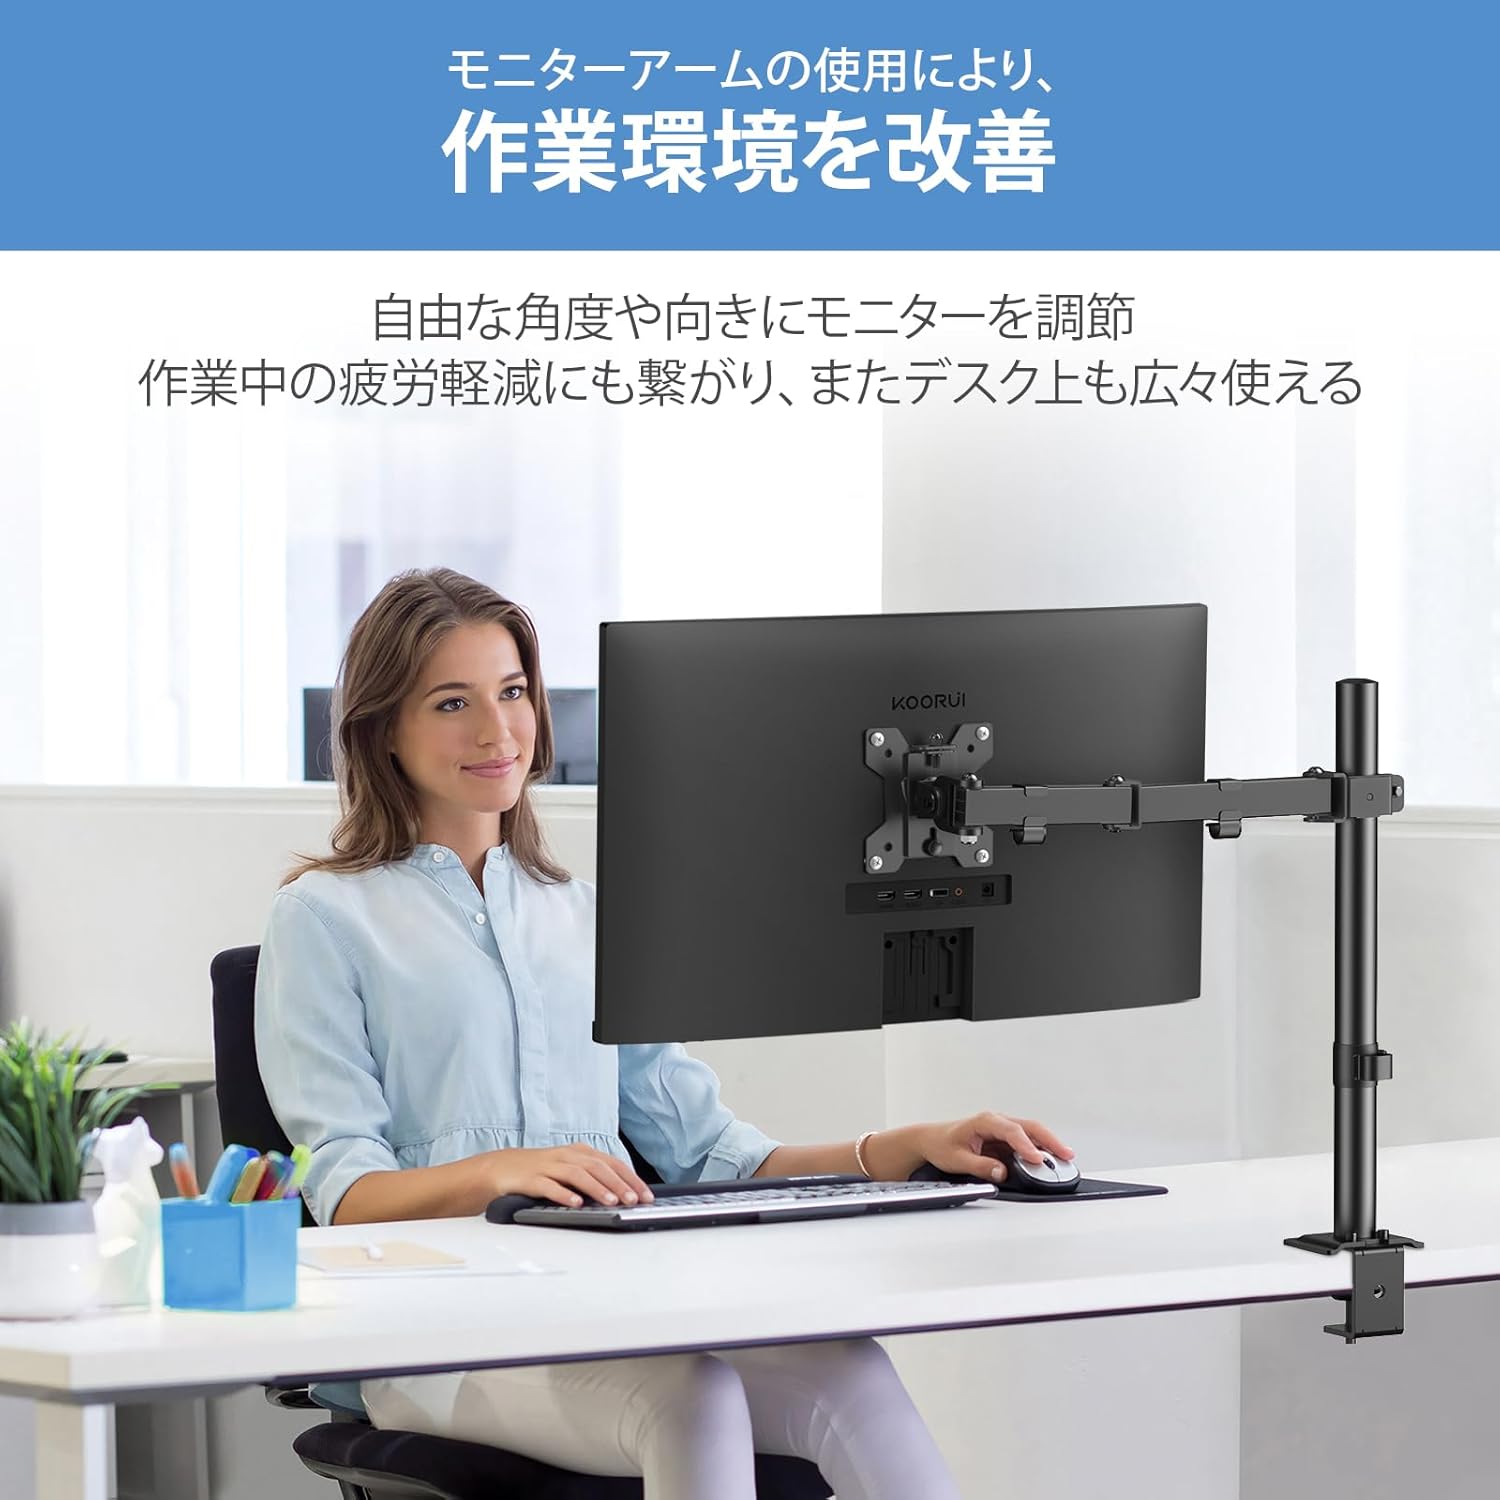
Image: Diagram showing the vertical height adjustment range of the monitor arm along the main pole.
5.2 Inclinación, giro y rotación
The monitor arm allows for multi-directional adjustments:
- Inclinación: Adjust the monitor screen ±72° (up/down) to reduce glare and find a comfortable viewángulo de ing.
- Girar: Rotate the monitor 90° left or right at the arm joint.
- Rotación: Gire el monitor 360° desde orientación horizontal a vertical.
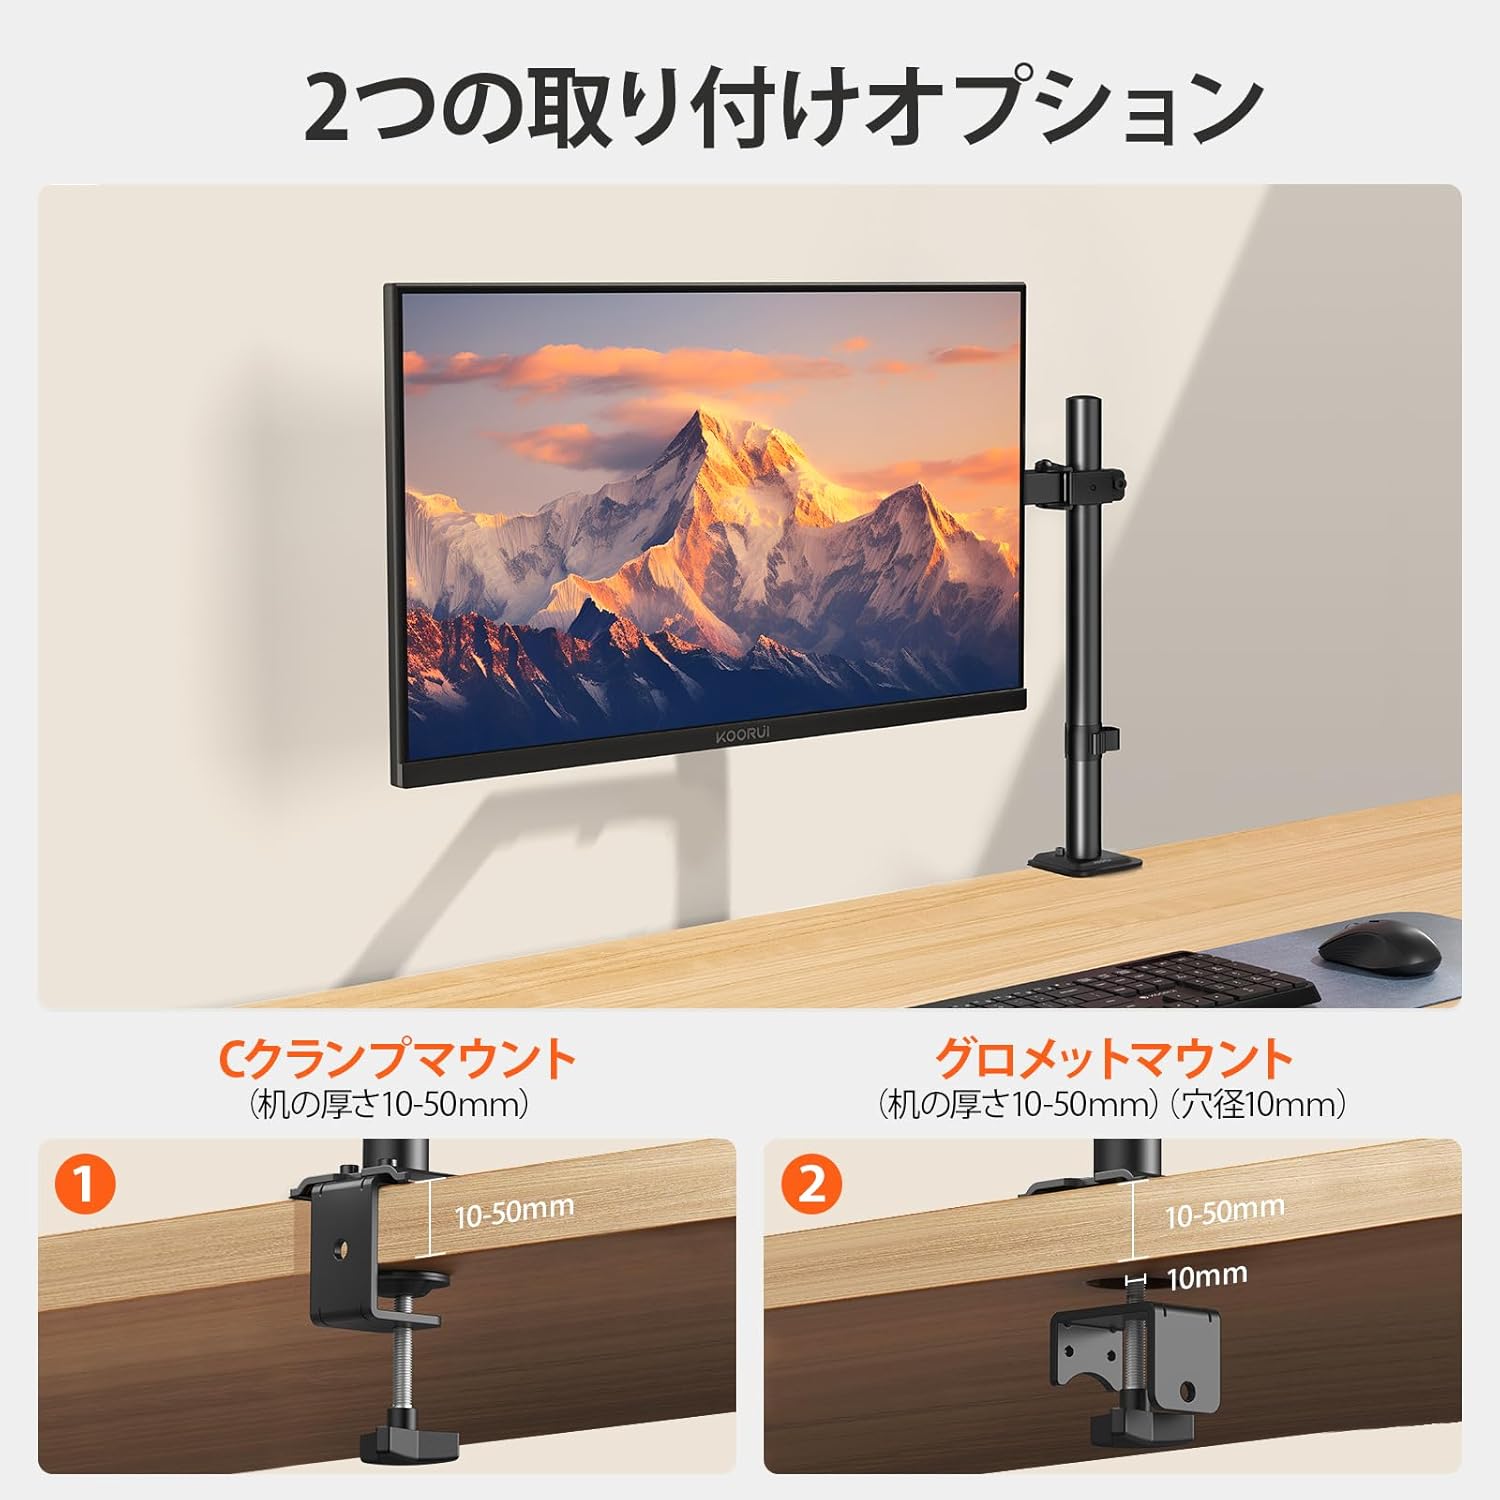
Image: Illustrations demonstrating the full range of motion: tilt (±72°), swivel (90° left/right), and 360° rotation.
5.3 Gestión de cables
Utilize the integrated cable clips along the arm to route and organize your monitor cables. This helps maintain a clean and clutter-free workspace.

Image: The monitor arm with cables neatly routed through the integrated cable management clips.
6. Mantenimiento
Regular maintenance ensures the longevity and safe operation of your KOORUI KR10G monitor arm.
- Limpieza: Limpie el brazo con un paño suave.amp paño. Evite limpiadores abrasivos o disolventes que puedan dañar el acabado.
- Comprobación de estanqueidad: Revise periódicamente todos los tornillos y conexiones, especialmente los del escritorio.amp/grommet base and VESA plate screws, to ensure they remain tight. Re-tighten if necessary.
- Verificación de movimiento: Ensure all joints move smoothly. If any joint becomes too loose or too stiff, use the provided Allen wrenches to adjust the tension screws.
7. Solución de problemas
If you encounter any issues with your monitor arm, please refer to the following common problems and solutions:
| Problema | Posible causa | Solución |
|---|---|---|
| El brazo del monitor es inestable o se tambalea. | Mounting base is not tight enough. | Vuelva a apretar el cierre del escritorio.amp or grommet base screws firmly. Ensure the desk surface is flat and stable. |
| El monitor se hunde o no mantiene la posición. | Joints are too loose; monitor weight exceeds capacity. | Tighten the tension screws on the arm joints using the provided Allen wrenches. Verify your monitor's weight is within the 22.0 lbs (10 kg) limit. |
| Monitor arm is difficult to move or adjust. | Las articulaciones están demasiado apretadas. | Loosen the tension screws on the arm joints slightly using the provided Allen wrenches. Remember the arm may be stiff before a monitor is mounted. |
| La placa VESA no se ajusta al monitor. | Patrón VESA incorrecto. | Confirm your monitor has a 75x75mm or 100x100mm VESA pattern. This arm is not compatible with other VESA sizes. |
8. Garantía y soporte
KOORUI products are manufactured with quality and reliability in mind. For warranty information or technical support, please refer to the warranty card included with your product or visit the official KOORUI websitio.
If you require further assistance, please contact KOORUI customer service through the following channels:
- Websitio: www.koorui.com (Consulte la información de contacto de soporte regional)
- Correo electrónico: Consulte el embalaje de su producto o webSitio para soporte por correo electrónico.