1. Introducción
The PikDik Mini Portable Photo Printer PD-Q2 is a compact thermal printer designed for on-the-go printing. It connects via Bluetooth to compatible Android and iOS devices, allowing users to print photos, labels, lists, and more without the need for ink cartridges. This manual provides essential information for setting up, operating, maintaining, and troubleshooting your PD-Q2 printer.
2. Información de seguridad
- No exponga la impresora al agua ni a la humedad excesiva.
- Avoid extreme temperatures. Operate and store the printer within recommended environmental conditions.
- Utilice únicamente el cable de carga proporcionado y las fuentes de alimentación recomendadas.
- Mantener fuera del alcance de los niños.
- No intente desmontar ni reparar la impresora usted mismo. Contacte con el servicio de atención al cliente para obtener ayuda.
3. Contenido del paquete
Por favor revise el paquete para ver los siguientes artículos:
- PikDik Mini Portable Photo Printer PD-Q2
- Cable de carga USB-C
- Roll of Thermal Photo Paper
- Manual de usuario
4. Producto terminadoview
The PD-Q2 printer features a compact design with a single power/function button and a paper output slot. It utilizes thermal printing technology, eliminating the need for ink. The device is powered by a built-in rechargeable lithium battery.
5. Guía de configuración
5.1 Carga de la impresora
Before first use, fully charge the printer. Connect the provided USB Type-C cable to the printer's charging port and a compatible USB power adapter. The LED indicator will show charging status.
5.2 Carga de papel térmico
- Abra la tapa del compartimiento de papel de la impresora.
- Insert a new roll of thermal paper, ensuring the printing side faces the print head.
- Pull a small length of paper out of the slot and close the cover securely.
5.3 Instalación de la aplicación y conexión Bluetooth
The PikDik PD-Q2 printer requires the "Meta Print" application for operation. Follow these steps to connect your device:
- Encienda la impresora: Mantenga presionado el botón de encendido hasta que la luz indicadora se ilumine.
- Download and Install the "Meta Print" APP: Buscar "Meta Print" on your smartphone's app store (Google Play for Android or App Store for iOS) and install it.
- Habilitar Bluetooth: On your phone or tablet, go to your device's settings and ensure Bluetooth is turned on.
- Conectarse en la APP: Open the "Meta Print" app. The app will guide you to link the printer via Bluetooth. Select the PD-Q2 from the list of available devices.
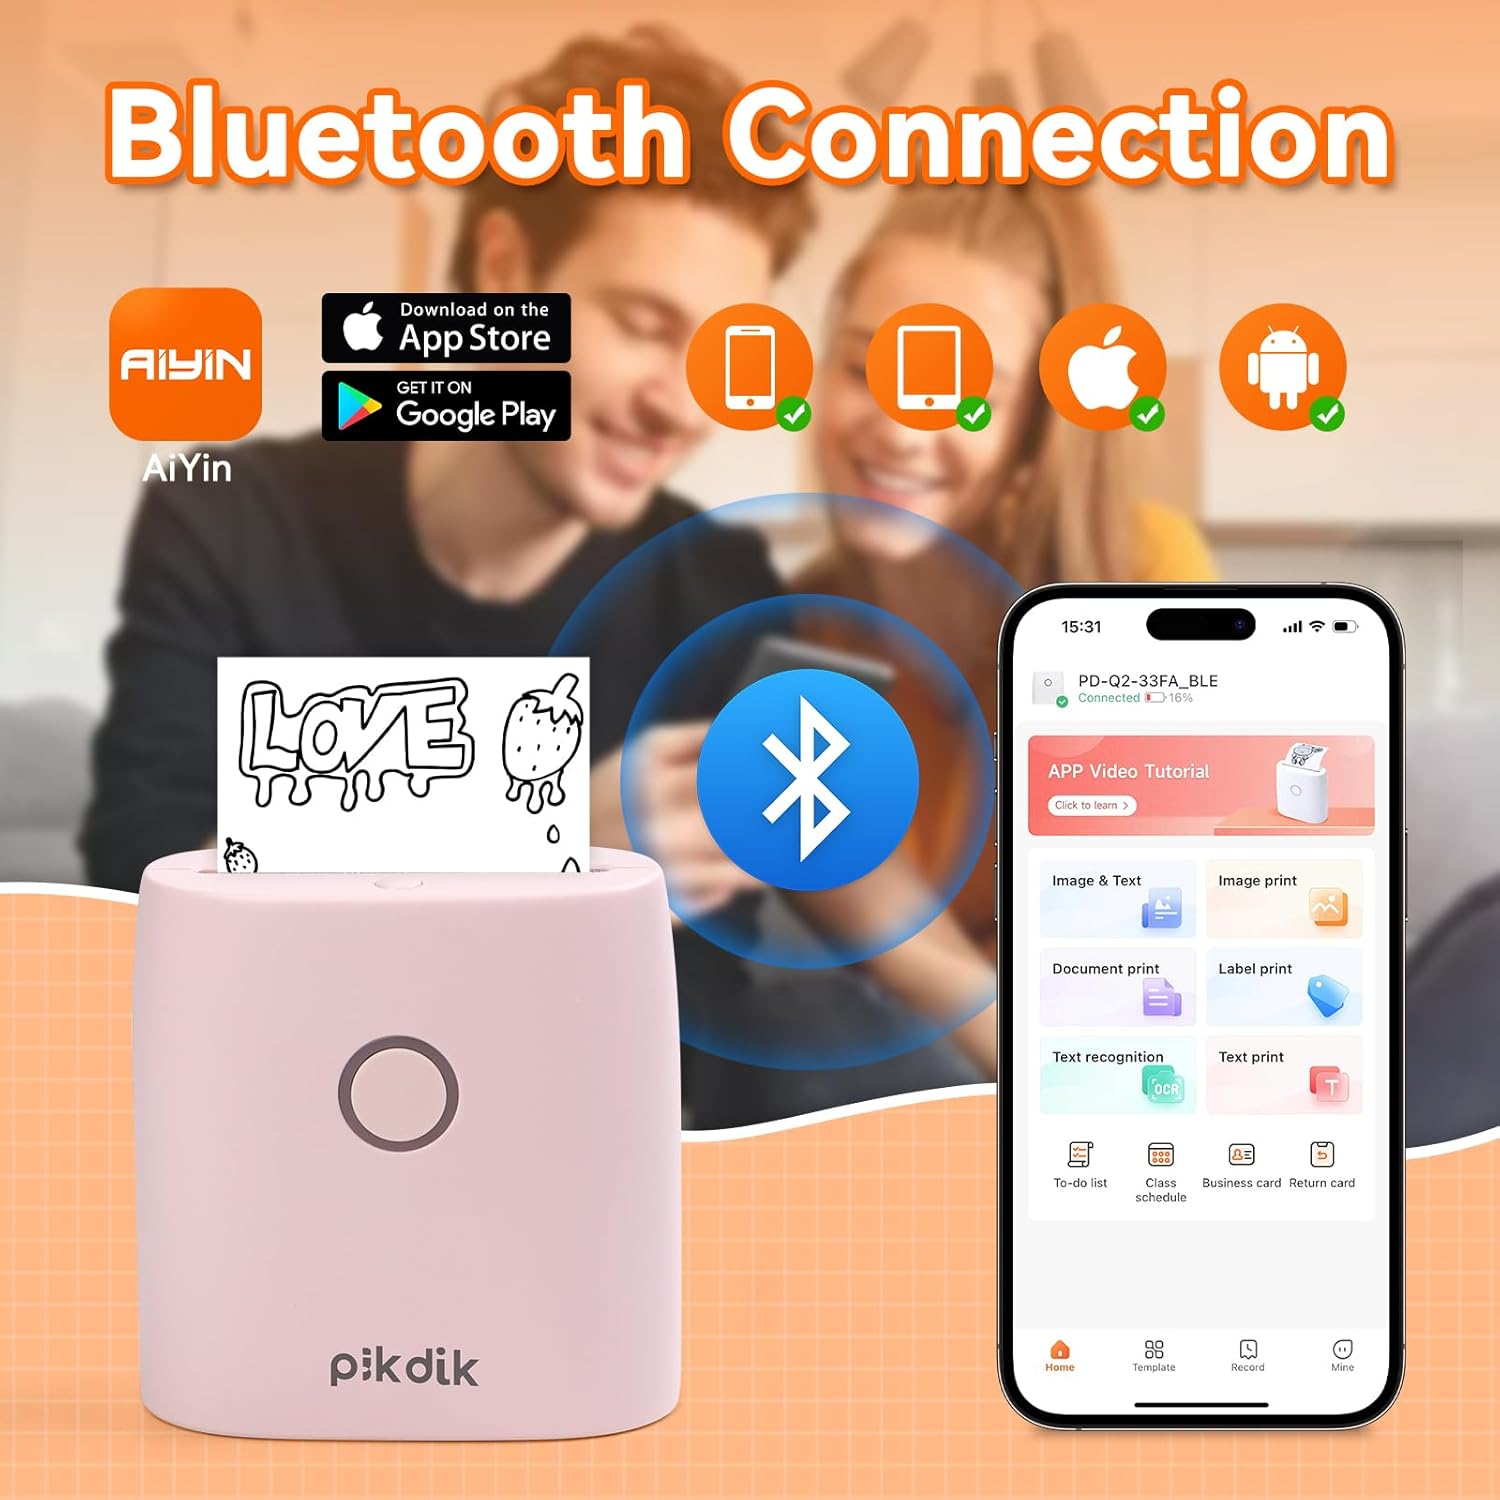
Image: The printer connects to your smartphone via Bluetooth using the Meta Print app, available on both Android and iOS.
6. Instrucciones de funcionamiento
6.1 Printing Content
Once connected to the "Meta Print" app, you can select various content types for printing:
- Image & Text: Print photos, graphics, or combine them with text.
- Impresión de documento: Print documents or notes.
- Label Print: Create and print custom labels.
- Reconocimiento de texto: Convierte imágenes de texto en texto editable para imprimir.
- Plantillas: Utilize pre-designed templates for to-do lists, business cards, emojis, and more.
After selecting and editing your content within the app, tap the print button to initiate printing. The printer will output the thermal paper with your printed content.

Image: The printer is suitable for various applications such as journaling, scrapbooking, printing shopping lists, and notes.
6.2 Print Quality and Limitations
The PD-Q2 printer offers a 300 DPI resolution for clear and detailed black and white prints. As a thermal printer, it does not support color printing.
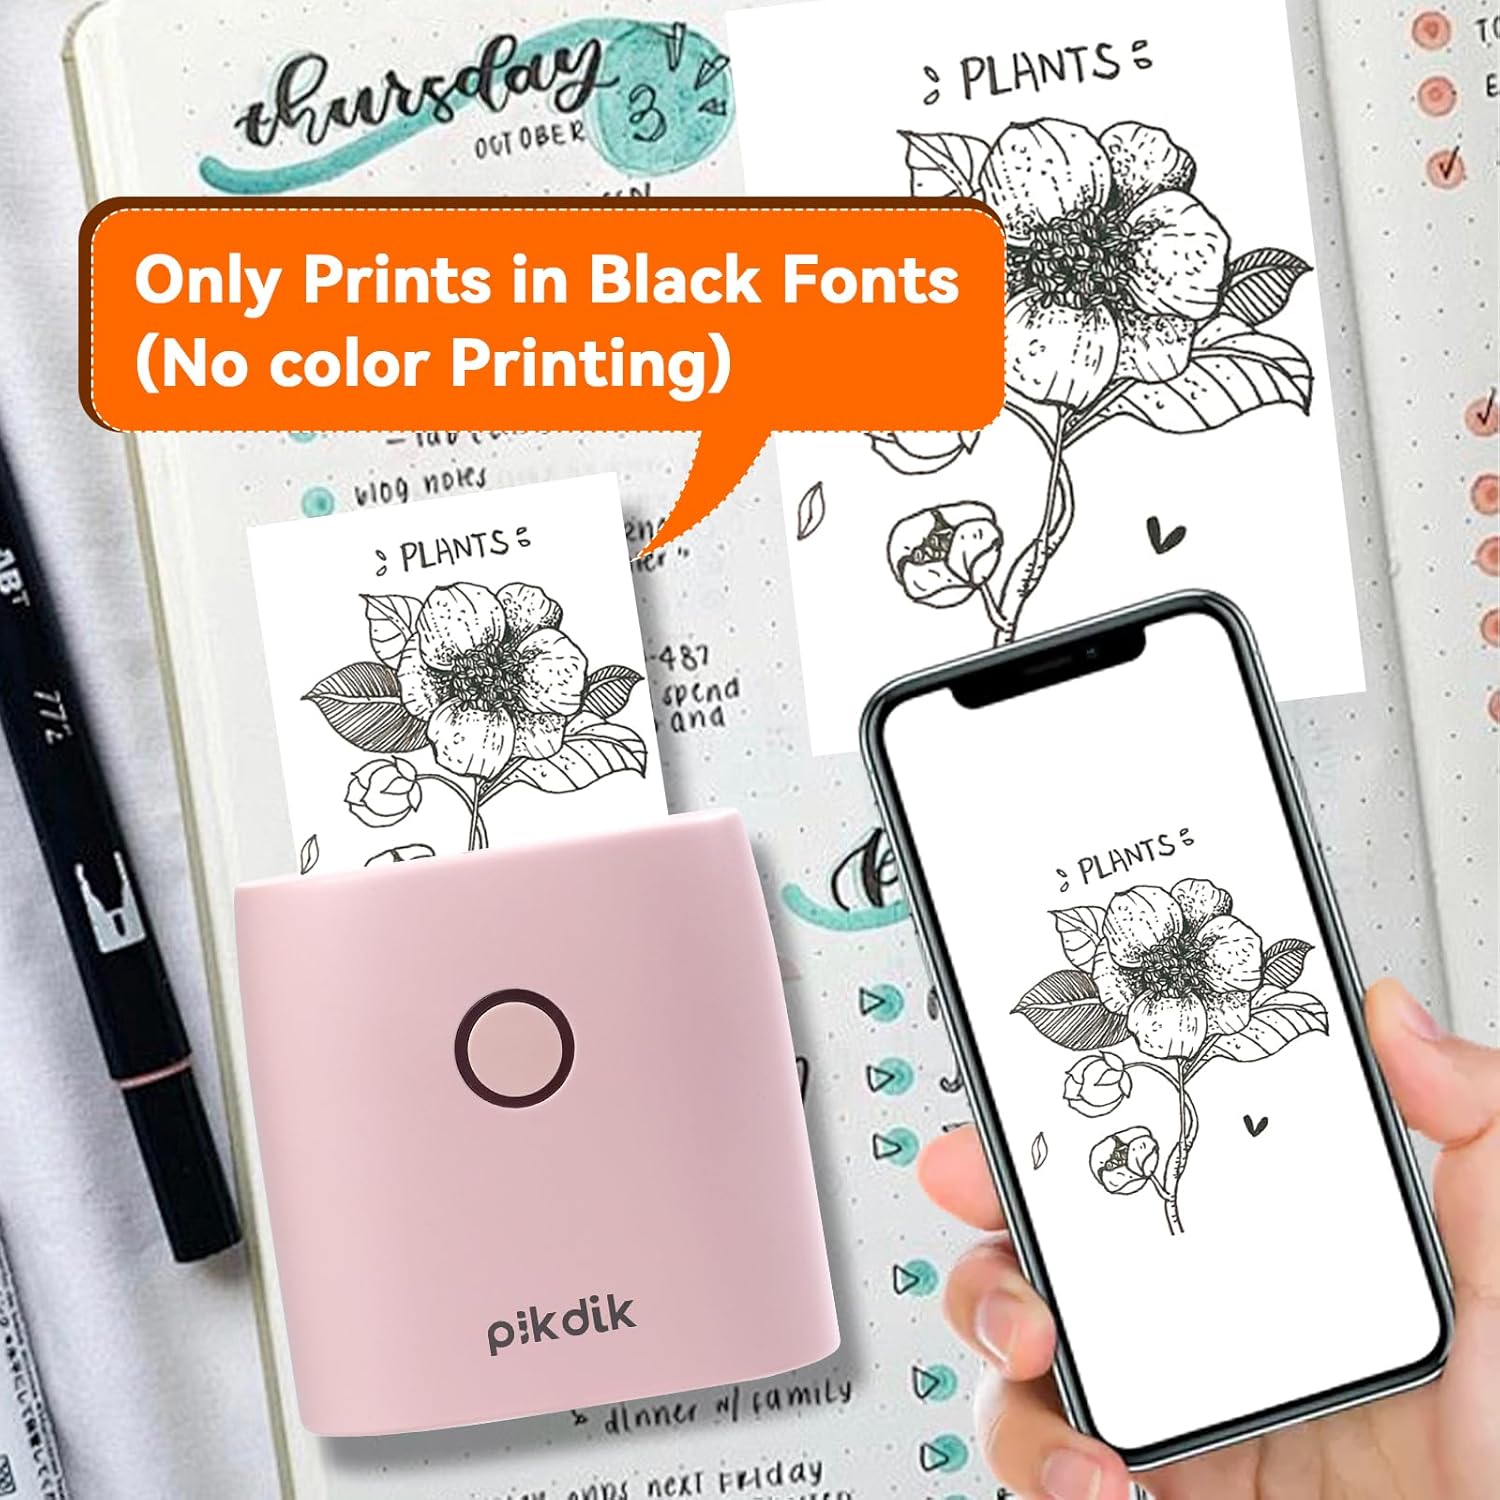
Image: The printer produces prints exclusively in black and white, as shown with a plant illustration.

Image: The 300 DPI resolution of the Q2 printer provides enhanced clarity and detail in prints compared to lower resolution alternatives.
7. Mantenimiento
7.1 Limpieza de la impresora
Para mantener una calidad de impresión óptima, limpie periódicamente el cabezal de impresión. Utilice un paño suave y sin pelusa ligeramente...ampLimpie con alcohol isopropílico. Limpie suavemente la superficie del cabezal de impresión. Asegúrese de que la impresora esté apagada y completamente seca antes de usarla.
7.2 Reemplazo del papel térmico
When the paper roll is depleted, replace it by following the steps in Section 5.2. Use only thermal paper compatible with the PD-Q2 printer to ensure proper function and print quality.
8. Solución de problemas
| Problema | Posible causa | Solución |
|---|---|---|
| La impresora no enciende | Batería baja; botón de encendido no presionado correctamente | Cargue la impresora; mantenga presionado el botón de encendido durante unos segundos. |
| No se puede conectar a través de Bluetooth | Bluetooth desactivado en el teléfono; la impresora no está en modo de emparejamiento; problema con la aplicación | Ensure phone Bluetooth is on; Restart printer and app; Re-pair device in app. |
| Poor print quality (faint, pixelated) | Low battery; Print head dirty; Incorrect paper type; Image resolution too low | Charge printer; Clean print head (Section 7.1); Use correct thermal paper; Use higher resolution images. |
| Atasco de papel | Paper not loaded correctly; Foreign object in paper path | Open cover, remove jammed paper, reload correctly; Check for obstructions. |
| La impresora no responde | Error del sistema | Perform a soft reset by turning the printer off and on again. If issue persists, contact support. |
9. Especificaciones
| Característica | Detalle |
|---|---|
| Modelo | Q2 |
| Dimensiones (D x W x H) | 4.1 x 8.4 x 8.4 cm (1.6 x 3.3 x 3.3 pulgadas) |
| Peso | 0.57 libras (aprox. 258.55 g) |
| Tecnología de impresión | Térmico |
| Resolución de impresión | 300 DPI (monocromo) |
| Conectividad | Bluetooth |
| Dispositivos compatibles | Teléfonos inteligentes, tabletas (Android, iOS) |
| Tamaño máximo de medios | 2 pulgadas |
| Fuente de poder | Built-in Lithium Polymer Battery (Rechargeable via USB Type-C) |
| Nombre de la aplicación | Meta Print |
10. Garantía y soporte
For warranty information and technical support, please refer to the warranty card included with your product or contact PikDik customer service directly. Keep your purchase receipt as proof of purchase.