iHome IOP18B
iHome Alarm Clock with Wireless Charging
Model: IOP18B
Introducción
The iHome IOP18 is a versatile 2-in-1 device combining a digital alarm clock with a wireless charging station. Designed for convenience, it allows you to charge Qi-compatible mobile devices wirelessly and a secondary device via its 5W USB port. This compact unit features an adjustable brightness display and programmable snooze, making it an ideal addition to any bedroom or home office.

Figure 1: The iHome Alarm Clock with Wireless Charging, Model IOP18B, shown in its retail packaging.
Características principales:
- Qi-Certified Wireless Charging: Provides up to 5W wireless charging for compatible smartphones and devices, including iPhone, AirPods, Samsung, and other Android devices.
- Puerto de carga USB: An additional 5W USB Type-A port allows for simultaneous charging of a second device (charging cable not included).
- Reloj despertador digital: Features a clear 12/24 hour display with adjustable brightness levels.
- Alarmas personalizables: Set alarms for every day, work week, or weekend schedules.
- Posponer programable: Snooze duration can be set from 1 to 29 minutes.
- Diseño que se adapta a cualquier funda: Wirelessly charges through most lightweight phone cases.
Configuración
1. Conexión de alimentación
Connect the included AC adapter to the DC jack located on the back of the iHome IOP18 unit. Plug the other end of the adapter into a standard wall outlet (100V - 240V universal voltage compatible).
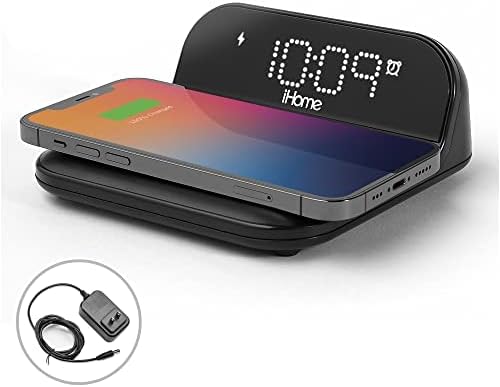
Figure 2: The iHome IOP18 unit with its power adapter, ready for connection.
2. Ajuste de hora inicial
Upon first power-up, the clock display may flash. Refer to the "Operating" section for detailed instructions on how to set the current time.
3. Placement for Wireless Charging
Place the unit on a flat, stable surface. For optimal wireless charging, ensure there are no metal objects or thick cases between your device and the charging pad.
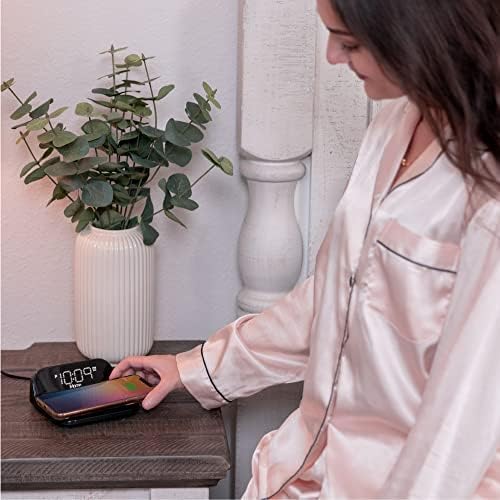
Figure 3: The iHome IOP18 placed on a nightstand, demonstrating a phone being wirelessly charged.
Instrucciones de funcionamiento
Ajuste de la hora
- Mantenga pulsado el Hora establecida button (usually located on the top or back of the unit) until the time display flashes.
- Utilice el + or - Botones para ajustar la hora. Preste atención a los indicadores AM/PM.
- Presione el Hora establecida Botón nuevamente para confirmar la hora y pasar a los minutos.
- Utilice el + or - Botones para ajustar los minutos.
- Presione el Hora establecida Presione el botón una última vez para guardar la hora y salir del modo de configuración de la hora.
Configuración de alarmas
The unit supports multiple alarm schedules (every day, work week, weekend).
- Mantenga pulsado el Alarma 1 or Alarma 2 Botón hasta que parpadee la hora de la alarma.
- Utilice el + or - Botones para configurar la hora de alarma deseada.
- Presione el Alarma Botón nuevamente para confirmar la hora y pasar a los minutos.
- Utilice el + or - Botones para configurar los minutos de alarma deseados.
- Presione el Alarma button again to select the alarm schedule (e.g., 7-day, 5-day, 2-day).
- Presione el Alarma Presione el botón una última vez para guardar la configuración de la alarma.

Figura 4: Arriba view of the iHome IOP18, highlighting the control buttons for time, alarm, and snooze settings.
Uso de la función de repetición
Cuando suene una alarma, presione el Siesta button to temporarily silence the alarm. The snooze duration can be programmed from 1 to 29 minutes. To adjust the snooze time, refer to the full user manual or product settings.
Ajuste del brillo de la pantalla
The clock display has adjustable brightness levels. Look for a dedicated Regulador de intensidad or Brillo button, or a combination of buttons, to cycle through brightness settings.
Carga inalámbrica
Place your Qi-compatible device directly onto the wireless charging pad. Ensure the device is centered on the pad for optimal charging. A charging indicator on the unit or your device will confirm charging status. The unit is designed to charge through most lightweight cases.
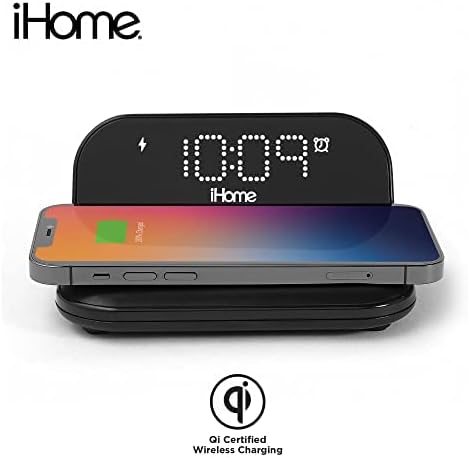
Figure 5: A smartphone positioned on the wireless charging pad, indicating active Qi-certified charging.
Carga USB
Connect your secondary device (e.g., another smartphone, smartwatch, or earbuds) to the 5W USB Type-A port located on the back or side of the unit using your device's charging cable (not included).
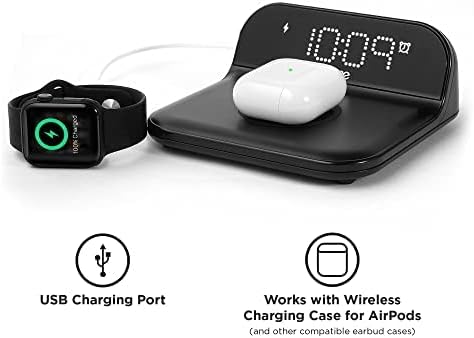
Figure 6: The iHome IOP18 demonstrating simultaneous charging of an Apple Watch via the USB port and AirPods wirelessly.
Mantenimiento
Limpieza
To clean the unit, gently wipe the surface with a soft, dry cloth. Do not use liquid cleaners, abrasive cleaners, or sprays, as these may damage the finish or internal components. Ensure the unit is unplugged before cleaning.
Cuidados generales
- Evite colocar la unidad bajo la luz solar directa o cerca de fuentes de calor.
- No exponga la unidad a la humedad, la lluvia o temperaturas extremas.
- Handle the unit with care to prevent drops or impacts.
Solución de problemas
| Problema | Posible causa | Solución |
|---|---|---|
| La unidad no se enciende / La pantalla está en blanco. | Power adapter not connected properly or power outlet is not active. | Asegúrese de que el adaptador de CA esté bien conectado a la unidad y a una toma de corriente que funcione. Pruebe con otra toma de corriente. |
| Wireless charging is not working or intermittent. | Device not properly aligned, thick phone case, foreign objects on pad, or device not Qi-compatible. |
|
| La carga USB no funciona. | USB cable is faulty, device not compatible, or unit is overloaded. |
|
| La alarma no suena. | Alarm not set correctly, alarm volume too low, or alarm is disabled. |
|
Presupuesto
| Característica | Detalle |
|---|---|
| Marca | iInicio |
| Número de modelo | IOP18B |
| Color | Negro |
| Tipo de pantalla | Digital |
| Característica especial | Wireless Charging, Alarm Clock |
| Fuente de poder | Eléctrico con cable (adaptador de CA) |
| Vol de entradatage | 5 Volts (Unit), 100V - 240V (Adapter) |
| Salida de carga inalámbrica | Hasta 5 W (certificación Qi) |
| Salida de carga USB | 5W USB Type-A Port |
| Dimensiones (L x An x Al) | 5.5 x 4.8 x 2.7 pulgadas |
| Peso del artículo | 10.2 onzas |
| Material | Plástico, marco de metal |
| Fabricante | Tecnologías SDI |
| Código Postal | 047532919011 |
Información de garantía
This iHome product is covered by a Manufacturer's Warranty. For specific details regarding the warranty period, coverage, and claims process, please refer to the documentation included with your product or visit the official iHome support websitio.
Soporte y contacto
For further assistance, technical support, or to explore other iHome products, please visit the official iHome brand store or their customer support portal.
Ask a question about this manual
Ask about setup, troubleshooting, compatibility, parts, safety, or missing instructions. Manuals+ will review the question and use this page’s manual context to help answer it.