SCUMAXCON DZT037
SCUMAXCON 7-inch Wireless Carplay Android Auto Car Stereo (Model DZT037) Instruction Manual
Comprehensive instruction manual for the SCUMAXCON 7-inch Wireless Carplay Android Auto Car Stereo (Model DZT037), covering installation, operation, features, and specifications.
1. Introducción
This manual provides detailed instructions for the installation, operation, and maintenance of your SCUMAXCON 7-inch Wireless Carplay Android Auto Car Stereo, Model DZT037. Please read this manual thoroughly before using the product to ensure proper functionality and safety.
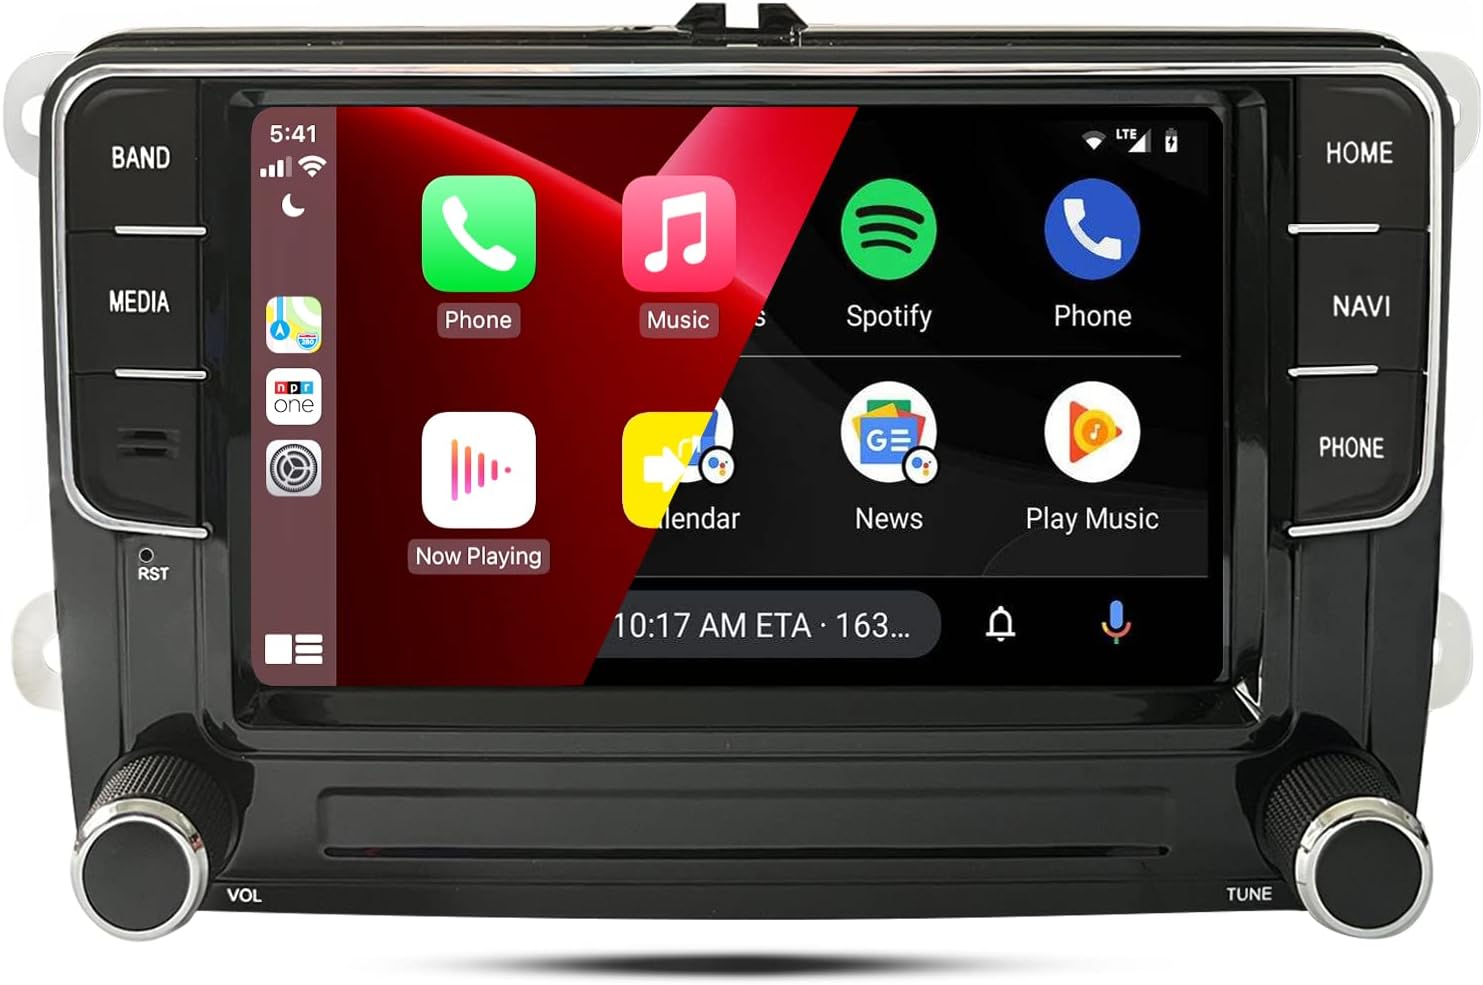
Figure 1: SCUMAXCON 7-inch Car Stereo main unit with Android interface displayed.
Video 1: Before and after comparison of the car stereo installation, showcasing the new interface and features.
2. Características principales
- CPU & OS: 8-Core 1.6Ghz processor with Android 13 operating system.
- Memoria: 4 GB de RAM + 64 GB de almacenamiento interno.
- Mostrar: 7-inch capacitive IPS touchscreen (1280*720 resolution) with split-screen capability.
- Conectividad: Wireless Carplay, Wireless Android Auto, WiFi (5G supported), GPS Navigation, Bluetooth 5.0, FM/AM-RDS Radio.
- Audio: DSP-36EQ for superior sound quality, compatible with speakers up to 4x4 ohm impedance.
- Entradas: USB (2 ports, one 6-pin high-speed charging/data, one 4-pin data), RCA, RVC (Rear View Camera), TMPS (Tire Pressure Monitoring System), DVR (Digital Video Recorder), OBD (On-Board Diagnostics).
- Control: Steering Wheel Controls support.
- Enfriamiento: All-aluminum shell with integrated cooling fan for stable performance.

Figura 2: Sobreview of the car stereo's advanced features and connectivity options.
3. Compatibilidad del vehículo
This car stereo is designed for various VW, Skoda, and Seat models. Please verify your vehicle's dashboard and original radio type against the images and list below to ensure compatibility.

Figura 3: ExampLes de tableros de vehículos compatibles.
Modelos compatibles:
- Para VW: Jetta, Golf, Passat, Tiguan, Transporter, EOS, CC, Golf V (2009/03-2013), Golf VI (2009-2013), Scirocco (2008-2013), Touran (2003-2013), Passat CC (2008-2011), Caddy (2004-2018), Polo V 6R (2009-2013), Sharan (2010-2014), Amarok (2010-2015), Beetle (2011-2015), Bora (2006-2015), Golf Plus (2004-2013), Magotan (2006-2013), Sagitar (2005-2015), Vento (2009-2015).
- Para Skoda: Fabia (2007-2013), Octavia (2007-2012), Praktik (2007-2011), Roomster (2006-2015), Superb (2008-2014), Yeti (2009-2015).
- Para asiento: Altea (2004-2015), Alhambra (2010-2014), León (2005-2012), Toledo (2004-2015).
Notas importantes:
- After installation, ensure the gateway is set up correctly. Refer to the setup section for details.
- If your original radio is RCD510/RNS510/RNS315 with an RGB camera, an adapter (YX2216 or YX2216-G) may be required.
- The radio does not support Dynaudio audio, Fender audio, or factory-installed power ampsistemas más duraderos.
4. ¿Qué hay en la caja?
El paquete incluye los siguientes componentes:
- SCUMAXCON 7-inch Car Stereo Unit
- Arnés de cable de alimentación
- RCA Cable Harness
- Cable de inversión
- Cable de salida de audio
- CANbus Decoder Box
- Antena GPS
- Antena 4G
- Cables USB (x2)
- Micrófono

Figura 4: Componentes incluidos y su apariencia típica.
5. Configuración e instalación
Follow these steps carefully for proper installation. If you are unsure, consult a professional installer.
5.1. Removing the Old Radio Unit
- Using a plastic pry tool, carefully remove the trim panel surrounding your old car radio.
- Unscrew the four screws located on both sides of the old unit.
- Gently pull out the old radio unit and disconnect all wires from its rear. Note the type of power plug (e.g., Quadlock).
Video 2: Detailed guide on removing the old car radio and connecting the new unit's wiring harness.
5.2. Conexión del nuevo estéreo
- Power Cable & CANbus:
- Connect the CANbus decoder box to the new stereo's power cable.
- Plug the CANbus power adapter into the designated port on the new stereo.
- Determine if the "Anti-leakage plug" in your vehicle's power cable should be connected or disconnected based on your vehicle's configuration. If uncertain, try both options. Incorrect connection may prevent the head unit from shutting down.
- Connect the main power adapter of the new stereo to the vehicle's power harness.
- Cable RCA: Plug the RCA cable into the new stereo. This cable includes connections for audio output, auxiliary input, and video input (e.g., for a rear view cámara).
- Cable de inversión: Plug the reversing cable into the new stereo. Connect the reversing camera's cable to the vehicle's reverse wire (wiring may vary by camera model).
- Cable de audio: Connect the audio cable if an external amplifier is being used. The position of this wire is the same interface as the CANbus power cable.
- Cables USB: Plug both USB cables into the new stereo. Route them to a convenient location, such as the glove compartment.
- Conexiones de antena:
- Plug the radio antenna adapter into the new stereo and connect it to the vehicle's radio antenna adapter.
- Stick the GPS antenna receiver to the edge of the dashboard panel and plug its adapter into the new stereo.
- Stick the 4G antenna receiver to the edge of the windshield and plug its adapter into the new stereo.
- Micrófono: Stick the microphone to the edge of the windshield (or a preferred location) and connect it to the new stereo.

Figure 5: Steering wheel control wiring and CANbus settings.

Figure 6: Power cable types and CANbus decoder connection.
5.3. Initial Testing & CANbus Settings
- Before fully reinstalling the unit, perform a preliminary test to ensure all connections are working.
- Configuración CANbus: This is a critical step for proper vehicle integration.
- Ir a Ajustes > Fábrica.
- Introduce la contraseña: 3368, luego haga clic Confirmar.
- Seleccionar Modelo de coche.
- Choose the CANbox type as RZC and the car brand as VW.
- Select your specific car model. If your model is not listed, choose a general option like [PQ-LOW/HIGH]. The [LOW/HIGH] refers to your original vehicle's configuration (e.g., automatic climate control, multifunction steering wheel).
5.4. Final Reinstallation
- Carefully slide the new stereo unit into the dashboard opening.
- Fix the new stereo with the four screws on both sides.
- Vuelva a colocar el panel de moldura, asegurándose de que encaje firmemente en su lugar.
6. Instrucciones de funcionamiento
Video 3: Demonstration of various applications and sound settings on the car stereo, including Netflix, YouTube, Spotify, and Waze.
6.1. Carplay inalámbrico y Android Auto
Connect your iOS or Android smartphone wirelessly to access various apps, maps, and media through the car's infotainment system.
- Carplay inalámbrico: Connect iOS phones via Bluetooth. Requires iOS 10 or later.
- Android inalámbrico automático: Requires a compatible phone with Android 13 or later, 5 GHz Wi-Fi, and an active data plan.
- Control de voz: Supports "Hey Siri" or "OK Google" for hands-free operation.

Figura 7: Interfaces inalámbricas Carplay y Android Auto.

Figura 8: Funcionalidad del asistente de voz.
6.2 Navegación
The unit supports GPS navigation and allows downloading offline maps from the Play Store. You can use popular navigation apps like Google Maps or Waze.

Figure 9: Navigation and other apps available via Google Play Store.
6.3. Media Playback & Streaming
Enjoy smooth and seamless video playback and music streaming from various sources.
- Aplicaciones de transmisión: Supports popular streaming services like Netflix, YouTube, Spotify, and TikTok (requires sufficient CPU, memory, and high-speed WiFi/4G).
- Pantalla IPS de alta definición: Provides clear visuals for videos.
- Bluetooth 5.0: Offers faster, more stable connections and enhanced audio quality with support for high-quality audio codecs.

Figure 10: EQ settings and available media applications.
6.4. Sound Settings (DSP-36EQ)
The integrated DSP-36EQ allows for precise audio customization.
- Adjust different frequencies (bass, mid-range, treble) to create a personalized sound profile.
- Utilize features like surround sound, stereo sound enhancement, and bass enhancement.

Figure 11: DSP-36EQ sound settings interface.
6.5. Funcionalidad de pantalla dividida
The 7-inch IPS touchscreen supports split-screen mode, allowing you to run two applications simultaneously.
- Example combinations: Map + Music, Map + FM Radio, Picture-in-Picture (PIP).
- The screen features a reflective film to reduce glare and improve visibility in strong light.
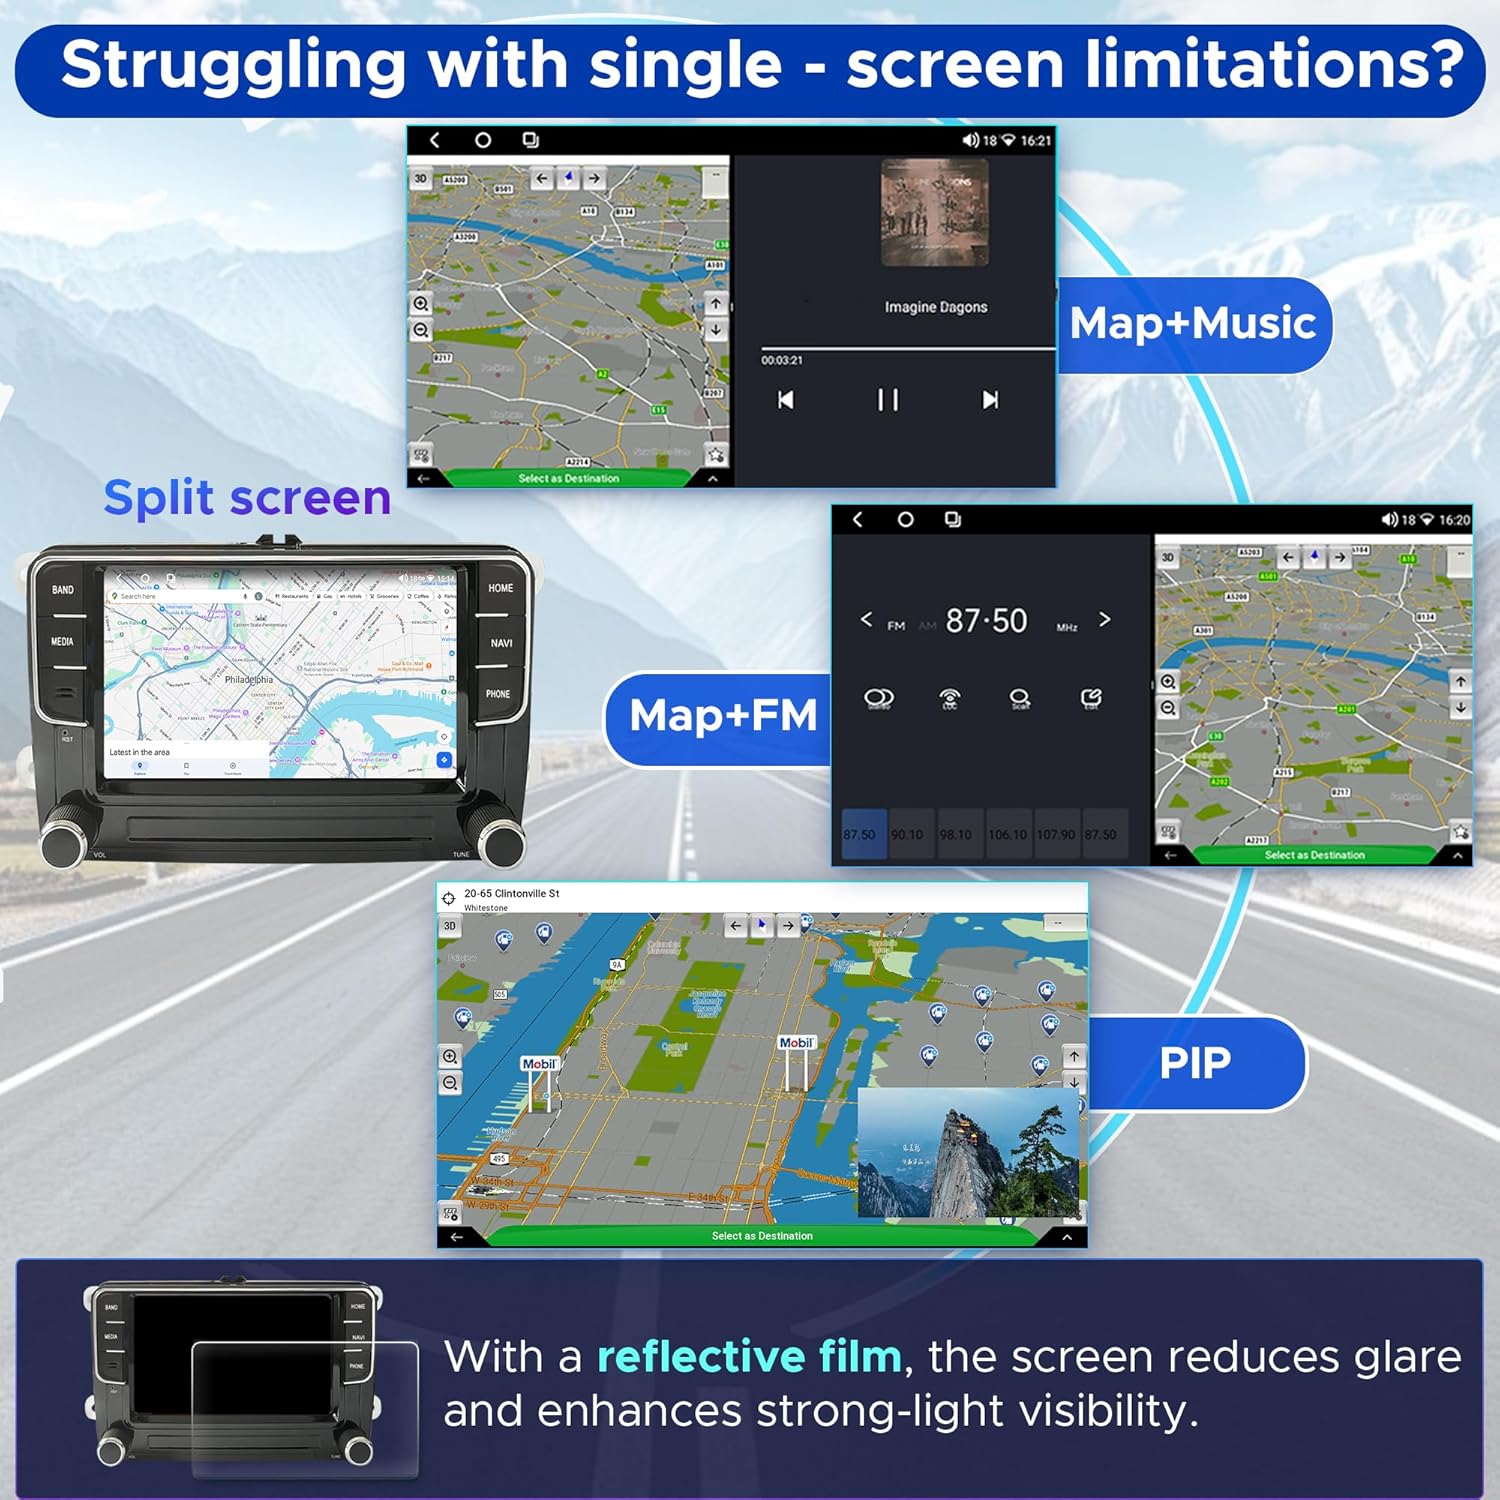
Figure 12: Split-screen and Picture-in-Picture modes.
6.6. Trasero View Camera (RVC)
La unidad admite una parte trasera view camera for enhanced safety during reversing. The camera is sold separately.
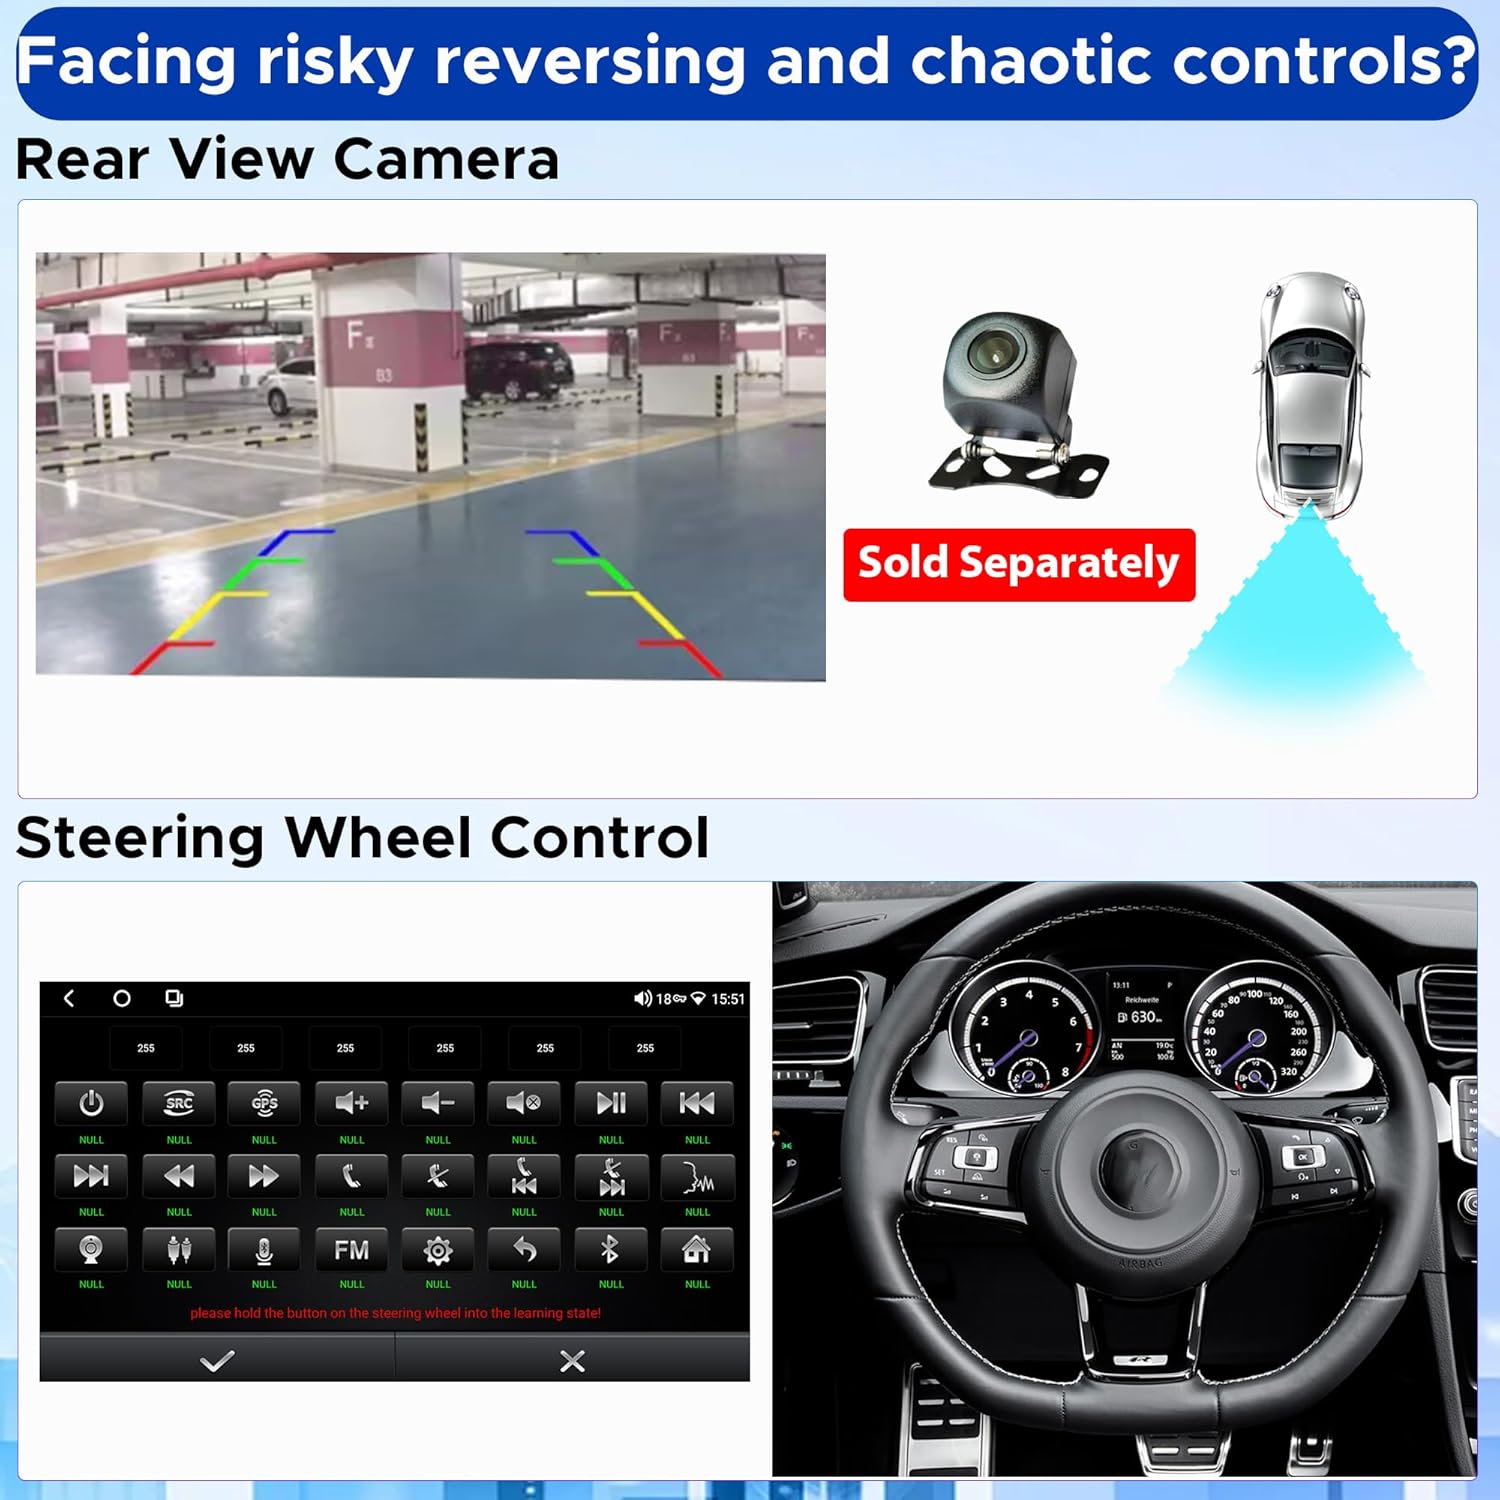
Figura 13: Posterior View Funcionalidad de la cámara.
7. Mantenimiento
- Limpieza: Utilice un paño suave y seco para limpiar la pantalla y la unidad. Evite limpiadores abrasivos o disolventes.
- Actualizaciones de software: Revise periódicamente las actualizaciones de software para garantizar un rendimiento óptimo y el acceso a nuevas funciones. Las actualizaciones suelen encontrarse en el sitio web del fabricante. websitio o a través de la configuración de la unidad.
- Sistema de enfriamiento: The unit features an all-aluminum shell with a cooling fan. Ensure the fan is not obstructed to maintain proper heat dissipation.

Figure 14: Integrated cooling fan for system stability.
8. Solución de problemas
| Problema | Posible causa | Solución |
|---|---|---|
| La unidad no se enciende. | Incorrect power cable connection; blown fuse. | Check all power connections. Verify vehicle's fuse box. Ensure CANbus decoder is correctly connected. |
| Unit does not shut down properly. | "Anti-leakage plug" incorrectly connected/disconnected. | Refer to the installation video and try connecting/disconnecting the "Anti-leakage plug" as appropriate for your vehicle. |
| Los controles del volante no funcionan. | CANbus not configured or 8-pin cable not connected. | Ensure the 8-pin CANbus cable is connected. Go to Ajustes > Fábrica (password 3368) > Modelo de coche and select the correct CANbox type and car model. |
| Trasero view La cámara no muestra nada. | Incorrect wiring; RGB camera requires adapter. | Check reversing cable connection. If using an RGB camera, ensure the correct RGB to AV adapter is installed. |
| Wireless Android Auto not connecting. | Phone OS version too old; 5 GHz Wi-Fi not active. | Ensure your Android phone is running Android 13 or later and has 5 GHz Wi-Fi enabled. |
| Apps like Netflix/YouTube are slow or laggy. | Insufficient CPU/RAM or slow internet connection. | Ensure a stable and fast 5G WiFi/4G LTE connection. Close other background applications. |
9. Especificaciones
| Característica | Detalle |
|---|---|
| Fabricante | SCUMAXCON |
| Peso del artículo | 3.45 libras |
| Dimensiones del paquete | 12.09 x 7.76 x 5.39 pulgadas |
| Número de modelo del artículo | DZT037 |
| Características especiales | Bluetooth, GPS Navigation, OPS/RVC, Wireless Android Auto, Wireless Carplay |
| Tipo de servicio del vehículo | Auto |
| Tamaño de pantalla | 7 pulgadas |
| Tecnología de conectividad | Bluetooth, USB, Wi-Fi |
| Tipo de mapa | North America (offline maps downloadable) |
| Modo de salida de audio | Estéreo |
| Tipo de montaje | Montaje en panel |
| Resolución | 1280 x 720 |
10. Garantía y soporte
For warranty information and technical support, please refer to the documentation included with your product or contact SCUMAXCON customer service directly. Keep your purchase receipt as proof of purchase.
Si encuentra algún problema no cubierto en este manual, comuníquese con el vendedor o el fabricante para obtener ayuda.