ARTISTRY MA-RM-UTP-FLCN-BLU-FLAT-1B
ARTISTRY Falcon Professional Wireless Tattoo Machine User Manual
Model: MA-RM-UTP-FLCN-BLU-FLAT-1B
Introducción
This manual provides essential information for the safe and effective operation, maintenance, and troubleshooting of your ARTISTRY Falcon Professional Wireless Tattoo Machine. Please read this manual thoroughly before using the device to ensure optimal performance and longevity.
The Falcon wireless machine is designed for professional tattoo artists, offering freedom of movement with its detachable batteries. Its robust construction from a solid rod ensures durability, while its lightweight design provides ideal weight distribution for comfortable use.
Producto terminadoview

Figura 1: En general view of the ARTISTRY Falcon Professional Wireless Tattoo Machine.
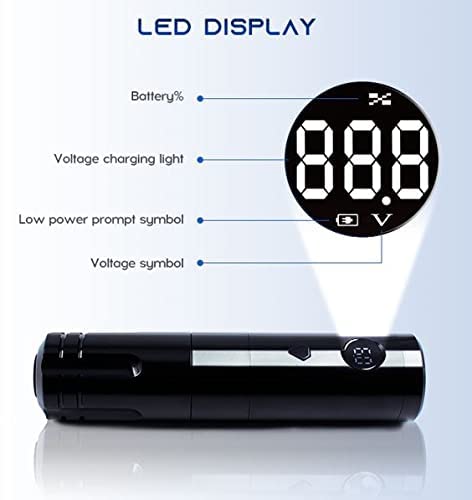
Figura 2: Close-up of the LED display, showing battery percentagmi, volumentage, y indicadores de carga.
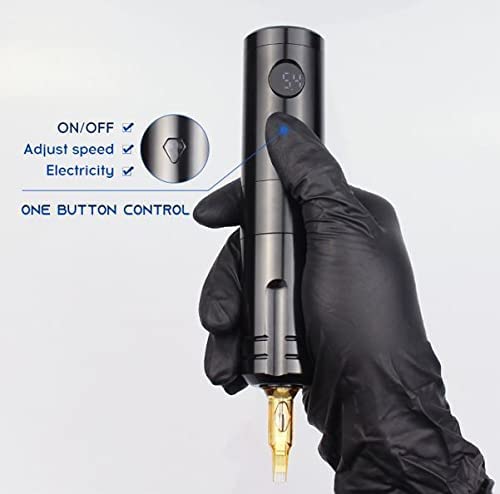
Figura 3: Illustration of the single-button control for power, speed adjustment, and battery check.
Características principales:
- Japanese coreless motor (10,000 RPM) for powerful and precise operation.
- LED display for real-time battery indicator, voltage, y estado de carga.
- Detachable 1200 mAh Lithium Battery for extended wireless operation (up to 6 hours on a single charge).
- One-key operation for power, speed adjustment, and battery level check.
- Compatible with universal tattoo cartridge needles.
Configuración
Carga de la batería:
- Ensure the battery is properly inserted into the machine or connected to the charger.
- Connect the provided DC 5V/2A (Standard USB Adapter) battery charger to a power source.
- The LED display will indicate charging status. A full charge typically provides up to 6 hours of working time.
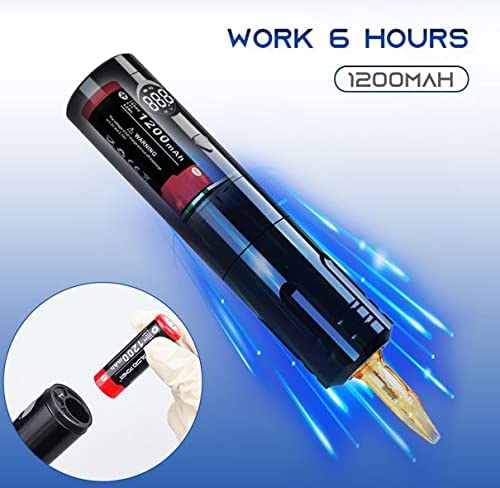
Figura 4: The machine is capable of up to 6 hours of continuous operation on a fully charged 1200mAh battery. The image also shows the detachable battery being inserted.
Cómo colocar una aguja de cartucho:
- Ensure the machine is turned off before attaching or detaching needles.
- Carefully insert the universal tattoo cartridge needle into the machine's needle port until it clicks securely into place.
- Verify that there is no gap between the needle cartridge and the machine body for stable operation.
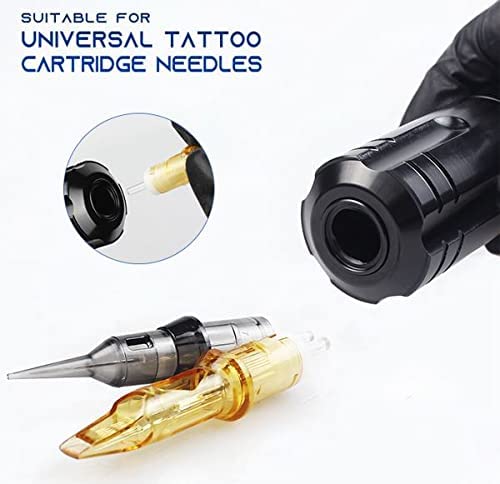
Figura 5: The machine is designed to be compatible with universal tattoo cartridge needles, shown here being inserted.
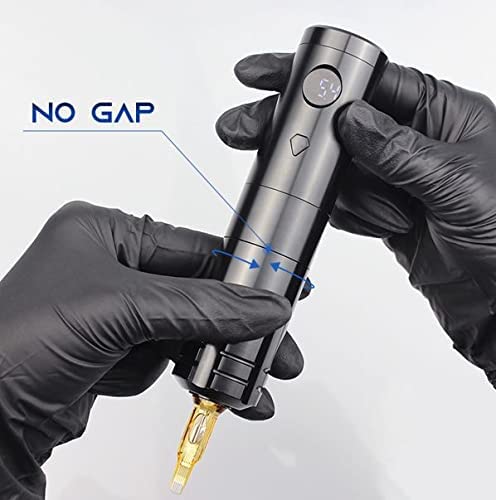
Figura 6: Proper attachment of the needle cartridge ensures a "no gap" fit, crucial for stable and precise tattooing.
Instrucciones de funcionamiento
Encendido/apagado:
- To turn on the machine, press and hold the power button until the LED display illuminates.
- To turn off the machine, press and hold the power button again until the LED display turns off.
Vol. de ajustetage/Speed:
- While the machine is on, short press the power button to cycle through voltage settings or adjust speed. The LED display will show the current voltage.
- The machine features a 10,000 RPM coreless motor, providing consistent power across various settings.
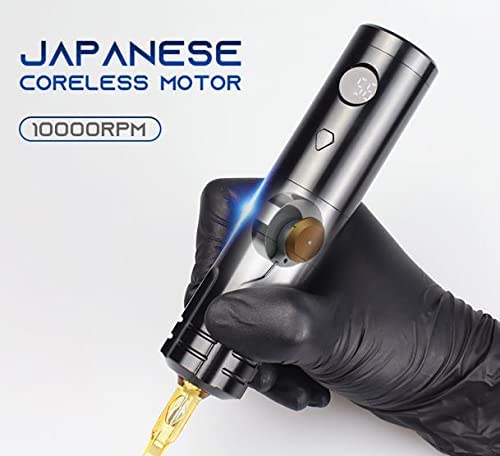
Figura 7: The machine is equipped with a powerful Japanese coreless motor, operating at 10,000 RPM for efficient tattooing.
Monitoring Battery and Voltage:
- The LED display provides real-time information on battery percentage and current voltage.
- A low power prompt symbol will appear when the battery needs recharging.
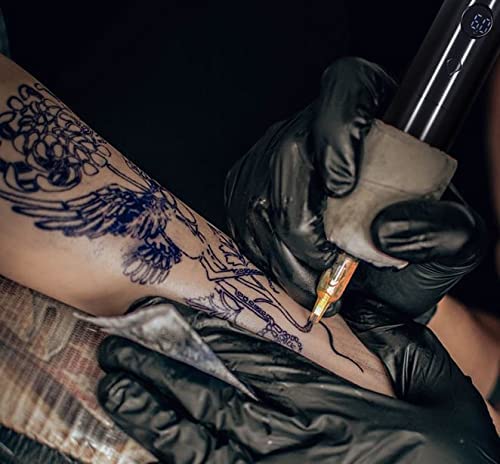
Figura 8: The ARTISTRY Falcon tattoo machine in active use, demonstrating its ergonomic design and wireless capability.
Mantenimiento
Limpieza:
- Always disconnect the power and remove the battery before cleaning.
- Limpie el exterior de la máquina con un paño limpio y seco.amp cloth and a mild, non-abrasive disinfectant.
- Do not submerge the machine in any liquid.
- Asegúrese de que todas las piezas estén completamente secas antes de volver a montarlas o guardarlas.
Cuidado de la batería:
- Guarde las baterías en un lugar fresco y seco, lejos de la luz solar directa y de temperaturas extremas.
- Evite descargar completamente la batería con frecuencia para prolongar su vida útil.
- Use only the specified DC 5V/2A charger.
Solución de problemas
| Problema | Posible causa | Solución |
|---|---|---|
| La máquina no se enciende. | La batería está descargada o no está insertada correctamente. | Cargue la batería. Asegúrese de que esté bien insertada. |
| Machine loses power during operation. | Carga de batería baja. | Recargue o reemplace la batería. |
| Needle not moving smoothly. | Needle cartridge not properly seated or damaged. | Re-seat the needle cartridge. Replace with a new cartridge if damaged. |
| La pantalla LED no funciona. | Problema de batería o falla interna. | Asegúrese de que la batería esté cargada. Si el problema persiste, contacte con atención al cliente. |
Presupuesto
- Modelo: MA-RM-UTP-FLCN-BLU-FLAT-1B
- Longitud del trazo: 3.6 milímetros
- Motor: Coreless 10,000 RPM Motor
- Batería: 1200 mAH Lithium Battery (included)
- Cargador de batería: DC 5V/2A (Standard USB Adapter)
- Tiempo de trabajo: Hasta 6 horas con una sola carga completa
- Construcción del cuerpo: Solid rod
- Dimensiones (paquete): 12 x 7 x 5 pulgadas
- Peso (paquete): 14.08 onzas
- Fabricante: ARTISTRY
Garantía y soporte
ARTISTRY products are manufactured to the highest quality standards. For warranty information and customer support, please refer to the warranty card included with your purchase or visit the official ARTISTRY websitio.
For technical assistance or service inquiries, please contact ARTISTRY customer support through the following channels:
- Soporte en línea: ARTISTRY Official Store on Amazon
- Fabricante: ARTISTRY
Conserve su comprobante de compra para reclamos de garantía.