Introducción
This manual provides comprehensive instructions for the installation, operation, and maintenance of your Banda Audioparts 4-Channel Vehicle Audio Bass Amplifier, Model 2000.41OHMGREEN. This Class D amplifier is designed to deliver high-powered audio performance for your vehicle's sound system. Please read this manual thoroughly before installation and use to ensure proper function and safety.
Información de seguridad
- Instalación profesional recomendada: Debido a la complejidad de los sistemas eléctricos de los vehículos, se recomienda encarecidamente una instalación profesional.
- Peligro eléctrico: Always disconnect the vehicle's battery before making any electrical connections to prevent electric shock or damage to the ampamplificador y vehículo.
- Cableado adecuado: Ensure all wiring is correctly sized and fused according to specifications to prevent overheating and fire hazards.
- Disipación de calor: Montar el amplifier in a location that allows for adequate airflow to prevent overheating. Avoid mounting in enclosed spaces without ventilation.
- Agua y humedad: No exponga el ampprotector contra el agua o humedad excesiva.
- Montaje seguro: Monte el dispositivo de forma segura amplifier to prevent it from becoming a projectile in the event of a sudden stop or accident.
Producto terminadoview
The Banda Audioparts 2000.41OHMGREEN is a 4-channel Class D amplifier designed for robust audio performance. It features a compact design and advanced circuitry for efficient power delivery.
Características principales:
- Clase D amplifier technology for high efficiency.
- 4-channel output, bridgeable for higher power.
- Integrated Subsonic Filter and Low Pass Filter for precise sound tuning.
- LED indicators for power, clipping, low voltage, and fuse status.
- RCA connectors for distortion-free signal transfer.
Indicadores LED:
- LED azul: Indica el ampEl lifier está encendido y funcionando.
- LED rojo: Illuminates to indicate output distortion (clipping). Reduce input gain if this LED is active.
- LED amarillo: Indica bajo volumentage battery. Check vehicle's charging system.
- Constant (Red/Yellow): If either Red or Yellow LED stays constant, it may indicate an output short circuit or a blown/missing fuse.
Ampmás vivaz Views:
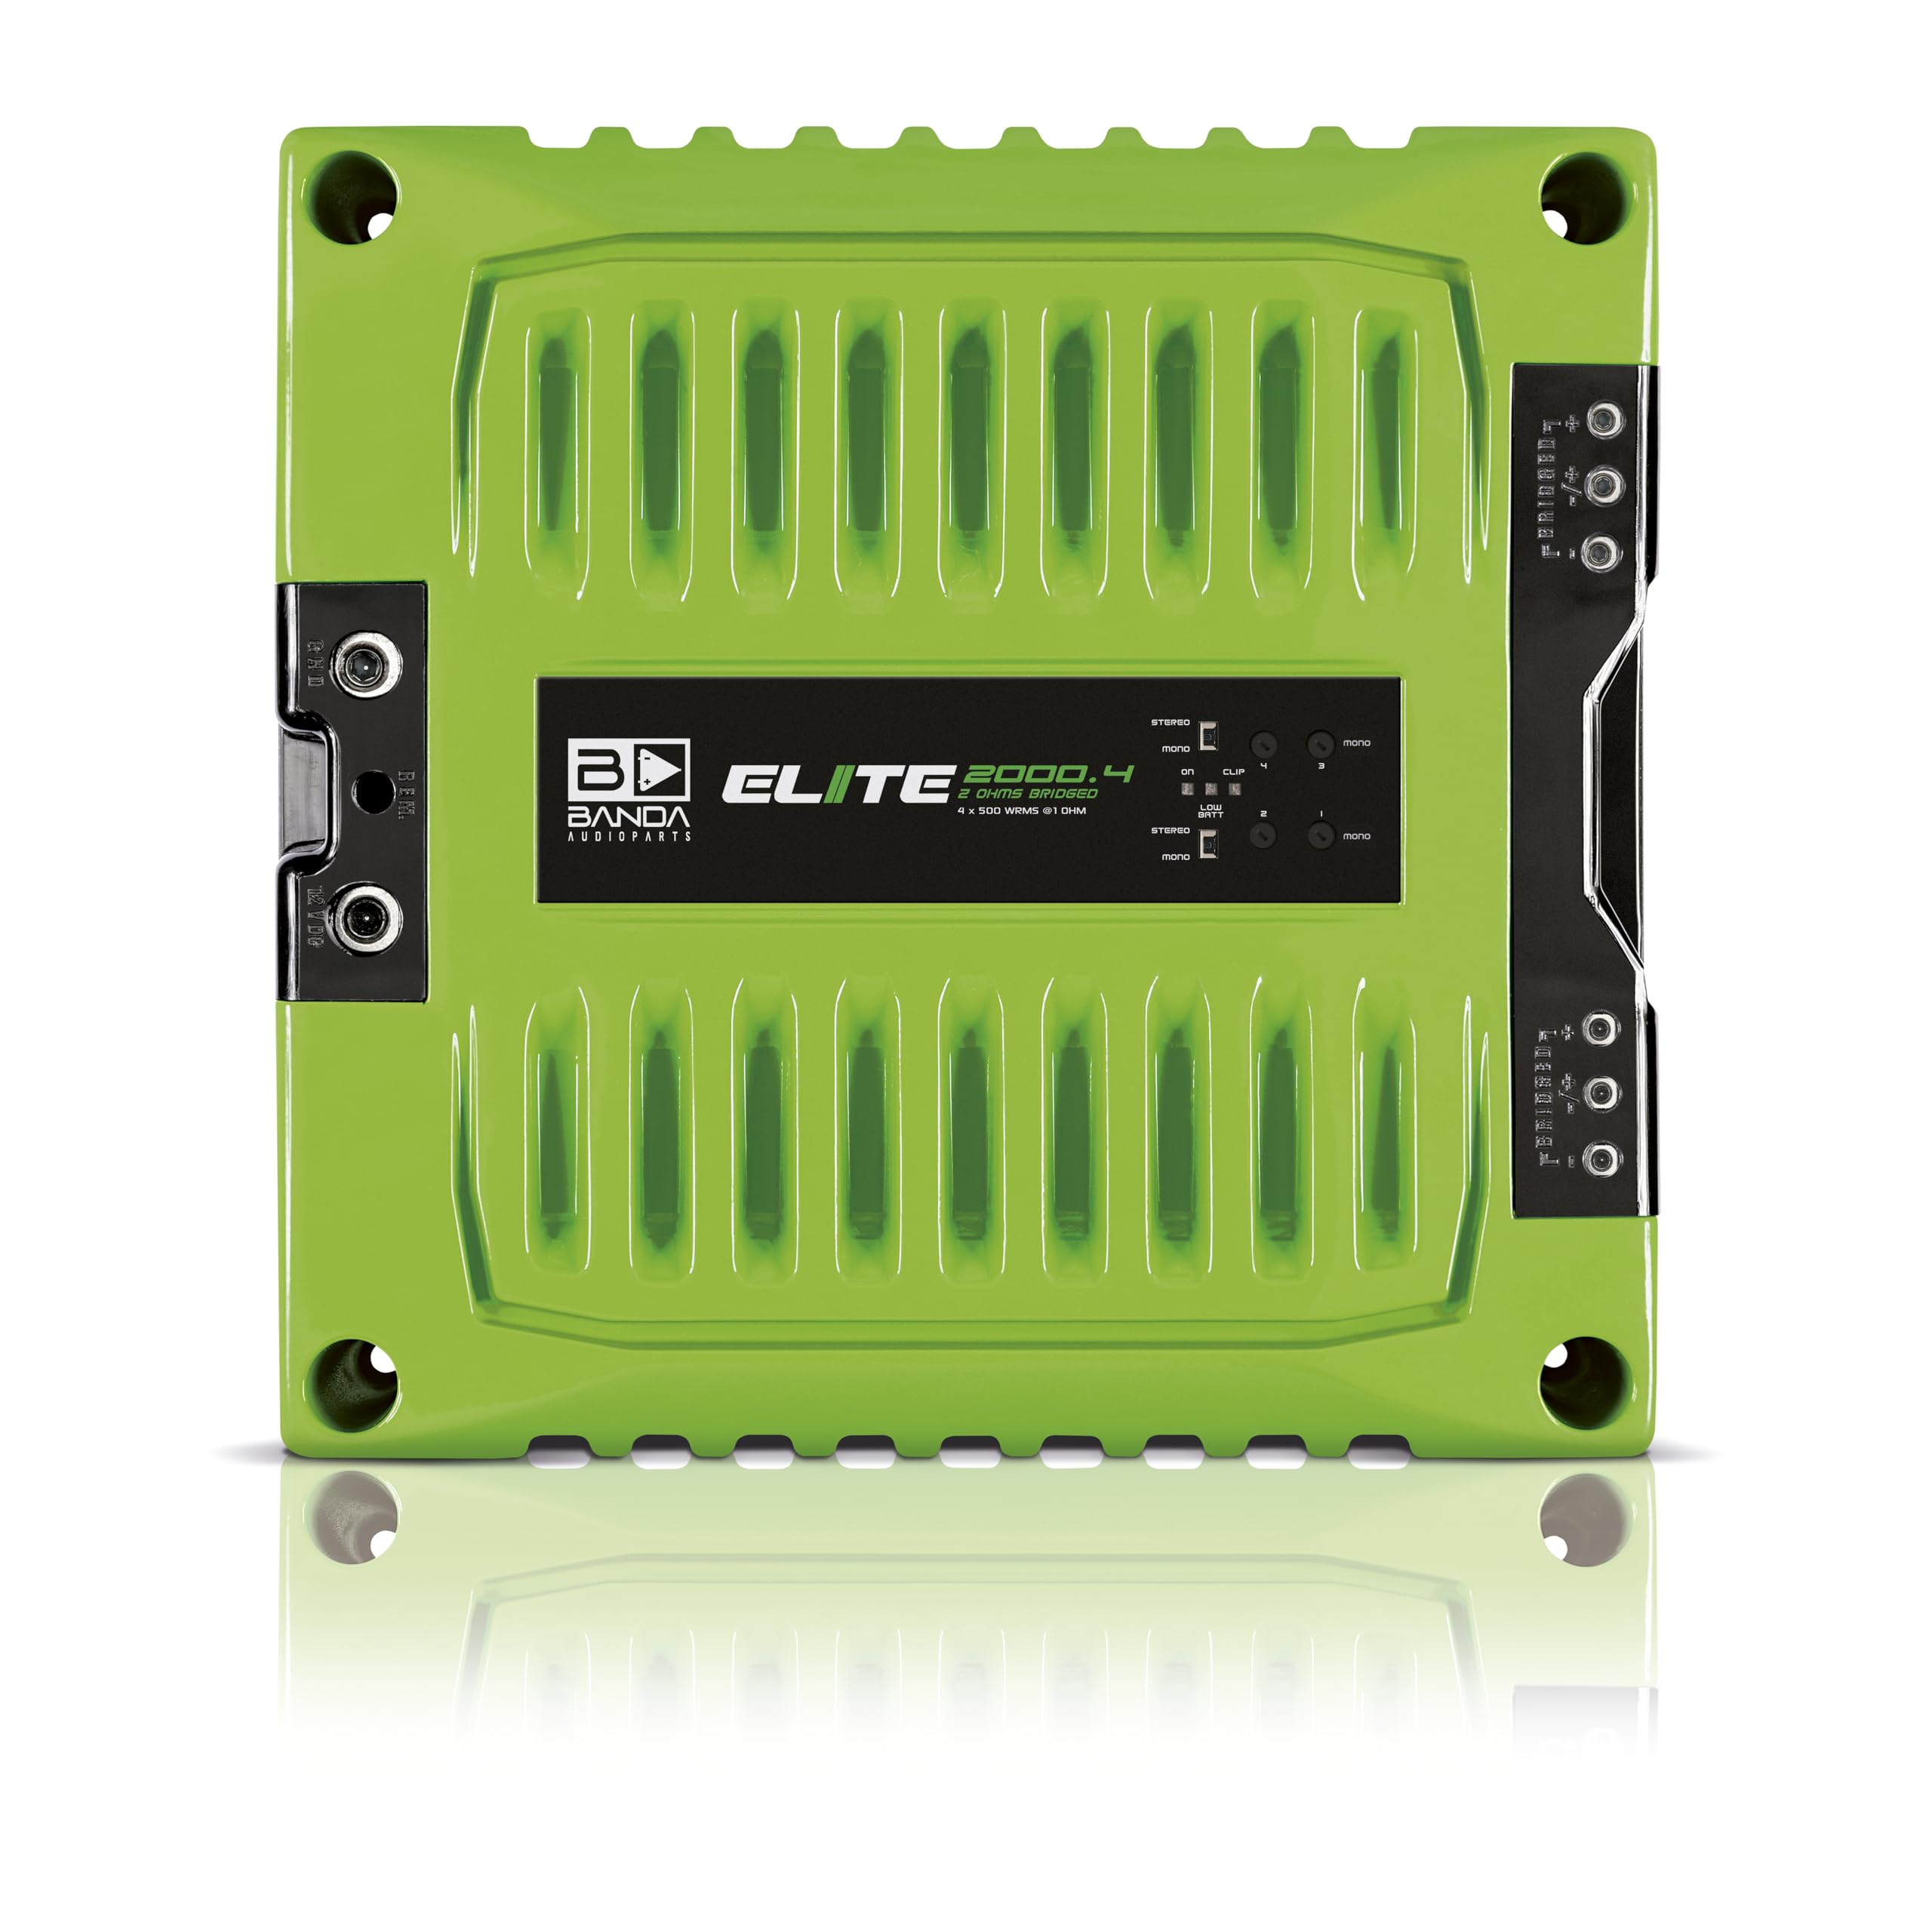
Frente view of the Banda Audioparts 4-Channel Amplificador, espectáculoasing the top panel and branding.

Trasero view del amplifier, displaying the RCA inputs, gain controls, and filter switches.

Lado view del amplifier, highlighting the power, ground, and remote terminals.
Presupuesto
| Parámetro | Valor |
|---|---|
| Potencia total 14.4 V a 1 ohmio | 4x600 WRMS |
| Potencia total 14.4 V a 2 ohmios | 4x400 WRMS |
| Total Power 14.4V Bridged @ 2 Ohms | 2x1250 WRMS |
| Potencia total 12.6 V a 1 ohmio | 4x500 WRMS |
| Potencia total 12.6 V a 2 ohmios | 4x300 WRMS |
| Total Power 12.6V Bridged @ 2 Ohms | 2x1000 WRMS |
| Eficiencia a 2 ohmios | 81% |
| Eficiencia a 1 ohmio | 76% |
| Vol de entradatage | 9 - 15 V |
| Impedancia de entrada | 100K ohmios |
| THD + ruido | 0.10% |
| Sensibilidad de entrada | 220mV - 4V |
| Relación señal/ruido (SNR) | 80 dB |
| Respuesta de frecuencia | 5Hz to 22kHz (-3dBs) |
| Filtro de paso alto (HPF) | 20 a 90 Hz a 12 dB/octava Linkwitz-Riley |
| Filtro de paso bajo (LPF) | 90 a 20 kHz a 12 dB/octava Linkwitz-Riley |
| Fusible recomendado | 100 A |
| Corriente en reposo | 1A |
| Consumo de corriente promedio (sinusoidal) | 210 A |
| Consumo medio de corriente (música) | 100 A |
| Calibre del cable de alimentación (mín. recomendado) | 21 mm² / 4 CAE |
| Calibre del cable del altavoz (mín. recomendado) | 2 x 2.5mm² / 2 x 13 AWG |
| Dimensiones del producto (alto x ancho x profundidad) | 2.2 x 8.4 x 9.7 pulgadas (aprox. 56 x 213 x 246 mm) |
| Peso del artículo | 3.3 libras (aproximadamente 1.5 kg) |
| Número de modelo | 2000.41OHMGREEN |
Configuración e instalación
Careful installation is crucial for optimal performance and safety. Ensure the vehicle's battery is disconnected before beginning.
Ubicación de montaje:
Elija un lugar seco y bien ventilado, alejado de la luz solar directa y de fuentes de calor. Asegúrese de que haya suficiente espacio alrededor. amplifier for air circulation to prevent overheating. Secure the ampSujételo firmemente a una superficie sólida utilizando los herrajes adecuados.
Conexiones de cableado:
- Potencia (B+): Connect a 4 AWG (21mm²) power cable directly from the positive terminal of the vehicle's battery to the amplifier's B+ terminal. Install a 100A fuse within 18 inches (45 cm) of the battery.
- Tierra (GND): Connect a 4 AWG (21mm²) ground cable from the ampConecte el terminal GND del voltímetro a una superficie metálica limpia y sin pintar del chasis del vehículo. Asegúrese de que la conexión sea sólida y de baja resistencia.
- Remoto (REM): Conecte un cable de encendido remoto desde la salida remota de la unidad principal a la ampTerminal REM del energizador. Este cable enciende el ampEncienda y apague el amplificador con la unidad principal.
- Entrada RCA: Conecte los cables RCA desde el preamplificador de su unidad principal.amp salidas a la ampTomas de entrada RCA del amplificador.
- Salida del altavoz: Conecte sus altavoces a la amplifier's speaker terminals using 13 AWG (2.5mm²) speaker wire. Ensure correct polarity (+ to + and - to -) for each speaker. For bridged operation, refer to the diagram on the amplificador o consulte a un profesional.
Detallado view del amplifier's rear panel, illustrating RCA input and speaker output terminals.
Instrucciones de funcionamiento
Una vez instalado, siga estos pasos para configurar y operar su ampmás duradero:
- Encendido inicial: Reconnect the vehicle's battery. Turn on your head unit. The blue LED on the ampEl indicador debe iluminarse, indicando que está encendido.
- Ajuste de ganancia: Set the head unit volume to about 75% of its maximum. Slowly increase the amplifier's gain control (Input Sensitivity) until you hear distortion or the red clipping LED illuminates. Then, reduce the gain slightly until the distortion disappears or the red LED turns off. This ensures maximum clean output.
- Configuración de filtro:
- HPF (filtro de paso alto): Use this to block low frequencies from reaching your speakers, typically for full-range or mid-range speakers. Adjust the frequency knob between 20Hz and 90Hz.
- LPF (filtro de paso bajo): Use this to allow only low frequencies to pass, typically for subwoofers. Adjust the frequency knob between 90Hz and 20kHz.
- Pruebas de sonido: Play various types of music to fine-tune the gain and filter settings for optimal sound quality.
Mantenimiento
Your Banda Audioparts ampEl lifador está diseñado para un funcionamiento fiable con un mantenimiento mínimo. Siga estas pautas para garantizar su longevidad:
- Limpieza: Limpie periódicamente el ampLimpie el exterior del elevador con un paño suave y seco. No utilice productos químicos agresivos ni limpiadores abrasivos.
- Comprobaciones de conexión: Inspeccione anualmente todas las conexiones de alimentación, tierra, control remoto y altavoces para garantizar que estén seguras y libres de corrosión. Las conexiones sueltas pueden causar problemas de rendimiento o daños.
- Ventilación: Asegúrese de que el amplifier's cooling fins and fan (if present) are free from dust and obstructions to maintain proper heat dissipation.
Solución de problemas
Si tiene problemas con su amplifier, consulte los siguientes problemas y soluciones comunes:
| Problema | Posible causa | Solución |
|---|---|---|
| Sin energía (LED azul apagado) | Fusible quemado, cable de alimentación/tierra/remoto suelto, sin señal remota. | Check the in-line fuse near the battery. Verify all power, ground, and remote connections are secure. Ensure head unit is on and sending a remote signal. |
| Sin salida de sonido | Loose RCA cables, incorrect gain settings, speaker wires disconnected, ampLifier en modo de protección. | Verifique las conexiones RCA en ambos amplifier and head unit. Adjust gain. Verify speaker wire connections and polarity. If amplifier is hot, allow it to cool. |
| Sonido distorsionado (LED rojo encendido) | Gain set too high, poor quality input signal, speaker impedance mismatch. | Reducir la amplifier's gain (Input Sensitivity). Check head unit output for distortion. Verify speaker impedance matches ampcapacidades del generador. |
| AmpSobrecalentamiento del ificador | Ventilación insuficiente, impedancia demasiado baja, salida alta prolongada. | Asegúrese de que haya un flujo de aire adecuado alrededor del amplifier. Check speaker impedance. Reduce volume or gain. |
| Yellow LED On (Low Voltage) | Vol de la batería del vehículotage too low, insufficient power wire gauge. | Check vehicle's battery and charging system. Ensure power wire gauge meets recommendations. |
Garantía y soporte
Banda Audioparts products are manufactured to high-quality standards. For specific warranty information and technical support, please refer to the warranty card included with your product or visit the official Banda Audioparts website. Do not attempt to repair the amplifier yourself, as this may void your warranty and cause further damage.