Introducción
This user manual provides detailed instructions for the installation, operation, maintenance, and troubleshooting of your Xprinter XP-K200L 80mm Thermal Receipt Printer. Please read this manual thoroughly before using the printer to ensure proper function and to extend the product's lifespan. Keep this manual for future reference.
Información de seguridad
- Utilice siempre el adaptador de corriente suministrado con la impresora.
- No exponga la impresora al agua ni a la humedad.
- Evite colocar la impresora bajo la luz solar directa o cerca de fuentes de calor.
- Asegúrese de que haya una ventilación adecuada alrededor de la impresora.
- No intente desmontar ni reparar la impresora usted mismo. Contacte con personal de servicio técnico cualificado.
- Mantener fuera del alcance de los niños.
Contenido del paquete
Por favor, revise el contenido del paquete al desempacarlo. Si falta algún artículo o está dañado, contacte con su proveedor.
- Xprinter XP-K200L Thermal Receipt Printer
- Adaptador de corriente
- Cable de alimentación
- Cable USB
- Rollo de papel térmico (rollo de inicio)
- Cable del cajón portamonedas
- Manual de usuario (este documento)
Producto terminadoview
Familiarize yourself with the main components of your Xprinter XP-K200L thermal receipt printer.

Figura 1: Lado view of the Xprinter XP-K200L thermal receipt printer. On the right, the power switch is visible, and on the left, a button to open the paper cover is present.
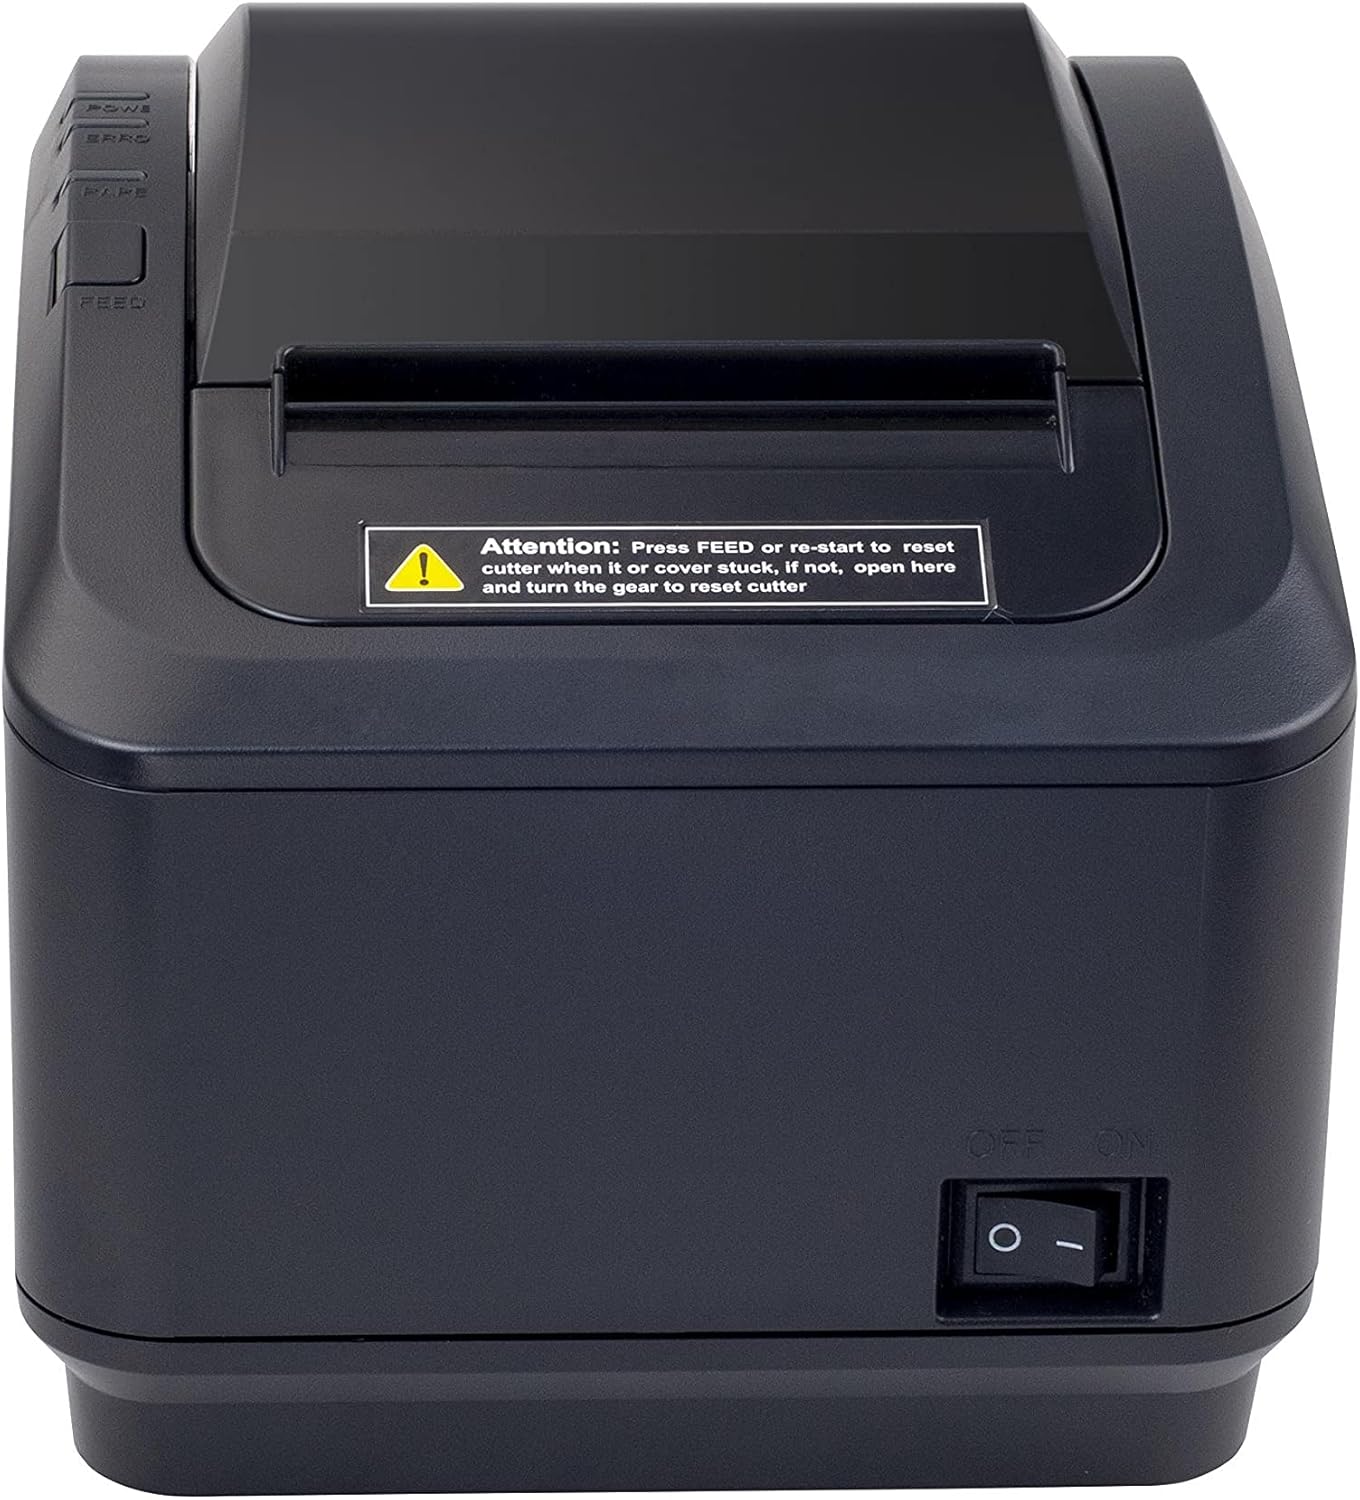
Figura 2: Un frente view of the Xprinter XP-K200L thermal receipt printer. The paper output slot is at the top, and below it are control buttons for functions like feed and error reset. A warning label is also visible.

Figure 3: This image displays the Xprinter XP-K200L thermal receipt printer with its top cover open, showing the internal compartment where the thermal paper roll is loaded. The print head mechanism is also visible.
Configuración
1. Conexión de la alimentación
- Ensure the printer's power switch is in the APAGADO posición.
- Conecte el adaptador de corriente al puerto de alimentación de la impresora.
- Conecte el cable de alimentación a una toma eléctrica adecuada.
2. Carga de papel térmico
- Press the cover open button (refer to Figure 1) to open the top cover of the printer.
- Insert a new 80mm thermal paper roll into the compartment, ensuring the paper feeds from the bottom and the leading edge extends slightly out of the printer.
- Close the top cover firmly until it clicks into place. Ensure there is no slack in the paper roll.
3. Conexión a una computadora/red
The XP-K200L printer supports both USB and LAN (Ethernet) connectivity.
Conexión USB:
- Conecte un extremo del cable USB al puerto USB de la impresora.
- Conecte el otro extremo del cable USB a un puerto USB disponible en su computadora.
- Install the printer drivers. Drivers are typically provided on a CD or can be downloaded from the manufacturer's webSitio. Siga las instrucciones en pantalla para la instalación.
Conexión LAN (Ethernet):
- Connect one end of an Ethernet cable to the printer's LAN port.
- Conecte el otro extremo del cable Ethernet a su enrutador o conmutador de red.
- Configure the printer's network settings (e.g., IP address) if necessary. This usually involves printing a self-test page to get the current IP address and then accessing the printer's web interface or using a utility tool provided by the manufacturer.
- Install the printer drivers on your computer, selecting the network connection option during setup.
4. Connecting a Cash Drawer
- Connect the cash drawer cable to the dedicated cash drawer port on the printer.
- Ensure your POS software is configured to send commands to open the cash drawer via the printer.
Instrucciones de funcionamiento
Encendido/apagado
- To power on the printer, flip the power switch (refer to Figure 1) to the ON posición.
- To power off the printer, flip the power switch to the APAGADO posición.
Impresión básica
Una vez que la impresora esté conectada y los controladores estén instalados, puede imprimir recibos desde su software POS o cualquier aplicación que admita la impresión.
- Asegúrese de que la impresora esté encendida y tenga papel cargado.
- Desde su aplicación, seleccione la opción de impresión.
- Choose the "Xprinter XP-K200L" from the list of available printers.
- Confirme la configuración de impresión y haga clic en "Imprimir".
Self-Test Page
To print a self-test page, which provides information about the printer's settings and status:
- Ensure the printer is powered off and the paper roll is loaded.
- Mantenga pulsado el ALIMENTAR botón.
- Mientras sostiene el ALIMENTAR button, turn the power switch to ON.
- Liberar el ALIMENTAR button after the printer starts printing.
Mantenimiento
Limpieza de la impresora
- Cabezal de impresión: Utilice un hisopo de algodón suavementeampened with isopropyl alcohol to gently wipe the thermal print head. Allow it to dry completely before use. Clean regularly to ensure print quality.
- Cortador: If the cutter becomes jammed or dirty, carefully clean it with a soft brush or cloth.
- Exterior: Limpie el exterior de la impresora con un paño suave y seco. No utilice limpiadores abrasivos ni disolventes.
Replacing Thermal Paper
When the paper roll is depleted or near its end, replace it following the steps in the "Loading Thermal Paper" section under Setup.
Solución de problemas
| Problema | Posible causa | Solución |
|---|---|---|
| La impresora no se enciende. | Power cord or adapter not connected properly; power outlet issue. | Revise todas las conexiones eléctricas. Pruebe con otra toma de corriente. |
| No imprimir. | No paper; paper loaded incorrectly; printer offline; driver issue; incorrect connection. | Load paper correctly. Check printer status. Reinstall drivers. Verify USB/LAN connection. |
| Mala calidad de impresión. | Dirty print head; low quality thermal paper. | Clean the print head (see Maintenance). Use recommended thermal paper. |
| Paper jam or cutter error. | Paper loaded incorrectly; debris in cutter mechanism. | As per printer label: Prensa ALIMENTAR or re-start to reset cutter. If the issue persists, open the top cover and carefully turn the gear to reset the cutter mechanism. Ensure paper is loaded correctly and remove any obstructions. |
| El cajón de efectivo no se abre. | Cable not connected; POS software not configured. | Check cash drawer cable connection. Verify POS software settings for cash drawer trigger. |
Presupuesto
| Característica | Detalle |
|---|---|
| Marca | Impresora X |
| Nombre del modelo | XP-K200L |
| Tecnología de impresora | Térmico |
| Tecnología de conectividad | USB, LAN (Ethernet) |
| Características especiales | Listo para la red |
| Color | Negro |
| Salida de impresora | Monocromo |
| Peso del artículo | 1.5 kilogramos |
| Dimensiones del producto (Pr x An x Al) | 19.5 cm x 14 cm x 13.8 cm |
| Compatible OS/Controller Type | Android (and typically Windows/Linux via drivers) |
| Medios impresos | Plain Thermal Paper |
| impresión color | Negro |
| Resolución | 576 x 512 dots per inch (or dots per line) |
| Max Print Resolution B/W | 576 ppp |
| Funciones adicionales de la impresora | Sólo imprimir |
| Método de control | Remoto |
| Tamaño máximo de medios | 80 milímetros |
| Tamaño del papel | 79.5 milímetros |
| Fuerza | 60 vatios |
| Componentes incluidos | Power adapter, Cash drawer cable |
| Serie | XP-K |
| Usos específicos | Restaurants, bars, cinemas, garages, transportation, hospitals, clinics |
| Puertos USB totales | 1 |
Garantía y soporte
For warranty information and technical support, please refer to the documentation provided with your purchase or contact your vendor directly. Keep your proof of purchase for warranty claims.
For driver downloads and further support resources, visit the official Xprinter websitio.